
|
|

Home > Arts and Crafts Projects for Kids > Bulletin Board Ideas Crafts for Kids
A bulletin board (also knows as pinboard, pin board, noticeboard, or notice board) is a surface intended for the posting of public messages, for example, to advertise items wanted or for sale, announce events, display photos, or provide information. Bulletin boards are often made of a material such as cork to facilitate addition and removal of message.
Children can easily make their own bulletin board for their bedroom or classroom from materials such as cork or thick cardboard, fabric(to match your bedroom but this is optional) and rubber bands or thumb tacks(push pins) to keep everything in place. There are tons of tutorial you can choose from.
A bulletin board is a must for every classroom, assembly room, hall and office in the School. It can be used to present information, display work completed by pupils, give instructions, and encourage participation. It can be made into a background for visual displays, room decorations, interest centers, etc. The purposes of the bulletin board are: to inform, attract attention, motivate learning, affect attitudes. Bulletin board displays should be SUPER: Simple, Up-to-date, Purposeful, Engaging, Related to the program, lesson, or project.
-
Plan them to be attractive enough to attract attention.
- Make frequent changes to keep the board up-to-date and interesting.
- Involve students in planning and arranging displays.
- Keep basic supplies on hand, such as: colored construction paper, pins, tacks, scissors, paste, ruler, poster paints and brushes, felt-tip pens, colored yarn, etc. to make a quick display or change on the board.
- Display pictures and clippings mounted on colored paper and put up in neat, balanced arrangement.
- Add titles and brief explanations neatly lettered with a felt-tip pen.
- Attach colored yarn from one item to another to indicate related information.
- Use larger paper arrows of contrasting color to attract attention.
- Create a 3-D effect by pasting squares of sponge or corrugated cardboard to backs of items.
- Use actual objects or models on the board, such as shells, leaves, plastic flowers, paper novelties, etc.
- Make shelves to hold lightweight objects or models alongside information or article concerning object.
- Tack up a calendar and circle dates you want students to notice. Attach yarn leading to cards with information about the events.
Students' interest will be aroused if, from time to time, there is a personal article about one of the kids in their group. Birthdays, hobbies and drawings or crafts of the children may be featured on the bulletin board. Each month choose a "student-of-themonth" and feature him on the bulletin with a photo and interesting facts, such as his hobbies, sport activities, family and home, school activitites, etc.
Each month or quarter of the year have the class elect a student to take care of the bulletin board. The student should keep the board up-to-date by posting news clippings, notices of class and school activities, and removing them when the article is no longer current. He should also see that the board is neat and plan attractive decorations to suit the season or an important event, etc.
There are many types of bulletin boards which can be made or purchased. Here are a few listed below.
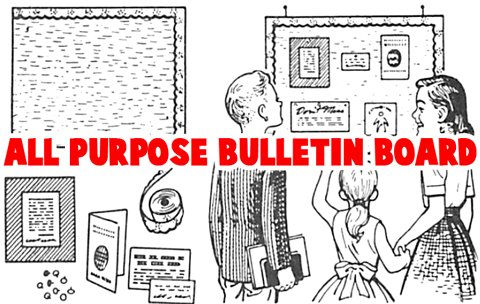
You will need the following: Fiberboard or similar material 30"x24", pastel-colored decorator's burlap 30"x24", or pastel-colored paint, paint brush, glue, wide colored adhesive tape, shelf-paper or wallpaper border trim, and two screw eyes. Glue decorator's burlap to board or paint board. Bind all edges with adhesive tape. Edge board with shelf paper or wallpaper border trim. Attach screw eyes to top back of board and hang at students' eye level.
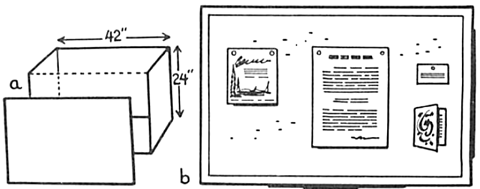
You will need 1 large cardboard box-42"x24" if possible, scissors, wide binding tape, scissors, paint, and a paint brush. Cut a sheet of cardboard from one side of a large cardboard box (see sketch a). Bind all edges with tape. Paint to match room dividers or to blend with wall color. Tack board to wall. Pins or thumbtacks will hold display materials satisfactorily.
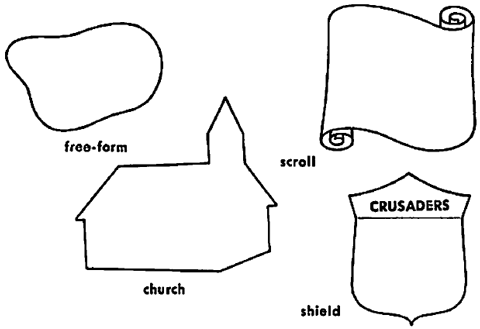
You will need 1 large cardboard box, pencil, ruler, scissors, plastic masking tape, paint, brush, and a felt-tip pen. Decide size and shape desired, considering purpose of board. For instance, use church shape for church and Sunday School news, modern free-form for teen-age group, shield for junior class, etc. Trace outline shape on sheet of cardboard cut from box. Cut out carefully and bind edges with plastic tape. Paint. When dry, add details or dass name with felt-tip pen.
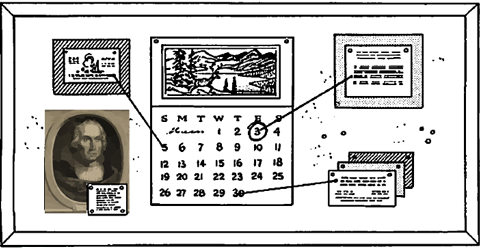
You will need the following items...Bulletin board or cork squares, calendars, pictures, letters, etc., yarn, construction paper, pencil, scissors, felt-tip pen, and thumbtacks. Hang board at pupils' eye level. Mount pictures, diagrams and other materials on construction paper and post on the board as you use them. Pupils are Less confused when they see one picture or item properly mounted and displayed, instead of many posted haphazardly. Tack up a calendar and draw circles around the dates you want the students to notice. Pin a piece of bright-colored yarn to each of these dates and let the yarn lead to written or pictured announcements. Feature a historic figure of the month, or quarter, and perhaps a student of the week. Choose a monthly theme and add to it each week a pictured item or story.
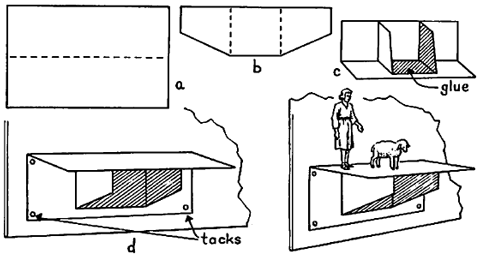
You will need corrugated cardboard boxes, ruler, pencil,scissors, glue, paint, paint brush, and long shank thumbtacks. Cut oval or rectangular pieces of cardboard, size desired from boxes (4"x5", 6"x8", etc.), to make shelf. Draw a line across length of cardboard about at center (sketch a). Place ruler firmly on line and carefully bend cardboard. Cut a shelf support from cardboard as long as shelf and one-third the width. Measure one third the distance from each end and carefully bend, using a ruler. Cut off one corner of folded portions as in Glue shelf support to shelf on widest portion just beneath fold as in sketch c. When dry, paint. Tack to bulletin board.
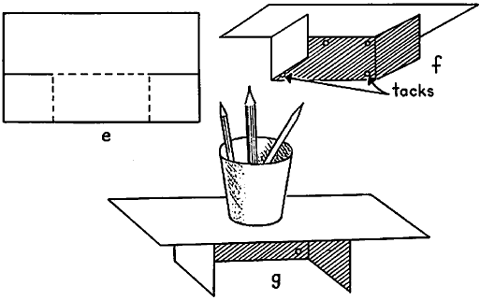
You will need Heavy cardboard 4"x5", ruler, scissors, paint and brush, and thumbtacks. Lightly score a line across center of cardboard as in sketch a. Measure 1 1/2" from sides and cut along scored line. Lightly score two lines down along sides (see sketch e). Fold along scored lines as in sketch f. Paint shelf and tack to bulletin board.
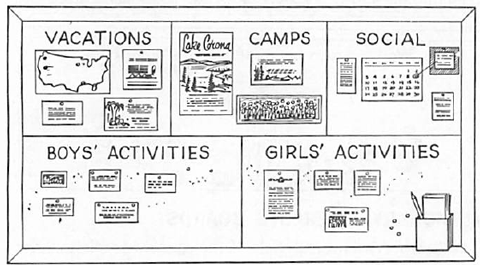
For Large Groups
For the entire Sunday School or large departments, use large bulletin boards. A practical size is 4 feet x 8 feet. You will need Colored tape, strips of lightweight cardboard 3" high, felt-tip pens, a supply of 3"x5" cards, thumbtacks, pencils, clippings, bulletins and other notices to post. Mark the bulletin board into four or more sections with tape to segregate areas of interest. For summer you might feature these areas: Vacations, Camps, Boys' Activities, Girls' Activities. Use the cardboard strips and a felt-tip pen to make the area labels. Use a separate 3"x5" card for every item of information and tack card to board. Keep extra cards and pencil near the board for convenience in adding information.
For Parents
You will need a bulletin board about 30"x24", parents' reading lists, meeting notices, snapshots of the children, quarterly materials, pieces of construction paper for making labels, signs, etc., felt-tip pen, and thumbtacks. Hang board outside door of class. Post up-to-date notices, reading lists, snapshots, etc., which you want to call to parents' attention. Change items frequently and add at least one new item each week.
If possible, have a Teachers' Bulletin Board in your School where training hints can be visualized from time to time. You will need construction paper for words and signs, felt-tip pens, pictures, posters, colored tape or yarn, scissors, pencil, ruler, and thumbtacks. Decide what help is needed by your school staff and select materials to visualize suggestions.
1. Organizational Helps: Use construction paper and felt-tip pens for making "responsibility" blocks. Yarn or ribbon and thumbtacks may be used to link blocks together. Use colored construction paper and felt-tip pens to make blocks. See sketch for one idea of showing the church's organization of School responsibilities.
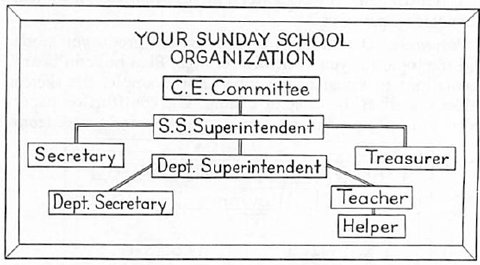
2. Contrast Pictures: Draw or have made contrasting pictures of a right and wrong way of a particular teaching procedure. Use colored construction paper and a felt-tip pen to make "this" "or this" labels for drawings.
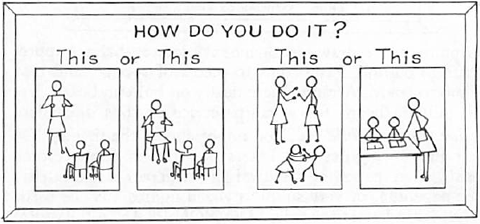
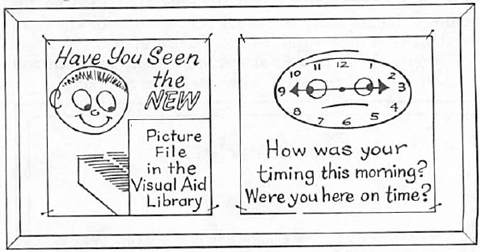
3. Cartoon Picture-Posters: Use cartoon pictures or posters on the bulletin board to convey suggestions to school workers. See sketch.
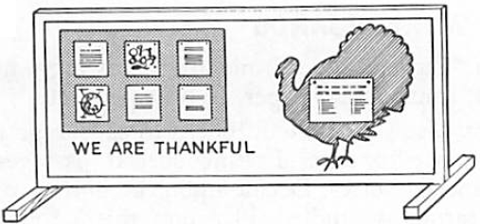
You will need portable partitions, folding screens, or classroom space dividers, large sheets of newsprint, poster paints and brushes, large cut-out silhouettes, and other theme materials. Entire partitions can be used as bulletin boards. Use them to display "giant-size" posters, memory work charts, Scripture verse and seasonal illustrations made of large silhouette figures. Cover them with newsprint and have students decorate with poster paint drawings and lettering.
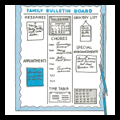 Make Bulletin Boards to Organize Family Events - It is so hard to get everything organized and de-cluttered when you have kids. If you have a lot of dates, appointments, grocery list items, messages, and other important facts straight, then why not make a family oriented family board. Making this family bulletin board can help you and your kids more organized and help you remember dates and other important information and appointments.
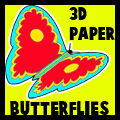 3D Paper Butterfly Bulletin Boards - Learn how to make these 3-dimensional butterflies - great bulletin board project.
 3-D Spring Showers Bulletin Board - Here is an idea for decorating the school bulletin board for Spring-time.
Also Visit School Bulletin Board Ideas for Teachers