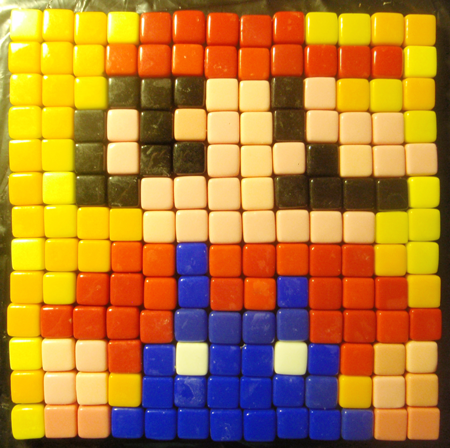
How to Make a Mosaic Super Mario 1-up Mushroom Pixelated Picture from Tiles

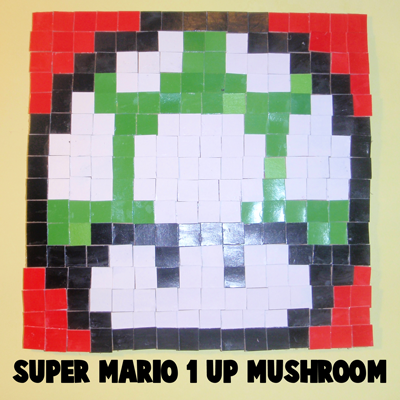
If you have ever played any of the Super Mario Series you know what the Super Mario 1-up Mushroom is.  The 1-up mushroom can give you an extra life and its hard to find.  If you are the Super Mario video game lover you are going to want to do this craft.  In this post I will show you how to make a mosaic Super Mario 1-up mushroom pixelated picture from tiles.  Fun, fun!!

Click here for more mosaic tutorials

How to Make a Mosaic Super Mario 1-up Mushroom Pixelated Picture from Tiles


Materials Needed:

Glue

Cardboard or Wood

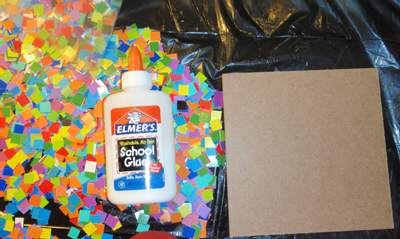
Tiles or Cut up Squares from Paper or Foam

Materials needed


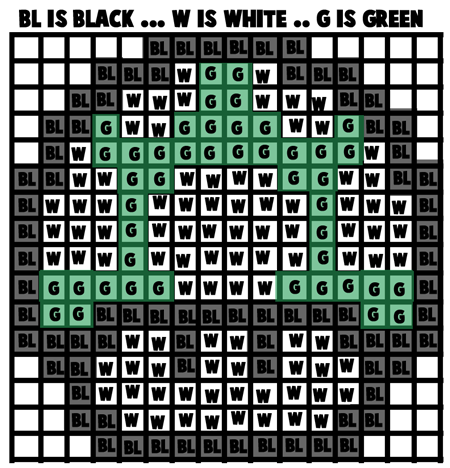
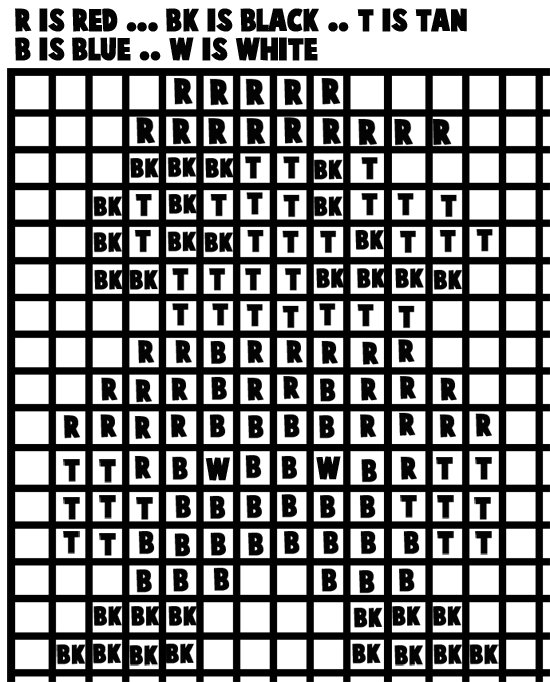
Here is a pattern for you to print or just look at while you are making your Mosaic Super Mario 1-up Mushroom.

Pattern for the Mosaic Mario 1-up Mushroom

The background of the picture can be any color you would like.  I happened to use red.


Step 1

Put Glue on First Tile

Put glue on first tile.

[ad#ahc]

Step 2

Place square firmly on cardboard

Place square firmly on cardboard or wood.


Step 3

How to Make a Mosaic Super Mario 1-up Mushroom Pixelated Picture from Tiles

After you finished putting all the tiles on the wood  make sure to put a heavy book on top of it overnight.  This will insure the tiles are glued fast and will hold.  There you have it….. easy peasy lemon squeezy.  You have just made an awesome Mosaic Super Mario 1-up Mushroom Pixelated Picture from Tiles.

Technorati Tags: , , , , , , ,

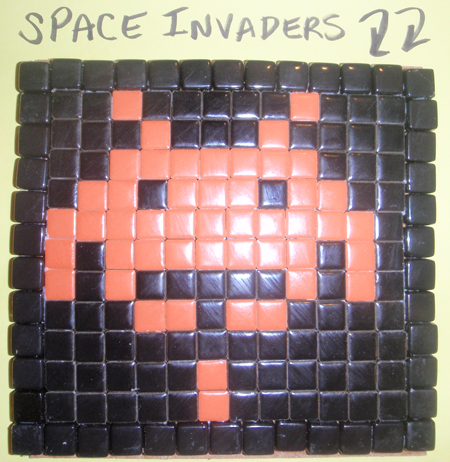
How to Make a Mosaic Space Invaders Pixelated Picture from Tiles

Space Invaders was my absolute favorite arcade game to play back in the 80’s.  I use to beg my dad to give me quarters to play Space Invaders…. I could spend hours in front of that game.  Today I will show you how to make a Space Invaders pixelated picture from Tiles.  I hope you have as much fun making the craft as I did playing the game.

Click here for more mosaic tutorials

How to Make a Mosaic Space Invader Pixelated Picture from Tiles


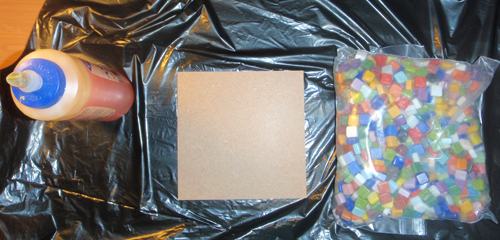
Materials Needed:

Glue

Cardboard or Wood

Tiles or Cut up Squares from Paper or Foam

Materials needed


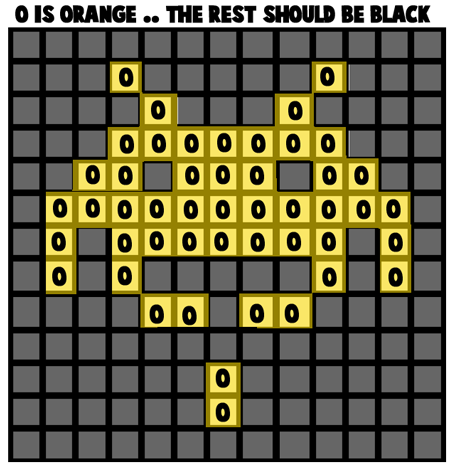
Here is a pattern for you to print or just look at while you are making your Mosaic Space Invaders Picture.

Pattern for Mosaic Space Invaders


Step 1

Put Glue on First Tile

Put glue on first tile.

[ad#ahc]

Step 2

Place square firmly on cardboard

Place square firmly on cardboard or wood.


Step 3

How to Make a Mosaic Space Invader Pixelated Picture from Tiles

Any child will love putting this mosaic Space Invaders pixelated picture craft together.  But, more than that they will love hanging it proudly for all to check out.

Technorati Tags: , , , , ,

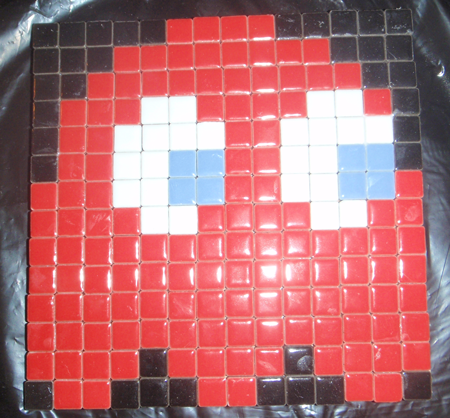
How to Make a Mosaic Red Ghost from Pacman Pixelated Picture from Tiles

The other day I showed you how to make a Mosaic Pacman pixelated picture from tiles.  Today I will continue the Pacman craft fun by showing you how to make a mosaic red ghost from Pacman pixelated picture.  You know you can’t have a Pacman without having at least one ghost for Pacman to have fun with….. he just wouldn’t know what to do.  “Chomp, chomp, chomp.”

Click here for more mosaic tutorials

How to Make a Mosaic Red Ghost from Pacman Pixelated Picture from Tiles


Materials Needed:

Glue

Cardboard or Wood

Tiles or Cut up Squares from Paper or Foam

Materials needed


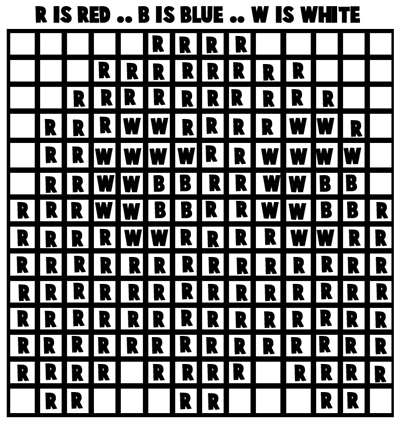
Here is a pattern for you to print or just look at while you are making your Mosaic Red Ghost.

Pattern for Mosaic Red Ghost from Pacman

Keep in mind that the surrounding area in this pattern can be any color….. I just happened to use black.


Step 1

Put Glue on First Tile

Put glue on first tile.

[ad#ahc]

Step 2

Place square firmly on cardboard

Place square firmly on cardboard or wood.


Step 3

How to Make a Mosaic Red Ghost from Pacman Pixelated Picture from Tiles

Place a heavy book on top of your mosaic craft overnight to make sure that the tiles are glued fast.  After that, make sure to place your mosaic red ghost craft with the Pacman craft and see who wins the battle this time around.  “Chomp, chomp, chomp.”

Technorati Tags: , , , , , , , , , ,

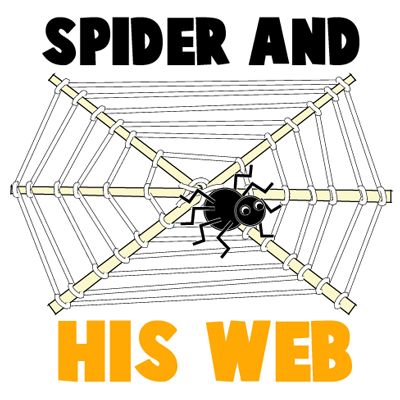
How to Make a Halloween Spider on His Web

I don’t know about you, but when I think of Halloween there are a few spooky characters I think of.  I think of witches, ghosts, skulls and of course the spider.  I just find spiders very scary.  In this post you will learn how to make a Halloween spider on his web perfect for decorating and displaying with your other Halloween paraphernalia.  On lookers will love it!!

Also check out our other Halloween Crafts OR Learn How to Draw a Cartoon Spider Web.

Halloween Spider and his Web Craft.


Materials Needed:

Chopsticks (or other type of sticks)

Glue

Yarn

Black Pom Poms (one big and one small)

Googly Eyes

4 Pipe Cleaners


Step 1

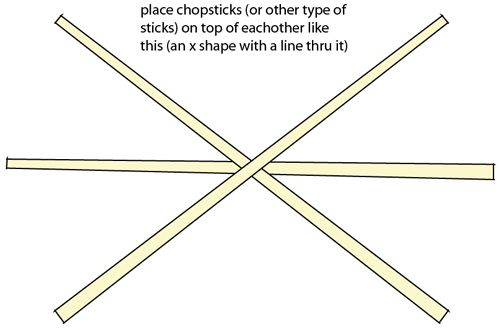
Place chopsticks on top of each other like above

Place chopsticks on top of each other like above (an x shape with a line through it).


[ad#ahc]

Step 2

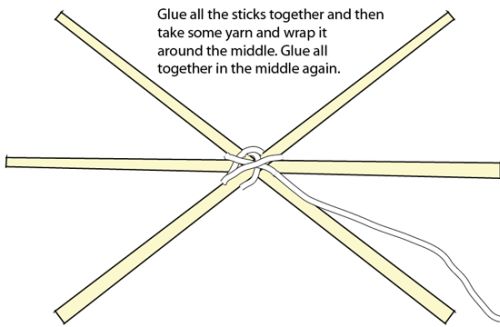
Glue all the sticks together and then take some yarn and wrap it around the middle

Glue all the sticks together and then take some yarn and wrap it around the middle.  Glue all together in the middle again.


Step 3

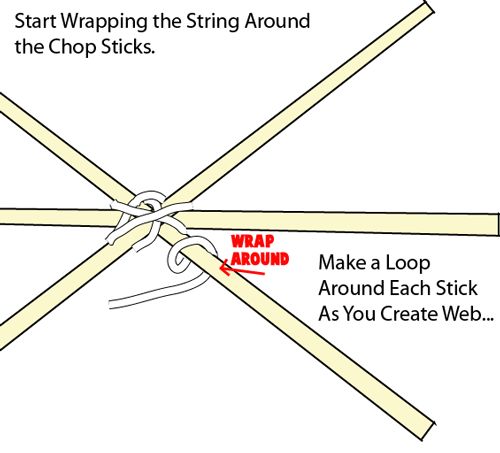
Start wrapping the string around the chopsticks

Start wrapping the string around the chopsticks.  Make a loop around each stick as you create the web.

Step 4

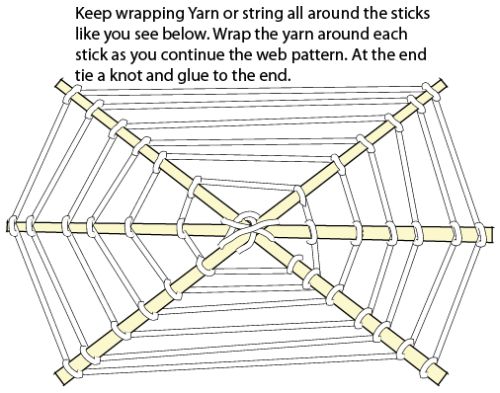
Keep wrapping yarn or string all around the sticks

Keep wrapping yarn or string all around the sticks like you see above.  Wrap the yarn around each stick as you continue the web pattern.  At the end tie a knot and glue to the end.


Step 5

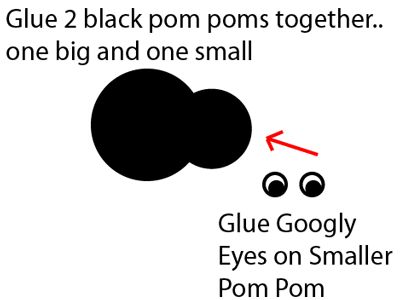
Glue 2 black pom poms together

Glue 2 black pom poms together… one big and one small.  Glue googly eyes on smaller pom pom.


Step 6

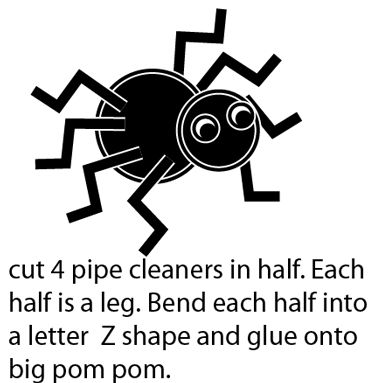
Cut 4 pipe cleaners in half

Cut 4 pipe cleaners in half.  Each half is a leg.  Bend each half into a letter Z shape and glue onto big pom pom.


Step 7

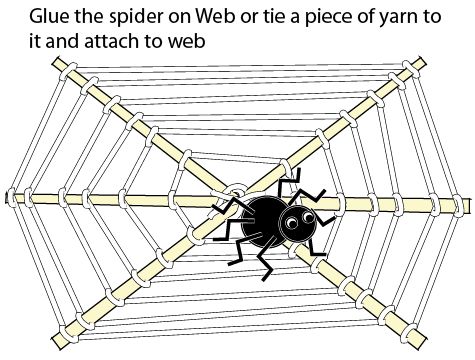
 Glue the spider on the web or tie a piece of yarn

Glue the spider on the web or tie a piece of yarn to it and attach to web.


Halloween Spider and his Web Craft.

Isn’t this craft perfect for Halloween?  The kids will love doing this craft, but they will also love the finished product even more.  They will certainly enjoy displaying it proudly this Halloween season.  And, make sure to check out our other Halloween Crafts so you can decorate your entire house this Halloween.

Technorati Tags: , , , , , , , ,

How to Make Opening and Closing Halloween Skulls

It’s time for a very spooky craft.  We are about to make an opening and closing Halloween skull.  Halloween skulls are scary, but can be a little boring.  These clever Halloween skulls are different because they actually move…. and they are easy to make.

Check out our other Halloween Crafts.

How to Make Opening and Closing Halloween Skulls


Materials Needed:

Card Stock or Cardboard

Scissors

Paper Fasteners

Materials needed


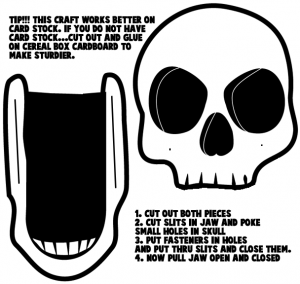
Follow the template below to make the two piece skull.

CLICK ON IMAGE TO OPEN IT UP BIGGER TO PRINT.

printable-template-opening-jaw-skull

(or if you want to…learn how to draw the very same skull with my cartoon skull drawing tutorial.)

Step 1

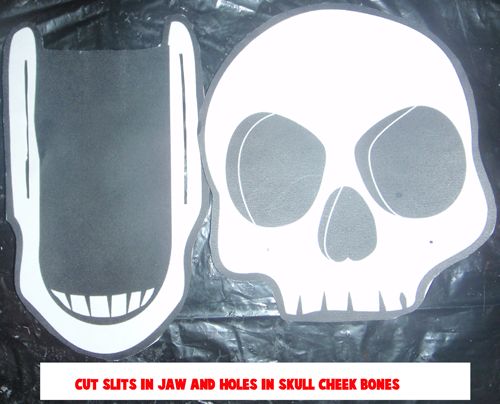
Cut slits in jaw and holes in skull

Cut slits in jaw and holes in skull cheek bones.


[ad#ahc]

Step 2

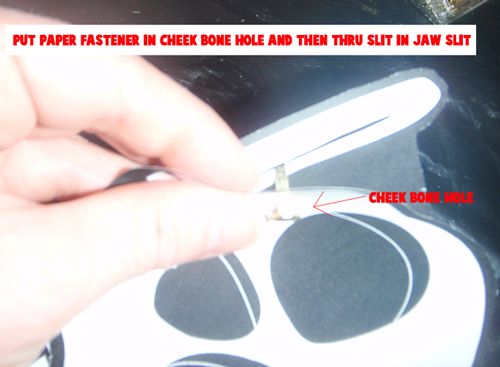
 Put paper fastener in cheek bone hole and then thru slit in jaw slit

Put paper fastener in cheek bone hole and then thru slit in jaw slit.


Step 3

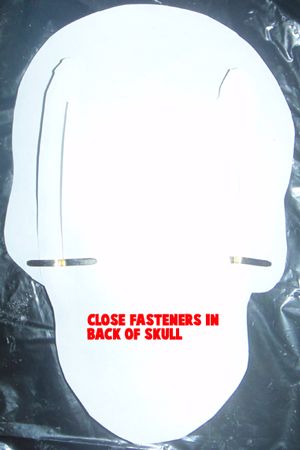
 Close fasteners in back of skull

Close fasteners in back of skull.


Step 4

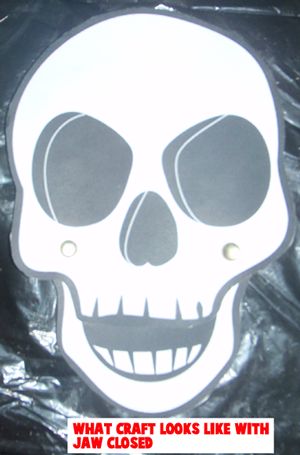
This is what the craft looks like with the jaw closed

This is what the craft looks like with the jaw closed.


Step 5

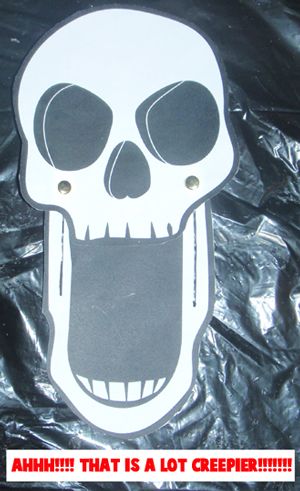
This is what the craft looks like with the jaw opened

This is what the craft looks like with the jaw opened…. CREEPY!!


How to Make Opening and Closing Halloween Skulls


I told you the craft was easy!!  But, the ease of this craft does not take away from the fact that you have one scary and creepy opening and closing Halloween Skull.  Why not make a few and decorate your entire house.  Now THAT would be spooky.

Here is our video on How to Make an Opening & Closing Halloween Skull

Technorati Tags: , , , , ,

Ideas for Displaying Your Kids’ Artwork So You Can See Your Fridge Again

As a parent, I love receiving beautiful artwork from my children. However, there comes a point when you feel like your entire refrigerator is covered with artwork. I have 4 kids, so not only is my fridge covered, but my fireplace’s mantle, my kitchen window, and the rest of my windows are all being taken over with artwork. This got me thinking…what else can I do with the artwork? I would love to see my refrigerator again…what color is it…I want to know….maybe soon I can find out again. 🙂
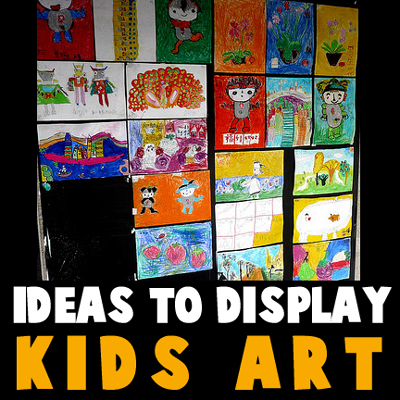
 

Ideas for Displaying Your Kids' Artwork So You Can See Your Fridge Again

Now for the ideas. Please comment below to add your own ideas or suggestions…everyone can contribute.

(1) Clothesline Art
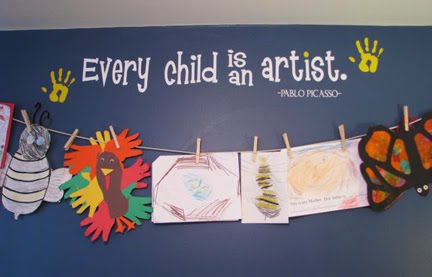
Hang childs artwork with clothespins

Hang a Clothesline in your child’s room or playroom (high enough that the child can’t get hurt) and then use clothespins to hang your child’s art.

(2) Curtain Hangers for Art
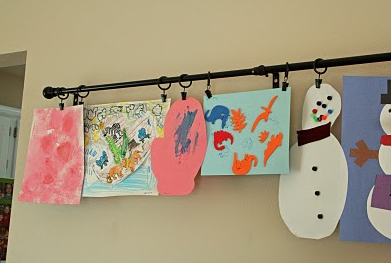
drapes artwork

This is similar to the clothespin idea, but instead by a curtain hanging system. Instead of hanging curtains with the clips, hang the artwork.  This idea comes from Project Nursery … visit it to find out how she did it.

(3) Plexiglass Table Cover to Display Artwork
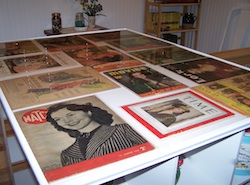
Plexiglass Table Cover to Display Artwork

There is a great how-to article, on the Examiner.com, about making a Plexiglass table cover in order to display artwork underneath. You can just go to Home Depot or Lowes and have them cut down a sheet of plexiglass to the same size as your table. Then just  place the plexiglass on top of your child’s art that you want to showcase.

(4) Hang Clipboards to Display Art
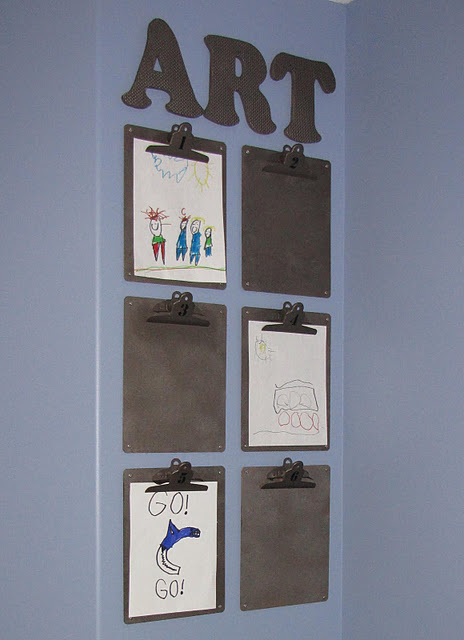
Hang Clipboards to Display Art

On a Blog called Clean and Scentsible, we found another way to display your child’s artwork. Hang Clipboards, and place newest artwork on the top layer that is showing. This is a really smart and sensible way to display your child’s artwork.

[ad#ahc]

(5) Vertical Lines of Hanging Yarn
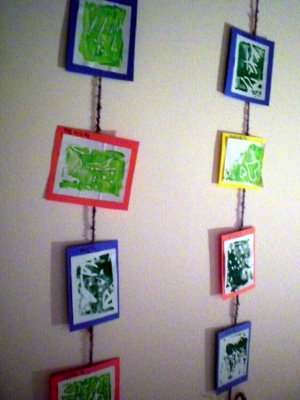
Vertical Lines of Hanging Yarn

I found a great example of hanging art from vertical lines of yarn or string or wire on a site called Spiral Montessori Mama. As this talented teacher / blogger suggests…just hang yarn from the ceiling with tape….then as your child brings home artwork just tape it to the yarn. I like how this teacher places a colorful piece of paper behind each piece of art to sort of frame it or mat it.

(6) Paint a Magnetic Wall – Maybe Even Chalkboard Paint
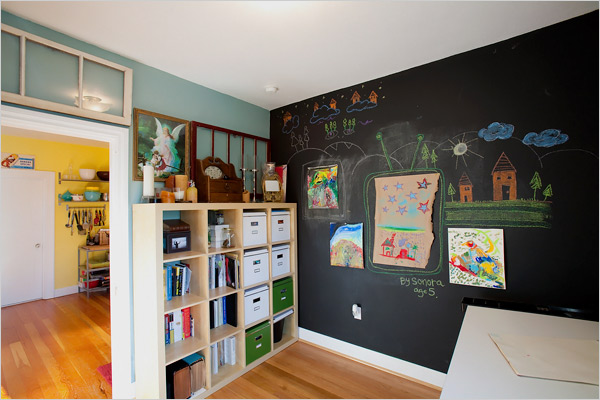
Paint a Magnetic Wall - Maybe Even Chalkboard Paint

On Zillow.com, I found a great idea. How about paint an entire wall with magnetic paint and then covering it with chalkboard paint (optional). You can then display all of your child’s artwork on a giant wall, instead of your refrigerator. Just a note…I did the same thing…I put 2 coats of magnetic paint and then a coat of chalkboard paint. It isn’t magnetic…although the chalkboard paint works great. I am just telling you this so you know that you might need to coat the wall with many coats of magnetic paint for it to work.

(7) Frame Them on a Special Wall
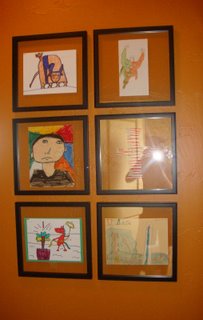
Frame Kids Artwork on a Special Wall

How about creating a special museum wall in your house….all with your child’s framed artwork. The above picture comes from Inside-OutDesigns.com.

(8) Using a Pocket Display
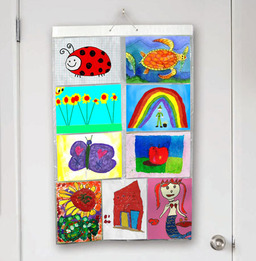
Using a Pocket Display

I found a simple pocket display case that has 9 pockets on each side of the case. You can then hang it either on a door knob or on the wall without damaging it.  If you want to make one of these one your own (so you don’t have to buy it), you can see a similar sort of creation here.

(9) Give Art as Gifts
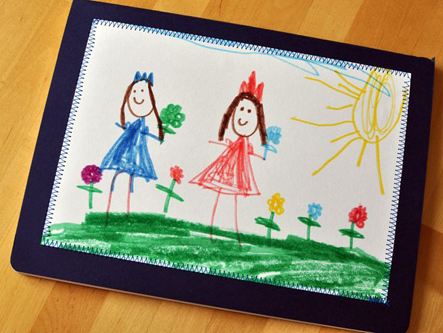
Give Art as Gifts

This artwork was found on the blog called Quince and Quire.  This blogger sewed her child’s artwork to a moleskin sketchbook to give to somebody as a gift. This is a great idea…but for somebody who hates sewing, this sounds tedious….how about just using hot glue or even colorful duct tape as a frame. Another idea is finding a notebook that has a clear cover and attaching it underneath the clear cover.

(10) Mod Podge Your Child’s Artwork to Anything
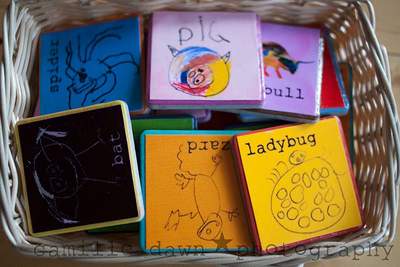
Mod Podge Your Child's Artwork to Anything

You can Mod Podge your kids’ artwork to coasters or any other item such as your child’s bookcase or wooden bed. This will bring your child’s room alive with color…and it is quite easy to do. This was found on the site…Mod Podge Rocks!

(11) Use Artwork for Gift Wrapping Paper
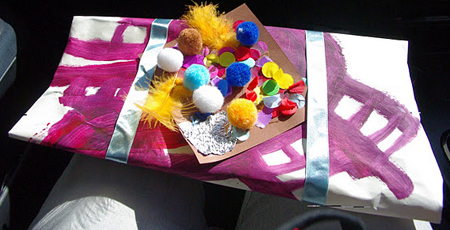
Use Artwork for Gift Wrapping Paper

On Krafty Guts Blog, the blogger used her child’s artwork for wrapping paper. This is a great idea…this makes the child feel so special.

(12) Laminate the Artwork and Use as Placemats
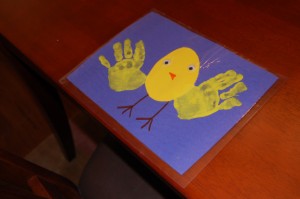
Laminate the Artwork and Use as Placemats

On the blog, Make Create Do, there is an example of a place mat made from a child’s piece of art. This is also a great idea. How special is it to your child that you would make a permanent use for his creativity. Awesome idea.

(13) Showcase Art with Digital Frames
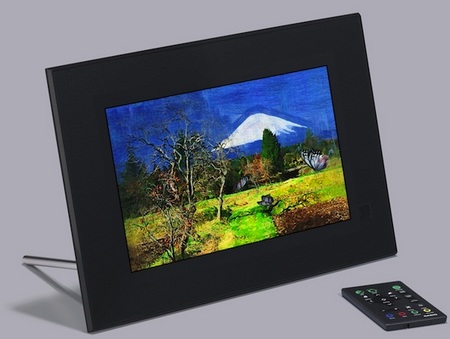
Showcase Art with Digital Frames

I love, love, love this idea. How about you scan all of your child’s work and put them all on permanent display in a digital frame.

(14) Use a L’il DaVinci Store and Display Art Cabinet
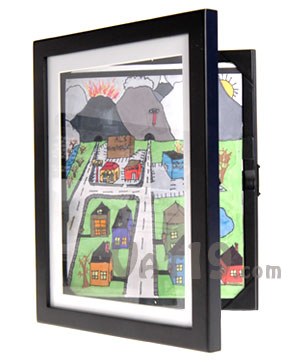
Use a L'il DaVinci Store and Display Art Cabinet

This is a really cool idea to have a cabinet that holds up to 50 pages of artwork. It then has a hinge that lets you open up the frame like a book to turn thru the pages. I found it here, see if you like it when you take a closer look.

(15) Make a Puzzles, Notebooks, Stickers, Magnets, Coffee Table Books and Other Items from Artwork

Make a Puzzles, Notebooks, Stickers, Magnets and Other Items from Artwork

On sites like Snapfish.com, you can create all sorts of things from your child’s artwork, such as stickers, puzzles, magnets, notebooks, coffee table books, posters, t-shirts, playing cards, etc.

Technorati Tags: , , , , , , , , , , ,

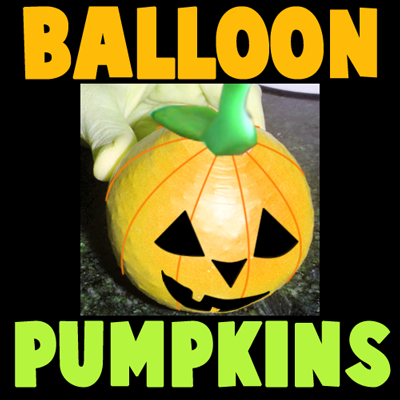
How to Make a Halloween Bean Bag Balloon Pumpkin

If you are looking for new Halloween decorations to put around the house, but are finding the same Halloween decorations at the store as every other year….. I have the perfect Halloween decoration craft for you.  Here I will show you how to make a Halloween bean bag balloon pumpkin perfect for this Halloween season.

Check out our other Halloween Crafts.

How to Make a Halloween Bean Bag Balloon Pumpkin

Materials Needed:

Water Bottle

3 Balloons

Rice or Split Peas

Scissors

Black Felt or Black Marker

Green Clay or Play Doh


Step 1:

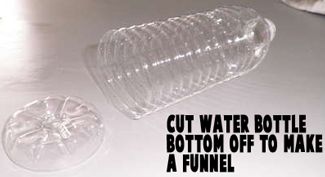
Cut water bottle bottom off to make a funnel

Cut water bottle bottom off to make a funnel.


[ad#ahc]

Step 2

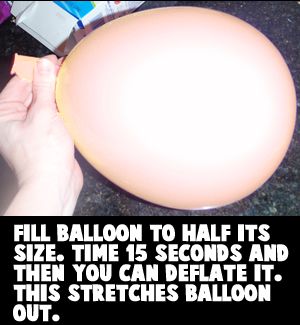
Fill balloon to half its size

Fill balloon to half its size.  Wait 15 seconds and then you can deflate the balloon.  This stretches the balloon out.


Step 3

Deflate balloon

This is what the deflated balloon should look like.


Step 4

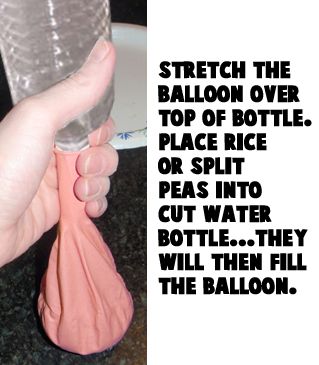
Stretch the balloon over the top of the bottle.

Stretch the balloon over the top of the bottle.  Place rice or split peas into the cut water bottle…. they will then fill the balloon.


Step 5

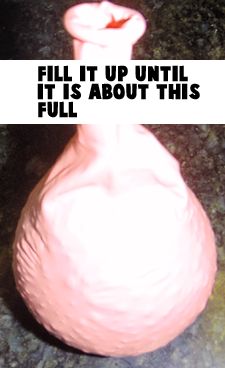
Fill up the balloon until it is about this full

Fill up the balloon until it is about this full.


Step 6

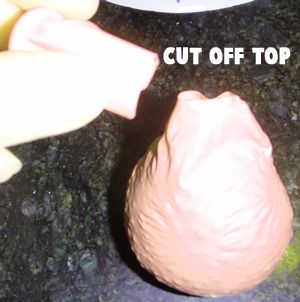
Cut off the top of the balloon

Cut off the top of the balloon.


Step 7

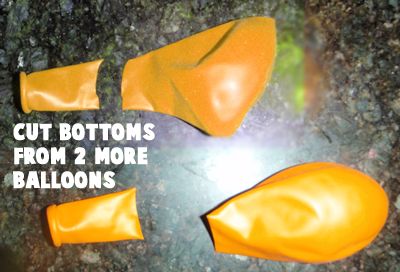
Cut bottoms from two more balloons

Cut bottoms from two more balloons.


Step 8

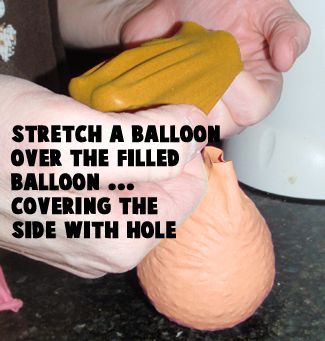
Stretch a balloon over the filled balloon

Stretch a balloon over the filled balloon… covering the side with hole.


Step 9

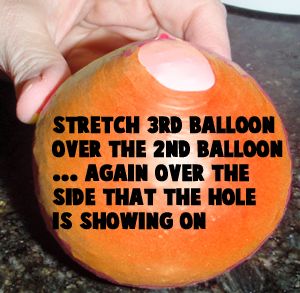
Stretch 3rd balloon over the 2nd balloon

Stretch 3rd balloon over the 2nd balloon… Again over the side the hole is showing on.


Step 10

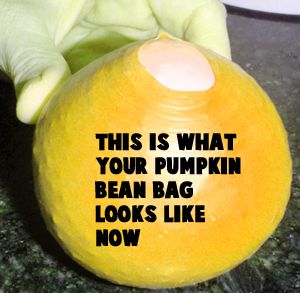
This is what your pumpkin bean bag looks like now

This is what your pumpkin bean bag looks like now.


Step 11

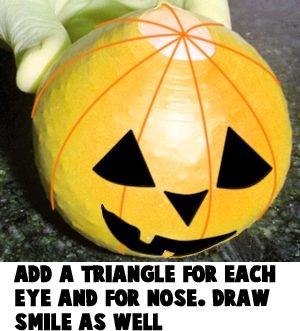
Add a triangle for each eye and for the nose

Go to Our – How to Draw a Jack-O-Lantern Drawing Tutorial to draw the face…or just add a triangle for each eye and for the nose.  Draw a smile as well.


Step 12

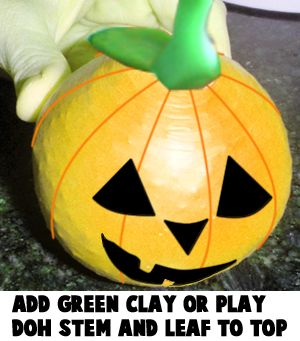
 Add green clay or play doh stem and leaf to top

Add green clay or play doh stem and leaf to top.


How to Make a Halloween Bean Bag Balloon Pumpkin


And there you go.  You have just made an original Halloween decoration for your house…. a Halloween bean bag balloon pumpkin.  Display it proudly.  And, have a very scary Halloween.

Technorati Tags: , , , , , , ,

Great Idea for Decorating the Walls for Your Kids Art or Play Room

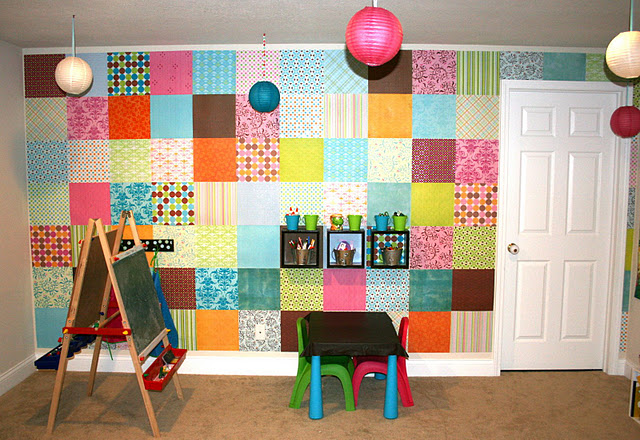
I was browsing the net today and I found a great idea for decorating your child’s art room or play room. How about getting a pack of decorative paper and using glue dots to place them on your wall? What you get is an amazing wallpaper that you can’t get anywhere else. The colors are amazing and it adds to the artsiness of the room.  See the picture of this amazing art room below.

Great Idea for Decorating the Walls for Your Kids Art or Play Room

Great Idea for Decorating the Walls for Your Kids Art or Play Room


The price for one wall was only $13…you can’t beat that. To see the before and after pictures of this artsy playroom, and to see the instructions for doing it yourself, check out the site here. So do you like this idea for decorating your child’s art room’s walls?

Please tell everybody if you have any ideas for decorating playroom walls….by commenting below.

[ad#ahc]

Technorati Tags: , , , , , , ,


How to Make Wallpaper Wax Flower Sculptures

This craft is all about taking ugly wallpaper and transforming it into beautiful 3-dimensional flowers. This craft only has 3 steps and is pretty simple to complete once you get the hang of it. You will need an adult, such as mom or dad, to assist you with dipping the wallpaper flower structures into hot wax. But other than that, you can complete these on your own.
How to Make Wallpaper Wax Flower Sculptures

How to Make Wallpaper Wax Sculptures

CRAFTS MATERIALS NEEDED

Flowers cut from Wallpaper

Melted candles or parafin wax (adult supervision / assistance needed)

2 Pronged Paper Fasteners

MAKING THE WAX SCULPTURES

Step 1

wallpaper-wax-sculptures-01

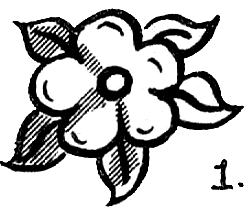
Cut out flower cluster from wall paper, as in Figure 1.

Step 2

wallpaper-wax-sculptures-02

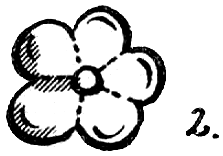
Cut out several single flowers of the same design. Cut hides of flower petals into center, as shown by broken line in Figure 2.

Step 3

wallpaper-wax-sculptures-03

[ad#ahc]

With a two-pronged paper fastener, attach single flowers to center flower in flower cluster. (Figure 1) Bend petals of top flowers upward.

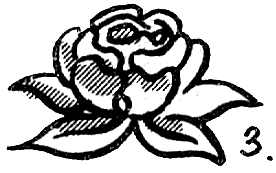
An adult should do this next part. Ask an adult to dip assembled flower into melted wax. These flower. will float, as in Figure 3.

Technorati Tags: , , , , , , , ,

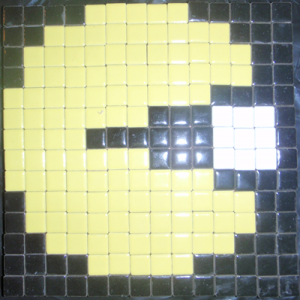
How to Make a Mosaic Pacman Pixelated Picture from Tiles

Pacman was the hottest arcade game from the 1980’s and it is still crazy popular today.  I’m going to show you how to make a super cool pixelated Pacman picture that is very easy and fun to make…. just follow the easy-to-follow pattern and you are as good as gold.

Click here for more mosaic tutorials

Mosaic Pacman Pixelated Picture from Tiles


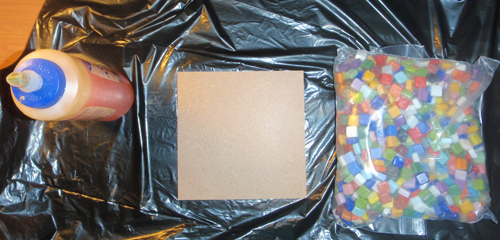
Materials Needed:

Glue

Cardboard or Wood

Tiles or Cut up Squares from Paper or Foam

Materials Needed


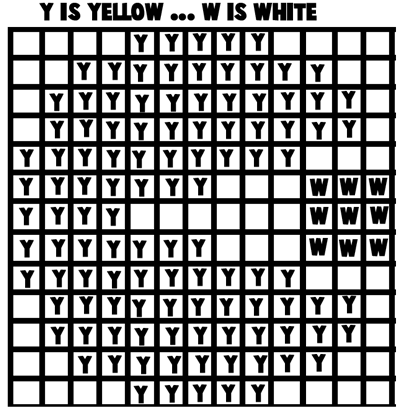
Here is a pattern for you to print or just look at while you are making your Mosaic Pacman.

Mosaic Pacman Pattern

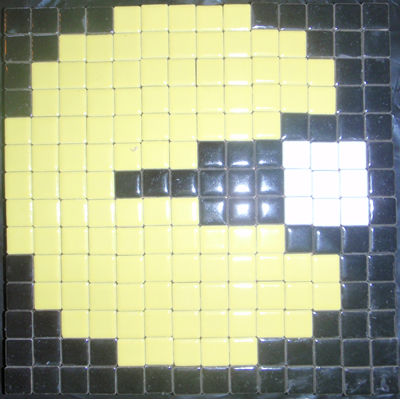
The surrounding area of your Mosaic Pacman can be any color you would like.  I made this area black, but feel free to use any color.

Step 1:

Put Glue on First Tile

Put glue on first tile.

[ad#ahc]

Step 2

Place square firmly on cardboard

Place square firmly on cardboard or wood.

Step 3

Finished Mosaic Pacman

Once you have the pattern completely finished make sure to place a heavy book on top of your finished craft overnight.  This will insure that your Mosaic Pacman craft is glued fast and ready to be shown proudly for all to see.

Technorati Tags: , , , , ,

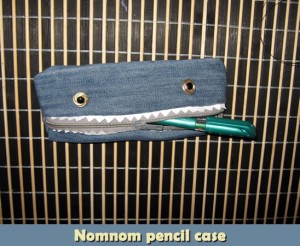
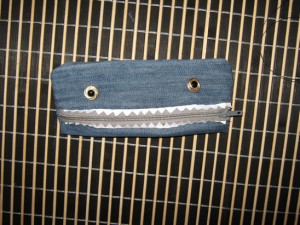
How to make a Nomnom pencil case

School is back in session once again. And, with school brings tons and tons of school supplies. Instead of using the same old pencil box that everyone else is using why not make a funny case that is like no other. Check out this funny nom nom pencil case craft. Why nom nom? Because it looks like it is eating your pencils….. “Nom nom nom.”

Step by step tutorial offered by Laura from Dacian Moon Handmade

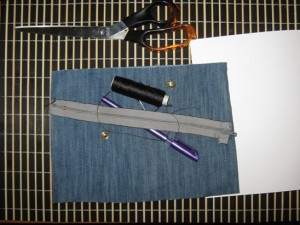
CRAFTS MATERIALS NEEDED:

– a piece of a recycled pair of jeans
– zip
– 2 buttons
– white cardboard
– scissors
– needle and thread
– pencil

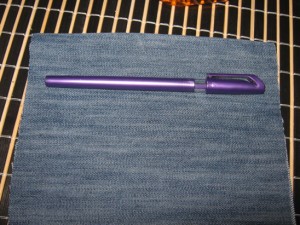
Step 1.

Take the piece of jeans and place it with the sewed part up. We will use that the way it is.

Place the pencil on it to measure if it will fit. It will.

[ad#ahc]
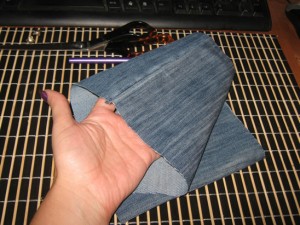
Step 2.

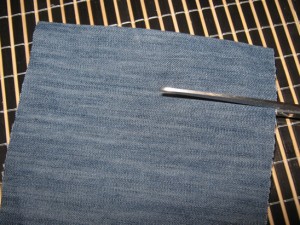
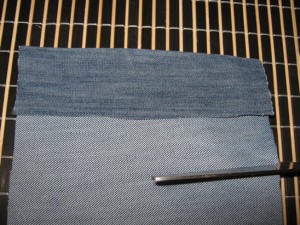
Measure 5 cm from the top and cut the fabric on the front part.

On the back part cut it at 10 cm.

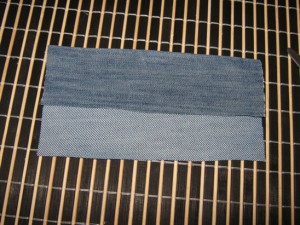
It will look like that.

We need the back part longer because it will close on the front.

Step 3.

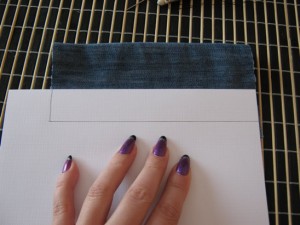
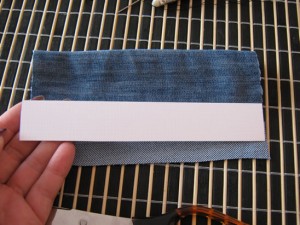
From the cardboard we must make the teeth. First draw a rectangle to have a guide.

Cut it out.

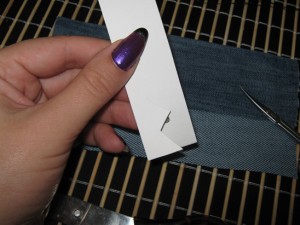
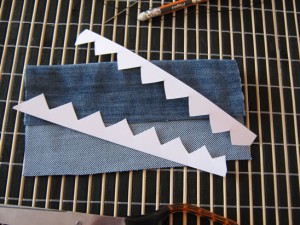
Using the scissors make a criss cross cut to form the two rows of teeth…

… like this.

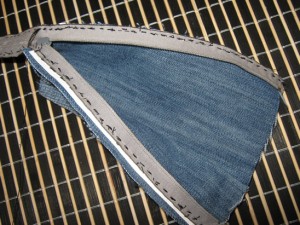
Step 4.

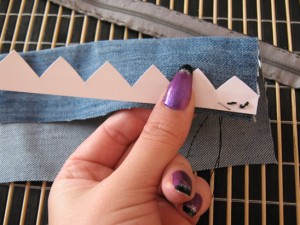
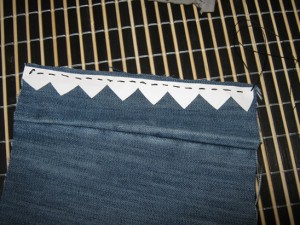
Sew one teeth row to the upper part of the fabric…

… like this.

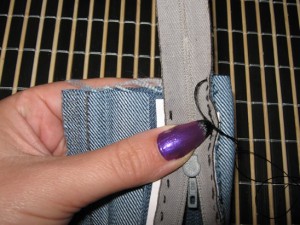
Step 5.

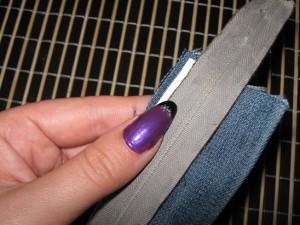
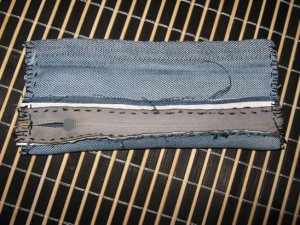
Now sew the zip over the cardboard…

… taking care that the zip not be covered by the teeth.

Step 6.

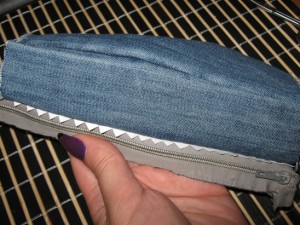
Repeat the step 4 and 5 on the other side, like that.

Step 7.

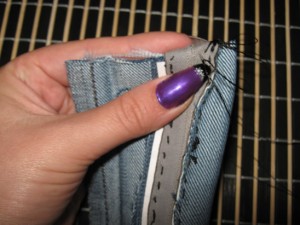
Now, we must close the small sides.

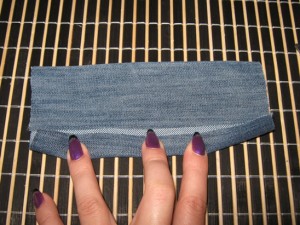
First of all fold the rest of the zip on the back…

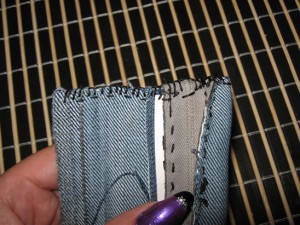
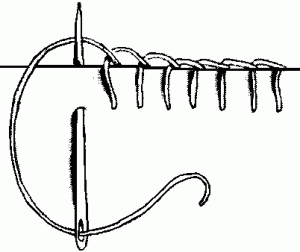
… then sew using a blanket stitch along the sides.

To make a blanket stitch, push the needle through the fabric then pull the needle through the loop.

Step 8.

Do the same on the other side.

Step 9.

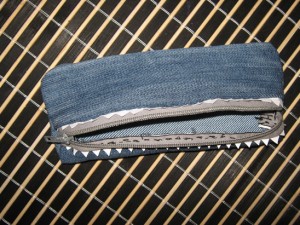
Turn it inside out.

Step 10.

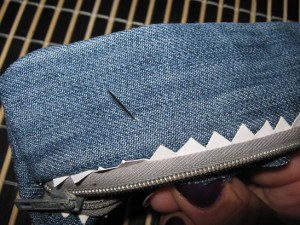
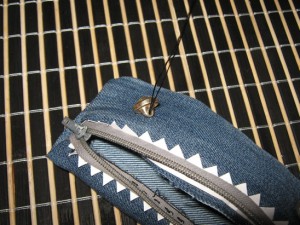
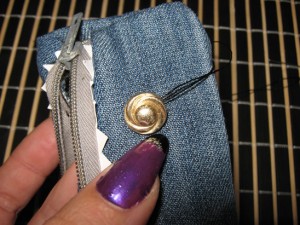
Choose a place where our Nomnom should have one eye…

… and sew a button there…

… then the other.

For a more alive feeling you can paint the middle of the buttons with black.

This is our Nomnom ready to chew all your pencils and pens. And your erasers too 😀

Technorati Tags: , , , ,

How to Make a Mosaic Super Mario Pixelated Picture from Tiles

Today we will show you how to make a really cool, pixelated Super Mario. This is the Mario from the 1980’s when he just looked like a bunch of squares….this is the classic Nintendo Mario. We have included a pattern for Mario’s complete body…or you can do just part of his body like I did. (and I know that I messed up on Mario’s thumbs…put the pattern below, reflects the correct pattern).

Click here for more mosaic tutorials

How to Make a Mosaic Super Mario Pixelated Picture from Tiles


Materials Needed:


Glue

Cardboard or Wood

Tiles or Cut up Squares from Paper or Foam


Materials Needed

Here is a pattern for you to print or just look at while you are making your mosaic Mario.

Here is a pattern for you to print or just look at while you are making your mosaic Mario.

You can make the surrounding color of Mario, any color that you want. You can also do only part of Mario, like I did, or Mario’s entire body.

Step 1:

Step 1 : Put Glue on Tile

Put Glue on First tile.

[ad#ahc]

Step 2

Put tile down

Place square firmly on cardboard or wood.

Step 3

Wow Your Done

Now continue thru the pattern until finished. Place a heavy book over tiles overnight to make sure that tiles are firmly placed. By morning you should have your finished craft. Your parents will look fondly at the Mario picture.

Technorati Tags: , , , , , ,

How to Paint, Glaze, and Fire Ceramic Tiles without a Kiln

Do you want to learn how to make your own customized ceramic tile? Well, then you’re in luck because today we will show you how to take a pencil design and then transfer it to your tile. From there you can take your liquid glaze and paint your design onto the tile. You don’t need a kiln to fire your ceramic tile, you just need a normal kitchen oven. Learn all about firing & glazing your ceramic tiles at home in the step by step tutorial below.

How to Paint, Glaze, and Fire Ceramic Tiles without a Kiln

How to Paint, Glaze, and Fire Ceramic Tiles

Crafts Materials Needed:

Blank glazed tiles

Low Fire Liquid Glaze

Watercolor brush

Tracing paper

Pencil

Paints or crayons

How to Design and Paint on a Ceramic Tile

Step 1

How to Design and Paint on a Ceramic Tile

On a piece of paper that is the same size as tile, draw a design.  Color design with paints or crayons, as in picture above.

Step 2

With pencil and tracing paper, trace off colored design outline, omitting most of the details

With pencil and tracing paper, trace off colored design outline, omitting most of the details. Remove tracing paper and scratch the back with soft pencil

[ad#ahc]

Step 3

Place tracing paper, scratched side down, over tile

Place tracing paper, scratched side down, over tile, and trace design on tile, as in picture above.

Step 4

Stir liquid glaze, and thin with reducer if necessary with watercolor brush, fill in tile

Stir liquid glaze, and thin with reducer if necessary with watercolor brush, fill in tile, as in picture above.

HOW TO FIRE A CERAMIC TILE

oven

Place tile in a cold oven and heat slowly to 250°F. Keep oven at the same temperature, with the oven slightly open, for 2 hours. Turn off oven, and leave tiles in oven until cool. Ask an adult to remove tile, and when thoroughly dry, wash with soap and water to remove all traces of pencil marks.

Technorati Tags: , , , , , , , ,

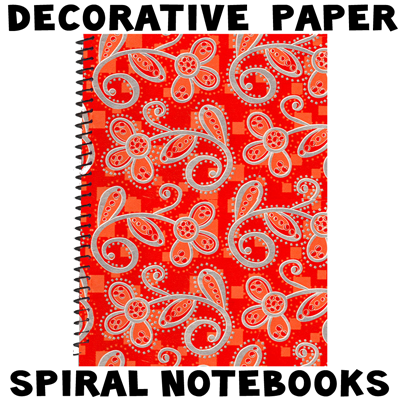
Decorating Spiral Notebooks with Decorative Paper for Back to School Craft

Do you want to make your Plain Jane notebooks look awesome?! This is a great craft for teens (boys and girls – it doesn’t have to be flowers) who want to have the coolest notebooks in school. All you will need is a spiral notebook, some wrapping paper or decorative paper (or even a poster or magazine layout), and some glue…and about 30 minutes of your time. Find out how to decorate your spiral notebooks below.

Decorating Spiral Notebooks with Decorative Paper for Back to School Craft

Decorating Spiral Notebooks with Decorative Paper for Back to School Craft

Step 1

Step 1 Decorating School Notebooks

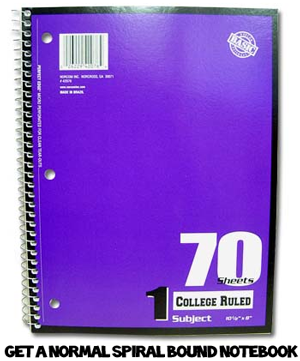
First of all, buy a cheapo spiral bound notebook…at the dollar store or at the store.

Step 2

Step 2 Decorating Notebooks

Then you will need to untwist the ends of the spiral wire. Then twist the wire so that it slowly comes out of the holes….do this until the wire is completely out.

[ad#ahc]

Step 3

step-03-decorative-notebook

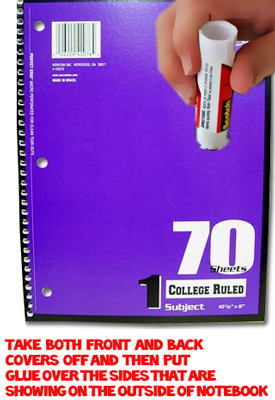
Now take both the front and back cover and put it out on the table (protect the table with newspaper or a garbage bag first). Put it on the table so that the sides that you need to decorate are facing up. Then spread glue on one side of both covers.

Step 4

step-04-decorative-notebook

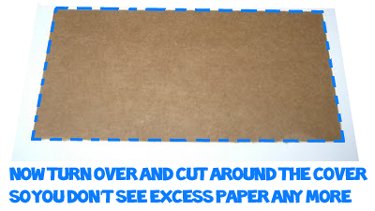
Now turn the covers over so that the decorative paper is at the bottom. You can now see where you can cut the excess paper off of the covers.

Step 5

step-05-decorative-notebook

You can now use the holes that are in the spiral notebook’s covers to guide you to where you need to poke holes in the decorative paper. You can use an awl (a tool that has a point at the end)…or you can use a needle, hole puncher, or a ball point pen if you have no other options. Poke holes all the way down each cover.

Step 6

Decorating Spiral Notebooks with Decorative Paper for Back to School Craft

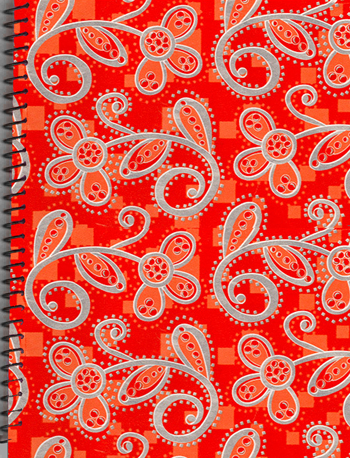
Now you just need to thread the spiral wire through the covers again and bend the ends so that it doesn’t come out again. Doesn’t this look beautiful? You can further personalize and decorate your notebook to make it more your own…but this is definitely enough if you don’t feel like customizing it further.

Here is our video on How to Decorate a Spiral Notebook with Decorative Paper.

Technorati Tags: , , , , , , ,

How to Decorate Your School Backpacks with Beads and Sequins

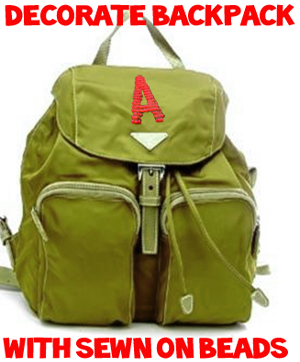
School is only days away for many kids so I thought that I would share a way to decorate your backpacks and messenger bags to make them unique and pretty cool to look at. Below, I will show you how to sew on beads so you can sew on cool designs or your initials. It is easy and a lot of fun.

How to Decorate and Personalize Your School Backpacks with Beads and Sequins

How to Decorate and Personalize Your School Backpacks with Beads and Sequins

Step 1

Personalizing Backpacks with Beads

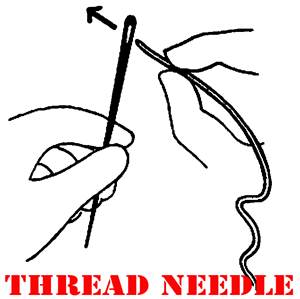
Firstly, thread your needle.

Step 2

Tie a KnotPersonalizing Backpacks with Beads

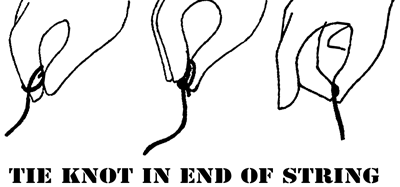
Now tie a knot at the end of your string.

Step 3

Then sew on your beads

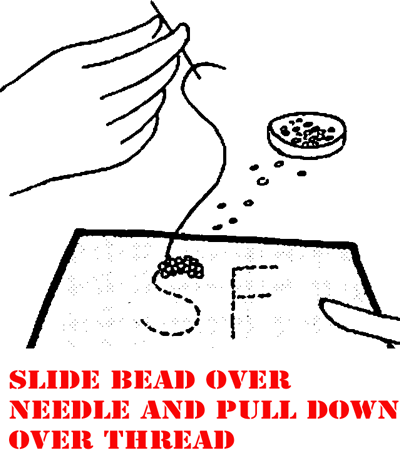
Draw a design or letters with chalk. Now just slide the beads over your needle and pull down over your thread. Then when the bead is down at the fabric level, push the needle back into the backpack as you follow the chalk letters or design that you drew. Then pull the needle back up along the design and again push the bead down over the needle and slide down string again. Do this until you have finished your design.

Step 4

Tie a knot in the back

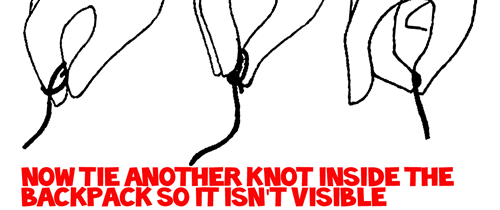
Now all that is left to do is to tie a few knots on the inside of the bag / backpack so that it isn’t visible from the outside of the bag. Now that is all that is left to do other than show your bag off. I hope that you like it.

Technorati Tags: , , , , , , , , , , , , ,

How to Make Pencil Toppers Using Pipe Cleaners

A very simply craft that your kids can do. As easy as 1-2-3. You can do this to add a little fun to your kid’s pens or pencils. Or this can also make a pretty present.

How to Make Pencil and Pen Toppers to Decorate Them for Back to School

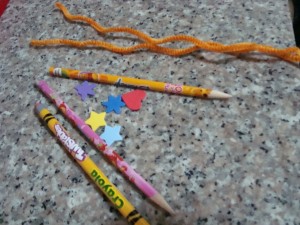
Crafts Materials Needed:

pencils, pens

pipe cleaners/fuzzy wires

craft foam shapes

glue

How to Make This Craft:

Step 1

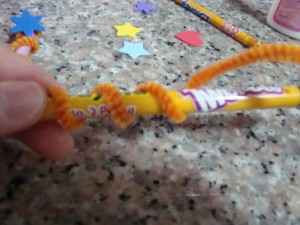
1. Holding the pipe cleaner on your right hand and the pencil on the other. With your left hand, holf the tip of the wire and gently push it against the pencil and swirl it around until you reach the other end.

Step 2


[ad#ahc]
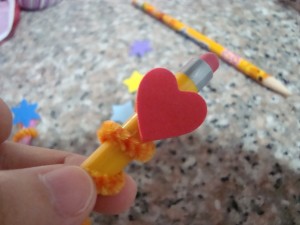
2. With the wire secure in place,  get any foam shape of your liking. Glue it to the upper tip of the wire.

Step 3

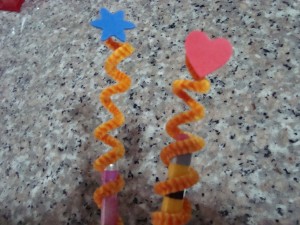
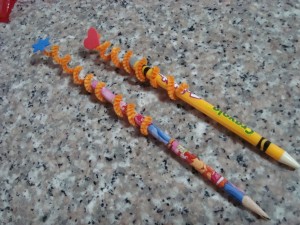
3. Gently slide the wire up the pencil, with only half of the wire hugging the pencil now. And you have a cool pencil topper!

Here is our video on how to Make Pencil Toppers.

Technorati Tags: , , , , , , , ,