How to Make the Hills from Super Mario Bros. with Perler Beads

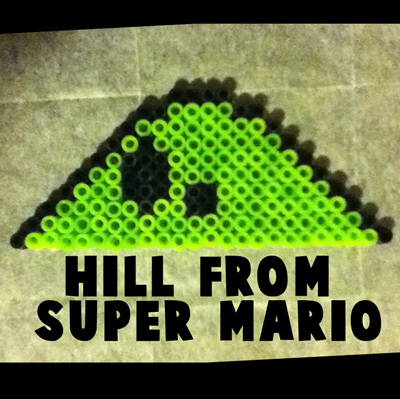
I think the reason I find Super Mario Bros. so cool is because of all the interesting characters and fascinating bricks, blocks, pipes and mushrooms they have.  It is just such a colorful and funny video game.  Today we are going to continue with the Super Mario Bros. Perler Bead fun by making hills.  In this post I’m going to show you how to make the Hills from Super Mario Bros. with Perler Beads.

Check out our other Super Mario Bros. Perler Bead Crafts and other Perler Bead Crafts.

How to Make the Hills from Super Mario Bros. with Perler Beads


Materials Needed

Perler Beads and Board

Iron

Wax Paper


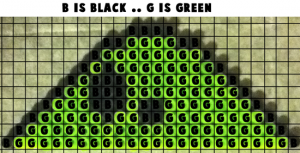
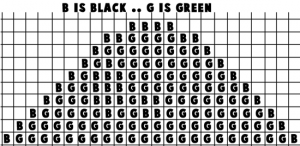
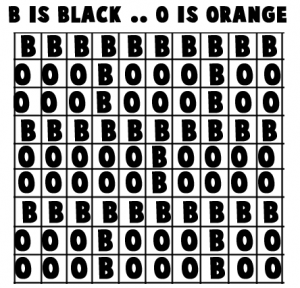
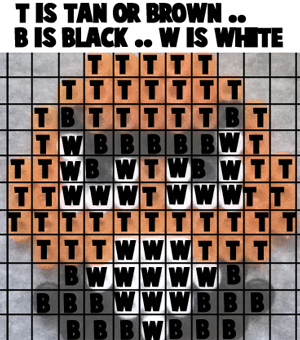
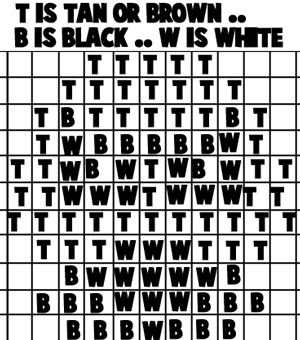
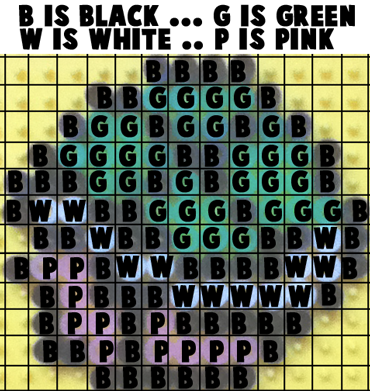
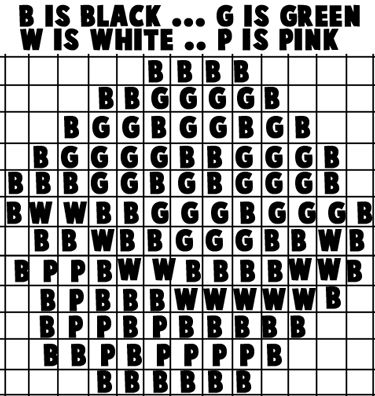
Below are printable templates for this craft.  You can choose to print off  a colored template or the black and white version.

Click on template image to make larger and to print.

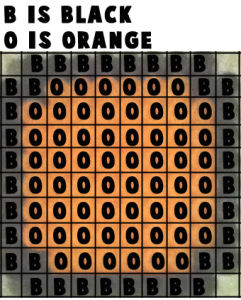
Printable color template for the Hills from Mario

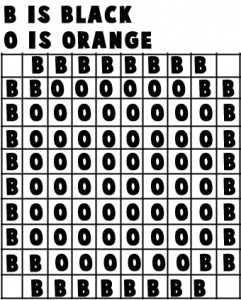
Printable black & white template for the Hills from Mario


Step 1

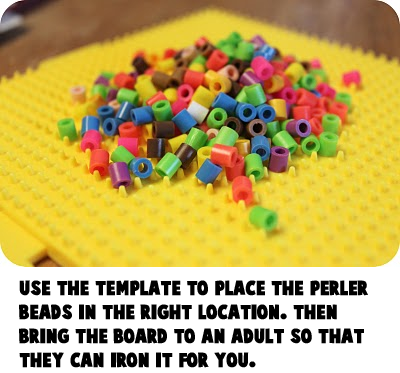
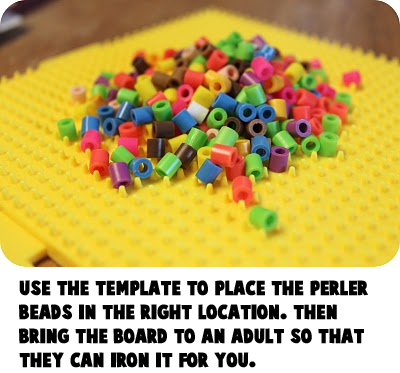
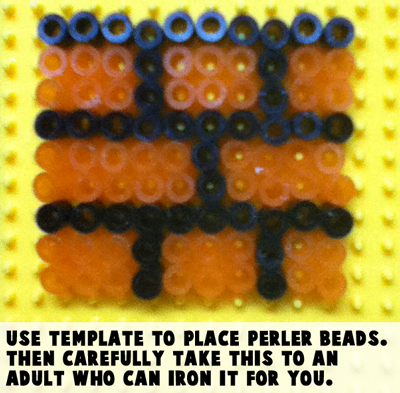
Use template to place perler beads in the right spots

Use template to place perler beads in the right spots.  Then carefully take this to an adult who can iron it for you.


[ad#ahc]

Step 2

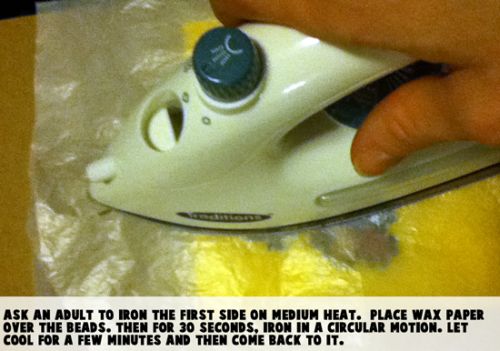
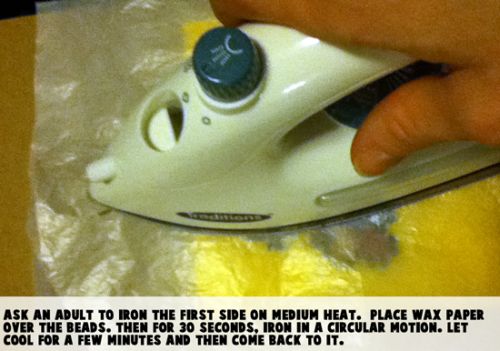
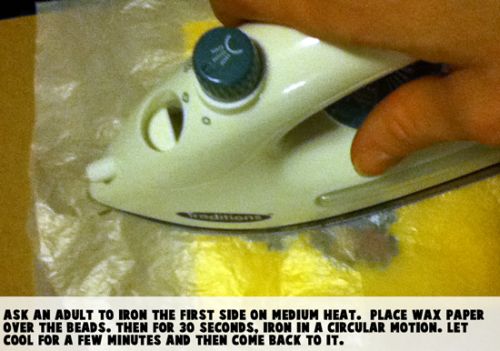
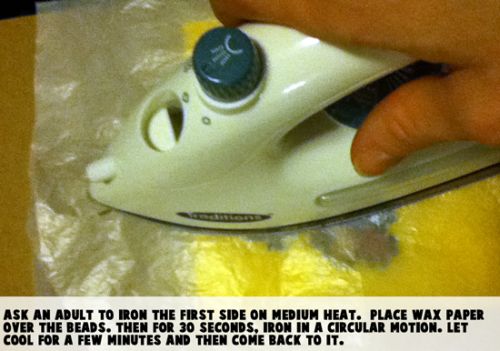
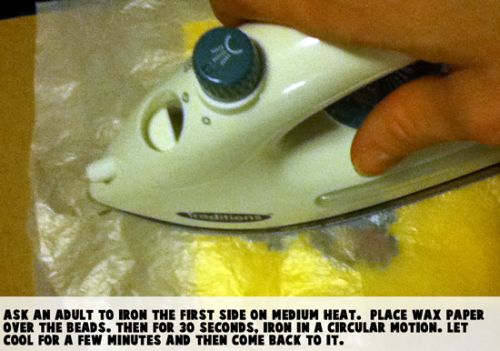
Ask an adult to iron the first side on medium heat

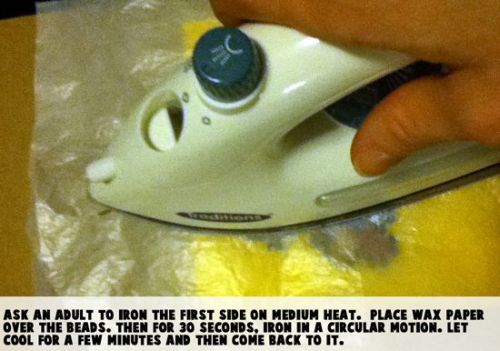
Ask an adult to iron the first side on medium heat.  Place wax paper over the beads.  Then for 30 seconds, iron in a circular motion.  Let cool for a few minutes and then come back to it.

Step 3

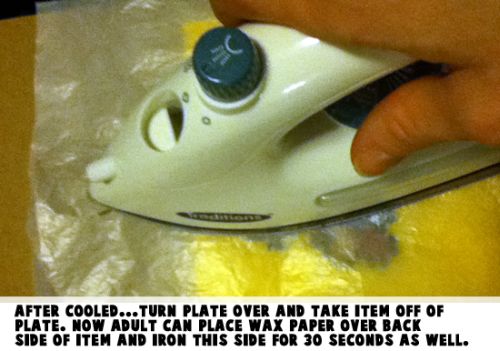
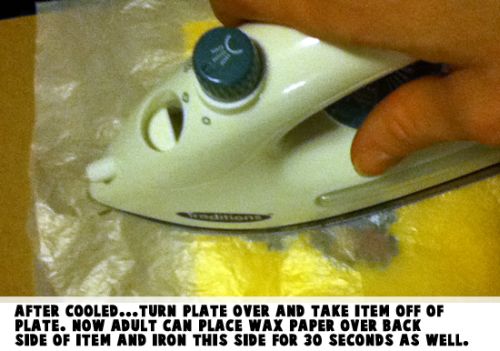
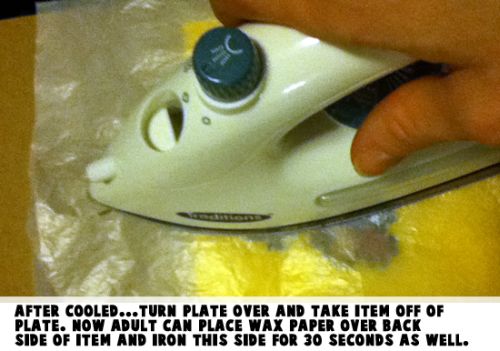
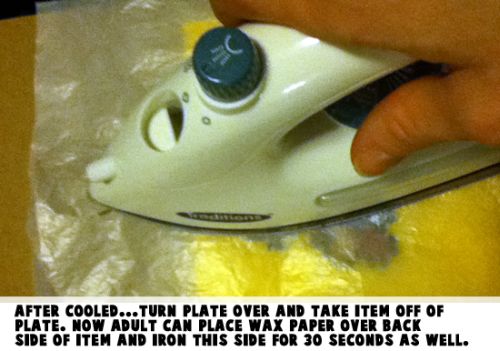
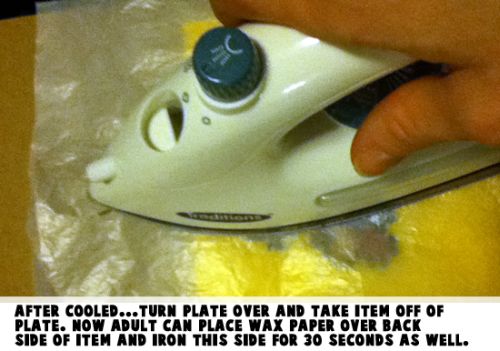
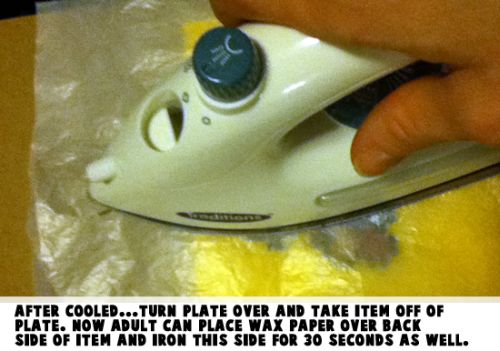
After cooled... Turn plate over and take item off of plate

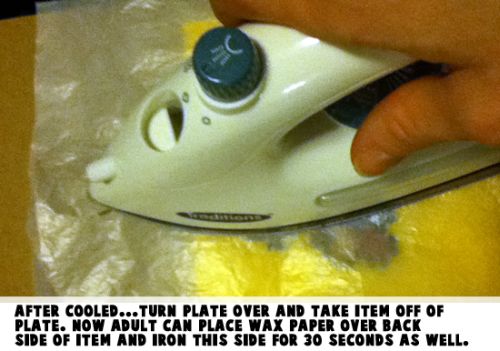
After cooled… Turn plate over and take item off of plate.  Now adult can place wax paper over back side of item and iron this side for 30 seconds as well.


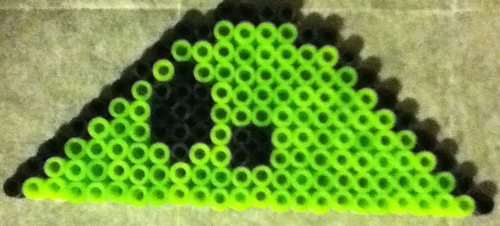
Finished hill from Super Mario Bros.

And, that’s it…. you just made the Hill from Super Mario Bros.  Make sure to check out our other Perler Bead Mario characters and items so you can make them all…. Make the whole Mushroom Kingdom out of Perler Beads.

Technorati Tags: , , , , , , ,

How to Make the Blocks from Super Mario Bros. with Perler Beads

For the past few days we have been making Super Mario Bros. characters from Perler Beads.  Well, the fun continues as I am going to show you how to make the Blocks from Super Mario Bros. with Perler Beads.  The blocks are so important for Mario as he walks on them and jumps on them.  And, sometimes if he jumps at them from below they will even pop out some coins.  Now, let’s get started.

Check out our other Super Mario Bros. Perler Bead Crafts and other Perler Bead Crafts.

How to Make the Blocks from Super Mario Bros. with Perler Beads


Materials Needed

Perler Beads and Board

Iron

Wax Paper


Below are printable templates for this craft.  You can choose to print off  a colored template or the black and white version.

Click on template image to make larger and to print.

Printable color template for Mario blocks

Printable black & white template for Mario blocks


Step 1

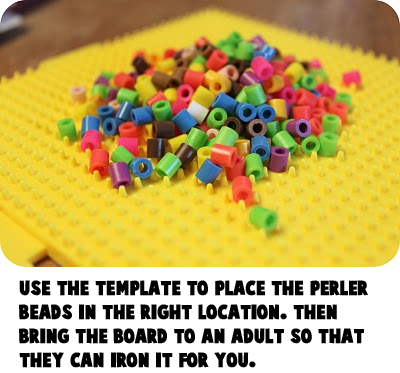
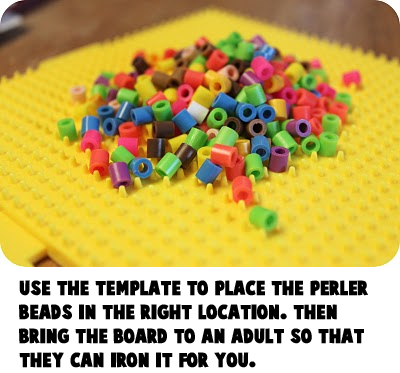
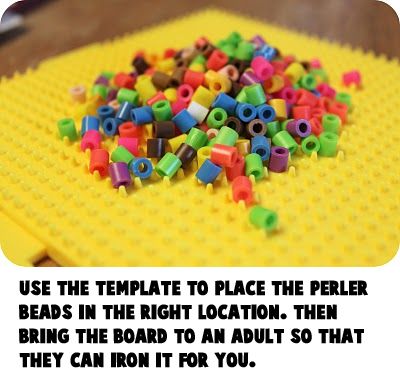
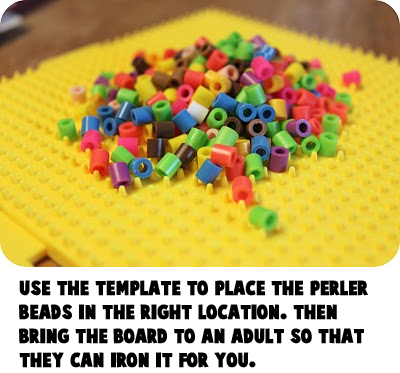
Use the template to place the Perler Beads in the right location

Use the template to place the Perler Beads in the right location.  Then bring the board to an adult so that they can iron it for you.


[ad#ahc]

Step 2

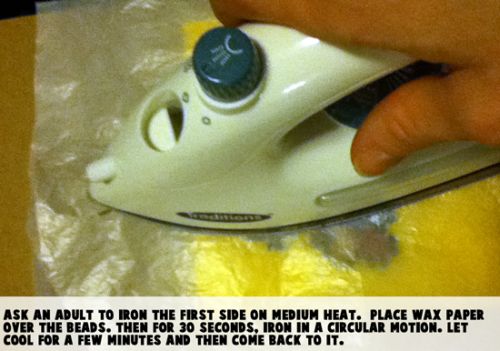
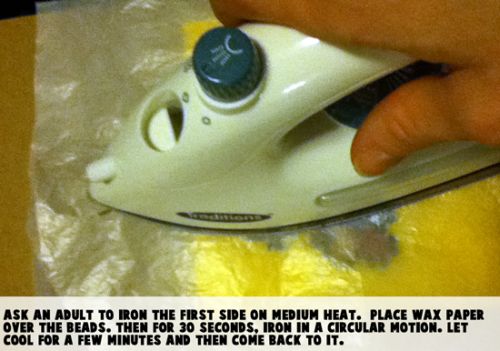
Ask an adult to iron the first side on medium heat

Ask an adult to iron the first side on medium heat.  Place wax paper over the beads.  Then for 30 seconds, iron in a circular motion.  Let cool for a few minutes and then come back to it.


Step 3

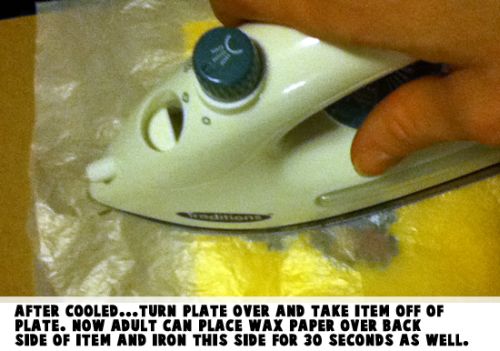
After cooled... Turn plate over and take item off of plate

After cooled… Turn plate over and take item off of plate.  Now adult can place wax paper over back side of item and iron this side for 30 seconds as well.


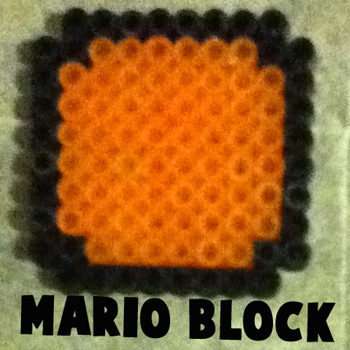
Finished Mario Block

Now that you made one block and you know how easy it is… why not make a few more.  Make enough that Mario and Luigi can jump on them and have some fun.

Technorati Tags: , , , , , , , , ,

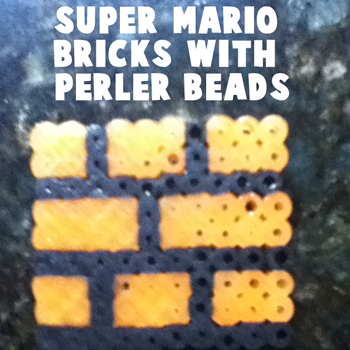
How to Make the Bricks from Super Mario Bros. with Perler Beads

If you are a fan of the Super Mario Bros. games you know what the bricks do.  If you were Super Mario or Super Lugi you could shatter the bricks and receive extra points.  Or, if the bricks contained a special item your player could release the special item.  Today I’m going to show you how to make the Bricks from Super Mario Bros. with Perler Beads.  So, let’s get started.

Check out our other Super Mario Bros. Perler Bead Crafts and other Perler Bead Crafts.

How to Make the Bricks from Super Mario Bros. with Perler Beads


Materials Needed

Perler Beads and Board

Iron

Wax Paper


Below are printable templates for this craft.  You can choose to print off  a colored template or the black and white version.

Click on template image to make larger and to print.

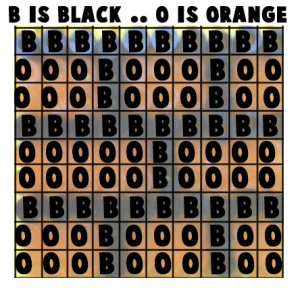
Printable color template for Mario Bricks

Printable black & white template for Mario Bricks


Step 1

Use template to place perler beads in the right spots

Use template to place perler beads in the right spots.  Then carefully take this to an adult who can iron it for you.


[ad#ahc]

Step 2

Ask an adult to iron the first side on medium heat

Ask an adult to iron the first side on medium heat.  Place wax paper over the beads.  Then for 30 seconds, iron in a circular motion.  Let cool for a few minutes and then come back to it.


Step 3

After cooled... Turn plate over and take item off of plate

After cooled… Turn plate over and take item off of plate.  Now adult can place wax paper over back side of item and iron this side for 30 seconds as well.


Step 4

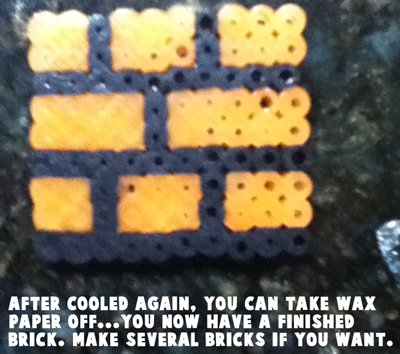
After it has cooled again.... you can take the wax paper off

After it has cooled again…. you can take the wax paper off.  You now have a finished brick.

Make a few of these along with Mario, Luigi and Princess Peach and the rest of the characters and you will have all of Mushroom Kingdom made out of Perler Beads.

Technorati Tags: , , , , , , , , ,

How to Make Yoshi from Super Mario Bros. with Perler Beads

Today I will show you how to make Yoshi from Super Mario Bros. with Perler Beads.  Yoshi is a good friend of Mario and Luigi.  For the past couple of days I have been showing you how to make many of the Mario Bros characters with Perler Beads.  Well, there is no stopping any time soon as now we are up to Yoshi.  So, grab your Perler Beads and let’s get started.

Check out our other Super Mario Bros. Perler Bead Crafts and other Perler Bead Crafts.

How to Make Yoshi from Super Mario Bros. with Perler Beads


Materials Needed

Perler Beads and Board

Iron

Wax Paper


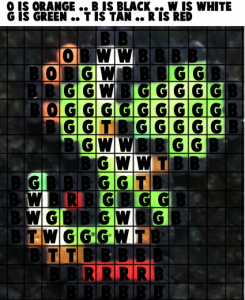
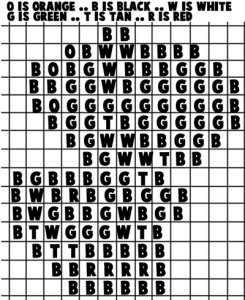
Below are printable templates for this craft.  You can choose to print off  a colored template or the black and white version.

Click on template image to make larger and to print.

Printable color template for Yoshi

Printable black & white template for Yoshi


Step 1

Use the template to place the Perler Beads in the right location

Use the template to place the Perler Beads in the right location.  Then bring the board to an adult so that they can iron it for you.


[ad#ahc]

Step 2

Ask an adult to iron the first side on medium heat

Ask an adult to iron the first side on medium heat.  Place wax paper over the beads.  Then for 30 seconds, iron in a circular motion.  Let cool for a few minutes and then come back to it.


Step 3

After cooled... Turn plate over and take item off of plate

After cooled… Turn plate over and take item off of plate.  Now adult can place wax paper over back side of item and iron this side for 30 seconds as well.


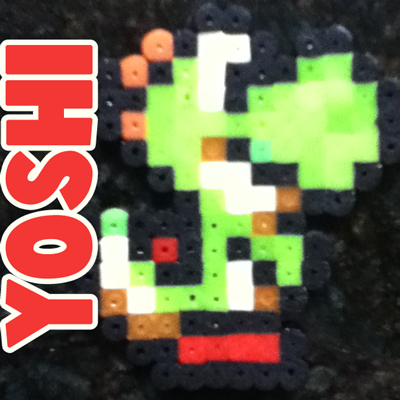
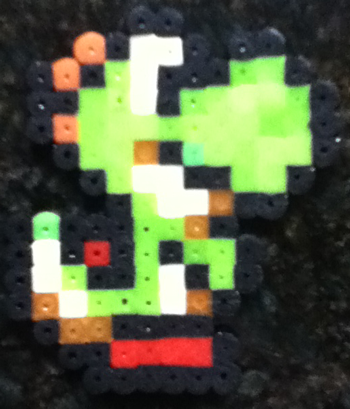
Finished Yoshi craft

There you go…. you just finished Yoshi made from Perler Beads.  How does he look?  Make sure to check back in the next day or two as I will be adding more Super Mario Bros. characters made from Perler Beads.

Technorati Tags: , , , , , , , , ,

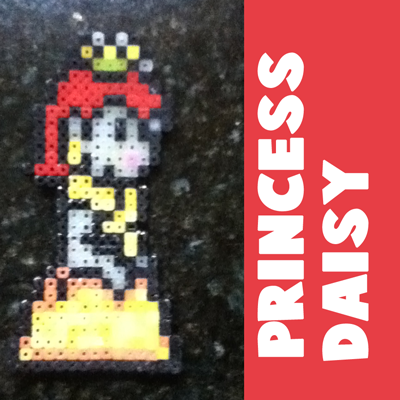
How to Make Princess Daisy from Super Mario Bros. with Perler Beads

In this post I will show you how to make Princess Daisy from Super Mario Bros. with Perler Beads.  Princess Daisy is best friends with Princess Peach… although Princess Daisy is more of a tomboy.  Princess Daisy is the Princess of  Sarasaland although she lives in Mushroom Kingdom.  Well, now that you know a little bit about Princess Daisy let’s do the craft.

Check out our other Super Mario Bros. Perler Bead Crafts and other Perler Bead Crafts.

How to Make Princess Daisy from Super Mario Bros. with Perler Beads


Materials Needed

Perler Beads and Board

Iron

Wax Paper


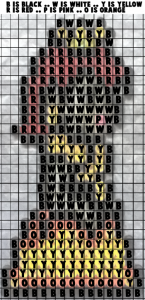
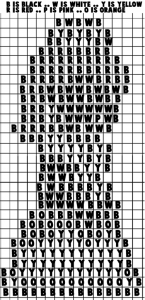
Below are printable templates for this craft.  You can choose to print off  a colored template or the black and white version.

Click on template image to make larger and to print.

Printable color Template for Princess Daisy

Printable black & white Template for Princess Daisy


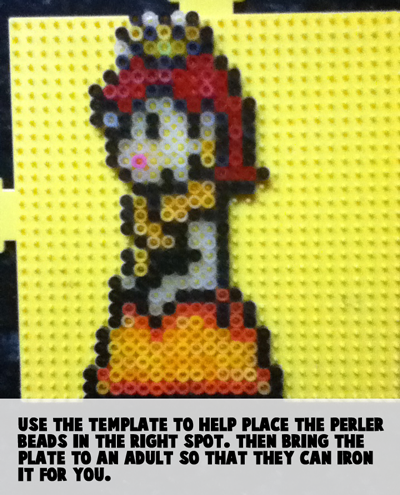
Step 1

 Use the template to help place the perler beads in the right spot

Use the template to help place the perler beads in the right spot.  Then bring the plate to an adult so that they can iron it for you.


[ad#ahc]

Step 2

Ask an adult to iron the first side on medium heat

Ask an adult to iron the first side on medium heat.  Place wax paper over the beads.  Then for 30 seconds, iron in a circular motion.  Let cool for a few minutes and then come back to it.


Step 3

After cooled... Turn plate over and take item off of plate

After cooled… Turn plate over and take item off of plate.  Now adult can place wax paper over back side of item and iron this side for 30 seconds as well.


Finished Princess Daisy Craft

Isn’t she a pretty princess?  Of course she is.  I heard Lugi thinks she is really pretty too.  What are your plans to do with your finished Princess Daisy Perler Bead craft?  Let me know in the comments below.

Technorati Tags: , , , , , , , , ,

How to Make a Koopa Shell from Super Mario Bros. with Perler Beads

Today I am going to show you how to make a Koopa Shell from Super Mario Bros. using Perler Beads.  Koopa Troopa are one of Mario‘s enemies.  The Koopa shell is the left over item after a Koopa Troopa has been killed or stepped on.  Once the shell is left over Mario can use it to throw at his enemies.  So, a Koopa Shell is an awesome find for Mario.  Get your perler beads ready and let’s get started.

Check out our other Super Mario Bros. Perler Bead Crafts and other Perler Bead Crafts.

How to Make a Koopa Shell from Super Mario Bros. with Perler Beads


Materials Needed

Perler Beads and Board

Iron

Wax Paper


Below are printable templates for this craft.  You can choose to print off  a colored template or the black and white version.

Click on template image to make larger and to print.

Printable color template for Koopa Shell craft

Printable black & white template for Koopa Shell craft


Step 1

Use the template to place the perler beads in the right location

Use the template to place the perler beads in the right location.  Then bring the board to an adult so that they can iron it for you.


[ad#ahc]

Step 2

Ask an adult to iron the first side on medium heat

Ask an adult to iron the first side on medium heat.  Place wax paper over the beads.  Then for 30 seconds, iron in a circular motion.  Let cool for a few minutes and then come back to it.


Step 3

After cooled... Turn plate over and take item off of plate

After cooled… Turn plate over and take item off of plate.  Now adult can place wax paper over back side of item and iron this side for 30 seconds as well.


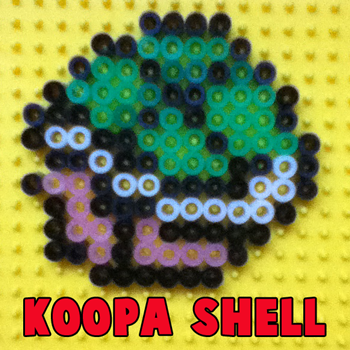
Finished Koopa Shell made from Perler Beads

You just made one awesome looking Koopa Shell from Perler Beads.  You don’t have to let the fun end there…. I will be adding more Super Mario Bros. perler bead templates over the next few days.  So, make sure to check back often.

Technorati Tags: , , , , , , , , ,

How to Make Goomba from Super Mario Bros. with Perler Beads

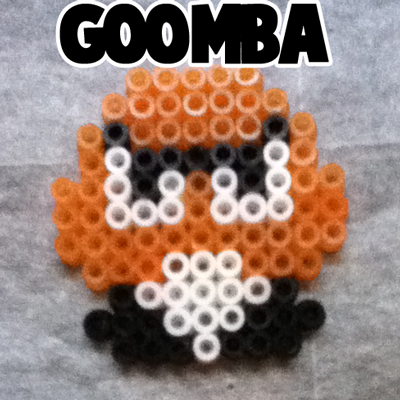
In this post I’m going to show you how to make Goomba from Super Mario Bros. using Perler Beads.  Goomba is one of Mario‘s enemies…. not a terrible one.  After all, Mario usually doesn’t have too much trouble defeating him with one simple stomp.  We can’t just make Mario’s friends…. we have to make some of his enemies as well.  So, let’s get started.

Check out our other Super Mario Bros. Perler Bead Crafts and other Perler Bead Crafts.

How to Make Goomba from Super Mario Bros. with Perler Beads


Materials Needed

Perler Beads and Board

Iron

Wax Paper


Below are printable templates for this craft.  You can choose to print off  a colored template or the black and white version.

Click on template image to make larger and to print.

Printable color template for Goomba perler bead craft

Printable black & white template for Goomba perler bead craft


Step 1

Use the template to place the perler beads in the right location

Use the template to place the perler beads in the right location.  Then bring the board to an adult so that they can iron it for you.


[ad#ahc]

Step 2

Ask an adult to iron the first side on medium heat

Ask an adult to iron the first side on medium heat.  Place wax paper over the beads.  Then for 30 seconds, iron in a circular motion.  Let cool for a few minutes and then come back to it.


Step 3

After cooled... Turn plate over and take item off of plate

After cooled… Turn plate over and take item off of plate.  Now adult can place wax paper over back side of item and iron this side for 30 seconds as well.


Finished Goomba made from Perler Beads

You did it…. you just finished Goomba.  Even Mario’s enemies are fun to make when you use Perler Beads.

Technorati Tags: , , , , , , , , ,

How to Make Princess Peach from Super Mario Bros. with Perler Beads

Today I’m going to continue making Super Mario Bros. characters out of Perler Beads.  It’s been so much fun…. why stop now.  In this post I will show you how to make Princess Peach with Perler Beads.  Princess Peach is the Princess of the Mushroom Kingdom and she usually plays the Damsel in Distress.  So, let’s get started with this Princess and we will add her to the rest of our Super Mario Bros. Perler Bead collection.

Check out our other Super Mario Bros. Perler Bead Crafts and other Perler Bead Crafts.

How to Make Princess Peach from Super Mario Bros. with Perler Beads


Materials Needed

Perler Beads and Board

Iron

Wax Paper


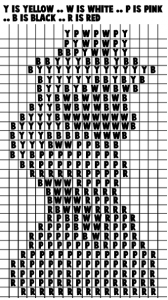
Below are printable templates for this craft.  You can choose to print off  a colored template or the black and white version.

Click on template image to make larger and to print.

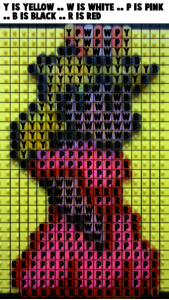
Princess Peach color template

Printable black & white template for Princess Peach


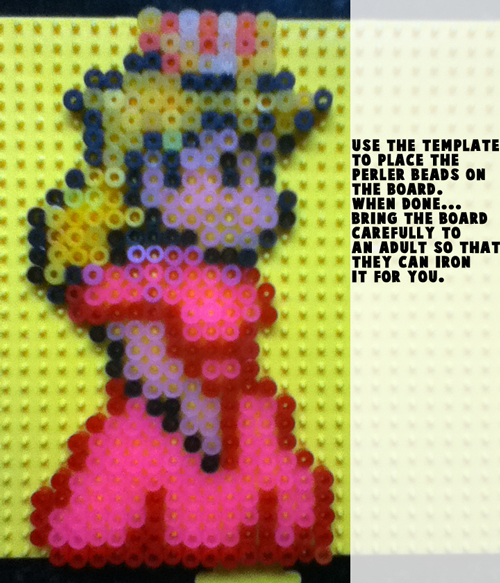
Step 1

Use the template to help place the perler beads in the right spot

Use the template to help place the perler beads in the right spot.  Then bring the plate to an adult, so that they can iron it for you.


[ad#ahc]

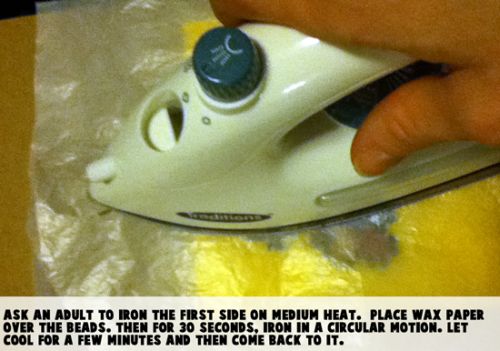
Step 2

Ask an adult to iron the first side on medium heat

Ask an adult to iron the first side on medium heat.  Place wax paper over the beads.  Then for 30 seconds, iron in a circular motion.  Let cool for a few minutes and then come back to it.


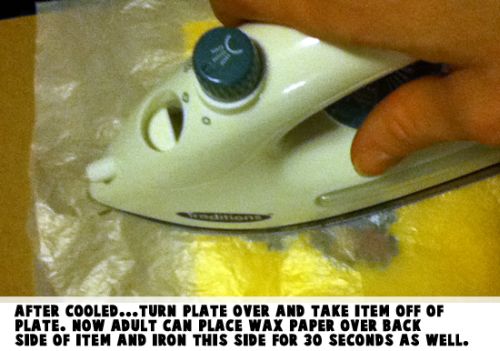
Step 3

After cooled... Turn plate over and take item off of plate.

After cooled… Turn plate over and take item off of plate.  Now adult can place wax paper over back side of item and iron this side for 30 seconds as well.


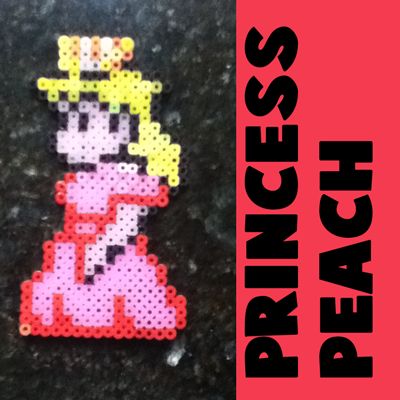
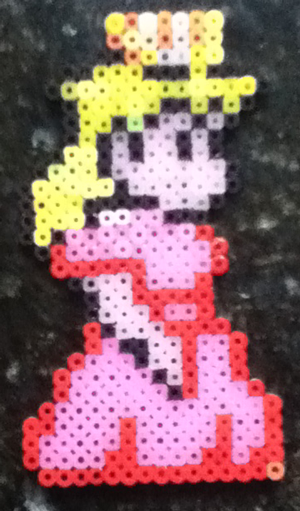
Finished Princess Peach made from Perler Beads Craft

And, there you have it.  You have just made Princess Peach from Super Mario Bros. using Perler Beads.  Remember, check back often as I will be adding more Mario Bros. characters made from Perler Beads in the next several posts.

Technorati Tags: , , , , , , , , ,

How to Make a Perler Bead Luigi from Super Mario Bros.

Today I am going to show you how to make a Perler Bead Luigi from Super Mario Bros.  Done in Perler Beads this Luigi looks very much like the classic version from the 80’s… when I use to love playing the Mario games.  Any Mario Bros. fan would know this, but in case you weren’t already aware… Luigi is Mario‘s younger twin brother… his taller and thinner twin brother.

Check out our other Super Mario Bros. Perler Bead Crafts and other Perler Bead Crafts.

How to Make a Perler Bead Luigi from Super Mario Bros.


Materials Needed

Perler Beads and Board

Iron

Wax Paper


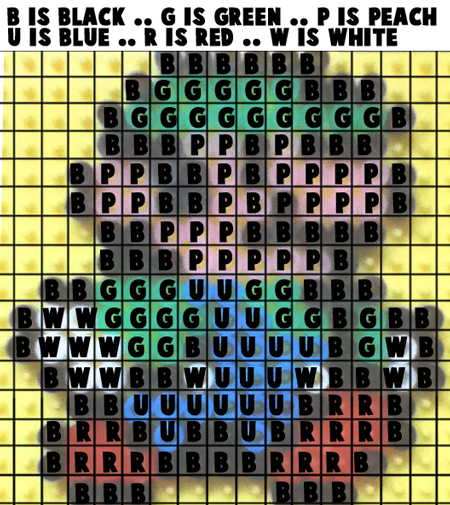
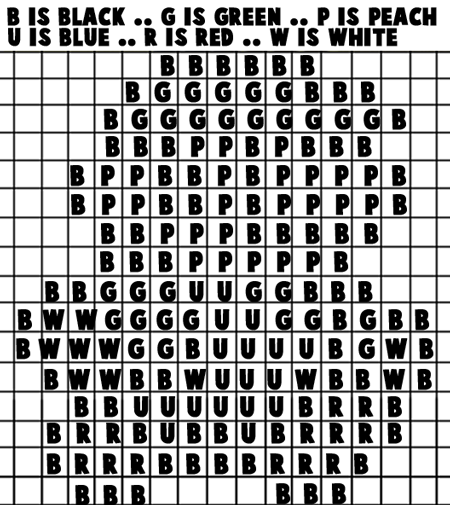
Below are printable templates for this craft.  You can choose to print off  a colored template or the black and white version.

Click on template image to make larger and to print.

Color template for Luigi perler bead craft

Black & white template for Luigi perler bead craft


Step 1

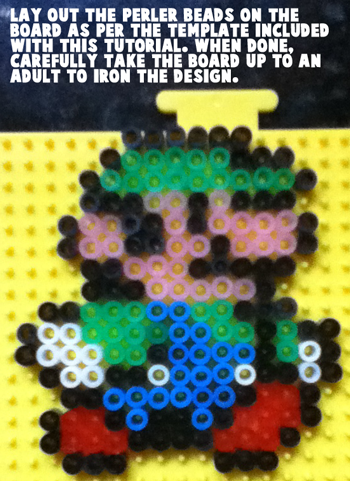
Lay out the perler beads on the board as per the template included with this tutorial

Lay out the perler beads on the board as per the template included with this tutorial.  When done, carefully take the board up to an adult to iron the design.


[ad#ahc]

Step 2

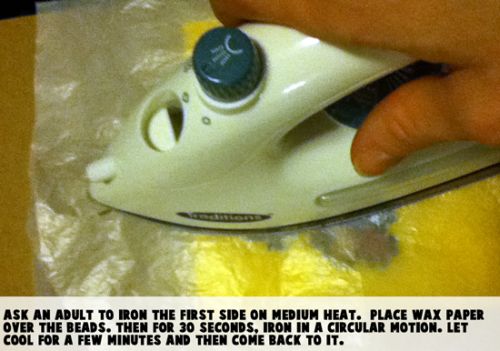
Ask an adult to iron the first side on medium heat

Ask an adult to iron the first side on medium heat.  Place wax paper over the beads.  Then for 30 seconds, iron in a circular motion.  Let cool for a few minutes and then come back to it.


Step 3

After cooled... Turn plate over and take item off of plate

After cooled… Turn plate over and take item off of plate.  Now adult can place wax paper over back side of item and iron this side for 30 seconds as well.


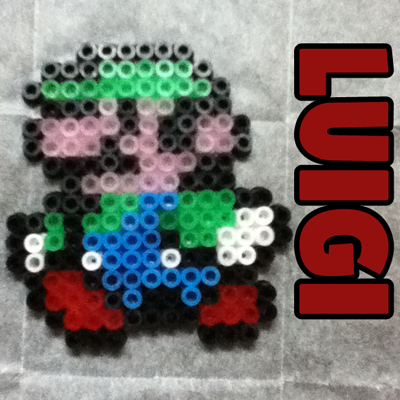
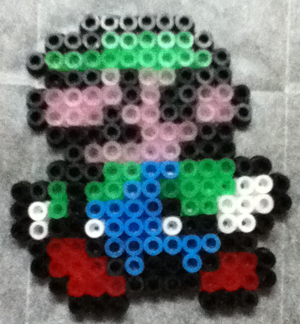
Finished Luigi perler beads craft

This Perler Bead Luigi is so cute, isn’t he?  And, it was so fun to make.  Keep an eye out for more later today and tomorrow…. I will be adding some of Luigi’s friends and enemies.  Make them all and you can create your own Super Mario Bros village.  🙂

Technorati Tags: , , , , , , , , ,

How to Make a Perler Bead Mario from Super Mario Bros.

In this post I’m going to show you how to make a Perler Bead Mario from Super Mario Bros.  Mario needs no introductions.  After all, he is been around since the mid 80’s. This craft is great for kids of all ages…. especially the Super Mario fans.  Keep in mind you will need a bit of parental help later in the craft as there is some ironing.

Check out our other Super Mario Bros. Perler Bead Crafts and other Perler Bead Crafts.

How to Make a Perler Bead Mario from Super Mario Bros.


Materials Needed

Perler Beads and Board

Iron

Wax Paper


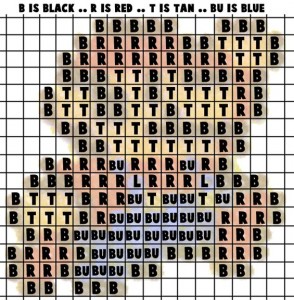
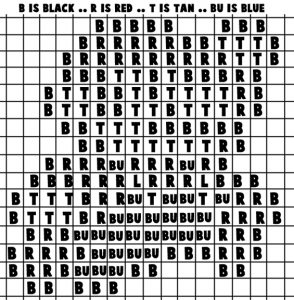
Below are printable templates for this craft.  You can choose to print off  a colored template or the black and white version.

Click on template image to make larger and to print.

Color Template for Mario Perler Beads Craft

Black & White Template for Mario Perler Beads Craft


Step 1

Use the template to guide you thru placing the perler beads

Use the template to guide you thru placing the perler beads… like the above picture.


[ad#ahc]

Step 2

Ask an adult to iron the first side on medium heat

Ask an adult to iron the first side on medium heat.  Place wax paper over the beads.  Then for 30 seconds, iron in a circular motion.  Let cool for a few minutes and then come back to it.


Step 3

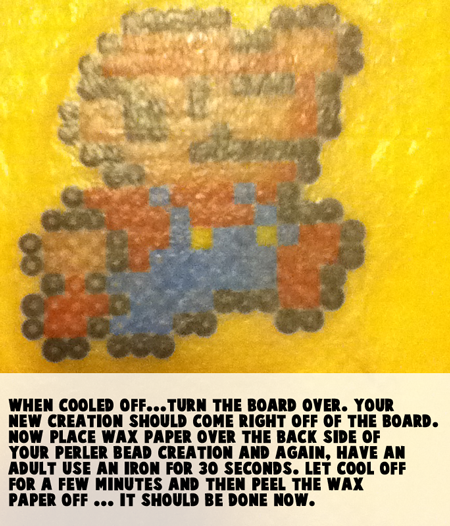
When cooled off... turn the board over.  Your new creation should come right off of the board

When cooled off… turn the board over.  Your new creation should come right off of the board.  Now, place wax paper over the back side of your perler bead creation and again, have an adult use an iron for 30 seconds.  Let it cool off for a few minutes and then peel the wax paper of… it should be done now.


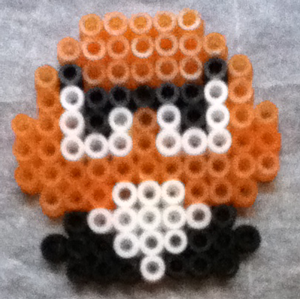
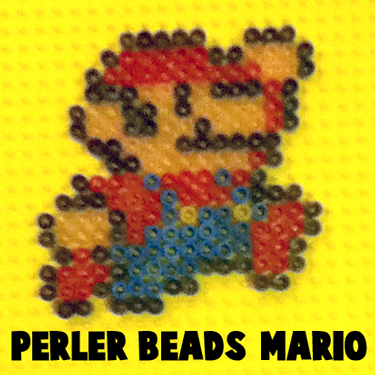
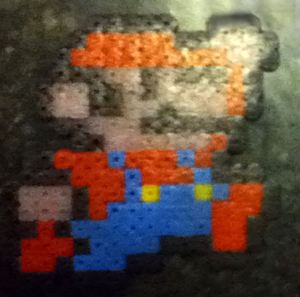
Finished Perler Bead Mario

Now, your Perler Bead Mario is all done.  Doesn’t he look cool?  He looks pixelated like he did back in the original Mario Bros in the mid 80’s.  Make sure to check back later today… I will be showing you how to make some of Mario’s friends and even enemies.

Technorati Tags: , , , , , , , , ,

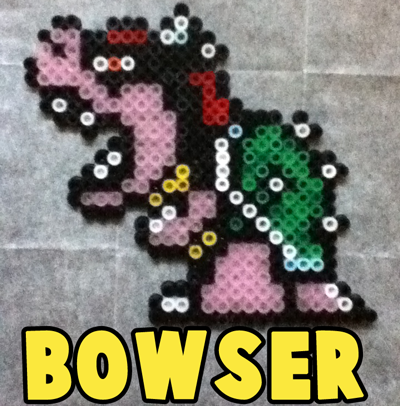
How to Make a Perler Bead Bowser from Super Mario Bros.

Today I’m going to show you how to make Bowser from Super Mario Bros. using Perler Beads.  Bowser is Mario‘s archnemesis and if you ever played any of the Super Mario Bros. games then you are sure to know who Bowser is.   Just follow the perler bead template below and you will have it done in no time at all.

Check out our other Super Mario Bros. Perler Bead Crafts and other Perler Bead Crafts.

How to Make a Perler Bead Bowser from Super Mario Bros.


Materials Needed

Perler Beads and Board

Iron

Wax Paper


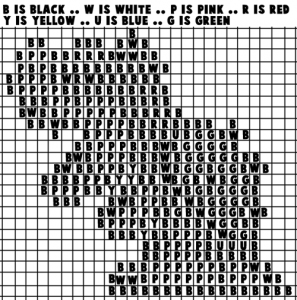
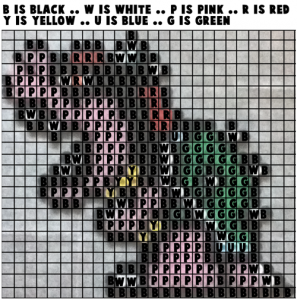
Below are printable templates for this craft.  You can choose to print off  a colored template or the black and white version.

Click on template image to make larger and to print.

Black and white printable template

Color printable template


Step 1

Use the template to put the perler beads in the right location

Use the template to put the perler beads in the right location.  Then bring the board to an adult so that they could iron it for you.


[ad#ahc]

Step 2

Ask an adult to iron the first side on medium heat

Ask an adult to iron the first side on medium heat.  Place wax paper over the beads.  Then for 30 seconds, iron in a circular motion.  Let cool for a few minutes and then come back to it.


Step 3

After cooled... turn plate over and take item off of plate

After cooled… turn plate over and take item off of plate.  Now adult can place wax paper over back side of item and iron this side for 30 seconds as well.


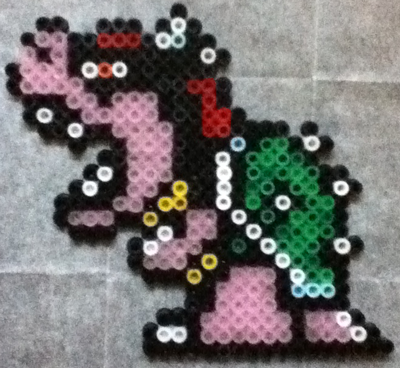
Finished Bowser from Super Mario

There you have it… you have finished the Perler Bead Bowser.  It should look like the above picture.  The perler fun doesn’t have to stop here… Keep an eye out for more Perler Bead templates later today.

Technorati Tags: , , , , , , , ,

Clever and Crafty Last Minute Costume Ideas

Halloween is just days away.  Soon all the kids in the neighborhood will be getting dressed up and going door to door trick or treating.  It is such an exciting time.  But, if you are like me and wait till the last minute it is very possible that you have no costumes ready at all.  If so, that exciting time has now shifted to a very stressful time.  Well, stop your worrying.  I have compiled 10 Clever and Crafty Last Minute Costume Ideas.  Surely, you will be able to find one that is perfect in there for you.

Check out our Halloween Crafts.

(1) Legos
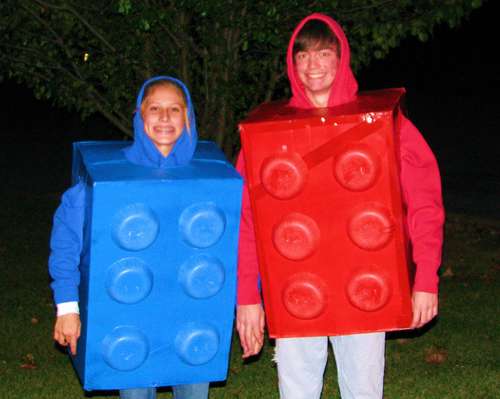
LEGO Costume

I found these costumes over at Instructables and it’s such a great idea.  Made with some items around the house… like a cardboard box, duct tape and paper bowels… you are sure to have this costume finished in no time.


[ad#ahc]

(2) Ghost
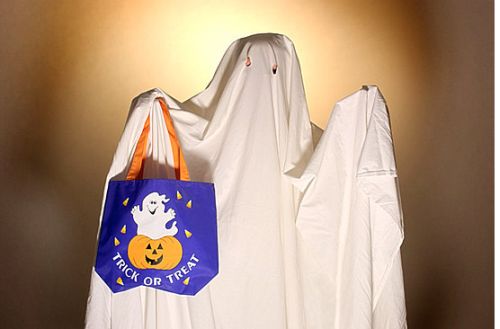
Ghost Costume

Whenever I think of a easy, yet spooky, costume for Halloween I think of the standard Ghost costume.  It never gets old…. it’s always good.  SavvySugar shows you how to make this costume on the cheap.


(3) Medusa
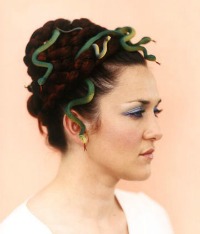
Medusa Costume

I think this costume is very imaginative and wouldn’t take too much to put together.  DebtFreeByThirty shows us how to put this very cool Medusa costume together with not much time or money.


(4) Quarterback
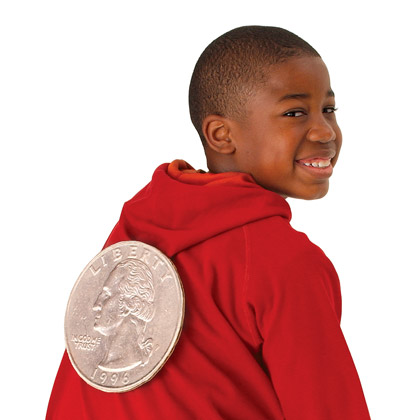
Quarterback Costume

I bet this wasn’t the Quarterback you were thinking of, huh?  But, I bet this one is not only easier to put together, but it is also really, really clever.  Made from cardboard and duct tape this costume is sure to get a lot of people talking.  Check out the details at FamilyFun.


(5) Raining Cats and Dogs
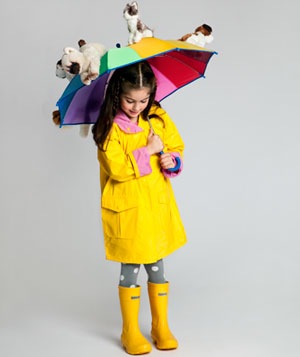
Raining Cats and Dogs Costume

Grab an old umbrella, raincoat and a couple of stuffed animals and you have a costume perfect for Halloween.  RealSimple shows us how to put this very cute costume together in no time at all.


(6) Bag of Jelly Beans
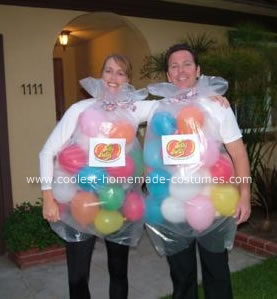
Bag of Jelly Beans Costume

I thought this costume was adorable.  It really is creative.  Coolest-Homemade-Costumes shows us how to take a simple clear garbage bag and fill it with colorful balloons to make a clever Bag of Jelly Beans.


(7) Spiderweb Mother and Sock Spider Baby Costume
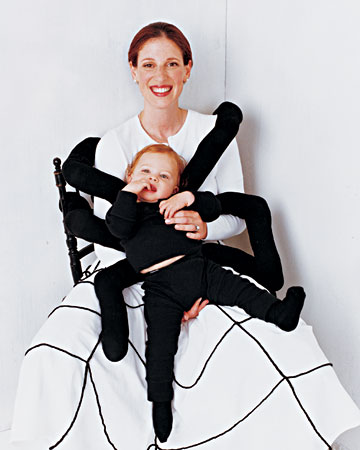
Spiderweb Mother and Sock Spider Baby Costume

Talk about an awesome costume for mother and child…. this Halloween costume ROCKS.  I found it over at the Martha Stewart site and I loved it.  Don’t worry, Martha Stewart shows you how to do this creative Halloween costume craft step-by-step, so you will be good to go by Halloween.


(8) Robot
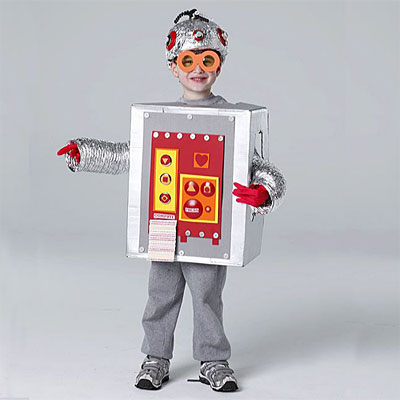
Robot Costume

Here is another clever costume you could whip together in no time.  It is a Robot costume and it is something else.  I found this costume at MyAtlantaMoms and she shows you just by using a few boxes, silver paint and aluminum you too can have a robot costume like this one in time for Halloween.


(9) Road Trip

Road Trip Costume

This is a crazy costume….. I love it!!  I think any little boy would enjoy it too.  Take an old sweatsuit, Velcro and toy cars and FamilyFun will show you how to turn it into this clever Road Trip costume.  Plus, your child will have no trouble keeping warm in it on Trick-or-Treat.  That’s a plus.


(10) Octopus Baby

Octopus Baby Costume

Do you have a baby and a bunch of unmatched socks or tights laying around at home?  If you answered yes, then this could be the Halloween costume for you.  Better Homes and Gardens shows us how to put together this creative costume in very little time.  You will even have some time left over to spare.
Technorati Tags: , , , , ,

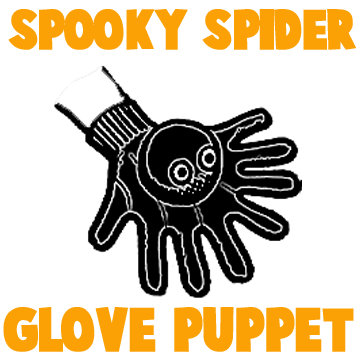
How to Make a Spooky Spider Glove Puppet

Today I have a fun craft for you.  I am going to show you how to make a spooky Spider Glove Puppet.  It’s going to be so much fun.  Plus, this spooky spider is so cute.  I know a spooky spider shouldn’t be cute.  But, it just is.  Something about seeing a spider as a puppet that makes it so cute.  So, find an old pair of gloves and grab your kids because they are going to love this craft…. and for sure playing with the finished puppet.
Check out our other Halloween Crafts.

How to Make a Spooky Spider Glove Puppet


Materials Needed

Pair of Black Gloves (old or new)
Needle

Black Thread

Cotton

Styrofoam Ball (1 1/4″ in diameter)

Scissors
 

Step 1

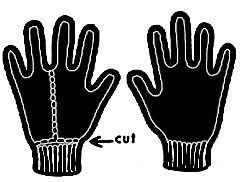
Buy a pair of black gloves....or even better, find an old pair of black gloves

Buy a pair of black gloves….or even better, find an old pair of black gloves. Decide if you want to wear this puppet on your right hand or left hand. Set one of the gloves in the pair aside…the one that you will not be wearing on your hand. For the purposes of this tutorial, we will assume that you are right handed. You are now going to cut up the glove that is NOT your good hand. If you are right handed, cut up the left glove…and vice versa if you are left handed. Now, cut off the bottom of the left handed glove(the cuff) if you are right handed. And then cut the thumb and first two fingers from the left glove as well… as shown in the picture above.


[ad#ahc]

Step 2

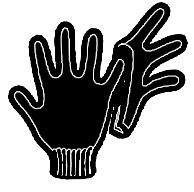
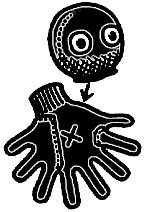
Now you will have a piece of the left glove that included 3 fingers without the cuff

Now, you will have a piece of the left glove that included 3 fingers without the cuff. You will slip the middle finger of this left glove over the little finger of the right glove.


Step 3

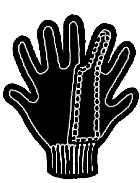
You will now sew the 2 pieces together

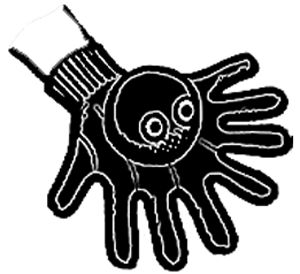
You will now sew the 2 pieces together.  Sew the seams together carefully so that a finger still will fit into opening (see sketch above).


Step 4

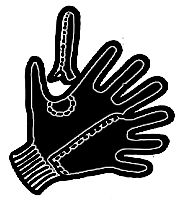
Now, stuff other finger and thumb of left glove with cotton and sew to right glove

Now, stuff other finger and thumb of left glove with cotton and sew to right glove. Cut another finger from left glove and stuff it with cotton. Sew it fast between the thumb and forefinger on the right handed glove (see sketch above).


Step 5

Cover a styrofoam ball

Cover a Styrofoam ball ( about 1 1/4″ in diameter) with some of the left-over left glove cuff and sew on to the right hand glove (see x on sketch above).


Step 6

Put it on and wear it as a scary black spider

Put it on and wear it as a scary black spider. Creep people out with your scary Halloween spider.  Hey, you can even make a few and put on a Halloween spider puppet show.  How fun would that be?!

Technorati Tags: , , , , ,

How to Make Mini Pumpkins from Oranges

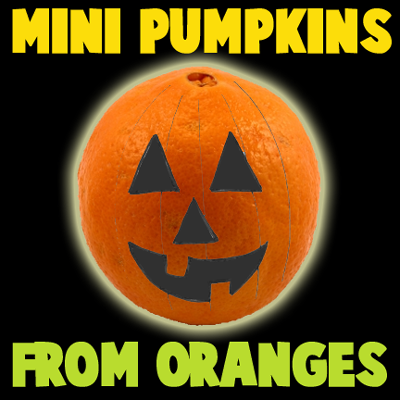
I have a cute little craft for you today.  I’m going to show you how to make Mini Pumpkins out of oranges.  They come out looking adorable and they will be a great Halloween decoration. These Mini Pumpkins are a great craft for all ages…. even the youngest of kids.  No knife needed…. just a simple sharpie.  So, make a few and have fun decorating for Halloween.

Check out our other Halloween Crafts.

How to Make Mini Pumpkins from Oranges

Materials Needed

A Few Oranges

Black Sharpie


Step 1

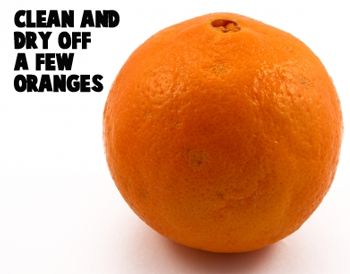
Clean and dry off a few oranges

Clean and dry off a few oranges.


[ad#ahc]

Step 2

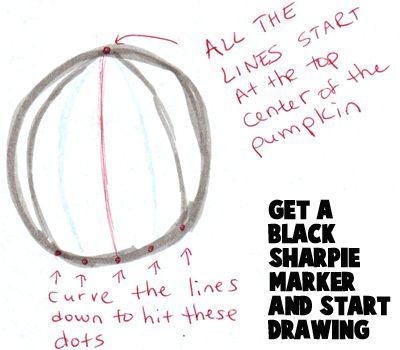
Draw Lines Down the Orange as in the Picture

Get a black sharpie marker and start drawing.  All the lines start at the top center of the pumpkin…. notice where the center dot is in the picture above.  Now, curve the lines down to hit the dots like above.


Step 3

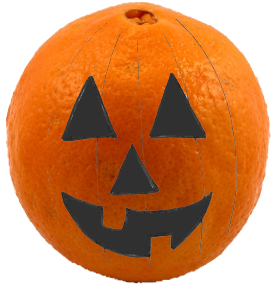
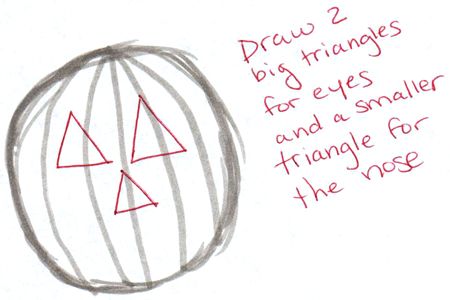
Draw 2 big triangles for the eyes and a smaller triangle for the nose

Draw 2 big triangles for the eyes and a smaller triangle for the nose.


Step 4

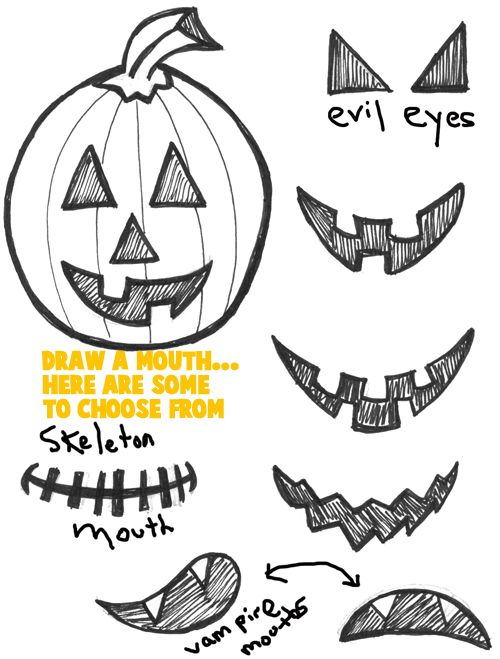
Draw a Mouth

Draw a Mouth.  Above I have many mouths to choose from.


Finished mini pumpkins

There you go…. you just finished your first Mini Pumpkin.  Doesn’t it look great?!  Now, make a few more and put them around the house this Halloween.  Imagine how proud your child will be when they see their work put around the house.  So proud!!

Technorati Tags: , , , , , , ,

How to Make Mini Ghosts with Sheets

Halloween is just about here and you know what Halloween brings?  A night filled with tons and tons of ghosts.  But, who says ghosts have to be just on the outside in the dark.  Why couldn’t the inside of your house be filled with ghosts?  Well, you can.  Today I’m going to show you how to make Mini Ghosts with sheets.  Why not make a bunch and fill your house with Ghost decorations perfect for the Halloween season.  SPOOKY!!

Check out our other Halloween Crafts.

How to Make Mini Ghosts with Sheets


Materials Needed

Old White Sheet

Cotton Balls

Ribbon or Rubber Band

Black Marker


Step 1

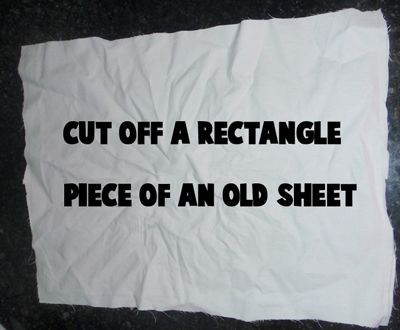
Cut off a rectangle piece from an old sheet

Cut off a rectangle piece from an old sheet.


[ad#ahc]

Step 2

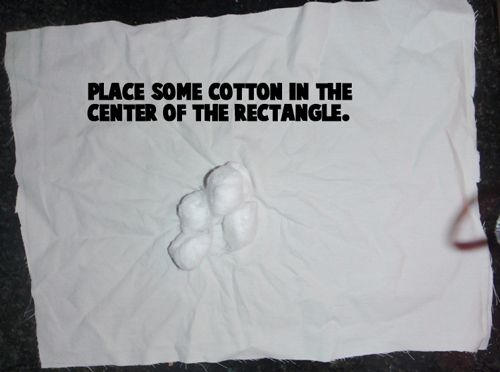
Place some cotton in the center of the rectangle

Place some cotton in the center of the rectangle.


Step 3

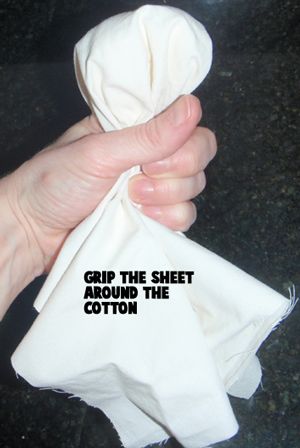
Grip the sheet around the cotton

Grip the sheet around the cotton.


Step 4

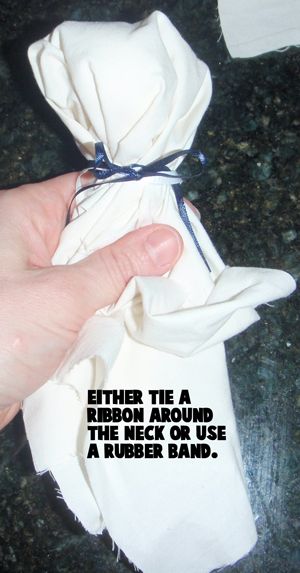
Either tie a ribbon around the neck or use a rubber band

Either tie a ribbon around the neck or use a rubber band.


Step 5

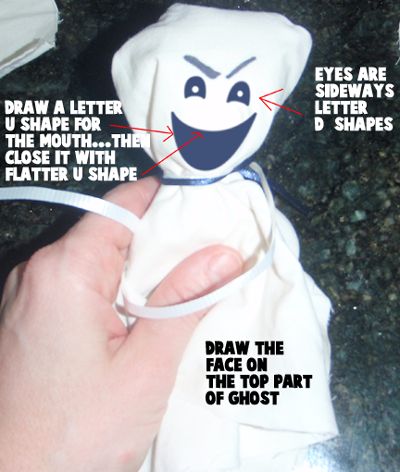
Draw the face on the top part of the ghost

Draw the face on the top part of the ghost.  Draw a letter U shape for the mouth… then close it with a flatter U shape.  Eyes are sideways letter D shapes.

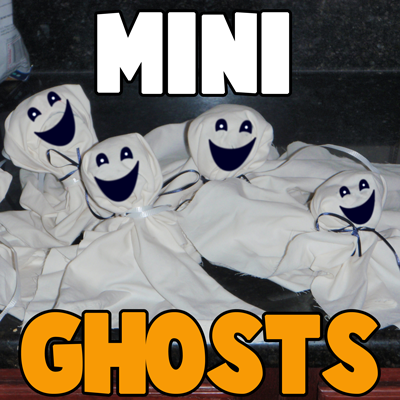
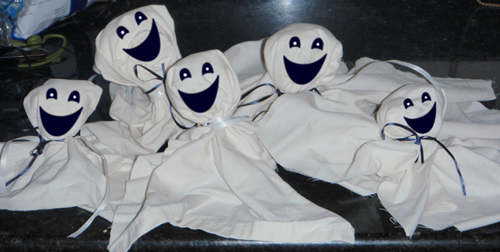
Finished Mini Ghosts with Sheets

Aren’t these Mini Ghosts fun to make?!  And, they aren’t that difficult either…. so kids of all ages can enjoy this Halloween craft.  So, get a little crafty and have fun decorating your house for Halloween.

Technorati Tags: , , , , ,

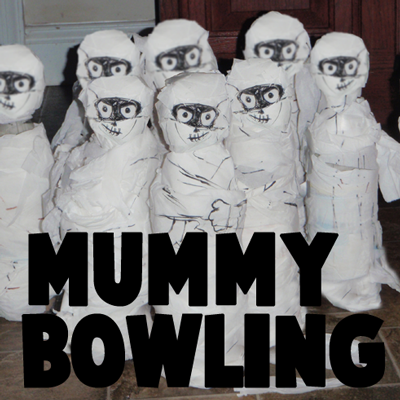
How to Make a Mummy Bowling Game for Halloween

Today I’m going to show you How to Make a Mummy Bowling Game for Halloween.  This is an awesome craft if you have a group of kids or better yet…. at a Halloween Party.  Made with water bottles and toilet paper its a fun craft that doesn’t end when the craft is finished.  Once you finished making the Mummies it’s time to play… Roll the ball and knock over those Mummies.

Check out our other Halloween Crafts.

How to Make a Mummy Bowling Game for Halloween


Materials Needed

10 Ball Pit Balls or Cheapo Balls from the Dollar Store

10 Water Bottles

Gravel, Sand or Water

Toilet Paper

Black Marker

Basketball or Kickball

Scissors


Step 1

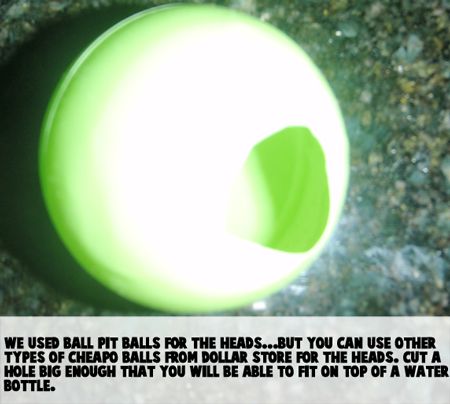
We used ball pit balls for the heads... but you can use other types of cheapo balls from Dollar Store for the heads

We used ball pit balls for the heads… but you can use other types of cheapo balls from the Dollar Store for the heads.  Cut a hole big enough that you will be able to fit it on top of a water bottle.


[ad#ahc]

Step 2

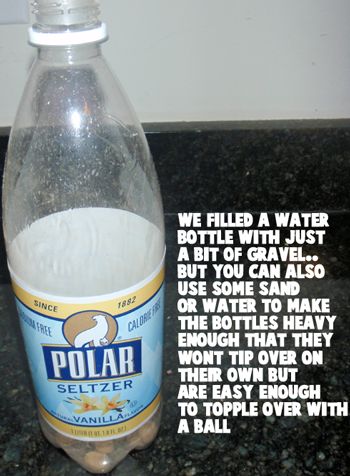
We filled the water bottle with just a little bit of gravel, but you could also use some sand or water

We filled the water bottle with just a little bit of gravel, but you could also use some sand or water to make the bottles heavy enough that they won’t tip over on their own… but are easy enough to topple over with a ball.


Step 3

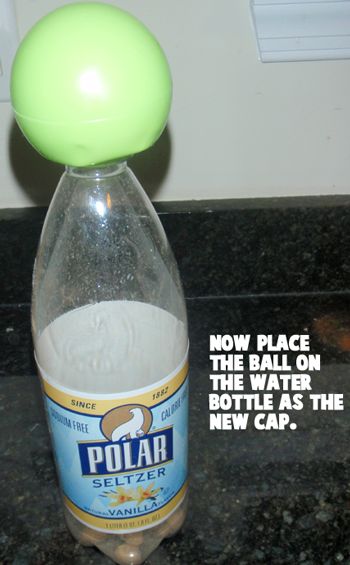
Now, place the ball on the water bottle as the new cap

Now, place the ball on the water bottle as the new cap.


Step 4

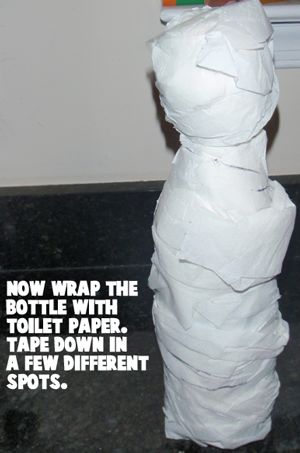
 Now, wrap the bottle with toilet paper

Now, wrap the bottle with toilet paper.  Tape down in a few different spots.


Step 5

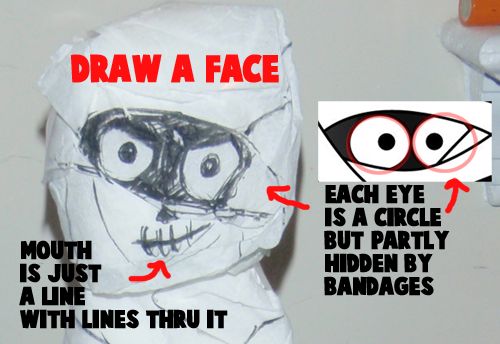
Draw the face

Draw the face.  The mouth is just a line with lines thru it.  Each eye is a circle, but partly hidden by bandages.


Step 6

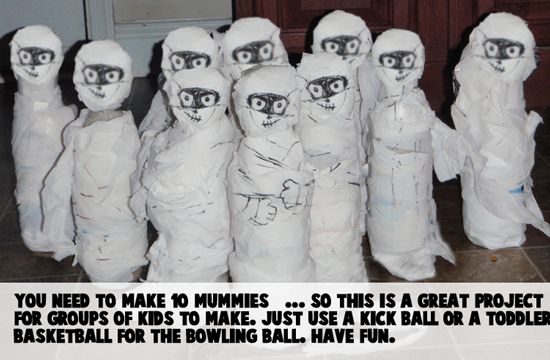
You need to make 10 mummies... so this is a great project for groups of kids to make

You need to make 10 mummies… so this is a great project for groups of kids to make.  Just use a kickball or a toddler basketball for the bowling ball.

Now, tell me that isn’t a great project for a Halloween party?  I don’t know which will be more fun…. making the craft or playing Mummy Bowling.  Have fun!!

Technorati Tags: , , , , , , ,