How to Make Stand-up Paper Turkeys

Today we are going to make Stand-up Turkeys made out of paper.  This is a great craft for young children as there are a limited amount of steps.  However, children of all ages will enjoy this craft.  These will be great little turkeys for decorating the Thanksgiving table for your big Turkey Day celebration.

Check out our other Thanksgiving Crafts.

How to Make Stand-up Paper Turkeys

Materials Needed

Paper or Cardstock

Scissors

Crayons, Markers or Watercolors


Step 1

8 x 11 size Template

Printable Stand-up Turkey Template


Large Template

Printable Large Template for Stand-up Turkeys

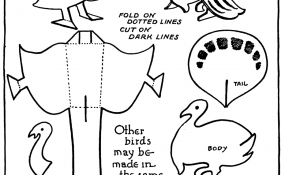
Click on one of the templates above to open in a new window.  One template is 8×11 and the other is quite a bit larger.  Click on the template size you want then print off.

[ad#ahc]

Step 2

Once you have printed off the template…  cut out along the dark lines.  Then fold items on the dotted lines.  Feel free to color or paint your turkeys to really bring them to life.


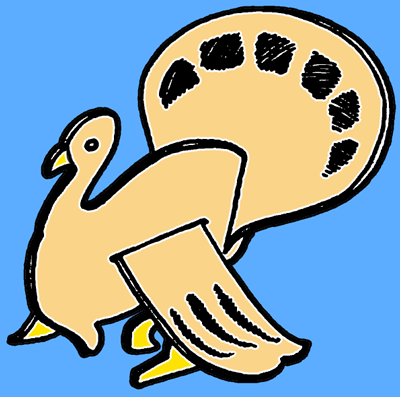
Finished stand-up turkey

There you go…. you just finished making Stand-up Paper Turkeys.  Make many Turkeys and decorate your house for Thanksgiving.

Technorati Tags: , , , , , , , , , , ,

How to Make a Yarn Turkey for Thanksgiving

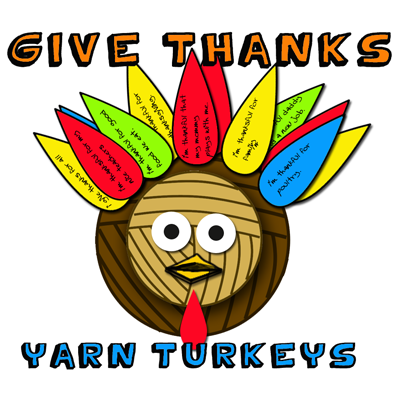
Thanksgiving is a wonderful holiday.  It is all about giving thanks for all that you have.  But, sometimes we forget about the true meaning of Thanksgiving with the food, parades and football games…. we lose focus.  Well, I have a great craft for you that will keep the focus on the true meaning of Thanksgiving.  Everyone that is at your Thanksgiving celebration will write down the reason they are thankful on a turkey feather which is then added to this Turkey craft.  Everyone will love participating in this beautiful Turkey craft.  So, let’s get started.

Check out our other Thanksgiving Crafts.

How to Make a Yarn Turkey for Thanksgiving

Materials Needed

Dark Brown Yarn

Tan Yarn

Chopstick, Dowel or Knitting Needle

Colorful Construction Paper

Glue, Tape or Pins

Scissors

Pen

Plastic Forks


Step 1

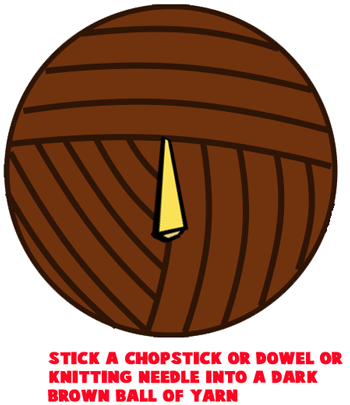
Stick a chopstick, dowel or knitting needle into a dark brown ball of yarn.

Stick a chopstick, dowel or knitting needle into a dark brown ball of yarn.

[ad#ahc]

Step 2

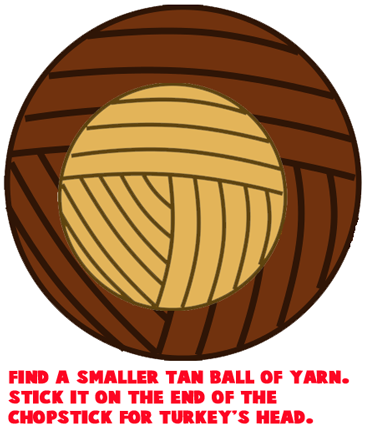
Find a smaller tan ball of yarn.

Find a smaller tan ball of yarn.  Stick it on the end of the chopstick for turkey’s head.


Step 3

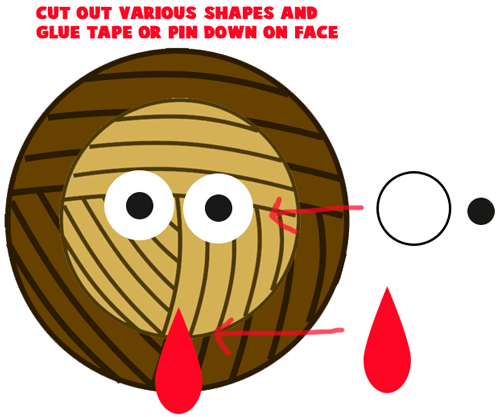
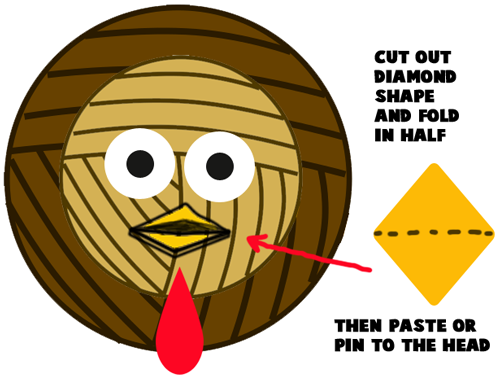
Cut out various shapes and glue, tape or pin down on face.

Cut out various shapes and glue, tape or pin down on face.


Step 4

Cut out diamond shape and fold in half.

Cut out diamond shape and fold in half.  Then paste or pin to the head.


Step 5

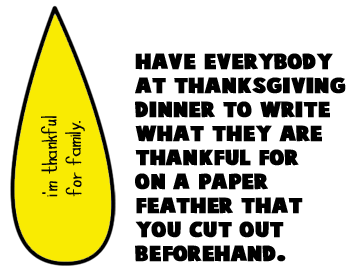
Have everyone at Thanksgiving dinner write what they are thankful for

Have everyone at Thanksgiving dinner write what they are thankful for on a paper feather that you cut out beforehand.


Step 6

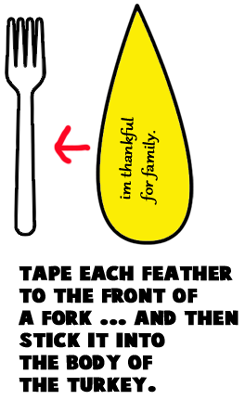
Tape each feather to the front of a fork

Tape each feather to the front of a fork… and then stick it into the body of the turkey.


Tape each feather to the front of a fork

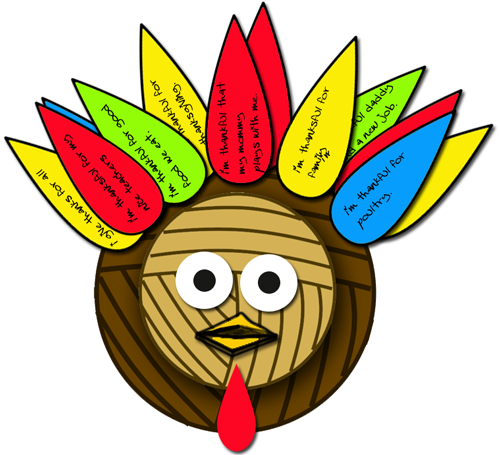
Isn’t that an awesome Turkey?!  There will be no turkey that will compare to this one…. after all, this turkey was made by your friends and loved ones.  It will make for a beautiful centerpiece during your Thanksgiving meal.

Technorati Tags: , , , , , , , , , , ,

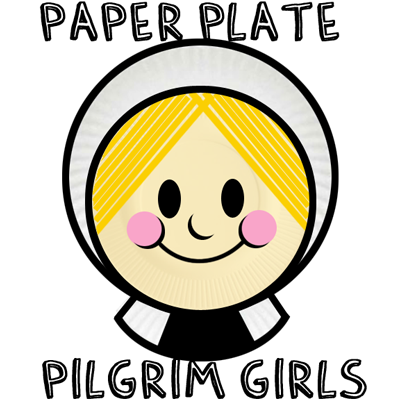
How to Make a Girl Paper Plate Pilgrim for Thanksgiving

Earlier today I showed you how to make a Boy Paper Plate Pilgrim for Thanksgiving.  But, how can I show you how to make a boy Pilgrim without showing you how to make the girl.  After all, women were an important part of the Pilgrims and their new colony.  Women were a big help when it came to creating a Harvest.  And, if it wasn’t for a successful harvest there would have been no Thanksgiving.  I shutter at the thought.  So, let’s make a Girl Paper Plate Pilgrim for Thanksgiving.

Check out our other Thanksgiving Crafts.

How to Make a Girl Paper Plate Pilgrim for Thanksgiving


Materials Needed

3 Paper Plates

Paint or Crayons

Black Marker

Gold or Yellow Yarn

Glue

Scissors


Step 1

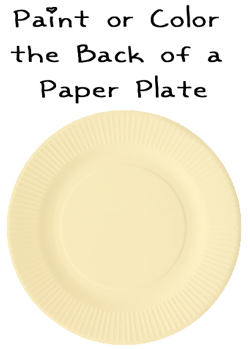
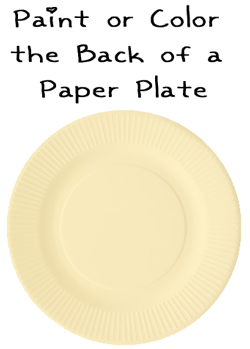
Paint or color the back of a paper plate.

Paint or color the back of a paper plate.

[ad#ahc]

Step 2

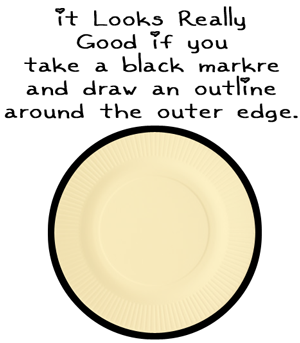
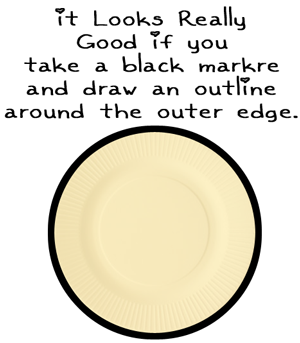
It looks really good if you take a black marker and draw an outline around the outer edge.

It looks really good if you take a black marker and draw an outline around the outer edge.


Step 3

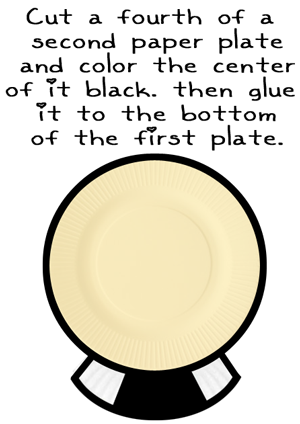
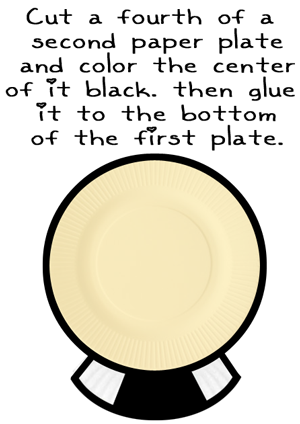
Cut a fourth of a second paper plate and color the center of it black.  Then glue it to the bottom of the first plate.


Step 4

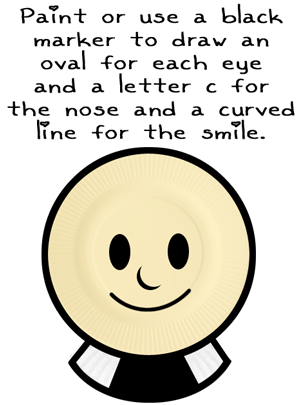
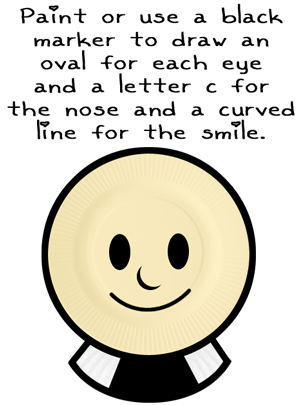
Paint or use a black marker to draw an oval for each eye and a letter C for the nose and a curved line for the smile.

Paint or use a black marker to draw an oval for each eye and a letter C for the nose and a curved line for the smile.


Step 5

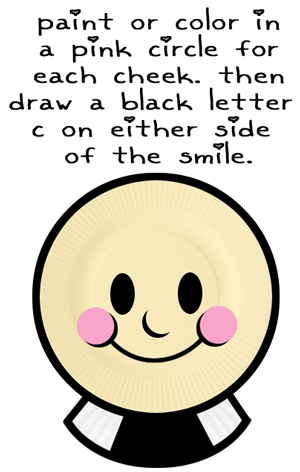
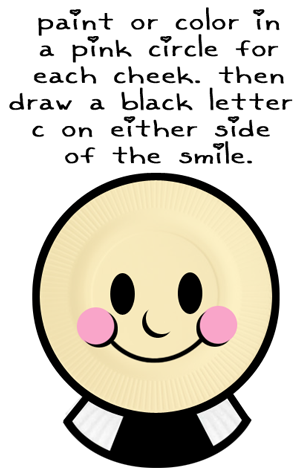
Paint or color in a pink circle for each cheek.

Paint or color in a pink circle for each cheek.  Then draw a black letter C on either side of the smile.


Step 6

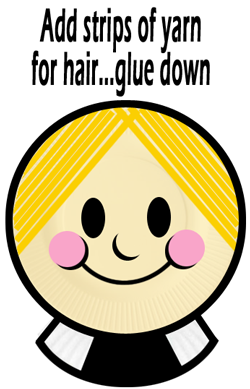
Add strips of yarn for hair... glue down.

Add strips of yarn for hair… glue down.


Step 7

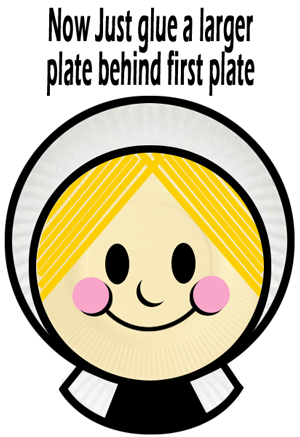
Now just glue a larger plate behind the first plate.

Now just glue a larger plate behind the first plate.


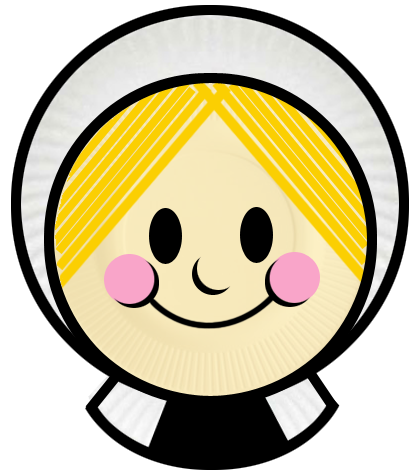
Finished girl pilgrim craft

There you go…. you just finished making the girl paper plate pilgrim perfect for decorating for Thanksgiving.  Make sure to make the boy paper plate pilgrim so you have the pair.

Technorati Tags: , , , , , , , , , , ,

How to Make a Paper Plate Pilgrim for Thanksgiving

Pilgrims are an important part of Thanksgiving.  After all, they were the first to have a Thanksgiving back in 1621.  Well, it wasn’t really Thanksgiving back then…. it was a celebration.  They were celebrating the fact that they finally had a good harvest.  Today I’m going to show you how to make a Paper Plate Pilgrim perfect for Thanksgiving.

Check out our other Thanksgiving Crafts.

How to Make a Paper Plate Pilgrim for Thanksgiving


Materials Needed

2 Paper Plates

Paint or Crayons

Black Marker

Glue

Black, Blue & Yellow Construction Paper

Scissors


Step 1

Paint or color the back of a paper plate.

Paint or color the back of a paper plate.

[ad#ahc]

Step 2

It looks really good if you take a black marker and draw an outline around the outer edge.

It looks really good if you take a black marker and draw an outline around the outer edge.


Step 3

Cut a fourth of a second paper plate and color the center of it black.

Cut a fourth of a second paper plate and color the center of it black.  Then glue it to the bottom of the first plate.


Step 4

Paint or use a black marker to draw an oval for each eye

Paint or use a black marker to draw an oval for each eye and a letter C for the nose and a curved line for the smile.


Step 5

Paint or color in a pink circle for each cheek.

Paint or color in a pink circle for each cheek.  Then draw a black letter C on either side of the smile.


Step 6

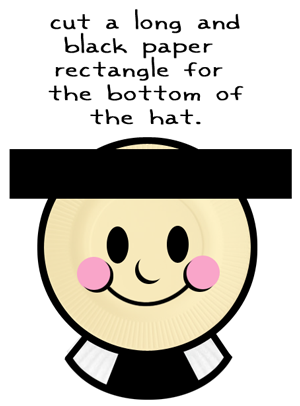
Cut a long, black paper rectangle for the bottom of the hat.

Cut a long, black paper rectangle for the bottom of the hat.


Step 7

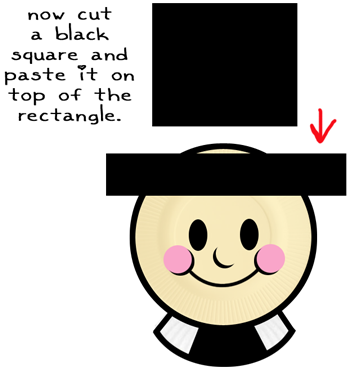
Now, cut a black square and paste it on the top of the rectangle.

Now, cut a black square and paste it on the top of the rectangle.


Step 8

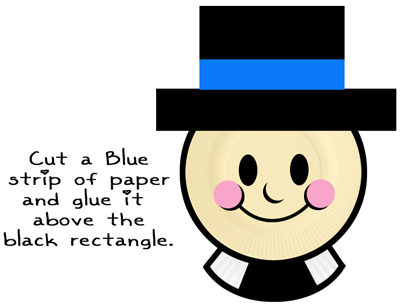
Cut a blue strip of paper and glue it above the black rectangle.

Cut a blue strip of paper and glue it above the black rectangle.


Step 9

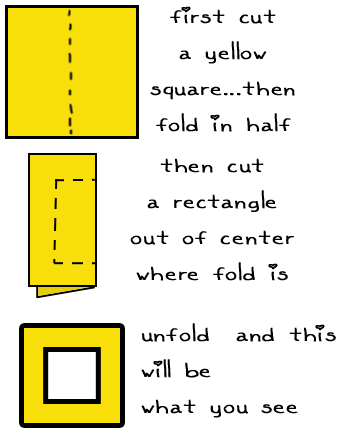
First, cut a yellow square... then fold in half.

First, cut a yellow square… then fold in half.  Now, cut a rectangle out of the center where fold is.  Unfold, and you should have a square with the center square missing…. like above.


Step 10

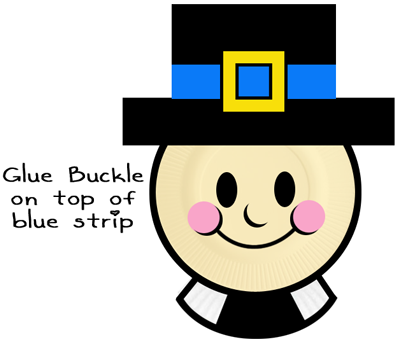
Glue buckle on top of blue strip.

Glue buckle on top of blue strip.


Step 11

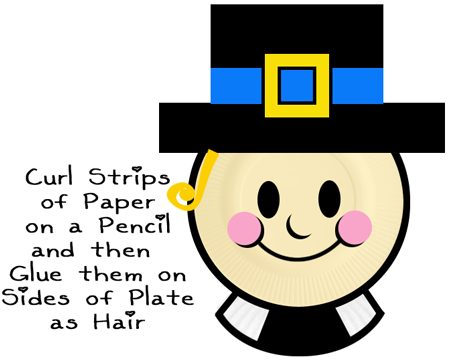
Curl strips of paper on a pencil and then glue them on sides of plate as hair.

Curl strips of paper on a pencil and then glue them on sides of plate as hair.


Step 12

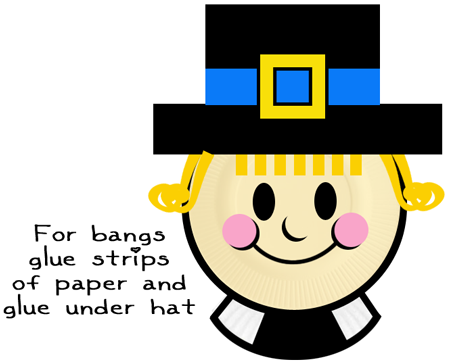
For bangs glue strips of paper and glue under hat.

For bangs glue strips of paper and glue under hat.


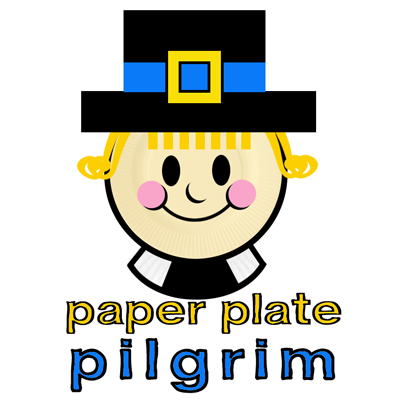
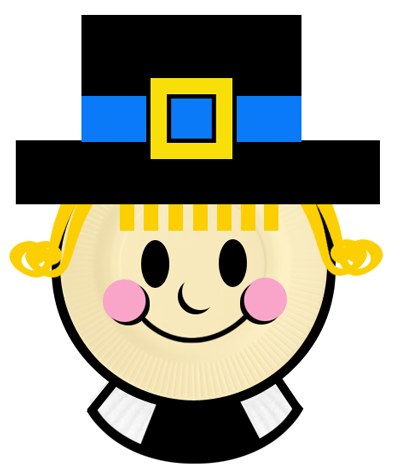
Finished paper plate Pilgrim

Isn’t that one awesome Pilgrim… so colorful!!  This Pilgrim will be wonderful for decorating for the Thanksgiving holiday.  And, keep an eye out…. as the next post I make will be a Paper Plate Pilgrim Girl.

Technorati Tags: , , , , , , , , , , ,

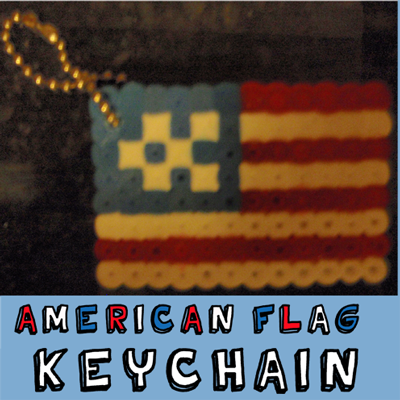
How to Make an American Flag Keychain for Veterans Day

Veterans Day is coming up quickly and what better way to show your appreciation to our American Veterans than to carry around an American Flag on your keychain.  For that matter, why just Veterans Day…. why not carry around your American Flag Keychain everyday?  It will show off your love for America.  So, with that being said, let’s get started on our American Flag Keychain craft.

Check out our other Perler Bead Crafts

How to Make an American Flag Keychain for Veterans Day


Materials Needed

Perler Beads and Board

Iron

Wax Paper

Key Ring or Chain Loop


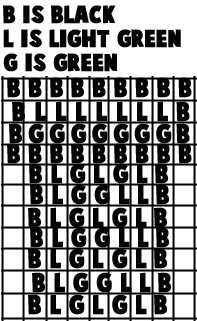
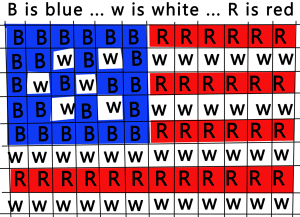
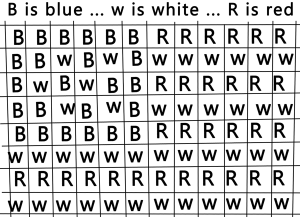
Below are printable templates for this craft.  You can choose to print off  a colored template or the black and white version.

Click on template image to make larger and to print.

Printable color template for Flag keychain

Printable black & white template for Flag keychain


Step 1

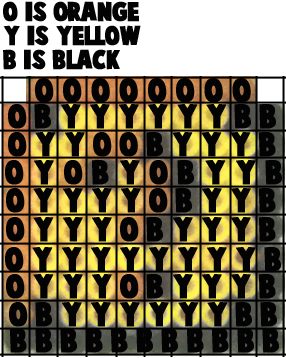
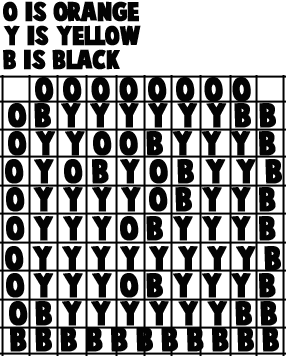
Place Perler Beads on to the board per the template included in this craft.

Place Perler Beads on to the board per the template included in this craft.


[ad#ahc]

Step 2

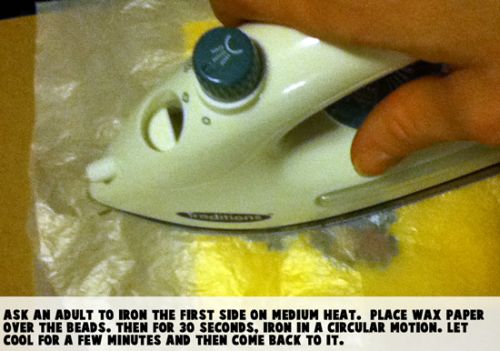
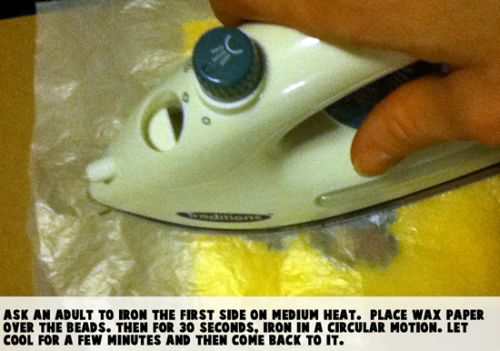
Ask an adult to iron the first side on medium heat.

Ask an adult to iron the first side on medium heat.  Place wax paper over the beads.  Then for 30 seconds, iron in a circular motion.  Let cool for a few minutes and then come back to it.


Step 3

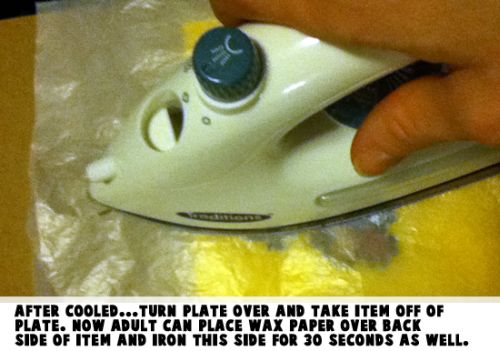
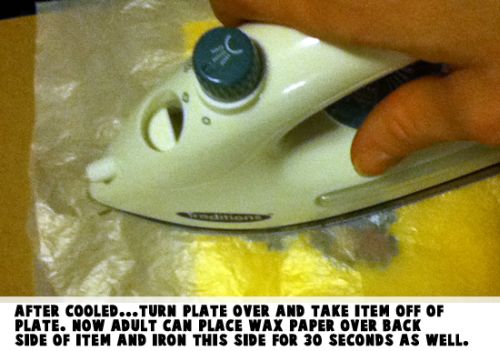
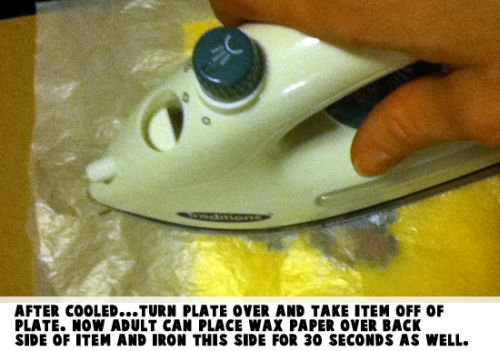
After cooled... Turn plate over and take item off of plate.

After cooled… Turn plate over and take item off of plate.  Now adult can place wax paper over back side of item and iron this side for 30 seconds as well.


Step 4

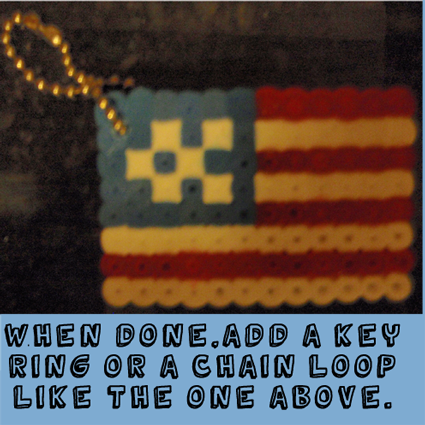
When done add a key ring or a chain loop like the one above.

When done add a key ring or a chain loop like the one above.

Awesome job…. you just finished your American Flag Key Chain perfect for Veterans Day and any day.  What a great way to carry your keys proudly!!

Technorati Tags: , , , , , , , , ,

Idea for Wrapping Gifts – Your Kids’ Artwork

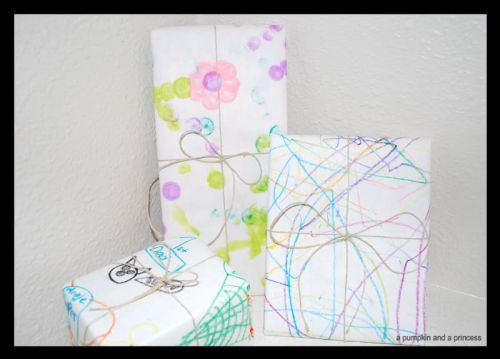
I was surfing the internet the other day and I came across A Pumpkin and a Princess who had a great idea…Wrap gifts with your children’s artwork.

Idea for Wrapping Gifts - Your Kids' Artwork

As a mother you probably have so much children’s art sitting around, on your walls and on your refrigerator.  I know you hate the feeling of throwing any of your children’s artwork away.  That feels terrible.  But, what else can you do with the extra artwork you can’t possibly display?  How about use their artwork as wrapping paper.  Children go to so many birthday parties.  Frankly, my children have more of a social life than I do.  They are constantly going to birthday parties.  Use your children’s beautiful artwork to wrap the birthday gifts.

And, you don’t have to just stick with children’s birthday gifts.  Your family member will love opening gifts wrapped with your children’s artwork.  It is so much more special than using store bought wrapping paper and a lot cheaper.  Plus, it helps the environment to have another use for your children’s artwork.

So, let your kids keep drawing and coloring away without fearing that you will have to eventually throw them away.  Simply store that artwork away for a future gift giving event or birthday party.  It will give you a good feeling to know you are doing something special with your children’s artwork.

[ad#ahc]

Technorati Tags: , , , , , ,


How to Make an Indian Village for Thanksgiving

I have a fun craft for you today.  Today I’m going to show you how to make an Indian Village perfect for the Holiday season.  Thanksgiving is coming quickly and with Thanksgiving comes decorating for the Holiday.  This Indian Village would be a great Thanksgiving decoration.  Let’s do it.

Check out our other Thanksgiving Crafts

How to Make an Indian Village for Thanksgiving


Materials Needed

Printer

Paper

Markers or Crayons

Glue or Paste

Sand, Gravel and Rocks

Twigs

Small Table


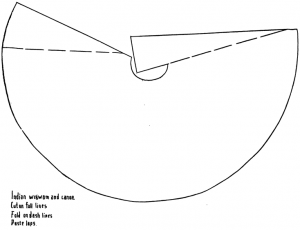
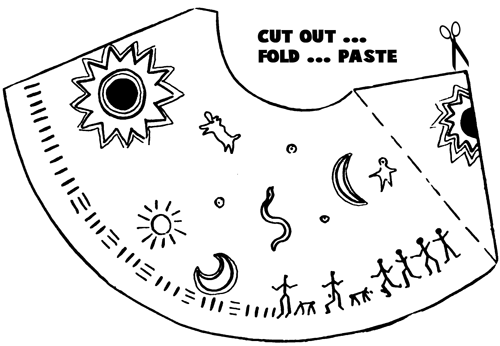
Below are the printable templates.  Click on the image to make larger and to print.

8×10 Size Template

Printable 8x10 size template


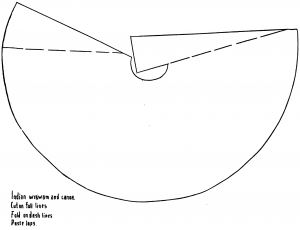
Large Template

Printable large template


Step 1

Print out template.

Print out template.


[ad#ahc]

Step 2

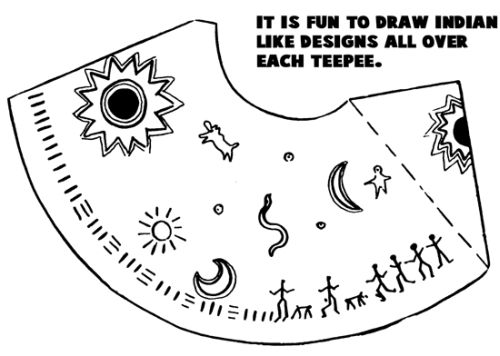
It is fun to draw Indian like designs all over each teepee.

It is fun to draw Indian like designs all over each teepee.


Step 3

Cut out... Fold... Paste.

Cut out… Fold… Paste.


Step 4

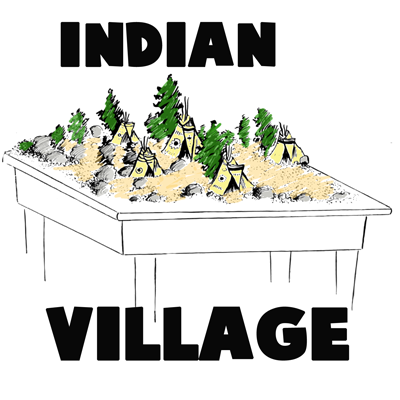
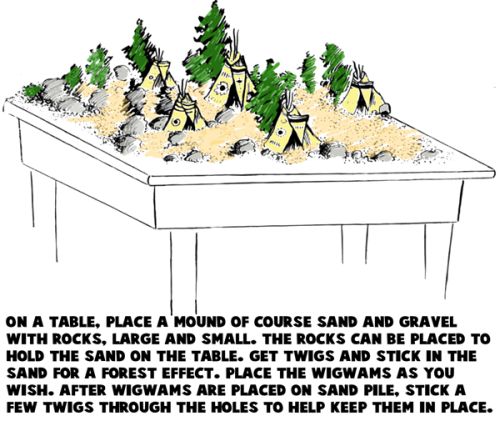
Finished Indian village craft

On a table, place a mound of course sand and gravel with rocks, large and small.  The rocks can be placed to hold the sand on the table.  Get twigs and stick in the sand for a forest effect.  Place the wigwams as you wish.  After wigwams are placed on the sand pile, stick a few twigs through the holes to help keep them in place.

Wow, what an amazing Thanksgiving decoration, huh?!  Can you believe just from 4 easy steps you were able to create this Indian Village?  You did an awesome job!!

Technorati Tags: , , , , , , , , , , , , , , ,

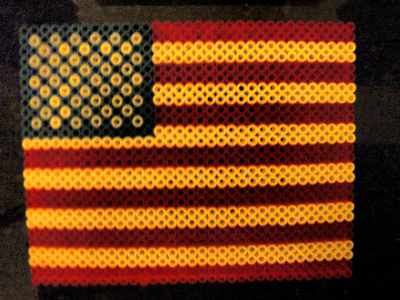
How to Make a Perler Bead American Flag for Veterans Day

Veterans Day is just around the corner… November 11th to be exact.  Veterans Day is a very special day honoring our Nation’s Veterans.  What better way to honor our Veterans than with the American Flag.  Today I’m going to show you how to make an American Flag out of Perler Beads for Veterans Day.  So, grab your Perler Beads and let’s get started.

Check out our other Perler Bead Crafts

How to Make a Perler Bead American Flag for Veterans Day


Materials Needed

Perler Beads and Board

Iron

Wax Paper


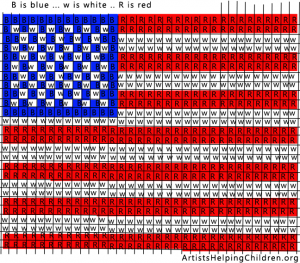
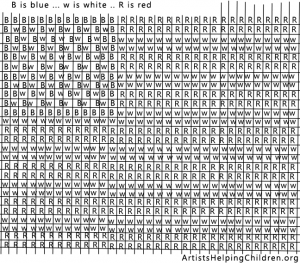
Below are printable templates for this craft.  You can choose to print off  a colored template or the black and white version.

Click on template image to make larger and to print.

Printable color template for American Flag Craft

Printable black & white template for American Flag Craft


Step 1

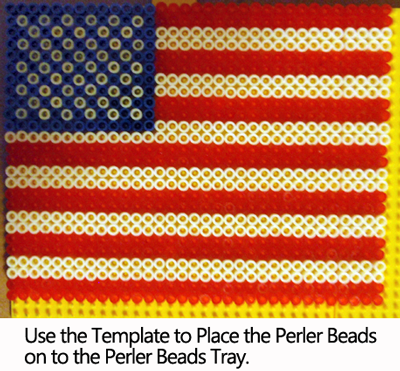
Use the template to place the Perler Beads on to the Perler Beads Tray.

Use the template to place the Perler Beads on to the Perler Beads Tray.


[ad#ahc]

Step 2

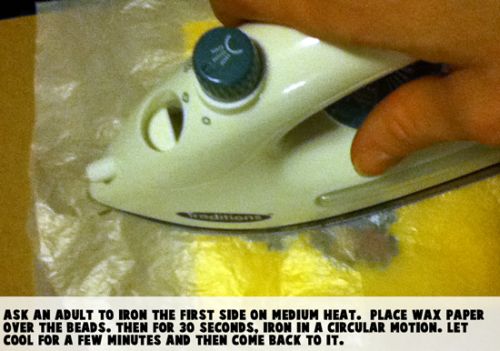
Ask an adult to iron the first side on medium heat.

Ask an adult to iron the first side on medium heat.  Place wax paper over the beads.  Then for 30 seconds, iron in a circular motion.  Let cool for a few minutes and then come back to it.


Step 3

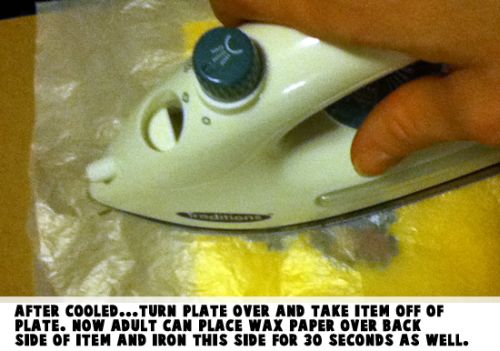
After cooled... Turn plate over and take item off of plate.

After cooled… Turn plate over and take item off of plate.  Now adult can place wax paper over back side of item and iron this side for 30 seconds as well.


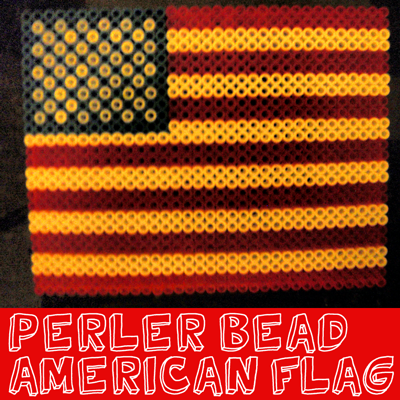
Finished American Flag for Veterans Day

And there you have it…. The American Flag for Veterans Day made out of Perler Beads.  Isn’t it magnificent?  Remember to check out our other Perler Bead crafts.

Technorati Tags: , , , , , , , , ,

How to Make Cardboard Beading Looms

I’m going to show you a great way to make beautiful beaded bracelets on your own.  We are going to make our very own Cardboard Beading Loom perfect for making awesome bracelets.  Do you have any idea who your first handmade beaded bracelet will go to?  How about your very best friend…. she’d love it!!

You Might Enjoy Our Other Friendship Bracelets Crafts Too
How to Make Cardboard Beading Looms


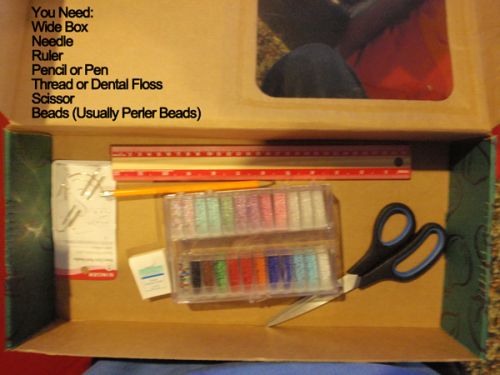
Materials Needed

Wide Box

Needle

Ruler

Pencil or Pen

Thread or Dental Floss

Scissors

Beads (Usually Perler Beads)
Materials Needed


Step 1

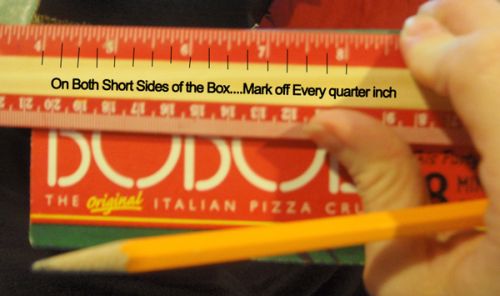
On both short sides of the box... mark off every quarter inch.

On both short sides of the box… mark off every quarter inch.


[ad#ahc]

Step 2
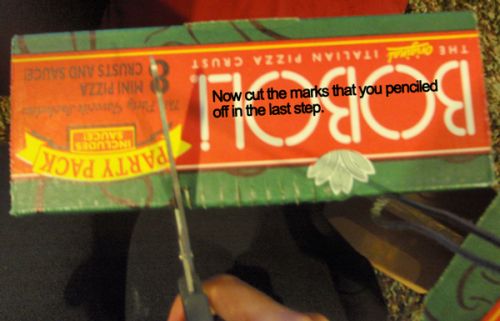
Now cut the marks that you penciled off in the last step.

Now cut the marks that you penciled off in the last step.


Step 3
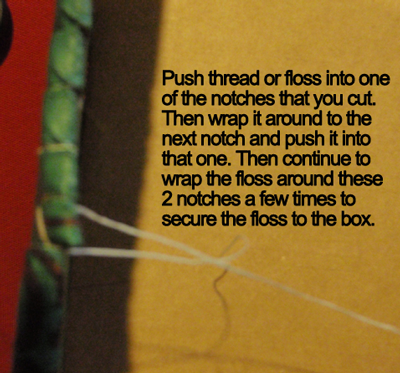
Push thread or floss into one of the notches that you cut.

Push thread or floss into one of the notches that you cut.  Then wrap it around to the next notch and push it into that one.  Then continue to wrap the floss around these 2 notches a few times to secure the floss to the box.


Step 4
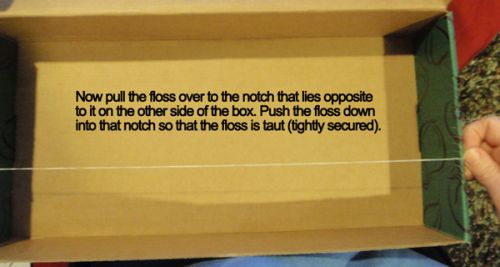
Now pull the floss over to the notch that lies opposite to it on the other side of the box.

Now pull the floss over to the notch that lies opposite to it on the other side of the box.  Push the floss down into that notch so that the floss is taut (tightly secured).


Step 5
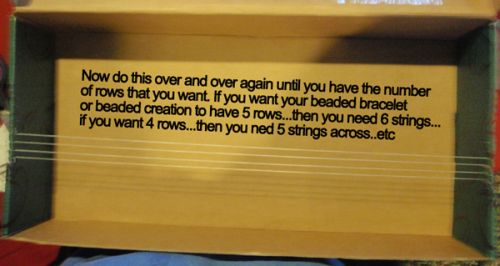
Now do this over and over again until you have the number of rows that you want.

Now do this over and over again until you have the number of rows that you want.  If you want your beaded bracelet or beaded creation to have 5 rows… then you need 6 strings… if you want 4 rows… then you need 5 strings across… etc.


Step 6
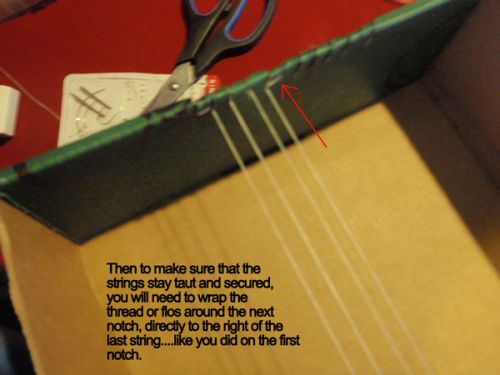
Then to make sure that the strings stay taut and secured, you will need to wrap the thread or floss around the next notch

Then to make sure that the strings stay taut and secured, you will need to wrap the thread or floss around the next notch, directly to the right of the last string… like you did on the first notch.


Step 7
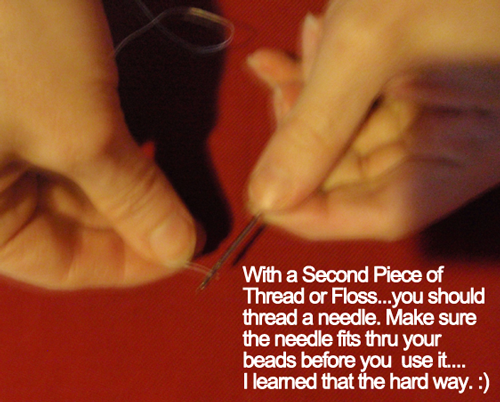
With a second piece of thread or floss... you should thread a needle.

With a second piece of thread or floss… you should thread a needle.  Make sure the needle fits thru your beads before you use it… I learned that they hard way.


Step 8
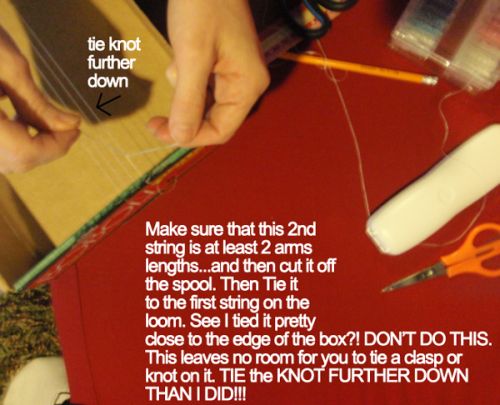
Make sure that this 2nd string is at least 2 arms length... and then cut it off the spool.

Make sure that this 2nd string is at least 2 arms length… and then cut it off the spool.  Then tie it to the first string on the loom.  See how I tied it very close to the edge of the box?!  DON’T DO THIS.  This leaves no room for you to tie a clasp or knot on it.   TIE THE KNOT FURTHER DOWN THAN I DID.


Step 9
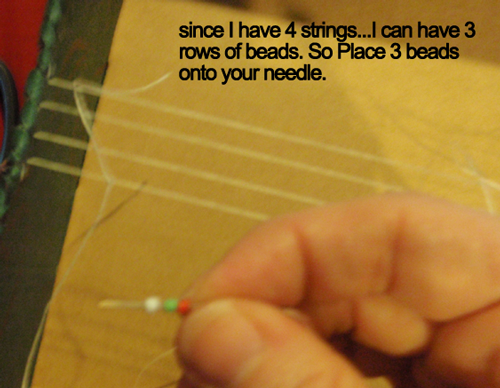
Since I have 4 strings... I can have 3 rows of beads.  So, place 3 beads onto your needle.

Since I have 4 strings… I can have 3 rows of beads.  So, place 3 beads onto your needle.


Step 10
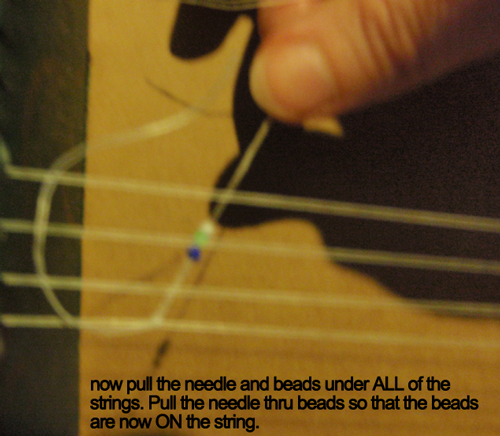
Now pull the needle and beads under ALL of the strings.

Now pull the needle and beads under ALL of the strings.  Pull the needle thru beads so that the beads are now ON the string.


Step 11

Now push each between in between 2 strings and then push your fingers below the beads and strings ... pushing the beads up.

Now push each between in between 2 strings and then push your fingers below the beads and strings … pushing the beads up.  Then push the needle thru all the beads and pull thru.  The first row is the hardest row… so don’t get frustrated… because the rest of the rows will be much easier.  I didn’t get a good picture of this with the little beads so I am showing you this with bigger beads.


Step 12
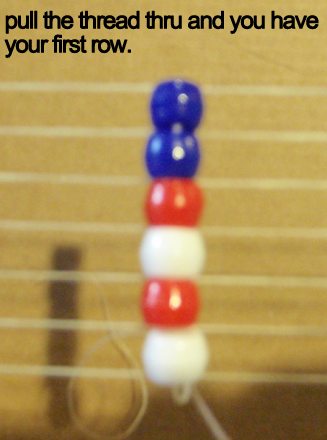
Pull the thread thru and you have your first row.

Pull the thread thru and you have your first row.


Step 13

Again... put beads on the needle... Push it under ALL the threads.

Again… put beads on the needle… Push it under ALL the threads.  Pull all beads onto the thread and then push all beads in between 2 threads…which will be MUCH easier this time than the 1st time.


Step 14

Push the beads up with your fingers... then push the needle thru the beads.

Push the beads up with your fingers… then push the needle thru the beads.


Step 15

Continue doing this until it looks big enough.

Continue doing this until it looks big enough.


Step 16

Cut the floss at both ends.

Cut the floss at both ends.

Step 17

Tie a knot.

Tie a knot.


Step 18

Tie a knot.

Tie it around your friend’s wrist.

You just finished your first beautiful bracelet with your Cardboard Beading Loom.  Wasn’t it a lot of fun?  Now the only thing left to do is  find the perfect friend to give it to.  Or, keep it for yourself.

You Might Enjoy Our Other Friendship Bracelets Crafts Too

Technorati Tags: , , , , , , , , , , , , ,

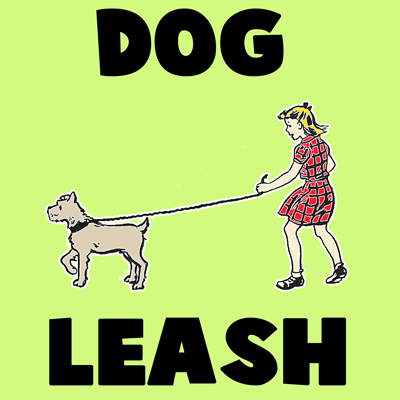
How to Make a Dog Leash

How would you like to learn how to make a dog leash for your dog?  Wouldn’t it be nice to walk your dog holding the leash that you made on your very own?  Well, today I’m going to show you how to do that…. I’m going to show you how to make your very own Dog Leash.  So, grab some twine and a pair of scissors and you are good to go.

How to Make a Dog Leash


Materials Needed

Ball of Twine – 1/16th of an inch thick

Scissors


Use twine that is smooth and hard, not hairy. It should be about 1/16th of an inch thick. You are going to braid eight pieces of this twine together, so you don’t want the cord to be too clumsy to handle. A round braid is usually made of four strands, but four double strands will be much stronger; and that’s what is recommended.

Important: To make the explanation simpler, we are going to speak of each double strand as if it were just One single strand.

Step 1

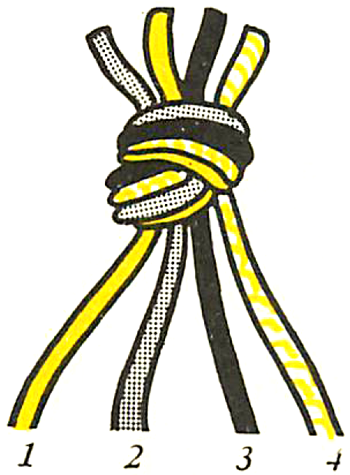
Cut your twine into eight 6 1/2 foot lengths. Tie them on a doorknob or on the back of a chair, knotting them together.

Cut your twine into eight 6 1/2 foot lengths. Tie them on a doorknob or on the back of a chair, knotting them together. These strands will make a six-foot leash. In the pictures, you will see that the strands are numbered 1, 2, 3, and 4.


[ad#ahc]

Step 2

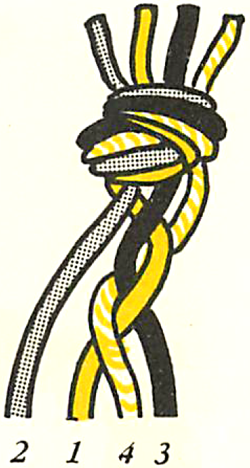
Take hold of Strand 1 which is on the extreme left. Move it behind Strand 2 and Strand 3.

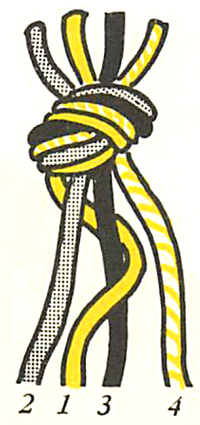
Take hold of Strand 1 which is on the extreme left. Move it behind Strand 2 and Strand 3. Then bring it forward and fold Hold it there with your left hand: Then take Strand 4 which is on the extreme right. Move Strand 4 behind the two strands that are now next to it.


Step 3

Then bring Strand 4 around over Strand 1. Strand 4 will then be between Strand 1 and Strand 3.

Then bring Strand 4 around over Strand 1. Strand 4 will then be between Strand 1 and Strand 3. Keep repeating this process. First use the strand on the left side, then do the same thing with the strand on the right side. Braid slowly and tightly. Smooth the strands out often so that they don’t get tangled.


Step 4

When you have completed your braid, slide it off the doorknob and knot the ends so that the weaving doesn't unravel.

When you have completed your braid, slide it off the doorknob and knot the ends so that the weaving doesn’t unravel. Now you can tie one end of this nice strong leash to your dog’s collar, and tie the other end into a big knot to hold on to.

You did it!!  You just finished making a Dog Leash on your own.  Think how proud you will be to walk your dog around the block carrying your homemade leash.  What color twine did you use?  Let me know.

Technorati Tags: , , , , , , ,

How to Make the Blow it Home Party Game

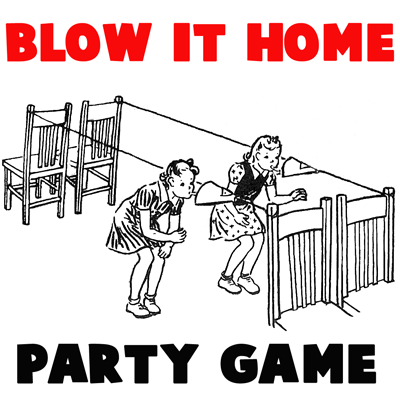
In this post I will show you how to make the “Blow it Home” Party Game.  This game, which can be played by any number of players from 2 to 24, always goes over big at a party.  The object of the game is simple, but the outcome is a ton of fun… there is sure to be plenty of laughter.  So, if you are planning an upcoming party be sure to add this game to the line-up.

How to Make the Blow it Home Party Game


Materials Needed

2 pieces of string, 4 yards long

2 sheets of paper

4 chairs

2 pins


Step 1

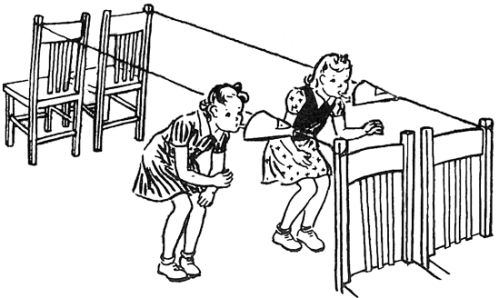
Place two chairs next to each other at one end of the room. Place two chairs at the other end. Two chairs should have their backs facing the backs of the other pair of chairs.


[ad#ahc]

Step 2

Take a piece of paper, place it around the string track, and roll it into a cone


Tie a piece of string to the back of the Start Chair, and the other end of the string to the end of the Home Chair. Now arrange the other two chairs in exactly the same way so that the two Start Chairs are even and parallel to each other, and the two Home Chairs are also even and parallel to each other.


Step 3

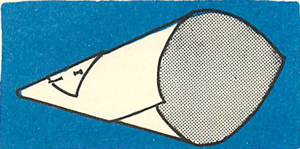
Take a piece of paper, place it around the string track, and roll it into a cone

Take a piece of paper, place it around the string track, and roll it into a cone. Now pin the paper together so that it remains in this cone shape. The large end of the cone should face the Start Chair. Make another cone the same way on the other string track.


Object of the Game

The object of the game is to see who can first blow the cone along the string track from Start to Home. Remember:—you blow into the wide end of the cone.


Rules of the Game

Let someone give the signal to start. Appoint two umpires to watch at the Home Chairs to pick the winner, because sometimes a race gets pretty close.  If there are, let’s say, 12 in the game, there will be 6 winners. You then run a series of races to pick the final winner.

Here are some important points to remember:  First—the starting point of the race is behind the seats of the two Start Chairs. The umpire should insist that the racers be behind these chairs when the starting signal is given. Second—the racers may not touch the string or paper cones with any parts of their bodies. If a player should push the cone with his face, even by accident, he loses the race.

And, that’s it…. you now know how to make the game and play the game too.  So, remember to keep it in your arsenal of game ideas for your next party.  It is sure to be a huge hit.

Technorati Tags: , , , , ,

How to Make Connecting Building Blocks

Today I’m going to show you how to make Connecting Building Blocks.  These blocks are made from simple milk cartons or cream containers.  This is a great way to teach young children how items can fit together.  So, let’s get started.

How to Make Connecting Building Blocks

Materials Needed

Milk or Cream Cartons

Aluminum Foil or Cellophane

Tape

Poster Paint

1 Teaspoonful Soap Flakes or Detergent

Construction Paper, Crepe Paper, or Grocery-bag Paper

Rubber Cement


[ad#ahc]

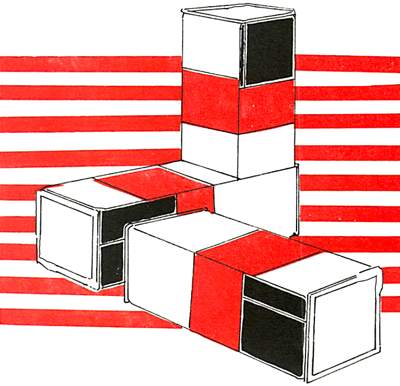
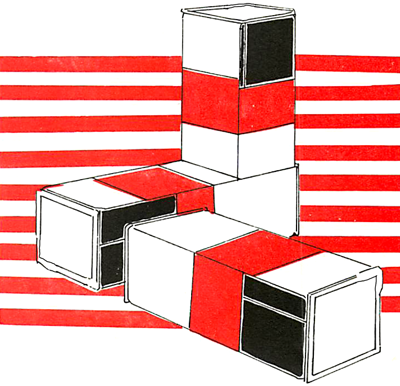
Don’t throw away those empty waxed milk cartons. You haven’t milked the last drop out of them yet! They can be washed, cut, pasted, painted, linked, and eventually thrown away with a clear conscience—after all, they’re free! Milk and cream cartons with flat tops are ideal for preschool block play. The advertising on the outside won’t bother the you at all, but covering the writing can be fun in itself.

Wrappers of aluminum foil will turn these blocks into glittering silver bricks (optionally).  Just cover as you would a gift package, and fasten each end with a tiny piece of tape; or poster paints will stick to the waxed surface if you put a teaspoonful of packaged soap or detergent into the jar of paint before you start; or paper (construction, crepe, or from grocery bags) can be made to adhere, with rubber cement.

These are more fun and more challenging than plain building blocks. They join together with great ease, and the play possibilities are endless.


If two square openings are cut in each carton, the blocks can then be linked together, one into another

If two square openings are cut in each carton, the blocks can then be linked together, one into another.


These blocks can be connected to construct all sorts of shapes and forms

These blocks can be connected to construct all sorts of shapes and forms, then taken apart and put together again, this time in a completely different way. This is more than just a “keep busy” activity —it is an engrossing project, excellent for developing co-ordination, and imagination too!

Technorati Tags: , , , , , ,

How to Make Paper Sculptures – Drawing with Paper

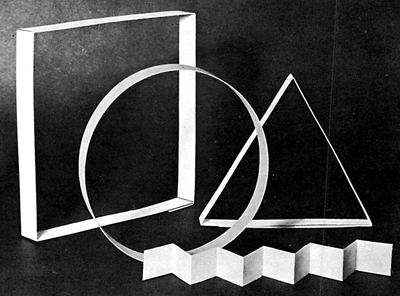
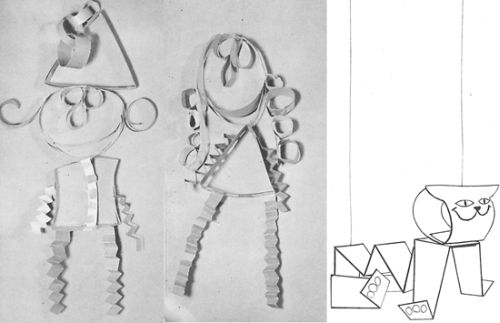
If children have not had much experience with 3-dimensional work, you can introduce them to paper sculpture through “drawing” with strips of paper. This method can be the basis for developing an understanding of sculpture, or form in space. Since children are familiar with line drawing, the transition to drawing in space would be logical. Strips of construction paper, cut to one inch widths on the paper cutter, can be made in advance. Demonstrate how a strip can be a straight line, a curved line, or by folding the strip it can be a zig-zag line. Everyone can try it and see how many different kinds of lines they can make. A line can enclose space so that basic geometric shapes —triangles, circles and squares—can be formed. These outline shapes can be combined with scotch tape, paste, or with a stapler. What can we make with these shapes?

How to Make Paper Sculptures – 3 Techniques


Materials Needed

Strips of Paper

Tape

Paste

Stapler

Hole Punch

Paper Fasteners

String


Technique 1

Make forms in space

Make forms in space. For example, four strips of equal length can be arranged in a radial design and fastened in the middle with a stapler, or holes can be punched and a paper fastener inserted. The ends of the strips can be gathered together to form a sphere. Or two ends fastened on one side and the others on the opposite side will produce a different form. To encourage experimentation, strips can vary in color, width, length, and perhaps in shape too!


[ad#ahc]

Technique 2

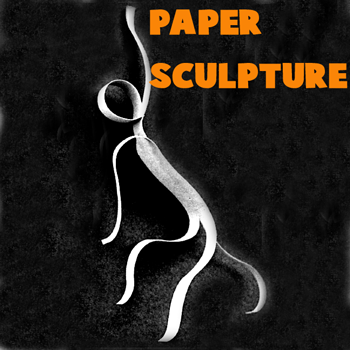
Make animals and people with paper.

Children love to use the paper strip figures and animals as puppets because of their lively quality. They also can be made as dangling puppets or mobiles by just tying strings to them.


Technique 3

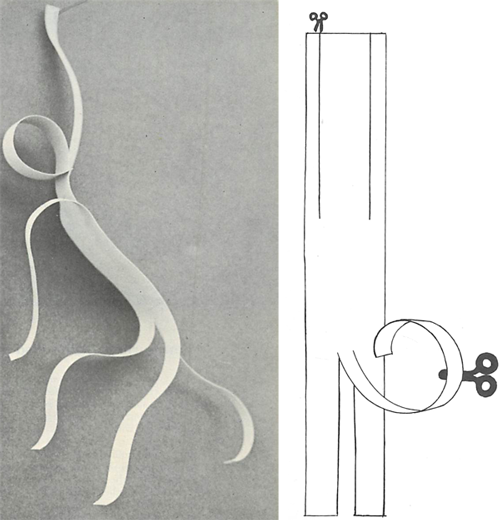
Perhaps you would like to experiment further by making your figure or animal from one wide strip of paper

Perhaps you would like to experiment further by making your figure or animal from one wide strip of paper.

And there you have it…. 3 different techniques for making sculptures using simple paper.  This is a great way to teach children about 3 dimensional figures and space…. not to mention teaching them their basic shapes.  What types of Paper Sculptures did you make?  Let me know.

Technorati Tags: , , , ,

How to Make Mario Mushrooms from Super Mario Bros. with Perler Beads
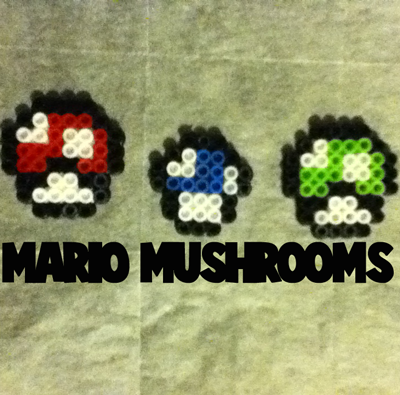
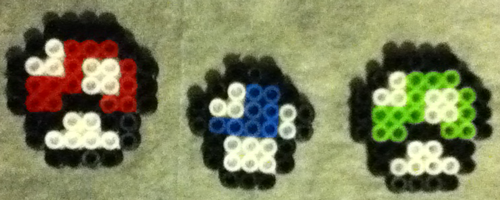
In this post I’m going to show you how to make Mario Mushrooms from Super Mario Bros. with Perler Beads.  Anyone that has ever played any of the Super Mario games knows that there are several different Mushrooms that do different things for Mario.  There is the Mini Mushroom that makes a player shrink and helps them get into tiny spots.  There is also the 1-up Mushroom that gives a player extra life.  And then, of course, there is the Super Mushroom that makes the player become bigger and stronger.  Today I am going to show you how to make all three with Perler Beads.
Check out our other Super Mario Bros. Perler Bead Crafts and other Perler Bead Crafts.

How to Make Mario Mushrooms from Super Mario Bros. with Perler Beads
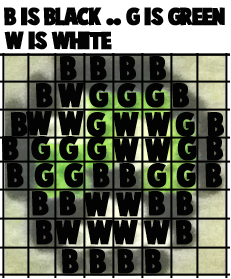
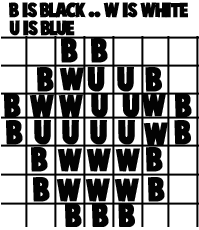
 

Materials Needed

Perler Beads and Board

Iron

Wax Paper


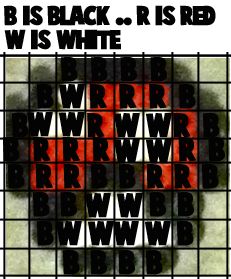
Click on template image to make larger and to print.

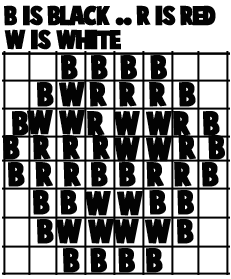
Super Mushroom Templates

Printable colored template for Super Mushroom

Printable black & white template for Super Mushroom


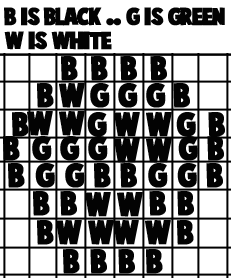
1-up Mushroom Templates

Printable color template for 1-up Mushroom

Printable black & white template for 1-up Mushroom


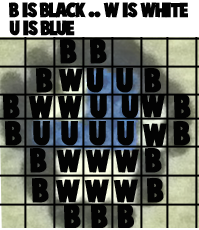
Mini Mushroom Templates

Printable color template for Mini Mushroom

Printable black & white template for Mini Mushroom


[ad#ahc]


Step 1

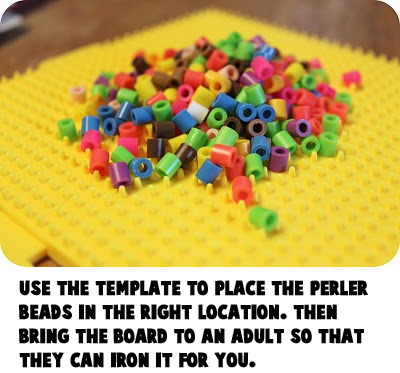
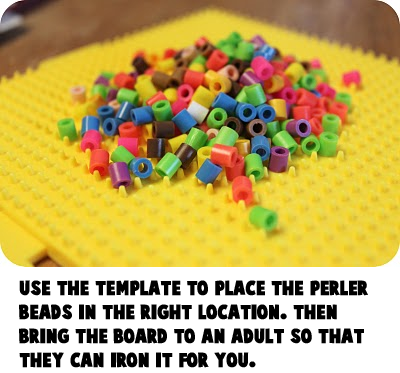
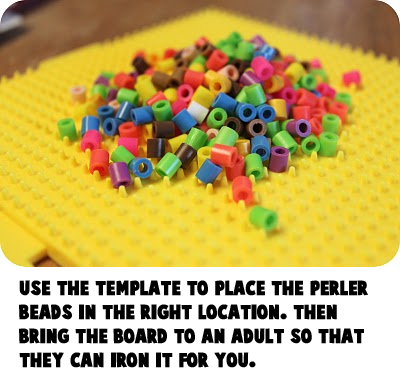
Use template to place perler beads in the right location

Use template to place perler beads in the right location.  Then carefully take the board to an adult who can iron it for you.


Step 2

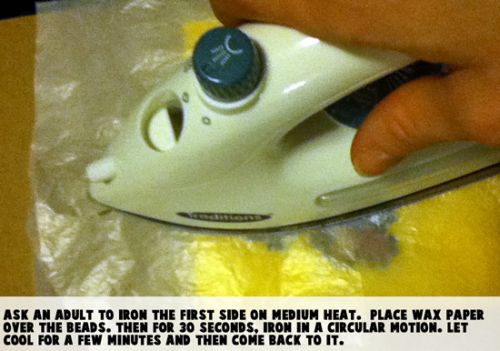
Ask an adult to iron the first side on medium heat

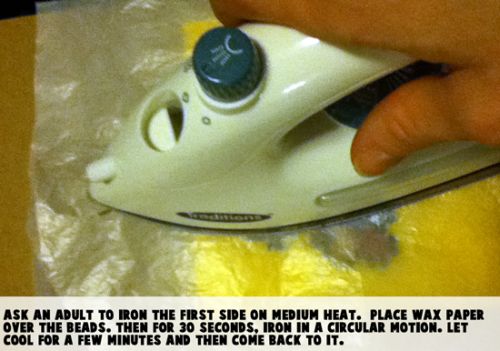
Ask an adult to iron the first side on medium heat.  Place wax paper over the beads.  Then for 30 seconds, iron in a circular motion.  Let cool for a few minutes and then come back to it.


Step 3

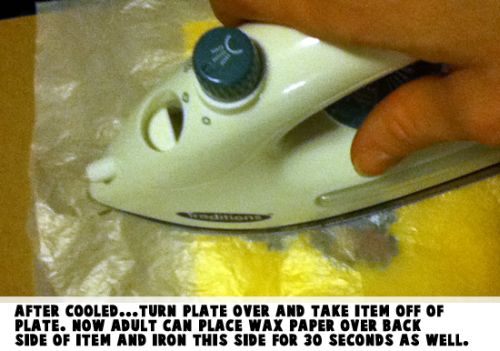
After cooled... Turn plate over and take item off of plate

After cooled… Turn plate over and take item off of plate.  Now adult can place wax paper over back side of item and iron this side for 30 seconds as well.


Finished Mario Mushroom Perler Bead Craft

There you go…. you just finished making all three kinds of Mario Mushrooms.  Also, please check out our other Super Mario Bros. with Perler Beads crafts and make the entire Mushroom Kingdom.

Technorati Tags: , , , , , , , , ,

How to Make Question Mark Boxes from Super Mario Bros. with Perler Beads

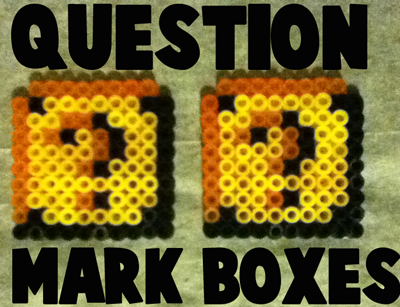
It is Mario or Luigi‘s lucky day when they come across Question Mark Boxes while playing Super Mario Bros.  Who knows what will be inside those question mark boxes.  It could be a Super Mushroom or a Fire Flower.  Or, it could be other wonderful things as well.  Whatever the player finds inside the question mark boxes it is usually always good.  Today I’m going to show you how to make Question Mark Boxes from Super Mario Bros. with Perler Beads.  So, grab your Perler Beads and let’s get started.

Check out our other Super Mario Bros. Perler Bead Crafts and other Perler Bead Crafts.

How to Make Question Mark Boxes from Super Mario Bros. with Perler Beads


Materials Needed

Perler Beads and Board

Iron

Wax Paper


Below are printable templates for this craft.  You can choose to print off  a colored template or the black and white version.

Click on template image to make larger and to print.

Printable color template for Question Mark Boxes craft

Printable black & white template for Question Mark Boxes craft


Step 1

Use template to place perler beads in the right spots

Use template to place perler beads in the right location.  Then carefully take the board to an adult who can iron it for you.


[ad#ahc]

Step 2

Ask an adult to iron the first side on medium heat

Ask an adult to iron the first side on medium heat.  Place wax paper over the beads.  Then for 30 seconds, iron in a circular motion.  Let cool for a few minutes and then come back to it.


Step 3

After cooled... Turn plate over and take item off of plate

After cooled… Turn plate over and take item off of plate.  Now adult can place wax paper over back side of item and iron this side for 30 seconds as well.


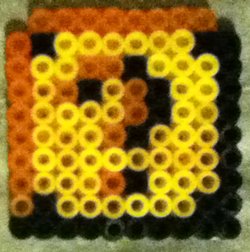
Finished Question Mark Boxes Craft

Now you have your very own Question Mark Box.  Why not make a few of our other Super Mario Bros. Perler Bead crafts…. you’ll have your very own Mushroom Kingdom.

Technorati Tags: , , , , , , , , ,

How to Make Warp Pipes from Super Mario Bros. with Perler Beads

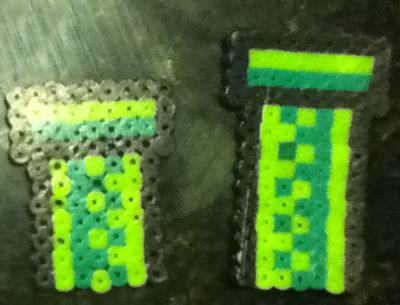
Today I’m going to show you how to make Warp Pipes from Super Mario Bros. with Perler Beads.  Warp Pipes are very important to Mario and all the other characters in Super Mario Bros.  It’s their way of traveling from one place to another.  Although, they have to be very careful too… sometimes vines and scary flowers come out of the pipes trying to eat them.  No worries, these Warp Pipes are the safe kind.  Let’s do it.

Check out our other Super Mario Bros. Perler Bead Crafts and other Perler Bead Crafts.

How to Make Warp Pipes from Super Mario Bros. with Perler Beads


Materials Needed

Perler Beads and Board

Iron

Wax Paper


Below are printable templates for this craft.  You can choose to print off  a colored template or the black and white version.

Click on template image to make larger and to print.

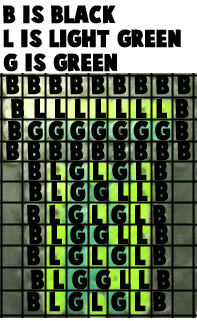
Printable color template for Warp Pipes from Super Mario Bros.

Printable black & white template for Warp Pipes from Super Mario Bros.


Step 1

Use template to place perler beads in the right location

Use template to place perler beads in the right location.  Then carefully take this to an adult who can iron it for you.


[ad#ahc]

Step 2

Ask an adult to iron the first side on medium heat

Ask an adult to iron the first side on medium heat.  Place wax paper over the beads.  Then for 30 seconds, iron in a circular motion.  Let cool for a few minutes and then come back to it.


Step 3

After cooled... Turn plate over and take item off of plate

After cooled… Turn plate over and take item off of plate.  Now adult can place wax paper over back side of item and iron this side for 30 seconds as well.


After cooled... Turn plate over and take item off of plate

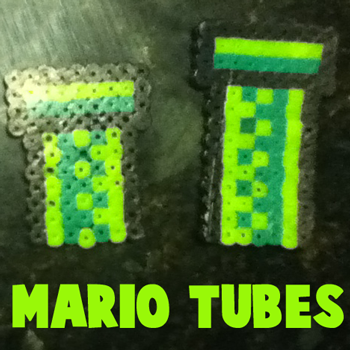
Now, your Warp Pipes are finished.  How awesome do they look?  Let me know in the comments below.

Technorati Tags: , , , , , , , , ,