Chinese New Year Crafts – Year of the Dragon

Chinese New Years Crafts

Chinese New Year falls on January 23rd this Year.  And, in honor of Chinese New Year I put together a list of crafts just about the Chinese New Year.  You will find that most of them are Dragon Crafts and you might wonder why….. well, I will tell you why.  This year is the Year of the Dragon.  So, to honor that fact the majority of the crafts I have listed here will be Dragon Crafts.  Not all of them…. there are plenty of fun other crafts that have nothing to do with Dragons.  So, check out the post and pick a few Chinese New Year Crafts to do with the kids….. they are sure to love them.  So, let’s get started.

Here are Even More Chinese New Years Crafts

Chinese New Year Crafts – Year of the Dragon

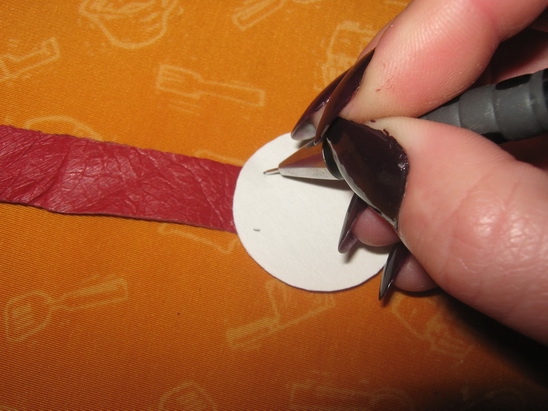
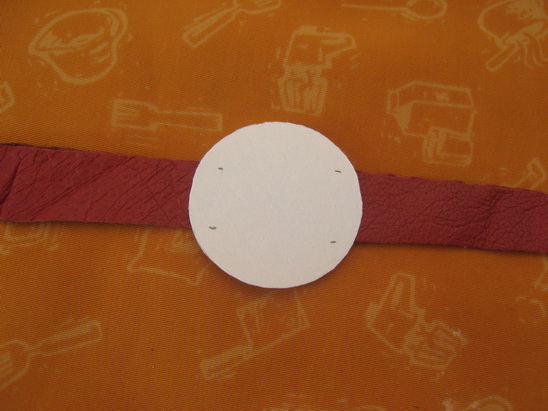
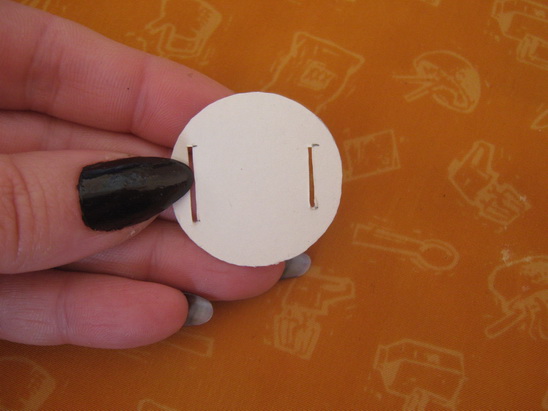
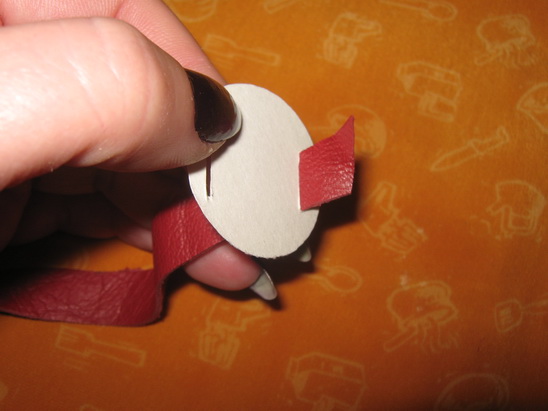
(1) Festive Ribbon Dragon

Festive Ribbon Dragon

Here is an adorable dragon perfect for this years Chinese New Years.  This is the mini sized version of the huge size dragon they use in parades for Chinese New Years.  Check out FamilyFun for all the crafting details.

[ad#ahc]

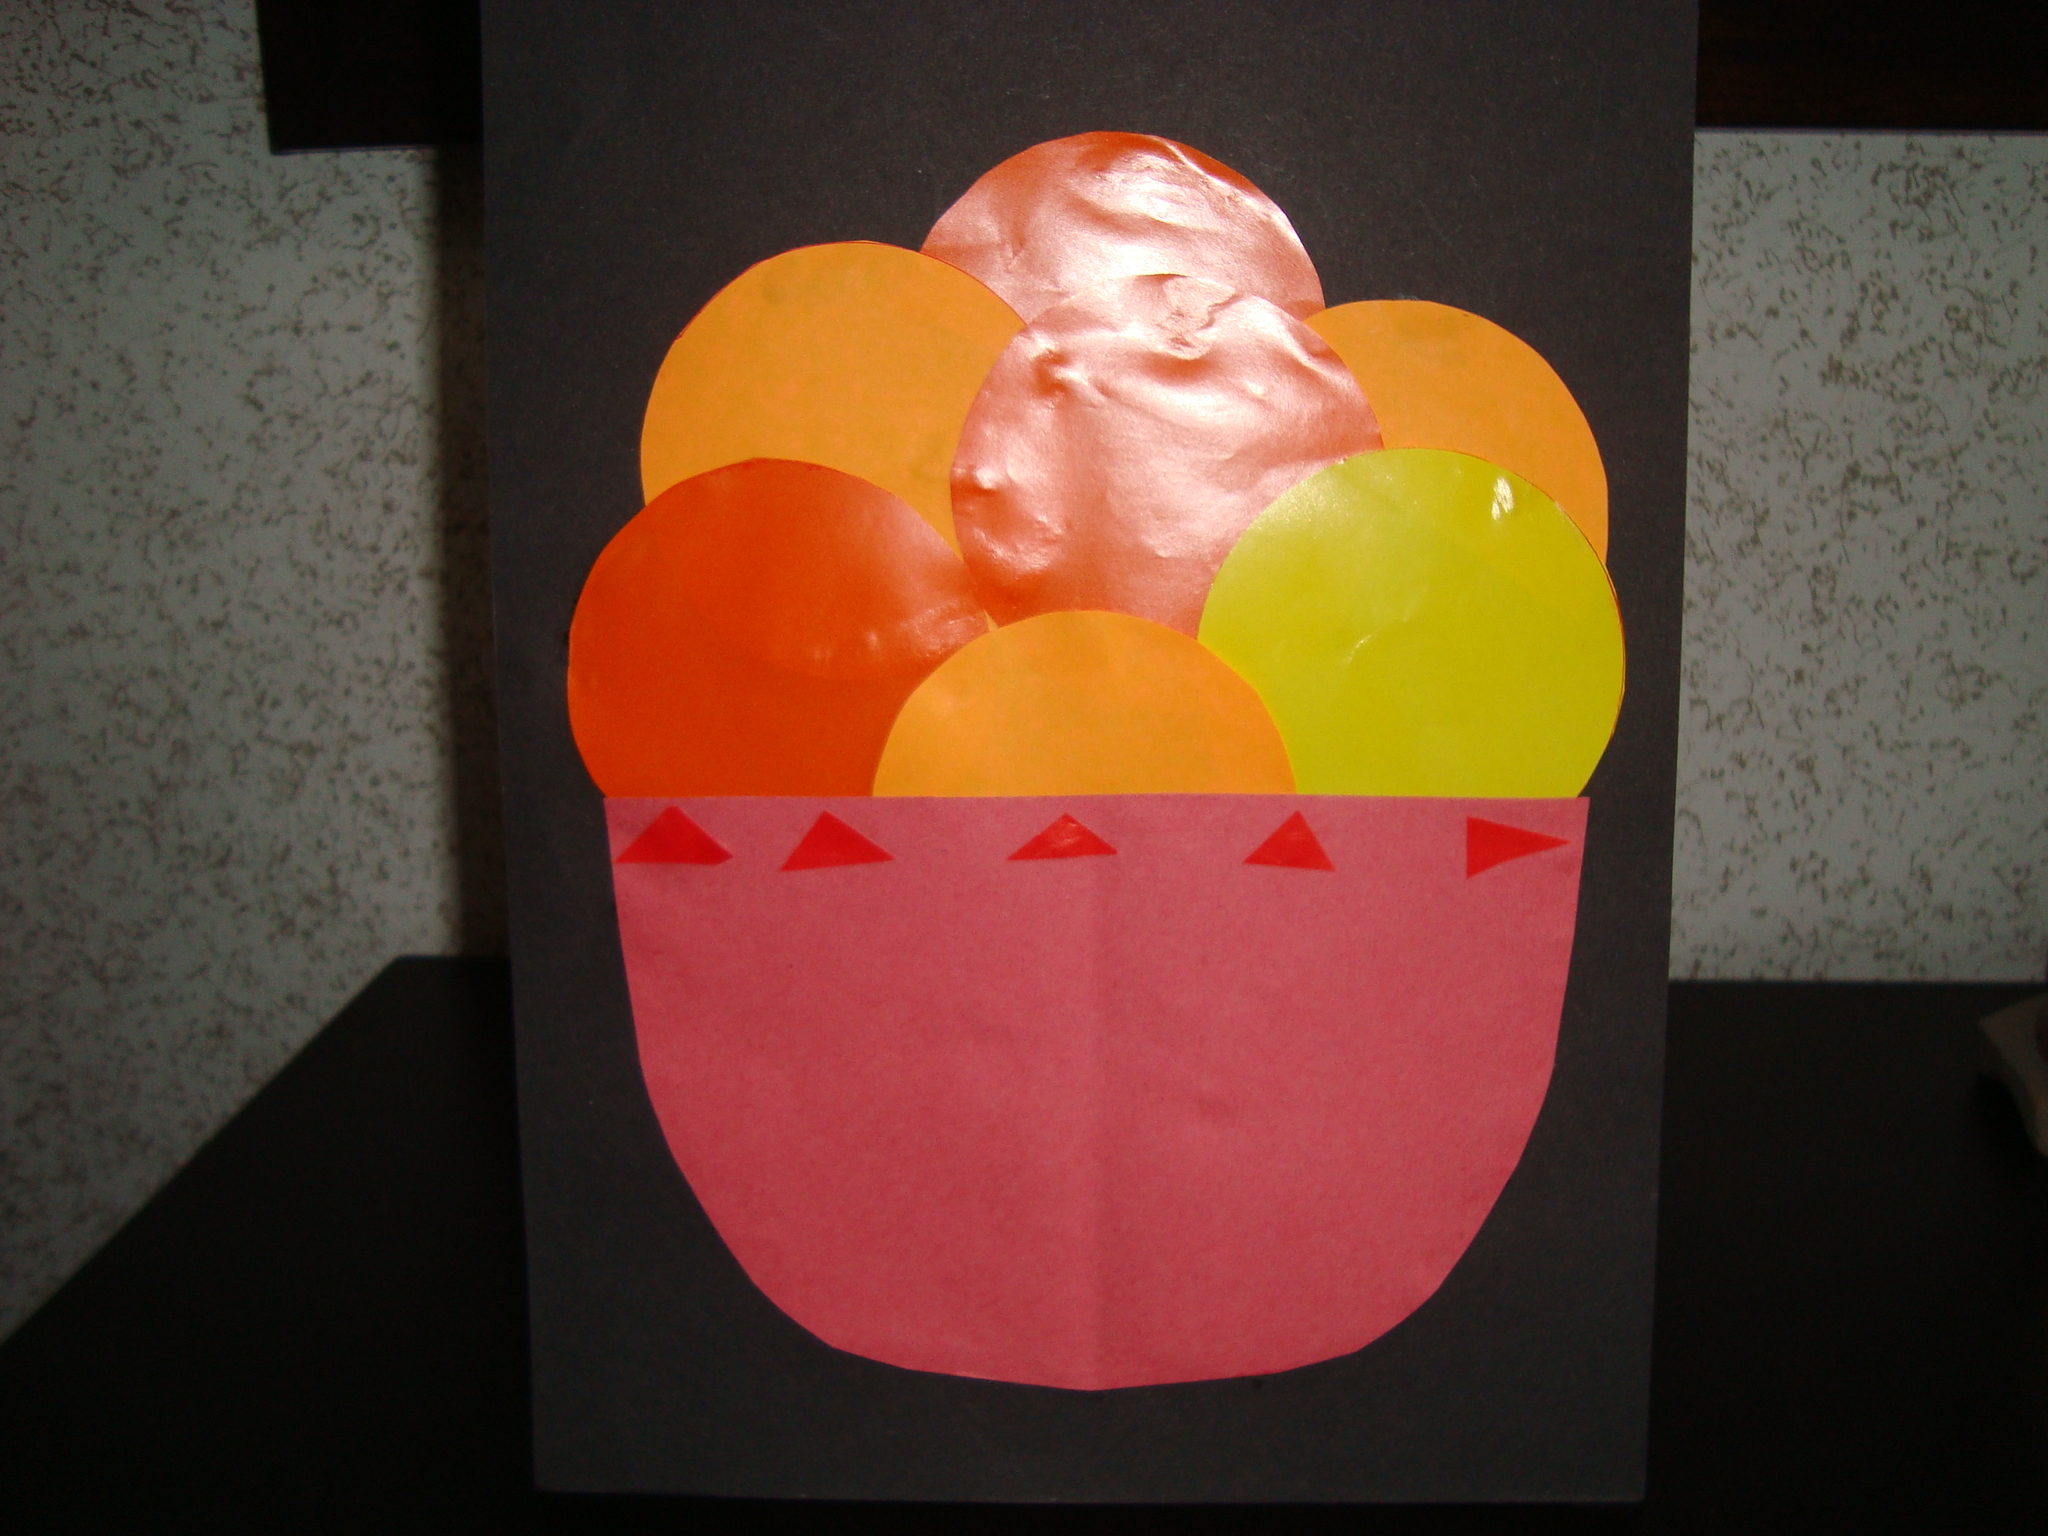
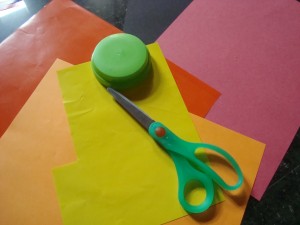
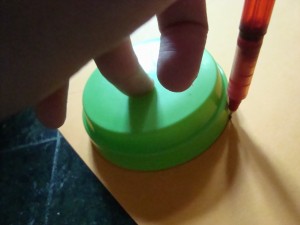
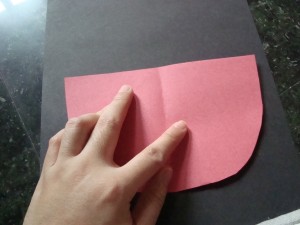
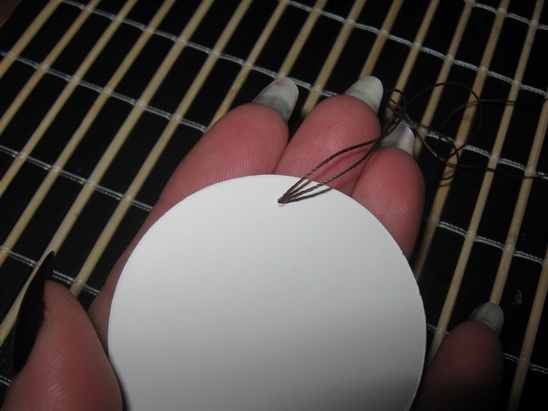
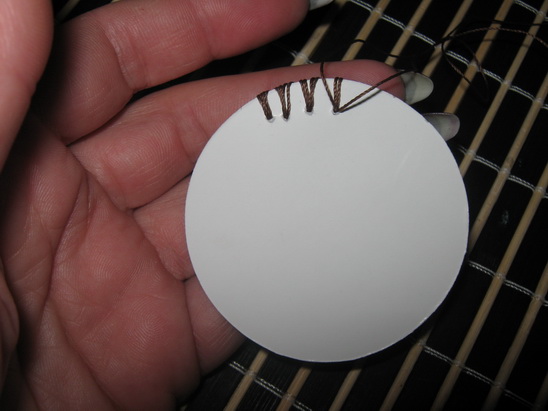
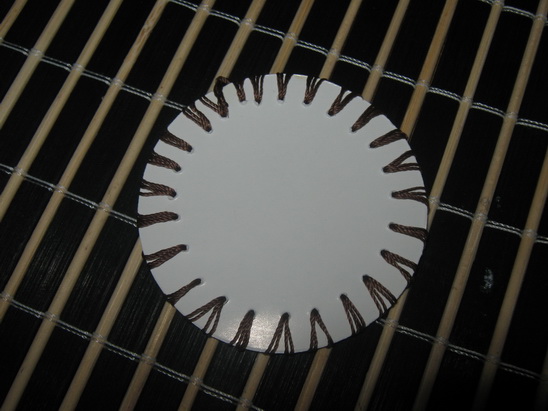
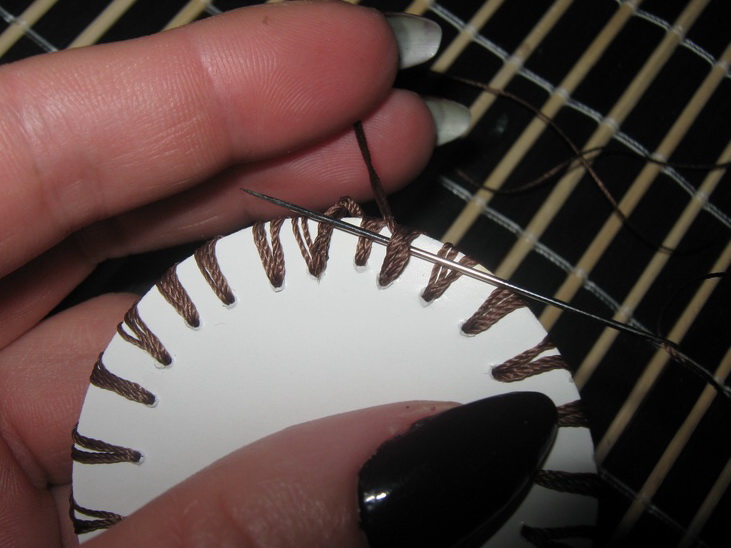
(2) Pop-Up Greeting Card

Pop-Up Greeting Card

Isn’t this Chinese Pop-Up Greeting card gorgeous?  I think it is really beautiful.  Imagine giving this to someone to celebrate the Chinese New Year.  Go to FreePaperCraftTemplate for all the details on how to print off this free template.
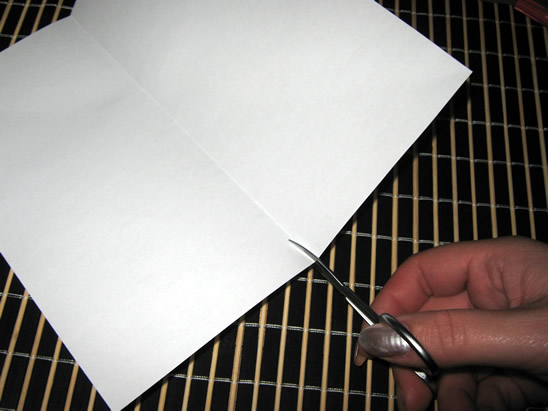
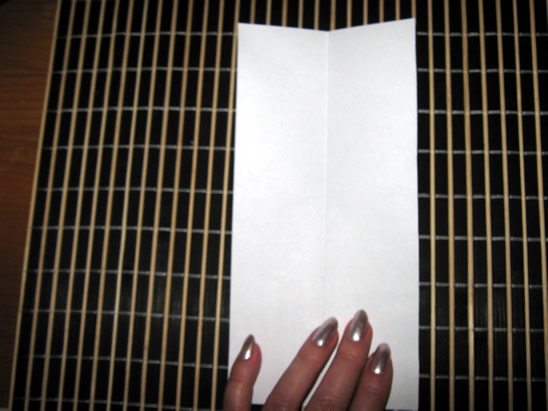
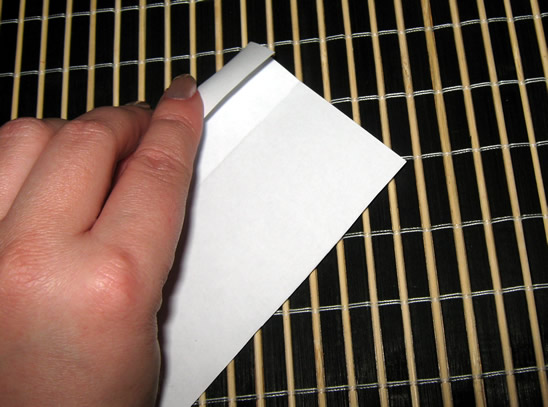
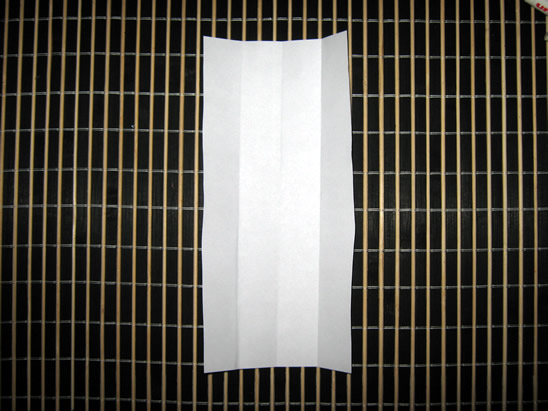
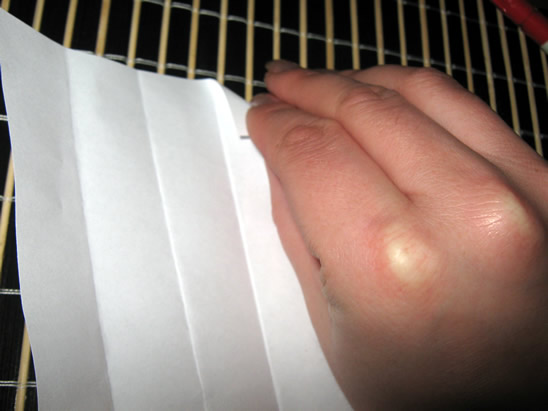
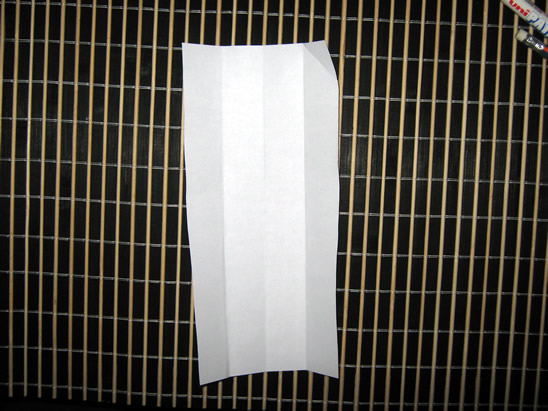
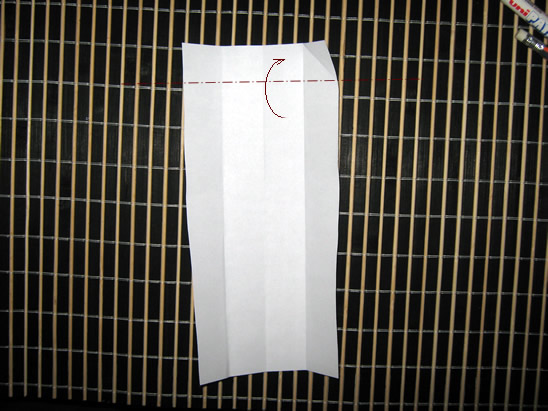
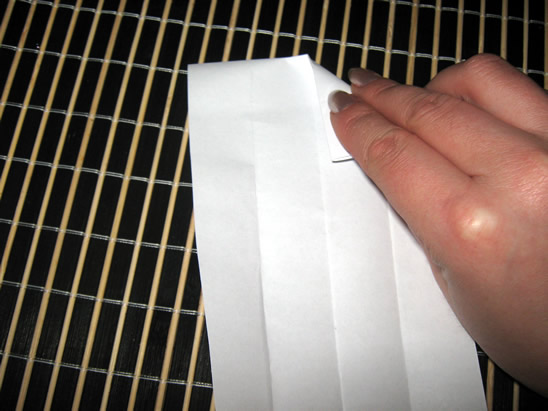
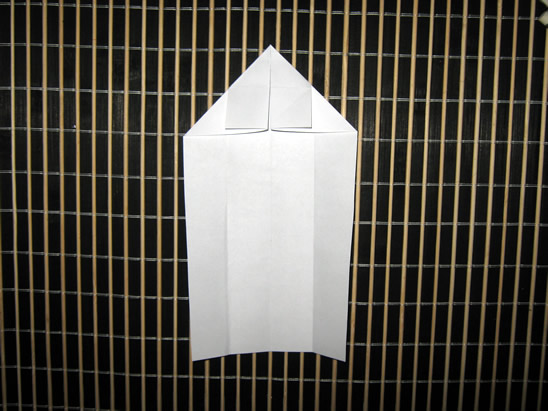
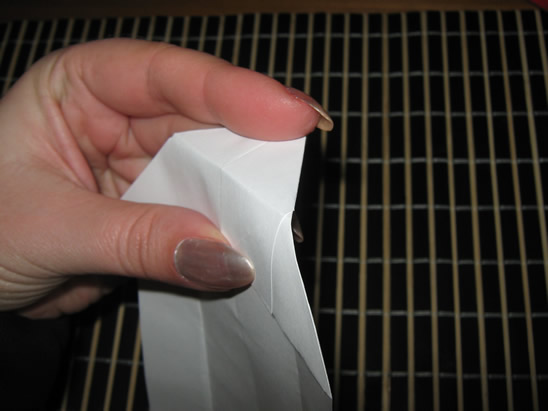
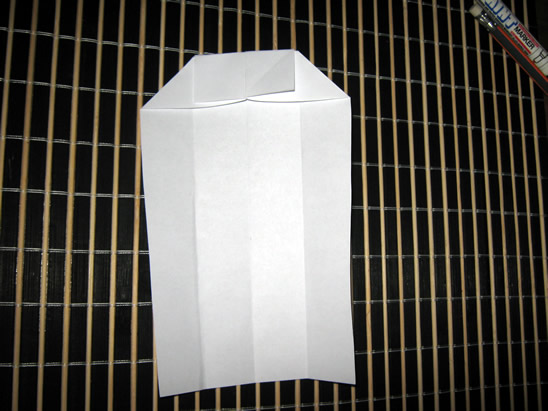
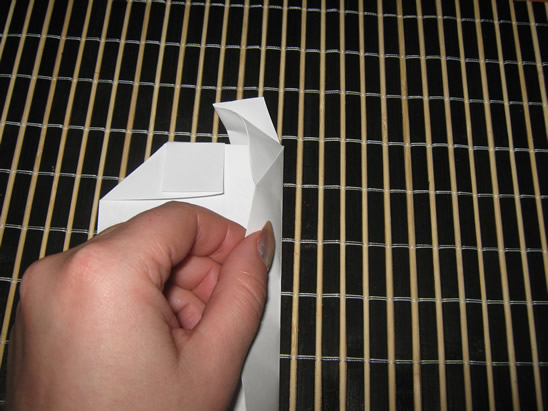
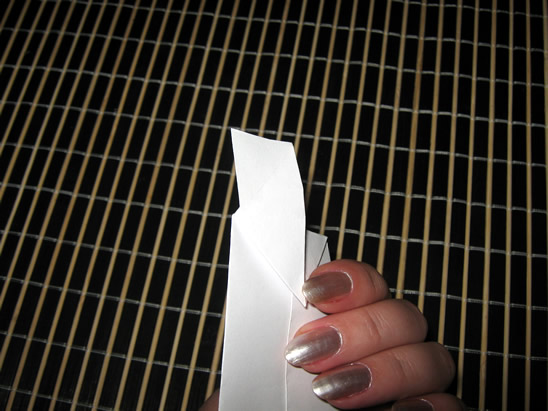
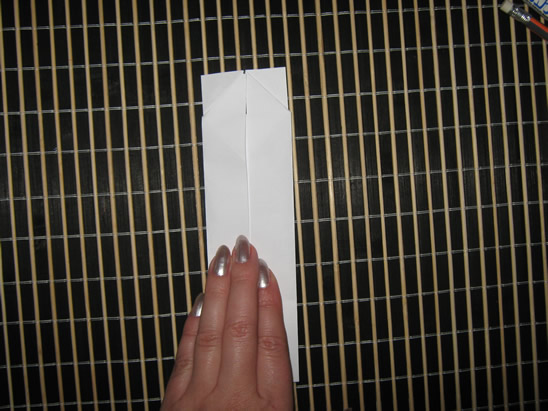
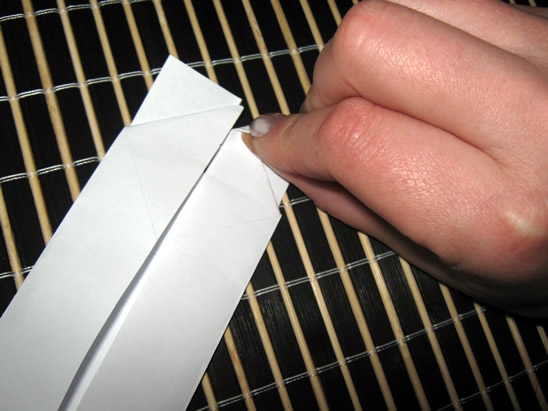
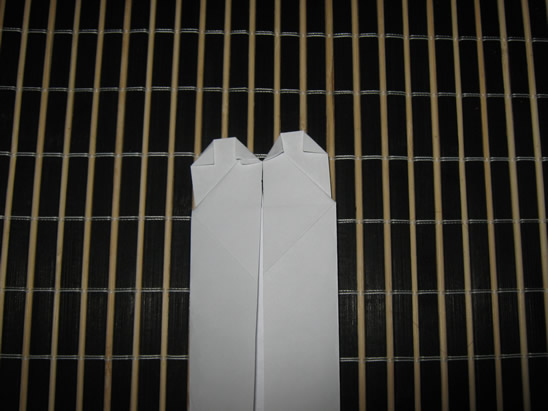
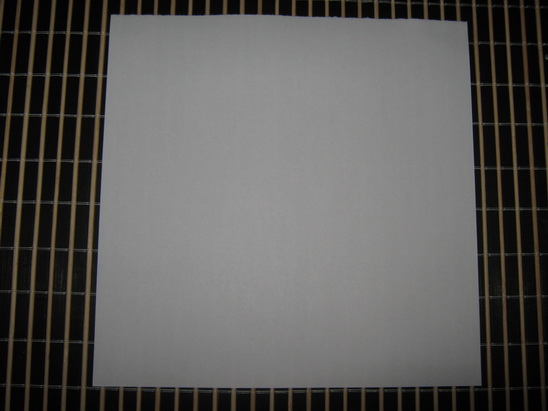
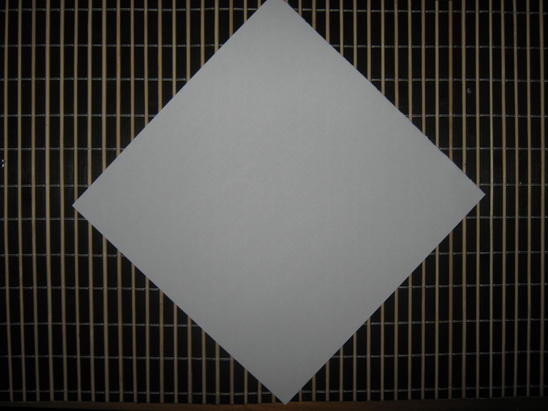
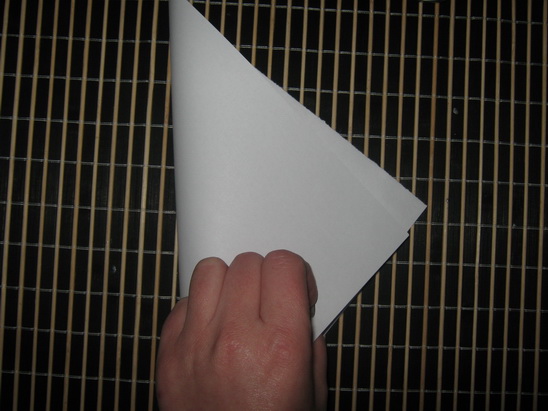
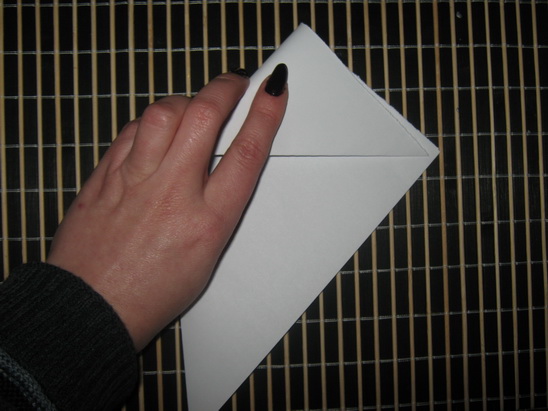
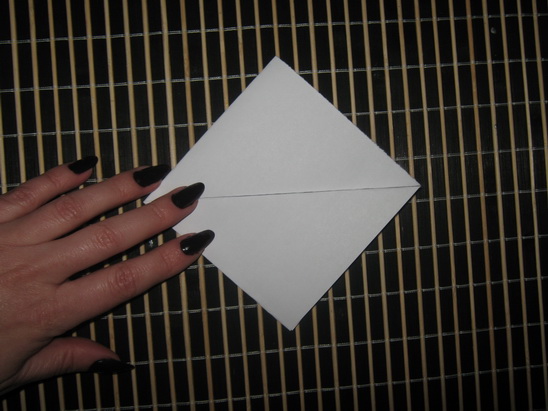
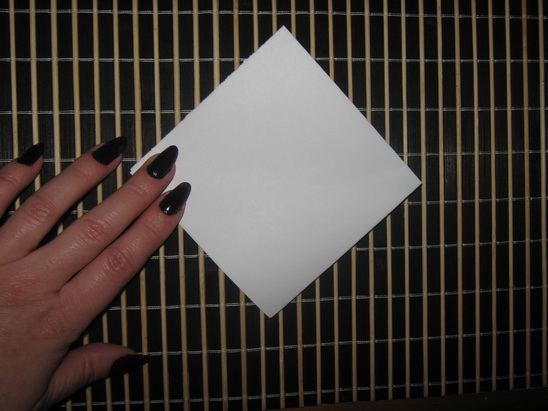
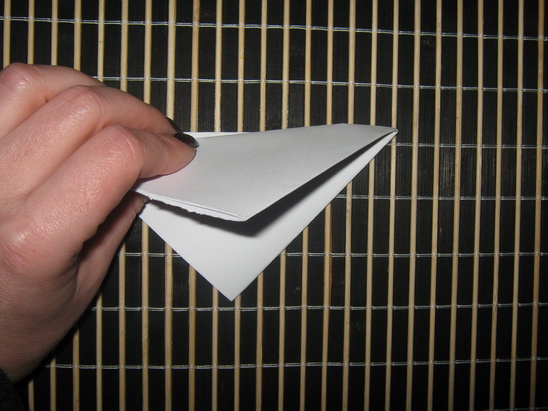
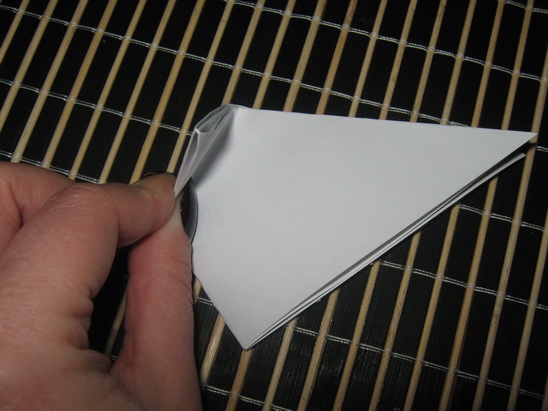
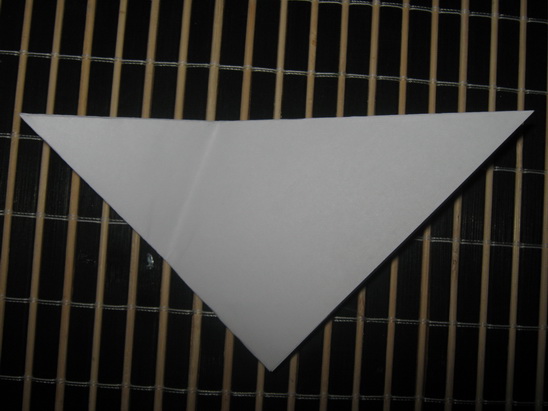
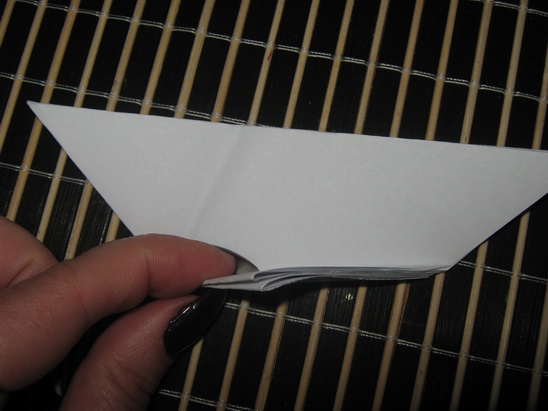
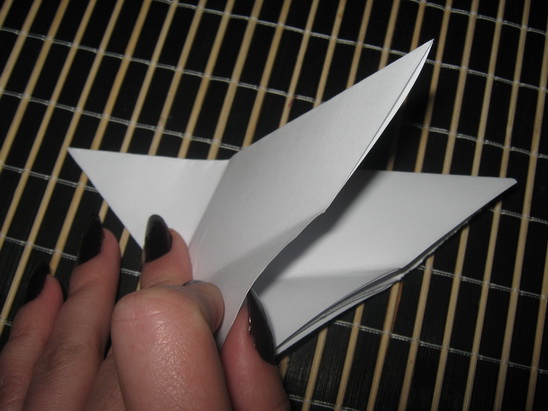
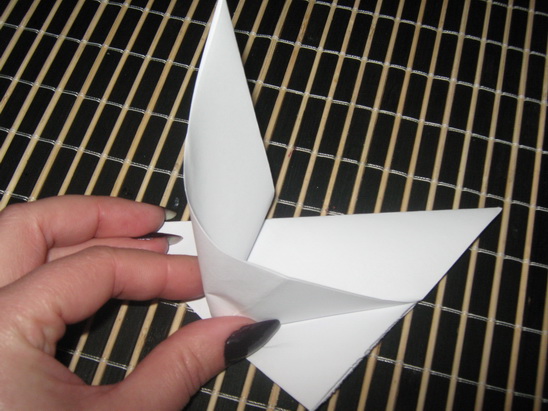
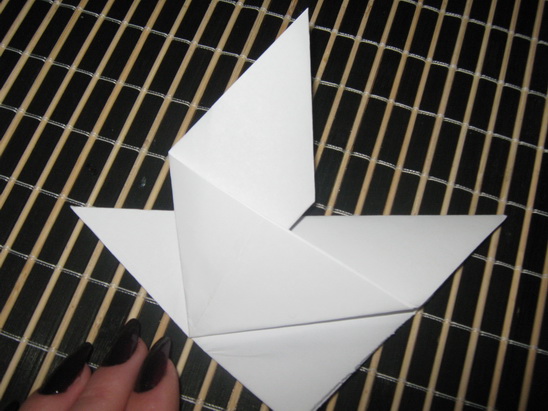
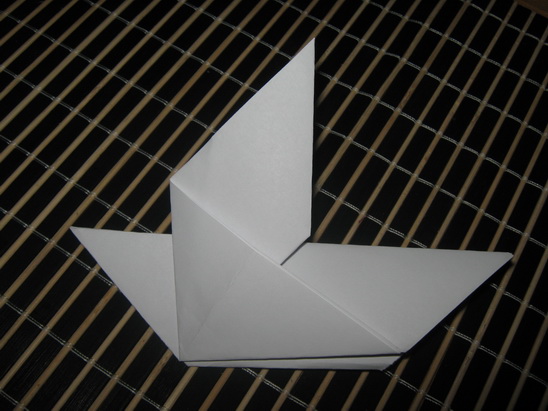
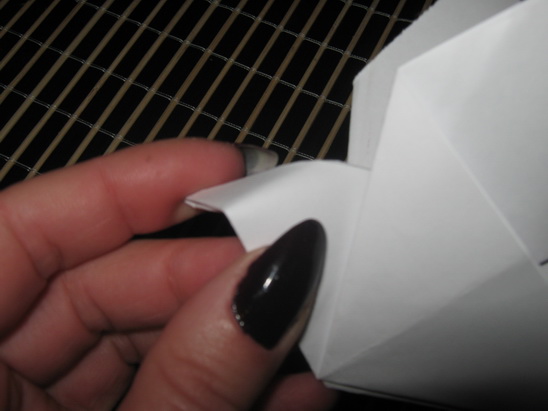
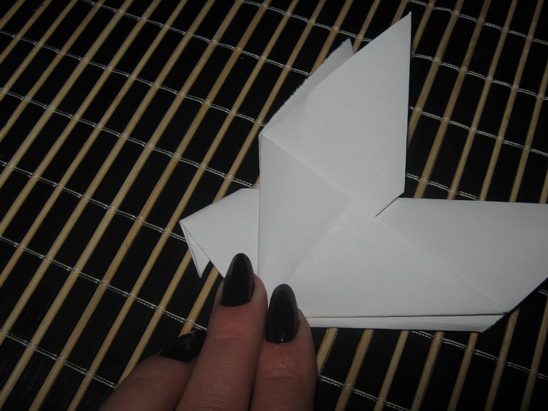
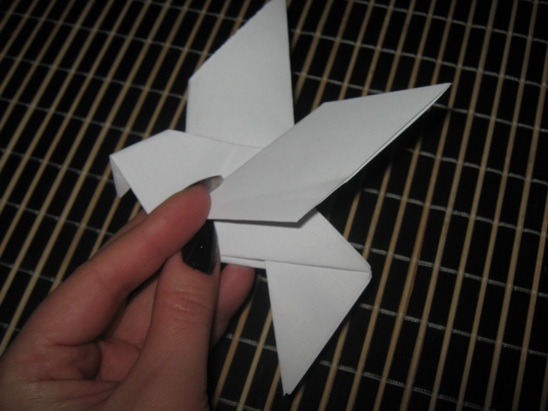
 

(3) Origami Dragon

Origami Dragon

Since this Chinese New Year is the year of the Dragon how could I not include an Origami Dragon in this post.  And, look how awesome this Origami Dragon turns out.  You can get the full instructions for this Origami by going to Origami-Instructions.


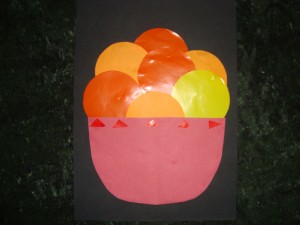
(4) Chinese New Year Fish

Chinese New Year Fish

Fish is a very popular dish on Chinese New year.  Fish is a sign of prosperity…. so it is very common to see people eating fish on Chinese New Year.  With that being said I thought it was a good idea to include Fish in this Chinese New Year Post.  Go to Julie K in Taiwan for all the craft details.


(5) Chinese Dragon Door Hanger

Chinese Dragon Door Hanger

Here is a cute craft for the youngest of crafters.  If you go to NickJr they show you how to make a simple Chinese Dragon Door Hanger that is perfect for any kid’s room.  Plus, making this craft with them is the perfect time to explain to your kids a little bit about the Chinese New Year.


(6) Dragon Mask

Dragon Mask

Now, isn’t this Dragon Mask incredible?  What little one wouldn’t love wearing this Dragon Mask all over the house.  After all, children love dressing up.  Find all the Dragon Mask “how-to’s” over at AlphaMom.  This is such a great Chinese New Year craft!!


(7) Pull-A-Long Dragon Craft

Pull-A-Long Dragon Craft

Here is a great way to make a Dragon for Chinese New Year….. made out of paper cups.  How awesome is that?!  It turns out so cute too.  This is a great way to teach your children about the Chinese culture.  Make sure to check out the craft in its entirety over at FreeKidsCrafts.


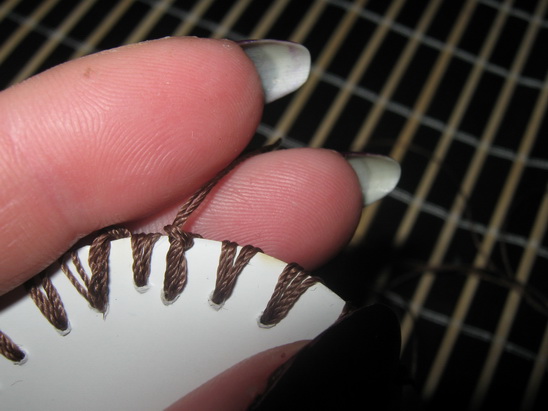
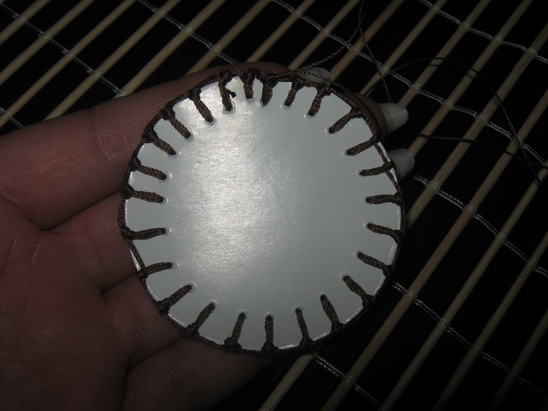
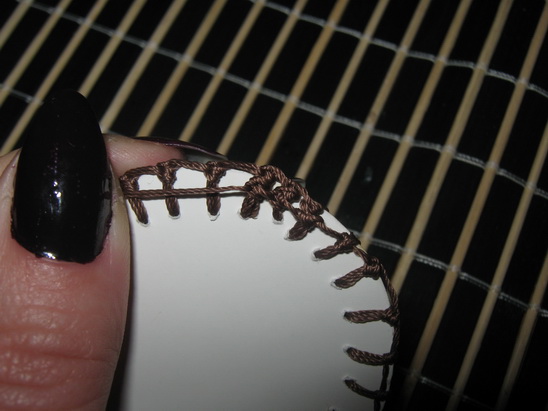
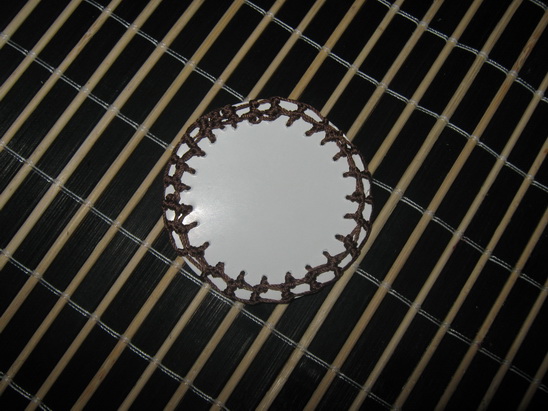
(8) Toy Spinning Hand Drum

Toy Spinning Hand Drum

Here is a fun toy for the Chinese New Year.  Not only fun to play with…. but also fun to make.  This toy is a great way to make lots of noise during the Chinese New Year.  Make sure to check out 4CrazyKings for all the fun details.
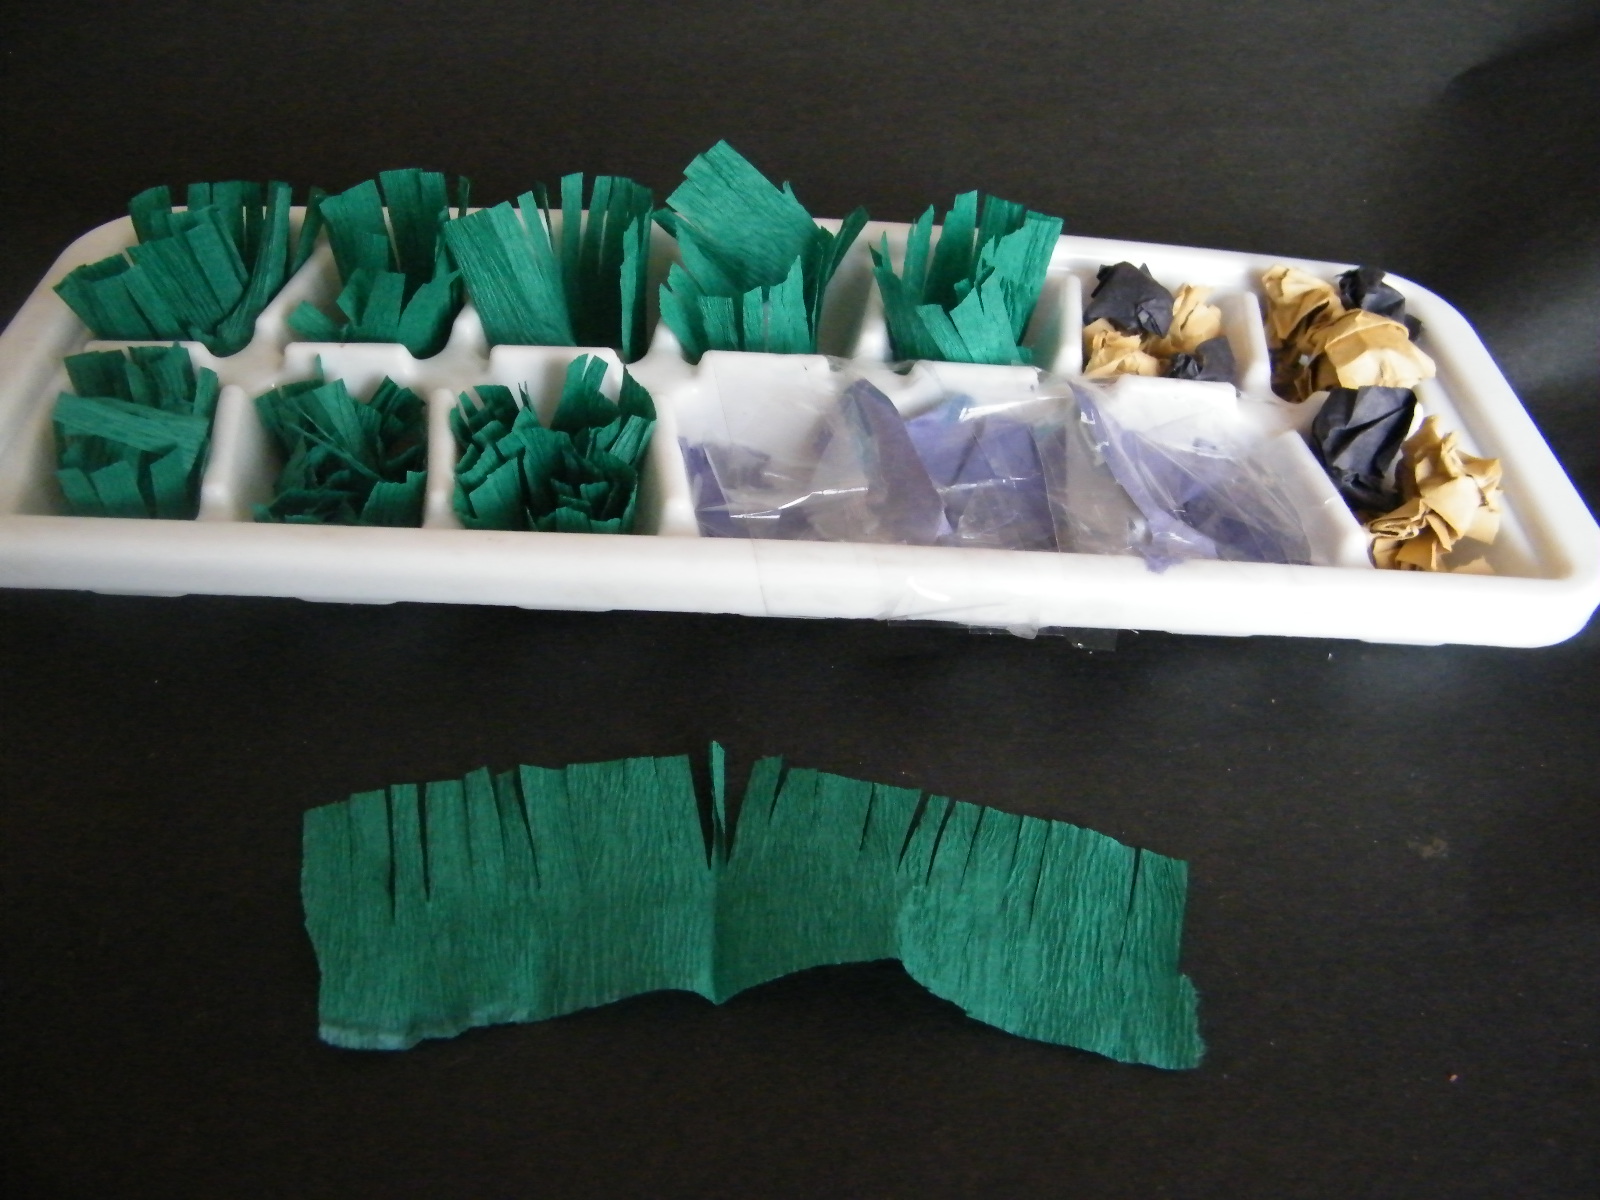
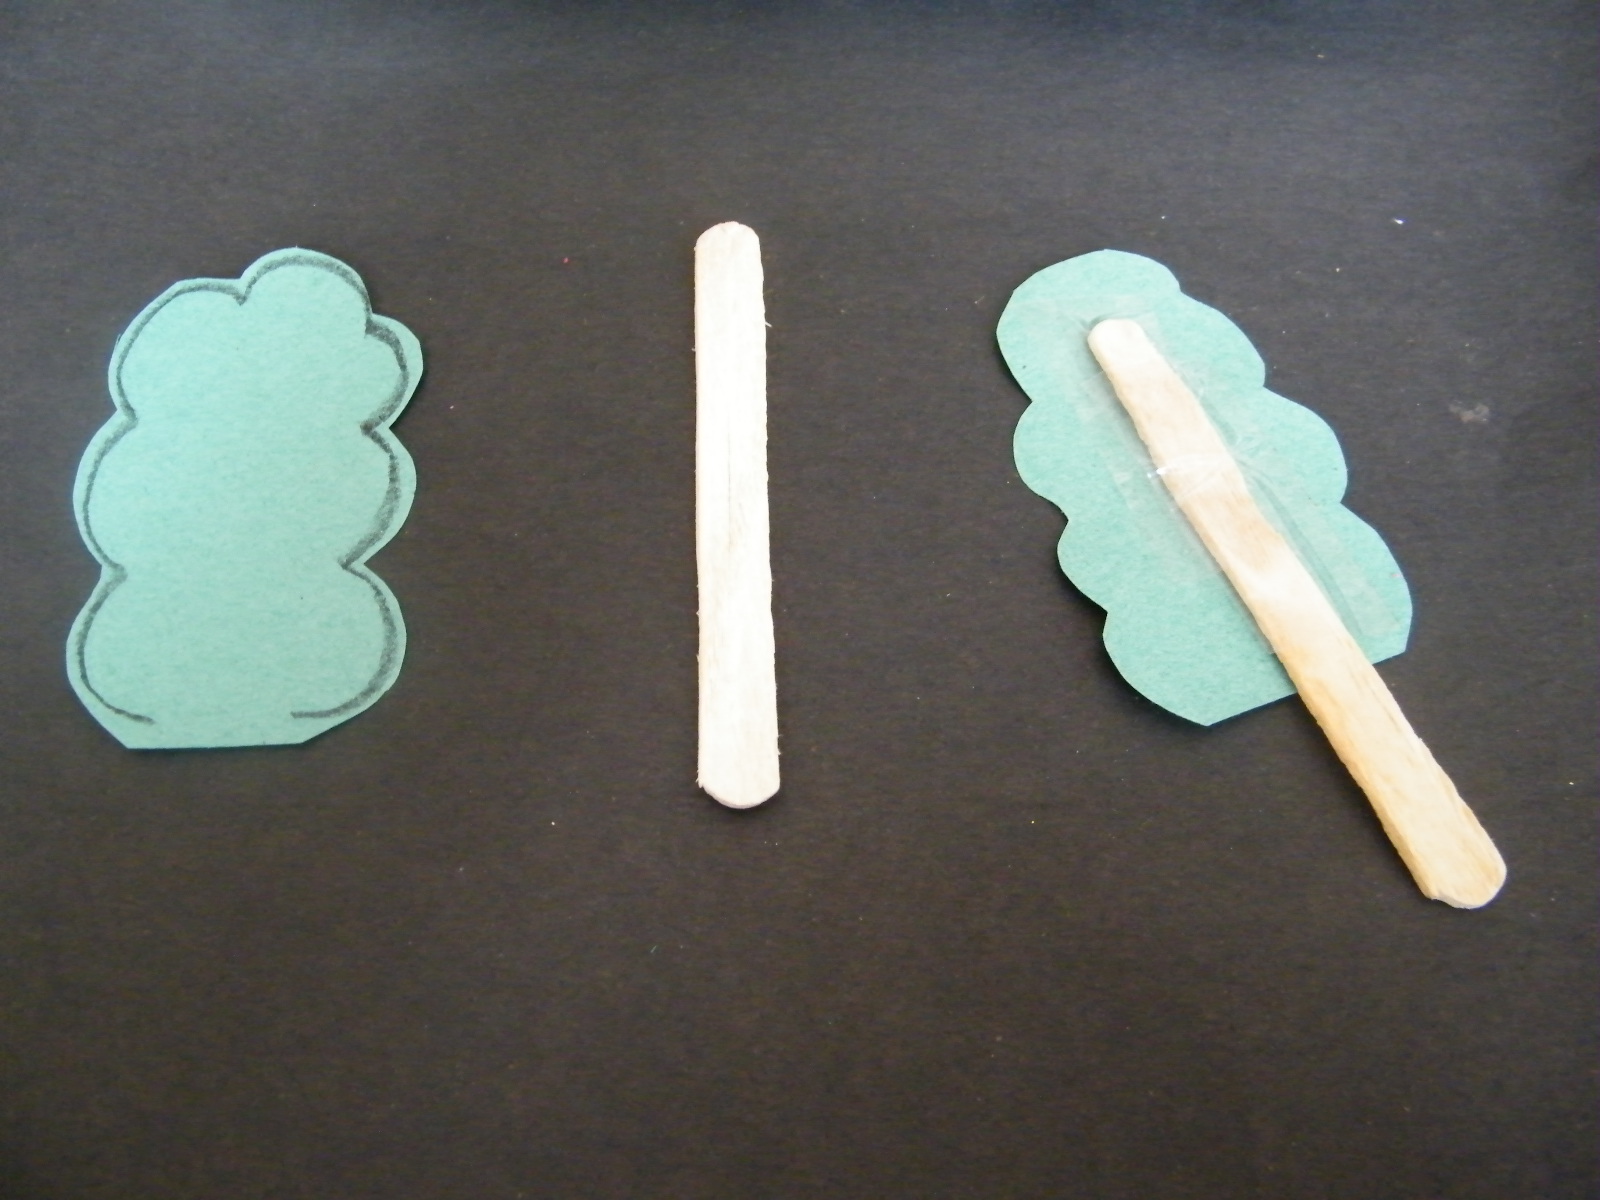
 

(9) Paper Dragon

Paper Dragon

This is a fun craft for the Chinese New Year.  This Paper Dragon turns out so beautiful…. I just love the colors.  I found this craft over at CraftJr and I just love it.  She explains how this craft is really so easy that a toddler can do it.  And, trust me…. the kids will love maneuvering around the dragon with the sticks.


(10) Marbled Red Vinasse Eggs

Marbled Red Vinasse Eggs

This Marbled Egg  is an extremely popular Chinese snack…. and it is extremely popular during Chinese New Year as the egg represents fertility.  To get this marbled effect you first crack the egg and then simmer the egg in colored liquid.  Get the full details at Pig Pigs Corner.


(11) Paper Chain Dragons

Paper Chain Dragons

One of the easiest crafts to teach a young child is how to make a paper chain.  So, let’s use that technique to make a Paper Dragon.  The kids will have such a fun time making this craft.  The Chinese tradition is a rich tradition….. why not show this to your kids by creating this craft.  Check out NaturallyEducational for all the craft details.


(12) Flying Dragon Puppet

Flying Dragon Puppet

Okay, I officially love this craft…. I just love how it turns out.  It turns out so colorful and festive…. just like any New year should be.  Check out JellyFishJelly for the craft details and put this Flying Dragon Puppet together.  I don’t know what your kids will love more…. putting the craft together or playing with the puppet.

Technorati Tags: , , , , , , , , ,

A Bowl of Oranges Collage – Craft for Chinese New Year

Chinese New Year is just a few days away…. It falls on January 23, 2012.  Chinese New Year is the most important of the traditional Chinese Holidays.  In honor of Chinese New Year today we are going to make a Bowl of Oranges Collage.  Oranges are passed out freely on Chinese New Year because they represent luck and wealth.  So, I thought this craft would be a perfect craft for Chinese New Year.  You only need a few materials for this craft, so grab them and let’s get started.

Check out our other Chinese New Year Crafts.


Materials Needed

colored papers in different shades of orange

2 construction papers, any color prefered (of different colors)

toy cup

scissors

glue


Step 1

Choose a darker construction paper as your base. Using a toy cup, draw circles on the orange papers.  Using the scissors, cut out the circles. These will be your oranges.

[ad#ahc]

Step 2

Using the other construction paper, cut a shape of a bowl.


Step 3

Arrange oranges on the bowl and glue.

You can add any  embellishments and designs to your bowl that you wish.  In my collage I added extra pieces of the orange papers to decorate the sides of the bowl.  How are you going to decorate your bowl?  Let me know in the comments below.  And, feel free to take a picture of your collage as well and add that to the comments…. I’d love to see it.

Technorati Tags: , , , , , , , ,

How to make a Heart Bookmark

Valentine’s Day is coming up next month.  And, with Valentine’s Day what do you think of?  Hearts, of course.  Well, with that being said…. today I’m going to show you how to make a Heart Bookmark.  This Heart Bookmark would be perfect to give to someone special this Valentine’s Day.  You can imagine that every time he or she looked at it they would be reminded of the fact that you made it especially for them.  So, grab the materials needed and let’s get started.

Check out our other Valentine’s Day Crafts or our other Bookmark Making Crafts.

Tutorial offered by Laura from Dacian Moon Handmade).


Materials Needed

– paper
– scissors
– red paint marker
– pencil


Step 1

Make the paper square.


[ad#ahc]

Step 2

Cut the paper in half.


Step 3

Fold in half, then unfold (because we need the crease).


Step 4

Fold every half in half again, like in the picture …

… and unfold.


Step 5

Fold the upper right corner until you reach the closest crease.

Unfold.


Step 6

Fold in the dotted line.


Step 7

Fold the right upper corner to meet the center crease.

Do the same with the left upper corner.


Step 8

Fold the new formed corner like in the picture (in half)

It will look like this.


Step 9

This could seem tricky but it is quite simple. Fold in the first crease on the right, lifting the corner and flattening it.

This will force another fold on the back.


Step 10

We are still working on the face. Do the same with the other side. It should look like this.


Step 11

Fold a little corner on all upper corners…

… like this.


Step 12

Turn over and… there is the heart!


Step 13

Use the paint marker to decorate it the way you like.

And, there you have it…. you just finished making your beautiful heart bookmark.  Didn’t it turn out just lovely?  Take a picture of your Heart Bookmark and post it in the comments below so I can see how awesome your bookmark turned out.

Technorati Tags: , , , , , , , , , , , ,

How to Make a Cute Valentine’s Card for Valentine’s Day

Valentine’s Day is just around the corner.  And, with Valentine’s Day comes what?  Valentines Cards, of course.  Store bought Valentine’s Day cards can be expensive….. plus, they can be extremely boring.  How about making your own Valentine’s Day Card.  Imagine the surprise of the receiver to receive a handmade card from you.  Plus this card is so cute…. no one can resist it.  So, grab the materials needed and let’s get started.

Check out our other Valentines Day crafts.

This tutorial is offered by Laura from Dacian Moon Handmade


CRAFTS MATERIALS NEEDED:

– paper (not too thin)
– scissors
– two pieces of leather (red and black)
– glue
– paints
– toothpick
– pencil


Step 1

Fold the paper in half.


[ad#ahc]

Step 2

Draw with your pencil a heart on the red leather…

… and then cut out the heart.

It should look like this.


Step 3

Draw a hat on the black leather.

Now, we’ll cut out the hat.

Here it is:


Step 4

Apply a good layer of glue on the back side of the heart…

… and place it on the middle of the folded paper.


Step 5

Take the toothpick and use it to paint with black paint the eyes and the mouth on the Heart.

We use a toothpick because with it we can make more thin traces and it will give us accuracy.

Now draw the hands with black paint on the heart.


Step 6

Apply a good layer of glue on the back side of the hat…

… and place it on one hand of the heart.


Step 7

Write with red “Be my Valentine”.

How could someone resist this cute heart?

Now the outside of your Valentine’s Card is done…… write something on the inside and your card is ready to hand out to someone special.  Now the real question is….. who is this someone special?  hmmmm….

Technorati Tags: , , , , , , , , , ,

How to Make a “Unity for All” Bracelet for Martin Luther King Day

Today is Martin Luther King Day.  Martin Luther King is best know for his “I Had a Dream” speech where he basically said in his dream all men were created equal.  He lived his entire life fighting for that fact.   Today I’m going to show you how to make a “Unity for All” Bracelet for Martin Luther King Day.  This bracelet represents Unity for all…. bringing us all together no matter the color of our skin.  Isn’t that what Martin Luther King would have wanted?  So, grab the materials needed and let’s get started.

Check out our other Martin Luther King Crafts.

Tutorial offered by Laura from Dacian Moon Handmade.


Materials Needed

– cardboard
– pencil
– a band of leather (can be replaced with ribbon)
– varnish (can be nail varnish too)
– black and blue paint
– paintbrush
– toothpick
– round nose pliers
– 2 jump rings
– 2 ribbon cord ends
– 1 lobster clasp


Step 1

Draw a circle on the cardboard.

Cut it out.


[ad#ahc]

Step 2

Place the cardboard circle over the leather …

… and mark the  places where leather will go through the cardboard…

… like this.

Make two cuts on the marks.

Put a side of the leather through one cut…

… then the other side through the other cut, until the circle is in the middle.


Step 3

Using the pencil…

… draw two curves on the cardboard, like this.

Then two human silhouettes.


Step 4

Paint one of them with black – I used the toothpick.

It will look like this.

With blue, color the up and down parts…

… like this…

… and write with black…

… “Unity for All”.


Step 5

To protect the cardboard it is good to use a varnish on it. It can even be nail varnish.

Apply it with the paintbrush all over the cardboard.

Let it dry well.


Step 6

Take a cord end…

… and put it on one end of the leather band, using the round nose pliers.

Like this.

Open one jump ring…

… and attach the lobster clasp of the cord end with it.

Do the same on the other side. You can add here a piece of chain (or you can put only the jump ring).

Now your bracelet is ready.

And, there you have it… you just finished your “Unity for All” Bracelet for Martin Luther King Day.  Wear it proudly….. after all Martin Luther King worked hard to make sure that everyone is created equal.

Technorati Tags: , , , , , , , , , , , ,

How to Make an Origami Dove

Today I’m going to show you how to make an Origami Dove.  I thought since today is Martin Luther King Day that today would be a perfect time to make a dove craft.  After all a Dove represents Peace and Tranquility and bottom line….. isn’t that what Martin Luther King wanted for everybody?  Martin Luther King was a great man and today it is all about remembering how wonderful he was and what he represented….. equality for all.  So, gather up the materials needed and let’s get started.

Check out our other Origami & Paper Folding Crafts or Check out our other Martin Luther King Crafts.

Laura from Dacian Moon Handmade  will show you, step by step, how to make an origami dove decoration.


Materials Needed

– white paper
– colored pen
– scissors
– ribbon
– glue


Step 1

Cut a square of white paper.

Place it with a corner to you.

Bring the left part over the right one.


[ad#ahc]

Step 2

Bring the upper corner over the middle one, like this.

Do the same for the lower corner.


Step 3

Turn it over.

Bring the upper corner over the lower one.

Fold the left corner over the piece, like this.

Unfold.

Fold the lower corner over the piece.

Unfold.

Let’s make the wings.

Open the right part like this…

And bring the lower corner to the left, following the crease you created. Press.

It will look like this.

Do the same on the other side.


Step 4

Now it is time for the beak. Fold the left corner on the back…

… like this. Press it well because it is thick enough that it will unfold itself.


Step 5

To make the tail, bring the right part down, like this…

… and press.


Step 6

We will fold one wing down, like this, to make it look better.


Step 7

Using the colored pen draw an eye and decorate it the way you like. I wrote “Peace” on one wing.


Step 8

Apply a layer of glue on the ends of the ribbon…

… and place it between the back wing and the body.

It will look like this.

Doesn’t the Dove turn out lovely?  It will be perfect to decorate a window or a doorknob this Martin Luther King Day.  After all a Dove represents Peace and Tranquility.  Isn’t that what Martin King longed for?

Technorati Tags: , , , , , , , , , , , , ,

How to make an “I Have a Dream” Pendant for Martin Luther King Day

Today is Martin Luther King Day.  And, what better way to celebrate Martin Luther King’s Life than to make a craft in is honor.  Remember that Martin Luther King had a dream….. in his dream everyone was created equal.  Martin Luther King was a great man and today we are going to honor the “I Have a Dream” speech he made by making an “I Have a Dream” pendant.  You can wear this pendant to honor Martin Luther king today and everyday you want to remember what Martin Luther King was all about.

Check out our other Martin Luther King Day crafts.

Laura from Dacian Moon Handmade will show you, step by step, how to make this simple pendant.


Materials Needed

– a cardboard disc
– colored pen
– scissors
– cord
– thick thread and needle


Step 1

Put the thread in two on the needle and make a little hole on one side of the disc, near the edge.

Like this.

Put the thread again through the same hole, next make another hole near first, and so on…

… until you cover all the edge.

[ad#ahc]

Step 2

Now, put the needle under a bunch of thread…

… and make a knot, like this.

Make knots on every bunch of threads.


Step 3

Start a second row of knots.

It will look like this (if you make the holes more close to one another, the pattern will look more tight).

Use the pen to write in the middle “I Have a Dream”…

… like this.

The only thing you have to do now is put the cord through the upper part (under a bunch of thread).

And there you go…. the finished Martin Luther King Day “I Have a Dream” pendant.  Doesn’t it turn out awesome?!  How did your pendant turn out?  Let me know in the comments below.  Also, take a picture of the “I Have a Dream” Pendant and share that with me in the comments below too…. I’d love to see it.

Technorati Tags: , , , , , , , , , , , , , ,

How to Make a Multicultural Kids Around Earth Craft for Martin Luther King Day

Martin Luther King Day is this Monday.  The Martin Luther King Day Holiday represents what he taught us…. equality in all people…. no matter what color their skin is.  That is an amazing thing.  So, today we will be honoring Martin Luther King and all he taught us… by making a craft for this Holiday.  So, in this post I will be showing you how to make a Multicultural Kids Around Earth craft for Martin Luther King Day.  The craft is a lot of fun and has tons of meaning.  So, let’s get started, shall we…

Check out our other Martin Luther King Day crafts.

Multicultural Kids Around Earth Craft for Martin Luther King Day


Materials Needed

Printer & Paper

Scissors

pencil

Many Different Colored Pieces of Paper

Black Marker

Glue


Click on Templates below to make larger and to print both off.

Children Template

Children Template


Earth Template

Earth Template


Step 1

 Print out Template.

Print out Template.

[ad#ahc]

Step 2

Cut out

Cut out the images on the template.


Step 3

trace on different colors of paper

Cut out like this then trace on different colors of paper.

Trace it like this.

Trace it like this.


Step 4

Cut about 7 out

Cut about 7 out… all in different colors.


Step 5

outline with black marker.

To make each one look nicer, outline with black marker.


Step 6

Draw a dot for each eye.

Draw a dot for each eye.

Draw a letter 'C' for nose.

Draw a letter ‘C’ for nose.

Draw a curved line for mouth.

Draw a curved line for mouth.

Draw a curved line above each eye

Draw a curved line above each eye and on each side of the mouth.


Step 7

Trace hair on colored paper

Trace hair on colored paper…. like you did with the people.

You can outline the hair too

You can outline the hair too.


Step 8

 You can draw on clothes too

You can draw on clothes too if you want to.


Step 9

Glue hair on figure.

Glue hair on figures.


Step 10

Cut out circle.  Then trace it on blue paper

Cut out circle.  Then trace it on blue paper like seen above.


Step 11

Cut out the pencil outline of the circle.

Cut out the pencil outline of the circle.


Step 12

Now cut out the small parts of the template.

Now cut out the small parts of the template.


Step 13

Trace the template onto green paper.

Trace the template onto green paper.


Step 14

Outline the blue circle in black marker.

Outline the blue circle in black marker.


Step 15

Glue green land on to the blue circle

Glue green land on to the blue circle globe.


Step 16

Glue kids around the globe.

Glue kids around the globe.

Awesome job!!  You just finished making your Multicultural Kids Around Earth craft for Martin Luther King Day.  Now go hang it proudly for all to see.  You are sure to get some really amazing compliments on it.

Technorati Tags: , , , , , , , , , , , , , , ,

How to Make a Rocking Groundhog for Groundhog’s Day

Groundhog’s Day is coming up on February 2nd.   According to folklore if the Groundhog sees his shadow on Groundhog’s Day then winter will continue for another 6 weeks.  If he doesn’t see his shadow then winter will be ending soon.    So, in honor of Groundhog’s Day I’m going to show you how to make a Rocking Groundhog.  Rock the Groundhog craft back and forth and see if he sees his shadow.  It will be a lot of fun.  So, grab the materials needed and let’s get started.

Check out our other Groundhog Day crafts.

How to Make a Rocking Groundhog for Groundhog's Day


Materials Needed

Printer and Paper

Scissors

Paper Fastener or Staples


Click on Image Below to make Template Bigger and to Print off.  You can choose to print off a colored template or the black & white version.

Colored Template

Colored Template


Black & White Template

Black & White Template


Step 1

Print out Template.

Print out Template.

[ad#ahc]

Step 2

Cut out the parts on the template.

Cut out the parts on the template.


Step 3

Cut out circle.

Cut out circle.


Step 4

Cut slit out of circle.

If you bend it (without making a crease) like this… you can cut the slit out easily.


Step 5

fold on both dotted lines

After slit is cut… fold on both dotted lines.


Step 6

Cut out support strip.

Cut out support strip.


Step 7

Fold on dashed line and then place inside the circle shape.

Fold on dashed line and then place inside the circle shape.


Step 8

Keep support in place with brass fasteners or a staple.

Keep support in place with brass fasteners or a staple.


Step 9

Push tab of groundhog into half circle rocker.

Push tab of groundhog into half circle rocker.

Rock it back and forth

Rock it back and forth.  Watch shadow move… We see it, but the groundhog doesn’t see it yet.

And there you have it…. you just finished making a rocking groundhog for Groundhog’s Day.  Isn’t he cute?  Rock him back and forth and see if he sees his shadow.

Technorati Tags: , , , , , , ,

All Colors are Beautiful Martin Luther King Craft

I have a really special craft for you today.  I am going to show you how to make an All Colors are Beautiful Martin Luther King Craft.  This craft is meant to remind all of us how no matter the color of the skin that people are the same and should be treated equally.  That is what Martin Luther King represented.  In this craft you will draw a picture of yourself, copy it and color each picture with different colors.   The craft turns out beautifully…. and should be hung up this Martin Luther King Day.  So, let’s get started.

Check out our other Martin Luther King crafts.

All Colors are Beautiful Martin Luther King Craft


Materials Needed

Large piece of Cardboard, Paper or Poster Board

Paper

Pencil

Photocopier

Glue

Crayons or Markers


Step 1

Draw a picture of yourself.

Draw a picture of yourself.

[ad#ahc]

Step 2

Make 3 photocopies of the picture and glue them on a big piece of cardboard

Make 3 photocopies of the picture and glue them on a big piece of cardboard or paper…. like this.


Step 3

Now color each picture with different colors

Now color each picture with different colored skin, hair, background, shirt…

It should look something like this.

…. like this.


Finished Martin Luther King - All Colors are Beautiful Craft

Doesn’t this Martin Luther King Craft turn out just amazing?!  It really gets the idea across that you are beautiful no matter what color skin, hair or clothes you wear.  You still are the same person inside.  Please let me know how your Martin Luther King craft turned out by posting your picture in the comments below.  I would love to see it.

Technorati Tags: , , , , , , , , ,

Block Printing for Kids : Making Block Prints from Cardboard

This method of making a block print will achieve results similar to a linoleum block or wood block, but will avoid the unnecessary cost and dangers of these block printing techniques. This version of block printing is much safer.

Block Printing for Kids : Making Block Prints from Cardboard

Block Printing for Kids : Making Block Prints from Cardboard

CRAFTS MATERIALS NEEDED:

1. Cardboard or pieces of rubber inner tube

2. Scissors

3. Glue

4. Wood block or heavy cardboard

5. Water soluble block printing ink

6. Ink roller (brayer) and rolling surface (glass is good)

7. Newspapers or magazines

8. Paper

HOW TO MAKE THEM:

1. Cut a silhouette shape or shapes from your cardboard or piece of rubber inner tube with a scissors or other suitable tool.

2. Glue the cardboard or rubber shape or shapes firmly to a piece of wood or heavy cardboard. Press under heavy books or some other weight to make sure that the shapes are flat.

[ad#ahc]

3. Place some ink on the glass rolling surface and roll it out until it is smooth and tacky.

4. When the ink roller (brayer) is evenly coated with ink, roll it over the surface of the prepared block. Make sure that the roller makes complete revolutions to thoroughly coat the raised surfaces of your block.

5. Lay your paper on a pad of newspapers or magazines and print the block. Exert heavy pressure for a good print. Standing on the block will assure adequate pressure.

NOTE: This technique is especially suitable for making greeting cards, posters, Christmas cards, and bookplates. It may also be used with permanent printing inks or textile paints to print textiles.

Technorati Tags: , , , , , , ,

11 Cool Outer Space Crafts for Kids

11 Cool Outer Space Crafts for Kids

Today I have some awesome craft ideas for you.  Not just any craft ideas…… today I have cool outer space crafts for you.  I was making my way through the internet looking for some really creative outer space crafts and I think I found them.  I found some that are made from food and others that are made from recycled materials.  I found crafts that are perfect for the youngest of crafters and others that are meant for older children.  But, bottom line…. there is an outer space craft here for you.  So, enough with the chit-chat….. let’s get started.

11 Cool Outer Space Crafts for Kids

(1)  Orbiting Planets

Orbiting Planets

Here is a great craft to help teach your kids about space and all the orbiting planets.  Plus, the craft is a lot of fun.  I found this craft over at BusyBeeKidsCrafts and they have the right idea….. use a fun craft to help teach your children about space.


(2) Recycled Robot Craft

Recycled Robot Craft

Look how cute this robot is….. so cute!!  And, it is made from many recycled materials which makes this robot even cooler.  FreeKidsCrafts shows you how you can take tin foil, an empty container and soda bottle lids and make it into a robot like above.  How fun!!

[ad#ahc]

(3) Alien Pipe Cleaner Craft

Alien Pipe Cleaner Craft

I love this craft…. I just love how these little aliens turn out.  I found this Outer Space craft over at Craft Jr. She shows you step-by-step how to make the aliens as pictured above.  But, she also explains how if you have mismatched colors or pipe cleaners of different sizes it doesn’t matter…. they are aliens after all.


(4) Spiral Galaxy

Spiral Galaxy

What a pretty craft….. I love all the colors in this Spiral Galaxy Craft.  And, believe it or not this Outer Space craft is made with a paper plate and some glow in the dark paint.  TheCraftyClassroom shows you in detail how you too can make this craft.


(5) Out of this World Centerpiece

Out of this World Centerpiece

Here is a cool craft that will be a lot of fun to put together.  Plus, this Out of this World Centerpiece is perfect if you are having an Outer Space birthday party.  Imagine this being the centerpiece at the Birthday table.  Find out how to make this over at MakingFriends.


(6) Grass Head Monster

Grass Head Monster

This is an awesome Outer Space craft because your child is going to have to care for it everyday.  It is actually made with real grass seed so your child will have to care for it everyday for the grass to grow.  Check out FreeKidsCrafts for all the details.


(7) Googly Eyed Green Blobs

Googly Eyed Green Blobs

These are pretty creepy looking…. aren’t they?  I found this craft over at MakeAndTakes and she had it posted as a Halloween craft, but I thought this craft would also fit for an Alien…. so I am including it in this Outer Space crafts list.  Check out her site for all the “how-to” details.


(8)  Rocket Craft

Rocket Craft

Isn’t this Rocket craft just adorable?  I love it!!  And, it is made out of a cardboard box.  What a creative idea.  You will need help from an adult for this craft as they do use a craft knife.  But, it would be so much fun making this with your parents.  Check out Se7en for the step-by-step details.


(9) Space Cake

Space Cake

I just had to add this cake to this post.  I know it really isn’t a craft Per Se, but I think cooking can be quite crafty…. and it is also a ton of fun to do with an adult.  So, check out this Outer Space cake over at FamilyFun and get the recipe to cook with your parents.  This would be great for an Outer Space birthday party.


(10) Puffy Paint Moon Craft

Puffy Paint Moon Craft

AllKidsNetwork shows us how if you mix shaving cream and glue together it makes a lumpy and bumpy surface….. just like the moon.  Actually, what they explain is that while the glue dries it makes a smooth-textured material that puffs while it’s drying and then flattens out.  Isn’t that cool?  Go to AllKidsNetwork to check out the full details.


(11) Space Shuttle Craft

Space Shuttle Craft

Wow, isn’t this space shuttle amazing?!  It’s just so creative.  And, the best part…. It’s made out of mostly all recycled materials.  How cool is that?!  Kids of all ages will love making this space shuttle…. the younger kids will need help from an adult.  Check out LooLeDo for the entire craft tutorial.

Technorati Tags: , , , , , , , , , , ,

How to Make a Miniature Garden Craft

We are right smack in the middle of Winter…. and if you are anything like me you are missing Spring pretty badly about now.  Well, I have a way to bring a little bit of Spring into your house.  Today I’m going to show you how to make a Miniature Garden for your house.  We are going to build this miniature garden in an ice cube tray.  So, ask your Mom or Dad if they have an extra ice cube tray for you to borrow.   You can follow my miniature garden step-by-step or you can be creative and come up with your own variations.  Either way….. let’s get started.


Materials Needed

Ice cube tray

Popsicle sticks

Twigs

Craft paper

Crepe paper- green

Cellophane paper/ transparent plastic

Scissors

Tape


Step 1

Cut bits of blue paper and use it to line a few cubes to make a pond.


[ad#ahc]

Step 2

Cut a few pieces of cellophane paper and put it in the cubes. Seal the top with a layer of tape to give it a shining top.


Step 3

Take brown and black paper and make small balls. Fill up a few cubes to make a rockery.


Step 4

Cut out strips of green crepe paper and make slits on the top as shown and put them in the rest of the cubes for grass. Cut wider strips at the back to make taller grass.


Step 5

Cut out outlines of trees and tape the back to a Popsicle stick to make trees. Tape them to the edge of the cubes.


Step 6

Cut out flowers and tape them to the back of twigs and tape these to the sides of the cube.


Step 7

Your garden is ready.

And there you go…. you have just finished your very own miniature garden craft.  You now have a little touch of spring for your house.  Put it on a window sill where you can see it often…. it will remind you that Spring is on its way.

Technorati Tags: , , , , ,

How to Make Cupid Valentines Day Cards

Valentines Day is going to be here before you know it.  And, with Valentines Day comes the Valentines Cards.  We all love sending out Valentines Cards to our friends and loved ones, but we hate sending the same old cards we get every year from the store.  Well, how about doing something different this Valentines Day…. make the Valentines Cards yourself.  Today I’m going to show you how to make Cupid Valentines Day cards.   You can choose to print off a colored template or print off the black and white version and color it yourself.  Either way the receiver of this Cupid Valentines Day Card is sure to love it.

Check out our other Valentines Day crafts.

How to Make Cupid Valentines Day Cards


Materials Needed

Printer and Paper

Scissors

Stickers

Crayons / Markers (optional)


Click on the templates below to make bigger and to print off.  You can choose to print off the color version or the black and white version.

Colored Template

Colored Template


Black and White Template

Black and White Template


Step 1

Print out template.

Print out template.

[ad#ahc]

Step 2

Cut out template.

Cut out template.


Step 3

Fold both sides in to center.

Fold both sides in to center.


Step 4

Close the heart and seal

Close the heart and seal….Decorate with stickers.

Isn’t this card ADORABLE?!  It really is.  I love how it folds and the message is inside.  I’m sure the receiver of this card will love it to.  Now, the real question is…. who are you sending this Cupid Valentines Day Card to?  Hmmmmm…..

Technorati Tags: , , , , , , , , , , , , ,

How to Make a Paper Kids Holding Hands Craft for Martin Luther King Day

I have a great craft to share with you today.  I’m going to show you how to make a Paper Kids Holding Hands craft for Martin Luther King Day.  Martin Luther King Day is about remembering Martin Luther King and what he was all about.  This craft is a great way to honor Martin Luther King and to remind the children what the holiday is all about.   Today’s craft reminds us that no matter what we look like…. no matter the color of our skin we should all be created equal.  So, in honor of that and Martin Luther King let’s make today’s craft together.  So, gather up the materials needed and let’s get started.

Check out our other Martin Luther King crafts.

How to Make a Paper Kids Holding Hands for Martin Luther King Day


Materials Needed

Printer and Paper

Many Different Colored Sheets of Paper

Pencil

Scissors

Black Marker

Round Object or Lid (I used an Ice Breakers Container)

Glue


Click on Template below to make larger and to print off.

Children Holding Hands Template


Step 1

Print out Template

Print out template.

[ad#ahc]

Step 2

Cut out images on Template

Cut out images on template.


Step 3

trace on different colors of paper

Cut out like this and then trace on different colors of paper.

Trace it like this.

Trace it like this.


Step 4

Cut about 7 out

Cut about 7 out… all in different colors.


Step 5

outline with black marker

To make each one look nicer, outline with black marker.


Step 6

Draw a dot for each eye

Draw a dot for each eye.

Draw a letter 'C' for the nose.

Draw a letter ‘C’ for the nose.

Draw a curved line for the mouth.

Draw a curved line for the mouth.

Draw a curved line above each eye

Draw a curved line above each eye and on each side of the mouth.


Step 7

Trace hair on colored paper

Trace hair on colored paper like you did with the people.

You can outline the hair too.

You can outline the hair too.


Step 8

You can draw on clothes too

You can draw on clothes too if you want to.


Step 9

 Glue hair on figure.

Glue hair on figure.


Step 10

To connect the hands... cut a slit on each arm

To connect the hands… cut a slit on each arm.  To connect two hands… Cut a slit on top of one arm and the bottom of the other.  Then slide the two arms together to hold in place.

Slide arms together.

Slide arms together… do with all arms.

Hook arms together

Hook arms together like so.


Step 11

connect arms around a round lid

I connected the last 2 arms around an Ice Breakers container, but you can use any round object like a lid.


Finished Martin Luther King Kids Holding Hands Craft

Isn’t this Martin Luther King Day craft cute?!  I love the meaning behind it too…. that makes it even more beautiful.  How did your Martin Luther King Day craft turn out?  Let me know in the comments below.  And, don’t forget to take a picture of the craft and share that too in the comments…. I’d love to see how yours turned out.

Technorati Tags: , , , , , , , , , , , , , , ,

How to Make a Pressed Flower Card

Today I’m going to show you how to make a Pressed Flower Card.  This card can be used for any occasion that comes around.  Imagine the excitement of anyone who receives this greeting card.  They are sure to love it.  Made from flowers and construction paper your kids are sure to have a lot fun making this card.  So grab the materials needed and let’s get started.

Check out our other Greeting Card crafts.


Materials Needed

fresh flowers of your choice (can include a little stem and leaves)

Construction Paper (any preferred color and size)

book

glue

scissors

colored pen


Step 1

Make sure flowers are free from insects. Arrange flowers and gently press it against the pages of the book. Leave it there for 2 hours or more.

[ad#ahc]

Step 2

Fold paper crosswise so it resembles a greeting card.


Step 3

When the flowers are ready, gently take them out and place them in the front side of the card… this is to roughly measure if there is enough space. Trimming stems and leaves may be necessary to fit in the card. Be careful when holding the flowers as they are fragile.


Step 4

With a glue, slowly start tracing the stems first. Let glue sit there for about a minute before placing flowers back. Then continue with the leaves, finishing with the flowers.


Step 5

With all parts glued to the paper, press it again with the book and leave it for 30 minutes or so.


Step 6

Check if all flower parts are properly glued. Then using a colored pen, write your message inside the card.


And your card is ready!   How beautiful is this card?!  And, it is unique from any other card…. that makes this greeting card even cooler.  You will find no other card like this.  Now, who are you going to send your first Pressed Flower Card to?

Technorati Tags: , , , , , , , ,