How to Make a Paper Rocking Horse Toy

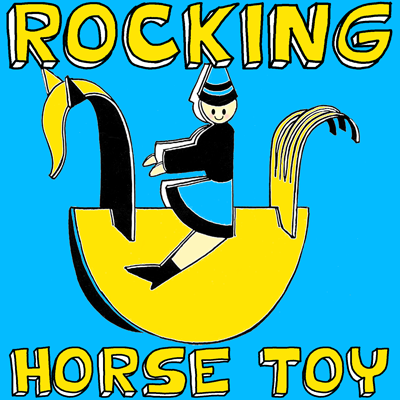
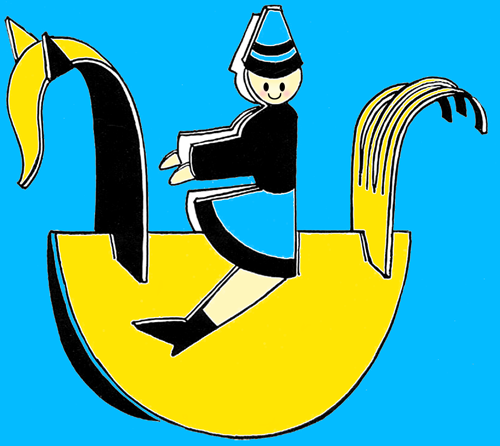
Today I have a fun and easy craft for you.  In this post I will be showing you how to make a Paper Rocking Horse Toy.  If you have a printer, paper, scissors and crayons…. you are all set to make this craft.  And, the cool part is when the craft is put together correctly….. the toy actually rocks.  This craft is made from 2 simple templates so that even the youngest of crafters can enjoy making this craft.  So, grab the materials needed and let’s get started.

How to Make a Paper Rocking Horse Toy


Materials Needed

Printer & Paper

Scissors

Crayons or Markers


Click on Images below to make larger and to print off Templates.

Template 1

Template 1


Template 2

Template 2


Step 1

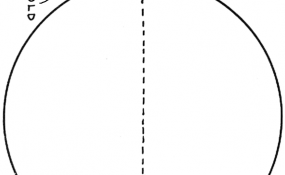
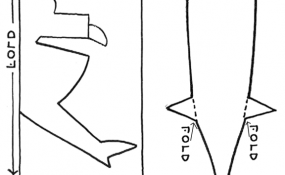
Print out templates.

Print out templates.

[ad#ahc]

Step 2

Cut out templates.

Cut out templates.


Step 3

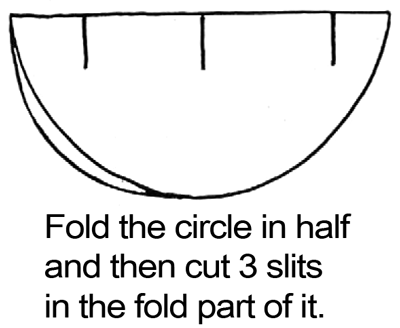
Fold the circle in half and then cut three slits in the fold part of it.

Fold the circle in half and then cut three slits in the fold part of it.


Step 4

Color in items.

Color in items.


Step 5

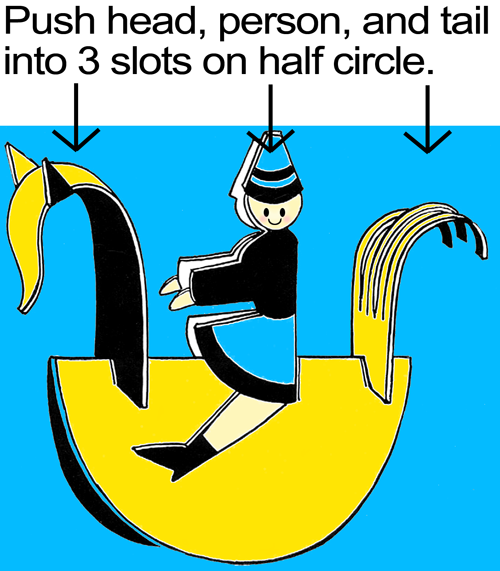
Push head, person and tail into 3 slots on half circle.

Push head, person and tail into 3 slots on half circle.


Finished Paper Rocking Horse Toy

And that’s it…. you just finished your Paper Rocking Horse Toy.  Notice how with just a tap of your finger the Rocking Horse actually rocks.  Have fun!!

Technorati Tags: , , , , , , , , , , ,

How to Crochet a Blanket for Beginners

Today I’m going to show you how to Crochet a Blanket for Beginners.  Crocheting a blanket is a lot of fun and it can also be totally relaxing.  Once you know how to crochet your choices of things you can make are limitless.  I will be showing you how to crochet a blanket using a much smaller version…. just to give you an idea.  Your blanket with be much wider than mine.  So, grab the materials needed and let’s get making a blanket.
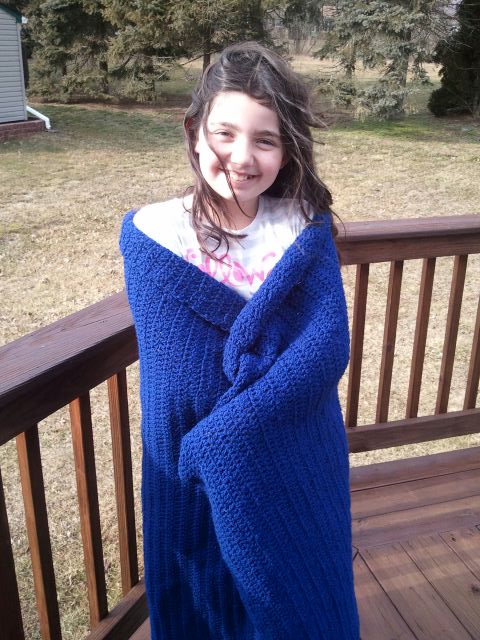
How to Crochet a Blanket for Beginners


Materials Needed

6 Skeins of Yarn (your choice in color)

5.5 mm Crochet Hook

Scissors


Step 1
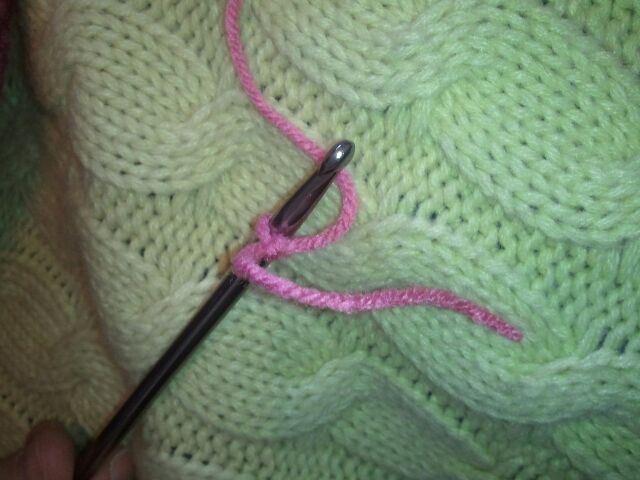
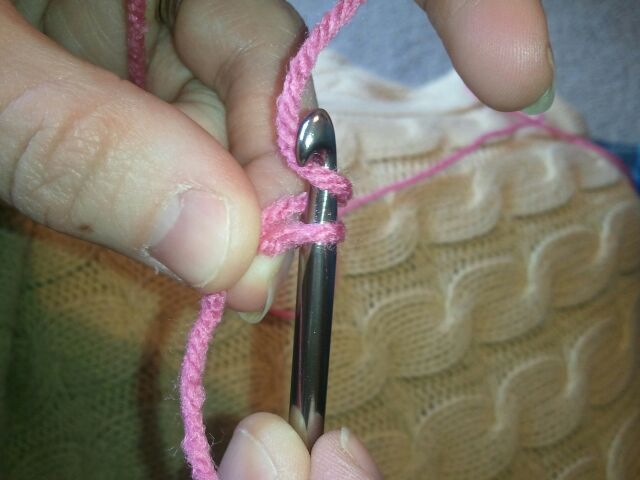
Knot yarn on crochet hook to begin.

Knot yarn on crochet hook to begin.

[ad#ahc]

Step 2
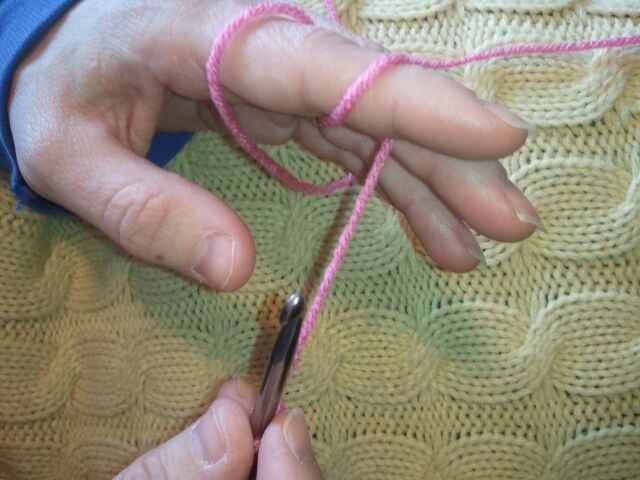
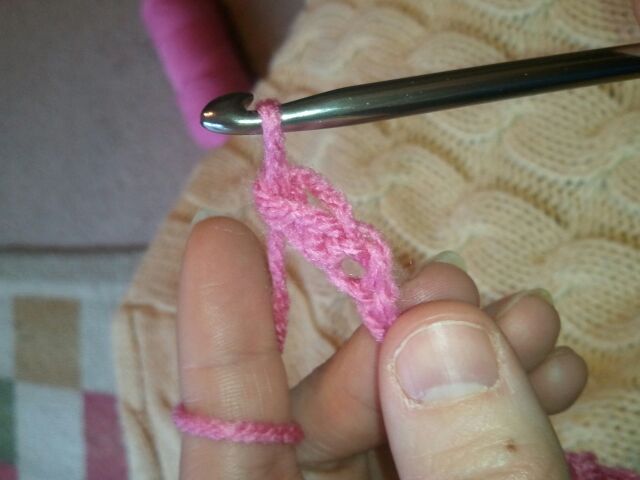
Wrap extra yarn around finger so that the yarn is pulled tight.

Wrap extra yarn around finger so that the yarn is pulled tight.


Step 3
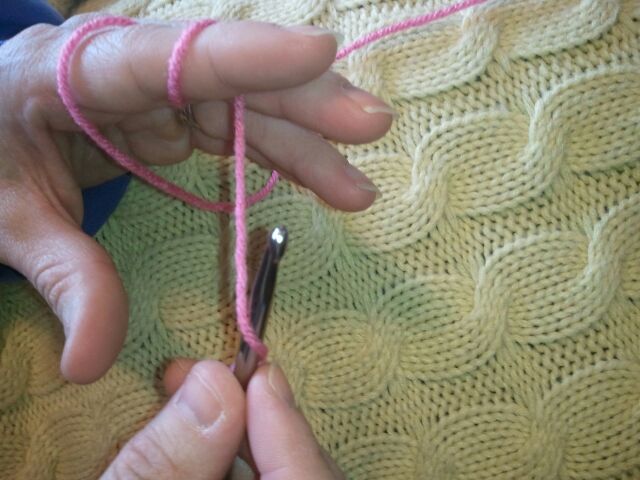
Go under the yarn.

Go under the yarn.


Step 4

Grab a hold of that loop with the hook.

Grab a hold of that loop with the hook.


Step 5
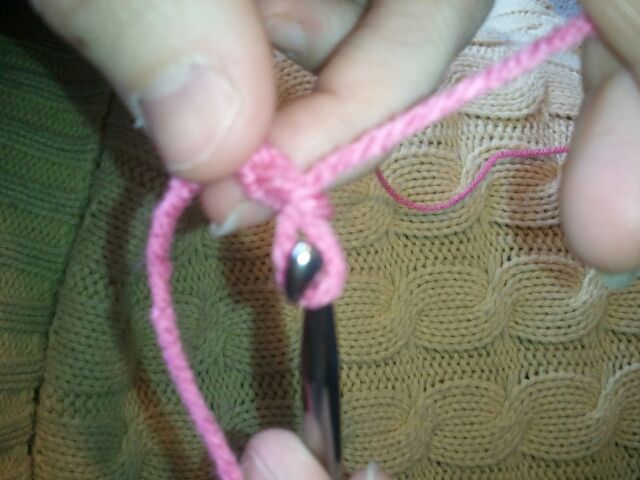
And, pull that loop through the loop you made with the original knot.

And, pull that loop through the loop you made with the original knot.


Step 6
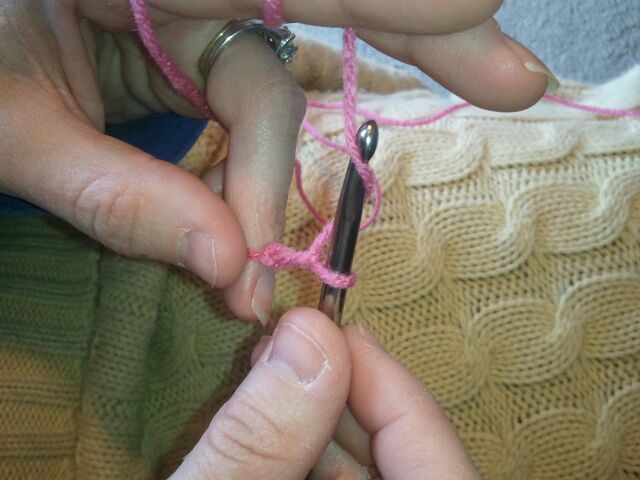
go under the yarn again

You just made your first stitch.  You will be making 135 of these stitches to make the width of the blanket. Now, go under the yarn again…


Step 7
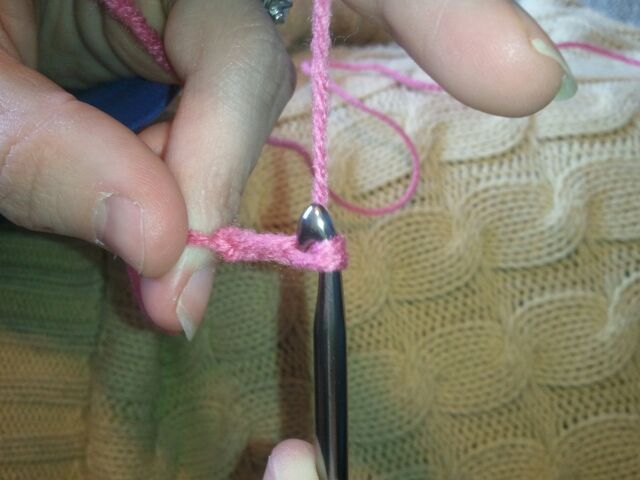
grab a hold of the yarn and pull it through the loop on the crochet hook.

…. and grab a hold of the yarn and pull it through the loop on the crochet hook.


Step 8
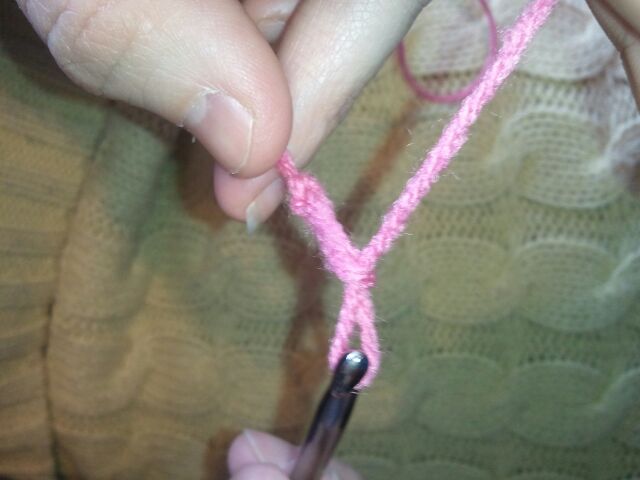
It should look like that

It should look like that once pulled through.


Step 9
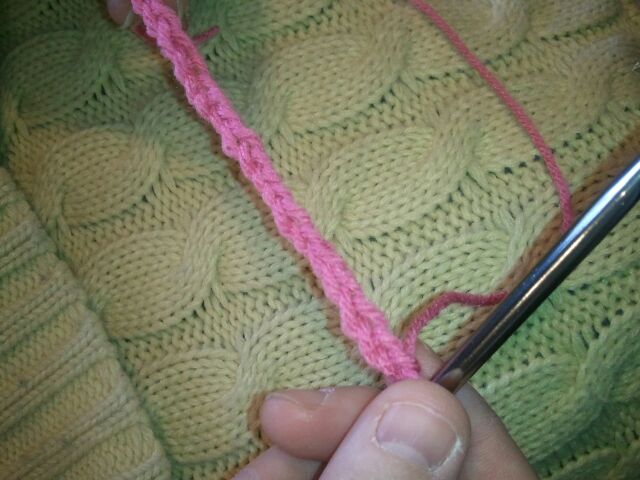
continue making these stitches until you have 135 of these stitches.

Now, continue making these stitches until you have 135 of these stitches.  This is your blanket’s width.


Step 10
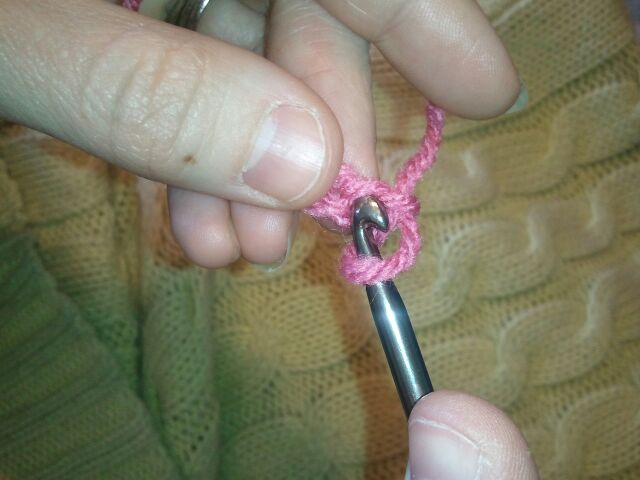
Push your hook through the first stitch of your crocheted blanket.

Now, this row is the most difficult of the entire blanket.  It is because you have the least amount of crocheted blanket to work with.  Push your hook into the first stitch of your blanket.


Step 11
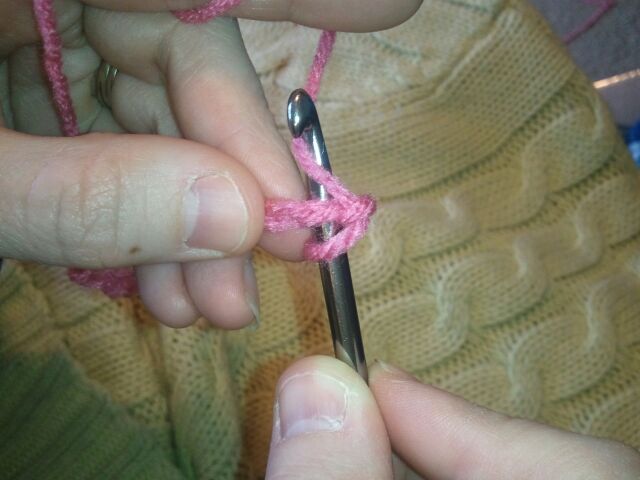
Go under the yarn and grab a hold of it.

Go under the yarn and grab a hold of it.


Step 12
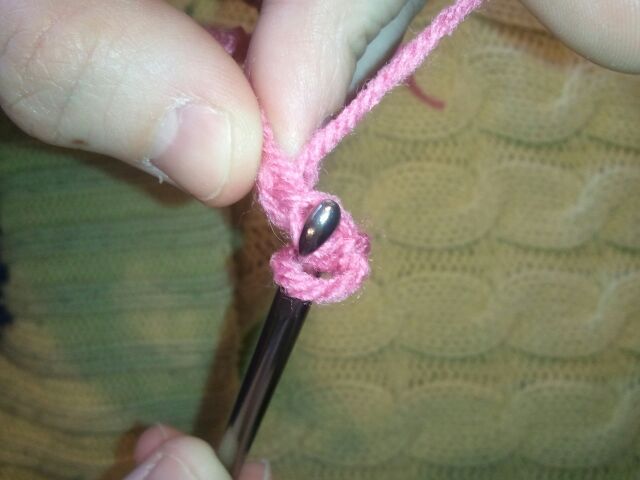
Pull that yarn through first stitch.

Pull that yarn through first stitch….. one of the loops on your crochet hook.  Do not go through both loops yet.


Step 13
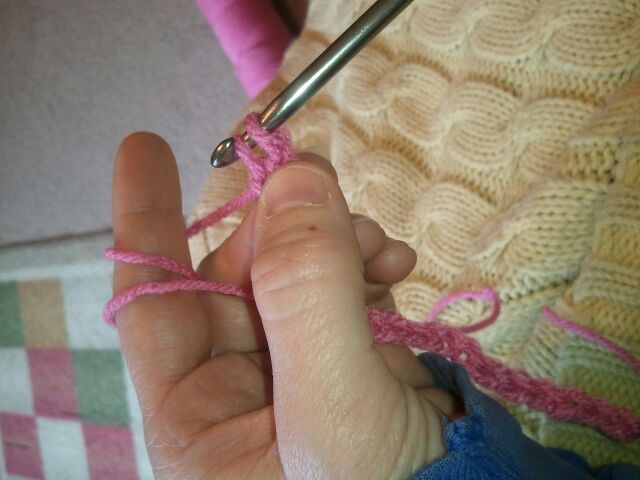
You will again have 2 loops on your crochet hook

You will again have 2 loops on your crochet hook.


Step 14
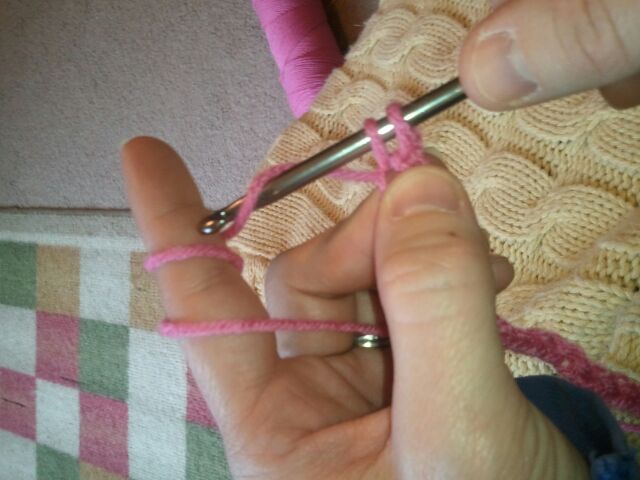
Go under yarn again with your hook.

Go under yarn again with your hook.


Step 15
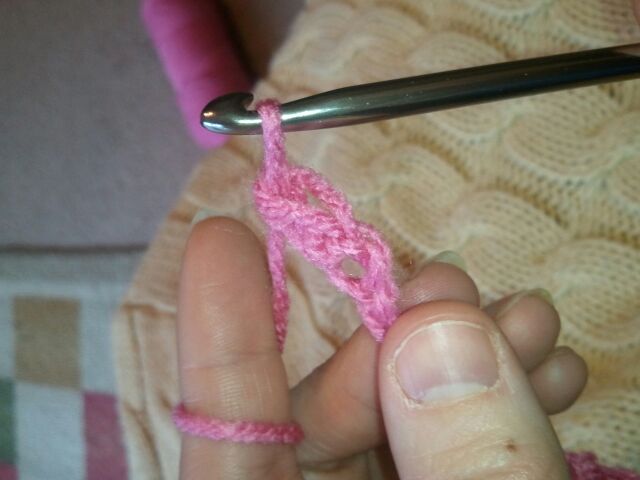
pull that yarn through both stitches on the crochet hook.

And, pull that yarn through both stitches on the crochet hook.


Step 16
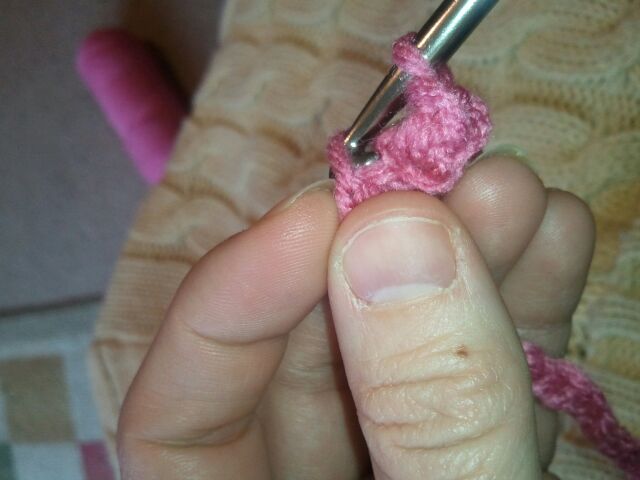
Push hook through 2nd stitch of crocheted blanket.

Push hook through 2nd stitch of crocheted blanket.


Step 17
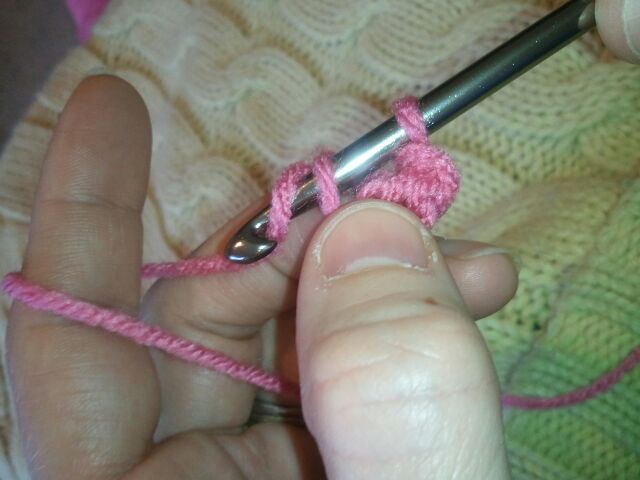
Go under yarn with hook.  Pull that yarn through the first loop on the crochet hook.

Go under yarn with hook.  Pull that yarn through the first loop on the crochet hook.


Step 18
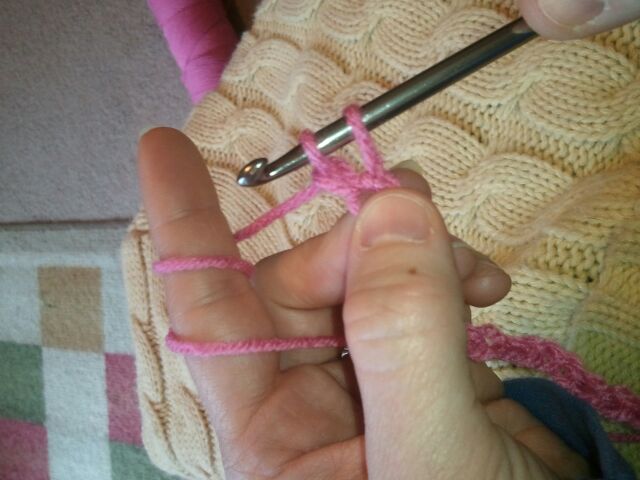
You now have 2 loops left on your crochet hook.

You now have 2 loops left on your crochet hook.


Step 19
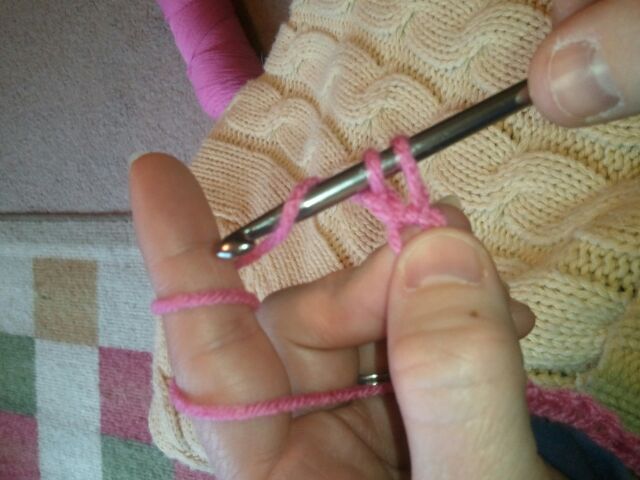
Go under yarn again.

Go under yarn again.


Step 20

pull yarn through both loops on crochet hook.

And, pull yarn through both loops on crochet hook.


Step 21
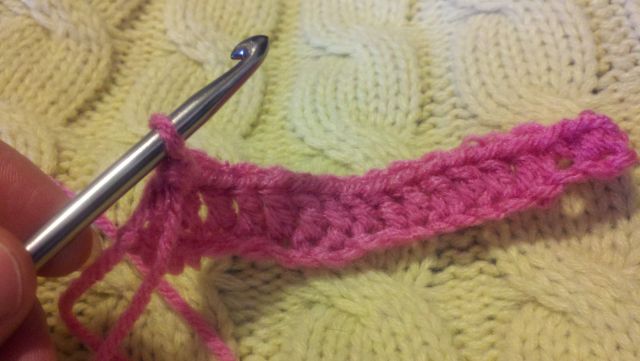
It should look like this when you reach the end of the 2nd row.

Continue doing this through every stitch on the first row of the blanket.  It should look like this when you reach the end of the 2nd row.  Your blanket will be a lot wider.  Remember, I am using a much shorter version, so it is easier to teach you.


Step 22
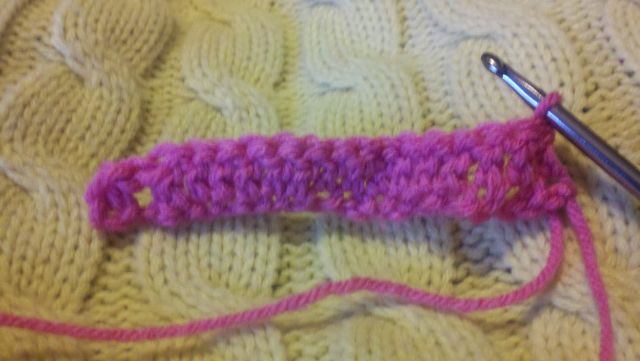
Turn the crocheted blanket over.

Turn over the blanket so that the crochet hook is back on the right side.


Step 23
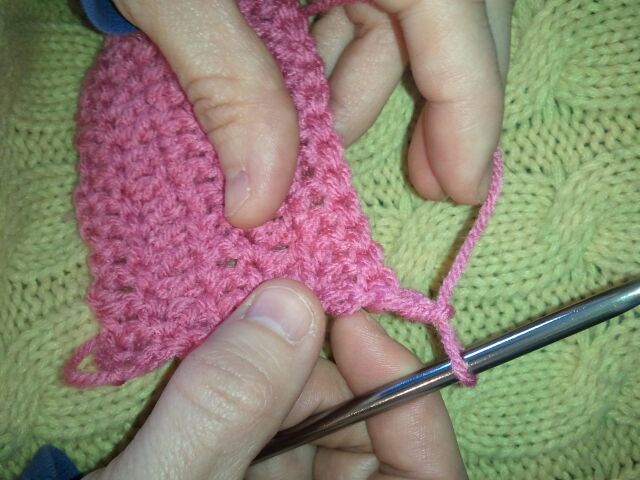
Add 2 chain stitches

Add 2 chain stitches like you did in step 2 through step 6.  You will do this every time you start a new row.


Step 24
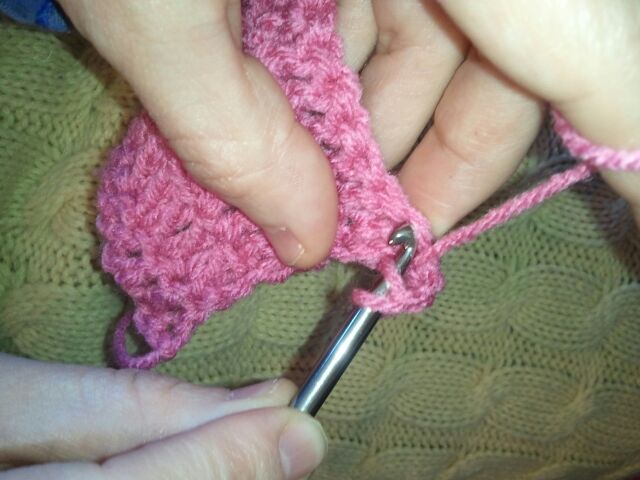
go into the first stitch of the previous row of the crocheted blanket like you did in step 10.

Go under the yarn with your hook…. grab a hold of the yarn and go into the first stitch of the previous row of the crocheted blanket like you did in step 10.


Step 25
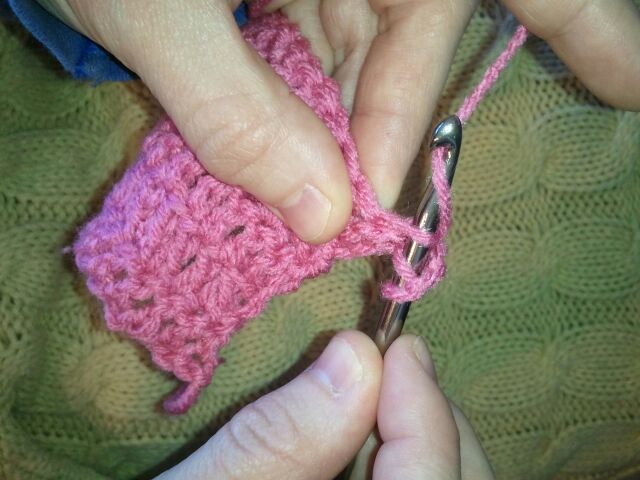
With your crochet hook through the first stitch grab a hold of the yarn with your hook.

With your crochet hook through the first stitch grab a hold of the yarn with your hook.


Step 26
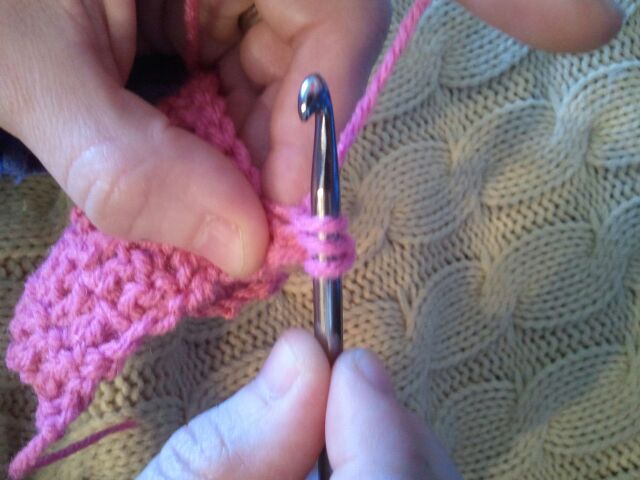
Pull the hook through the first loop on the crochet hook.

Pull the hook through the first loop on the crochet hook.  You are left with three loops on your hook.


Step 27
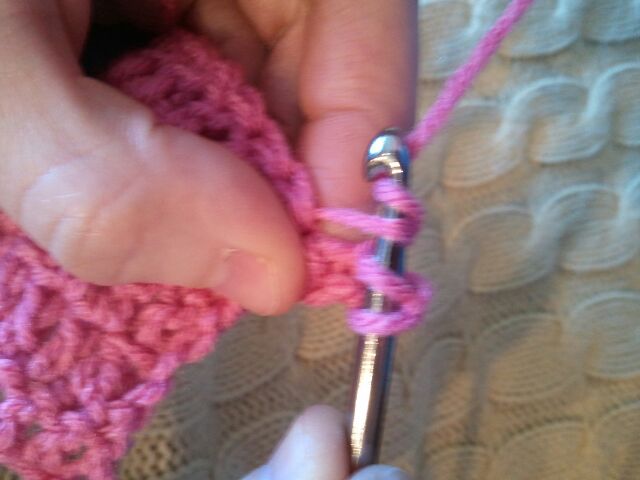
Go under the yarn again

Go under the yarn again….


Step 28

then pull the hook through the first two loops.

…. then pull the hook through the first two loops.  You are left with 2 loops on your hook.


Step 29
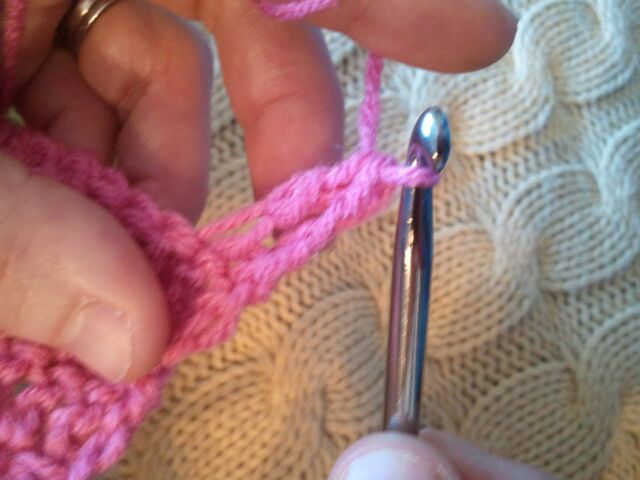
Go under the yarn with your hook and pull it through the last two loops on your hook.

Go under the yarn with your hook and pull it through the last two loops on your hook.  You are now left with one loop…. you are done with the stitch and ready to go into your 2nd stitch of the previous row like you did in Step 24.


Step 30
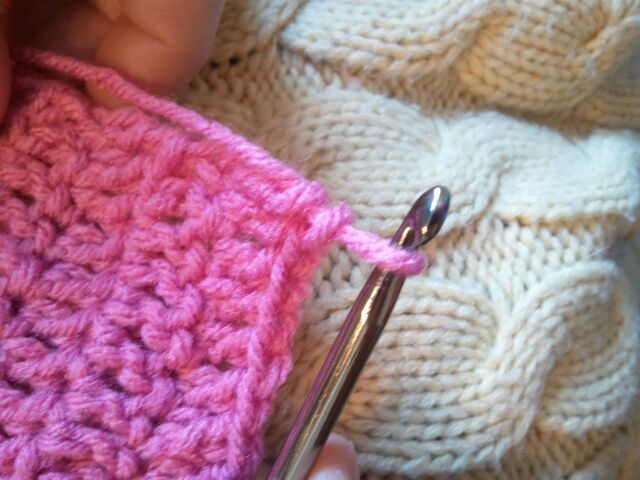
Keep doing this entire process until you finish this row of the blanket.

Keep doing this entire process until you finish this row of the blanket.


Step 31
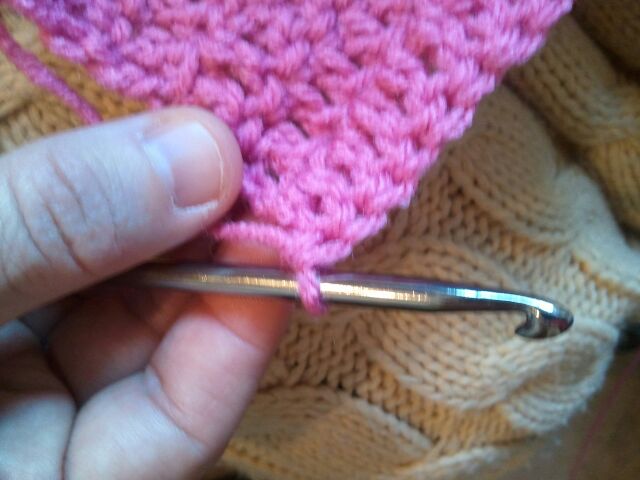
When you are finished with that row turn over your blanket so that the crochet hook is back on the right side.

When you are finished with that row turn over your blanket so that the crochet hook is back on the right side.  You are ready to start a new row.


Step 32
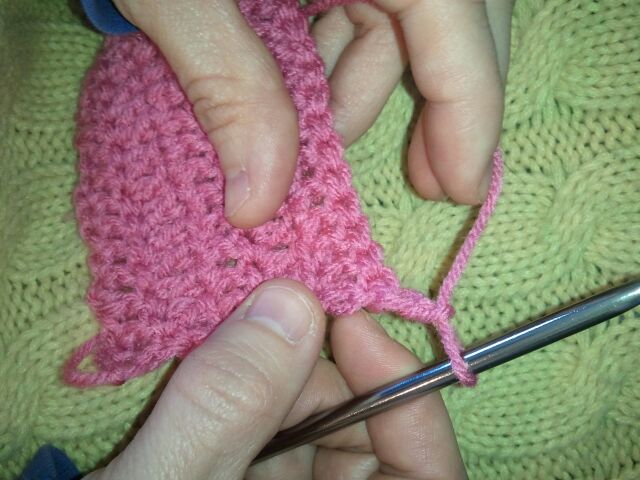
Remember when you start a new row you need to add 2 chain stitches like you did in Step 23.

Remember when you start a new row you need to add 2 chain stitches like you did in Step 23.  You need to do this every time you start a new row.


Step 33
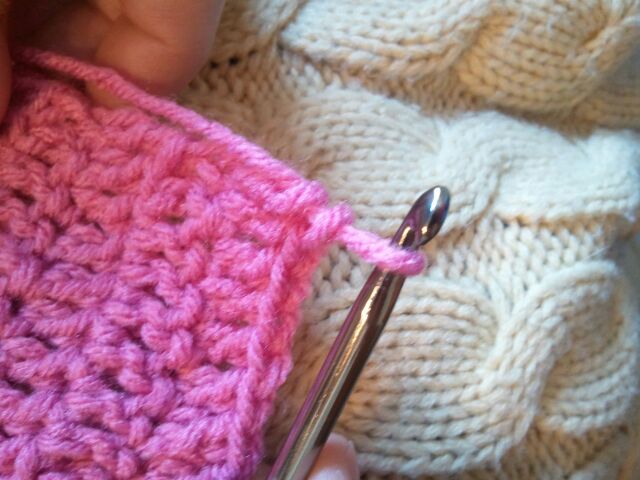
Continue doing Step 23 thru 31 for each row of the blanket.

Continue doing Step 23 thru 31 for each row of the blanket.  It will get easier as you go along as you will get more confident.  As you move along through your blanket you will find that you will need to add more yarn.  That is super easy.  Simply knot a new piece of yarn to the old and cut off the remaining string.  It’s that simple.


Step 34
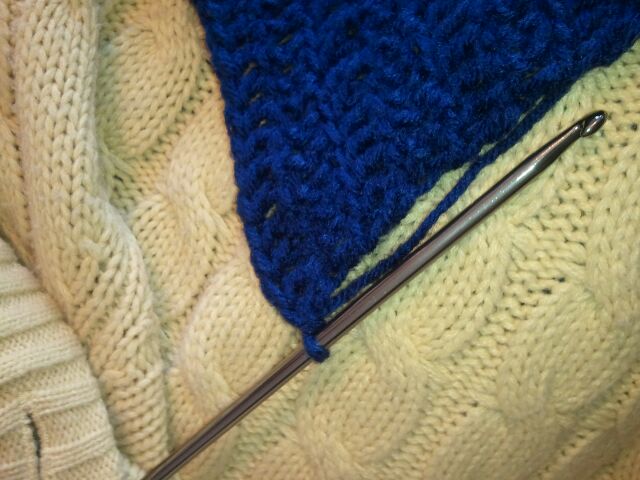
When you decide your crocheted blanket is finished you will want to end it correctly.

When you decide your crocheted blanket is finished you will want to end it correctly.  That is what I will show you now.


Step 35
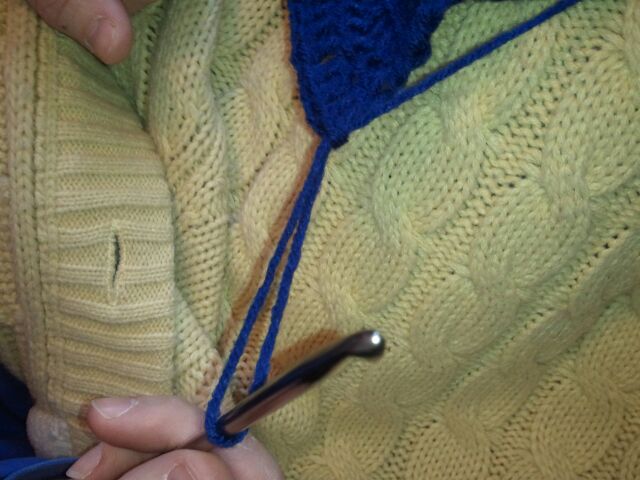
Pull crochet hook to give yourself a large loop to work with.

Pull crochet hook to give yourself a large loop to work with.


Step 36
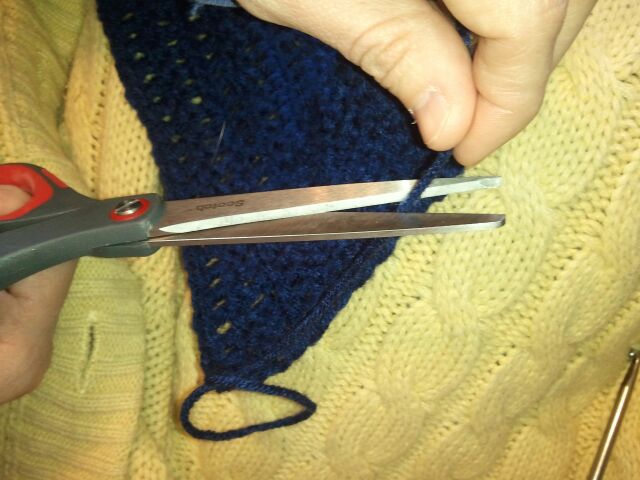
Cut the yarn to remove it from the skein of yarn.

Cut the string of yarn to remove it from the skein of yarn.  Leave enough of the string of yarn that you will be able to use it to tie a knot in the next few steps.


Step 37
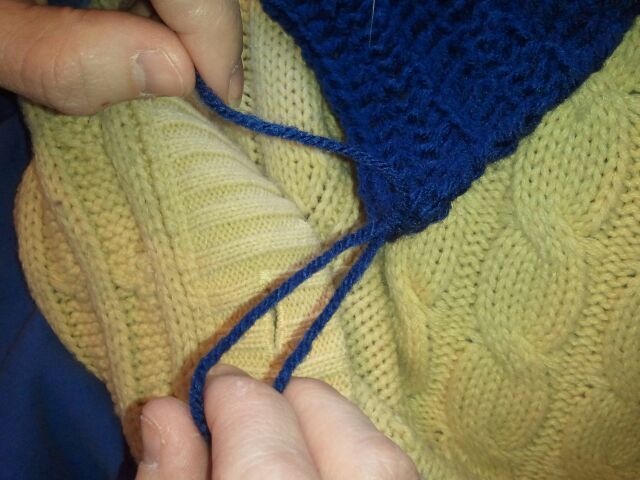
Grab a hold of the string of yarn and the loop of yarn.

Grab a hold of the string of yarn and the loop of yarn.  You are ready to tie a knot.


Step 38
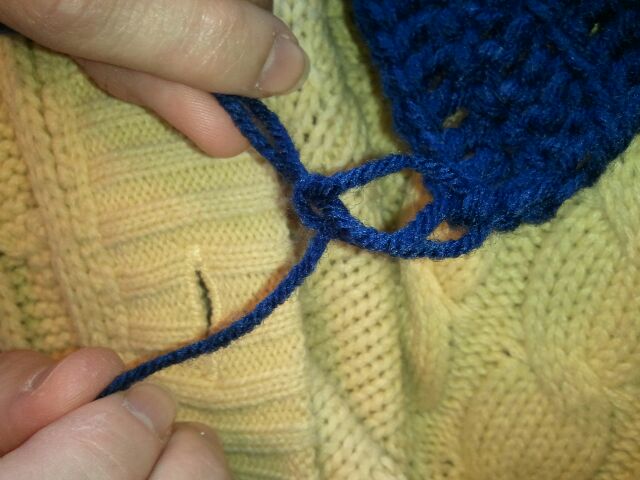
Tie a knot

Tie a knot with the string of yarn and the loop of yarn.


Step 39
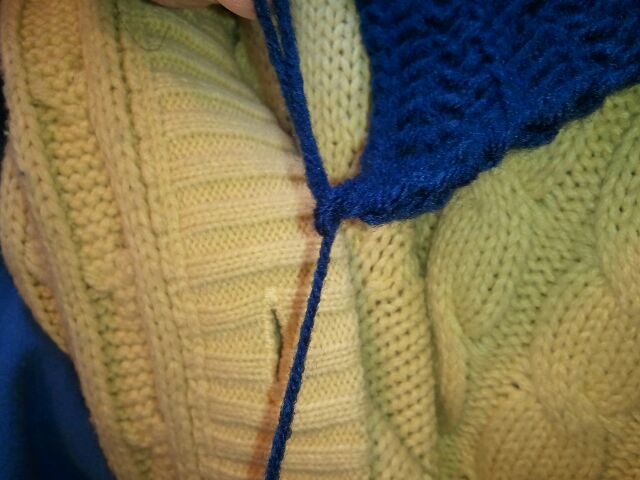
Pull the knot tight.

Pull the knot tight.


Step 40

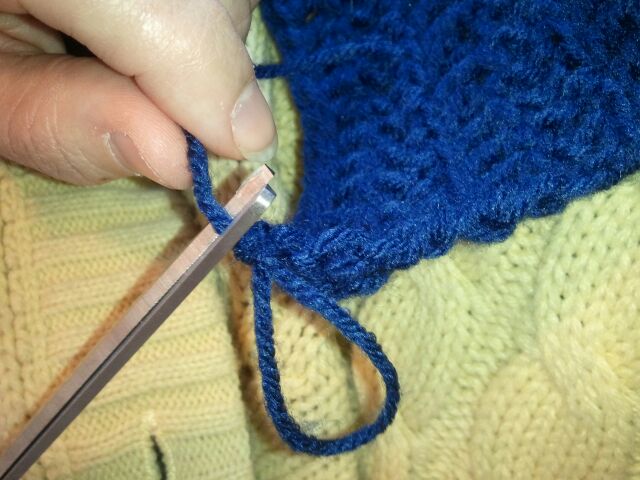
Once knot is made you can cut off remaining string of yarn and loop of yarn.

Once knot is made you can cut off remaining string of yarn and loop of yarn.


Step 41
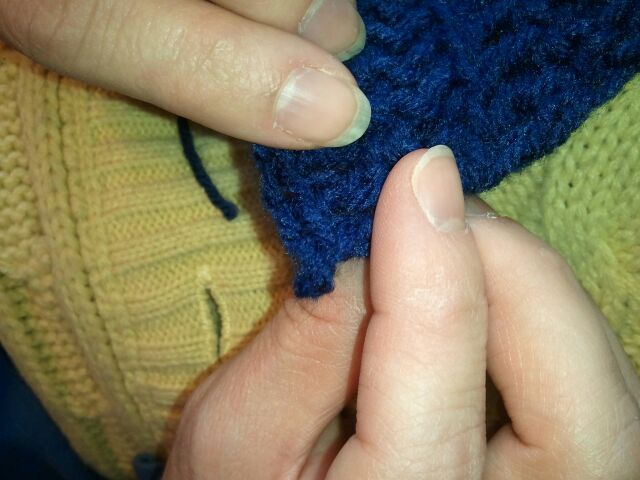
It should look like this now.

It should look like this now.  Your crocheted blanket is all finished.
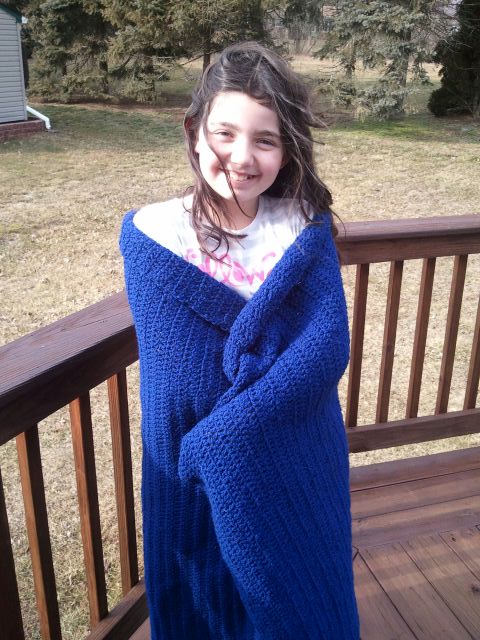
 

Finished Crocheted Blanket

And, that is it.  You have yourself a finished crocheted blanket that you made yourself.  The blanket itself is crocheted from one simple stitch and yet it comes out looking awesome!!  Please take a picture of your crocheted blanket and share it along with a comment in the comment section below…. I’d love to see a picture of your blanket.

Technorati Tags: , , , , , , , , , , , , , , , ,

How to Make a Clothespin Butterfly

Spring is right around the corner…. it is literally days away.  In honor of Spring today I’m going to show you how to make a Clothespin Butterfly.  This craft is super simple, but it is equally that much fun too.  Make a few of these Clothespin Butterflies and decorate your house or your entire bedroom.  These Clothespin Butterflies when hung up are sure to get you in the Spring mood.  So, grab the materials needed and let’s get started.

Check out our other Spring Crafts.

How to Make a Clothespin Butterfly


Materials Needed

Paper

Clothespin

Pencil

Scissors

Crayons or Markers

Glue

Pipe Cleaner


Step 1

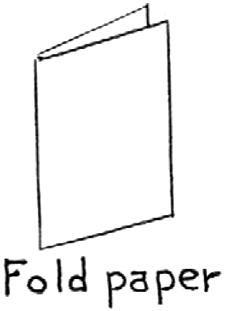
Fold paper.

Fold paper.

[ad#ahc]

Step 2

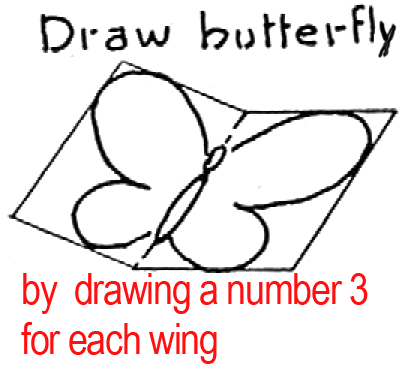
Draw butterfly by drawing a number 3 for each wing.

Draw butterfly by drawing a number 3 for each wing.


Step 3

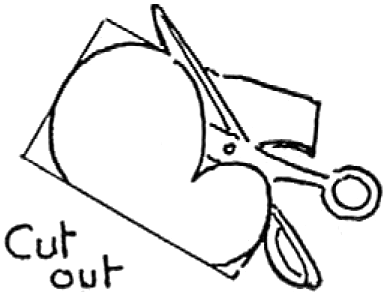
Cut it out.

Cut it out.


Step 4

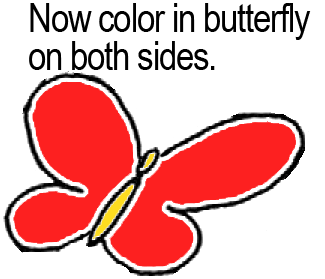
Now color in butterfly on both sides.

Now color in butterfly on both sides.


Step 5

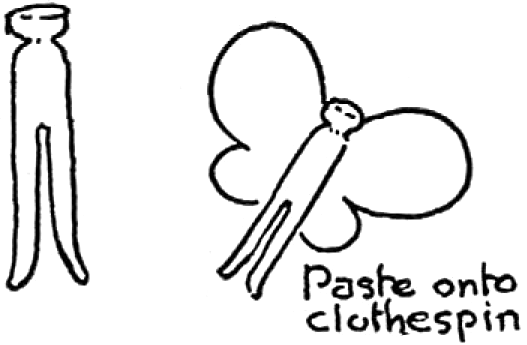
Paste onto clothespin.

Paste onto clothespin.

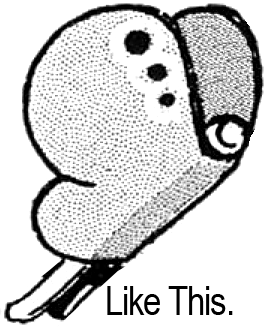
Like this.

Like this.


Step 6

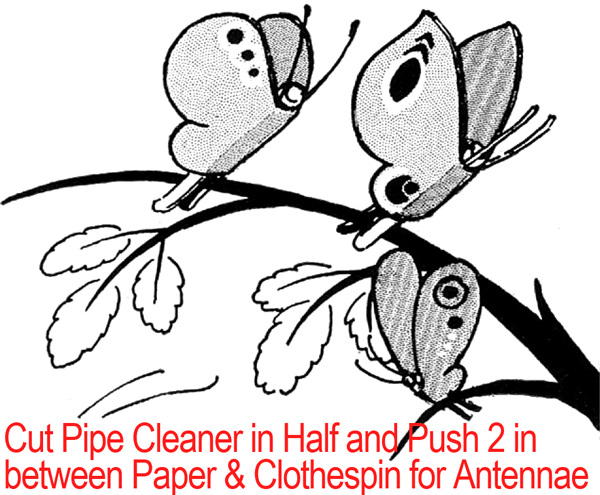
Cut pipe cleaner in half and push 2 in between paper and clothespin for antennae.

Cut pipe cleaner in half and push 2 in between paper and clothespin for antennae.

Now your Clothespin Butterfly is all finished.  Didn’t it turn out adorable?  Make a few and decorate your house this Spring.  These butterflies are sure to get you in the Spring spirit.

Technorati Tags: , , , , , , , , ,

How to Make an Origami Shamrock

St. Patrick’s Day is just days away.  And, when you think of St. Patrick’s Day what do you think of?  I know what I think of…. Shamrocks!!  So, in honor of Shamrocks and St. Patrick’s Day I’m going to show you how to make an Origami Shamrock.  This Origami Shamrock will be perfect to hang up for St. Patrick’s Day or even use as a bookmark.  So, grab some Origami Paper and some glue and let’s get started with this craft.

Check out our other Origami & Paper Folding Activities & St. Patrick’s Day Crafts.

How to Make an Origami Shamrock


Materials Needed

5 Sheets Green Origami Paper

Glue


Step 1

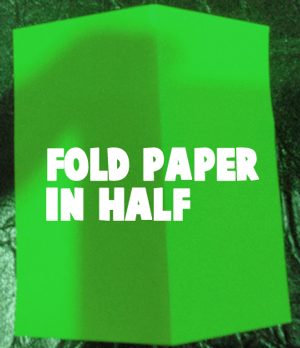
Fold paper in half.

Fold paper in half.

[ad#ahc]

Step 2

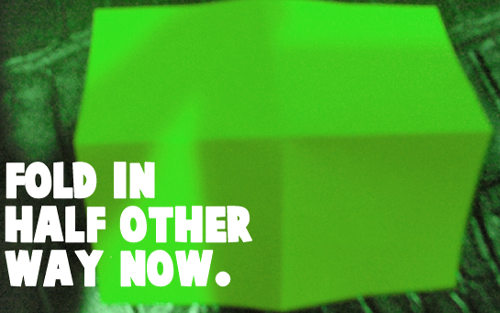
Fold in half the other way now.

Fold in half the other way now.


Step 3

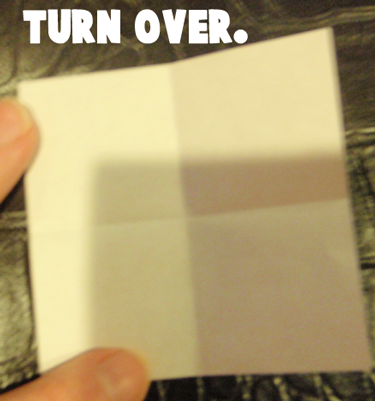
Turn over.

Turn over.


Step 4

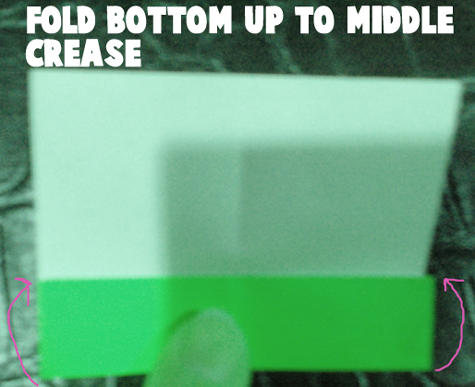
Fold bottom up to middle crease.

Fold bottom up to middle crease.


Step 5

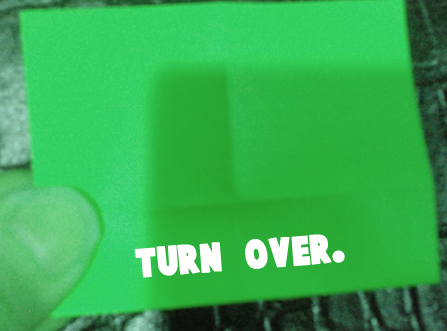
Turn over.

Turn over.


Step 6

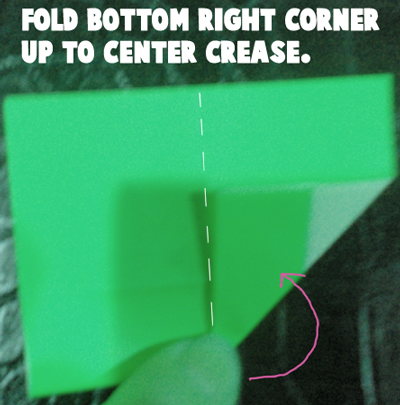
Fold bottom right corner up to center crease.

Fold bottom right corner up to center crease.


Step 7

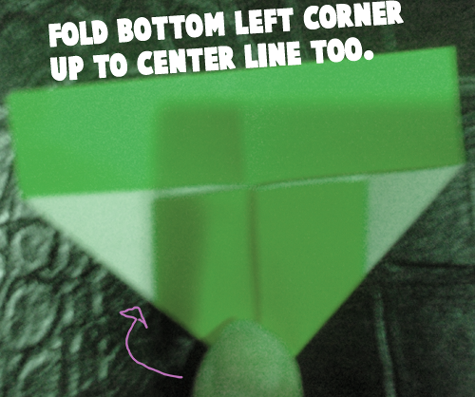
Fold bottom left corner up to center line too.

Fold bottom left corner up to center line too.


Step 8

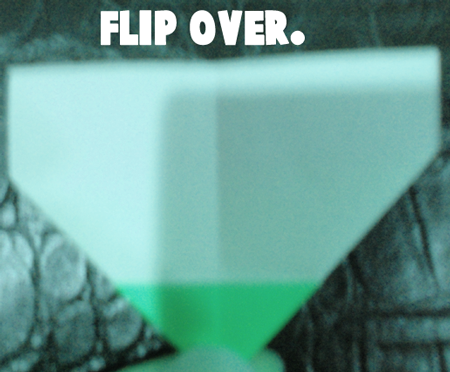
Flip over.

Flip over.


Step 9

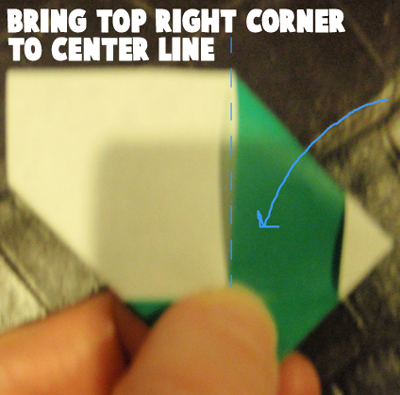
Bring top right corner to center line.

Bring top right corner to center line.


Step 10

Now bring left top corner over to center line too.

Now bring left top corner over to center line too.


Step 11

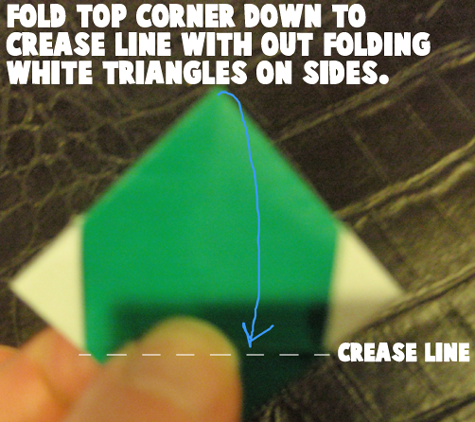
Fold top corner down to crease line without folding white triangles on sides.

Fold top corner down to crease line without folding white triangles on sides.

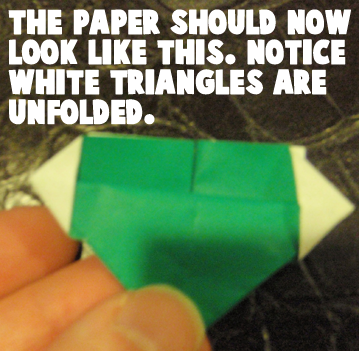
The paper should now look like this.

The paper should now look like this.  Notice white triangles are unfolded.


Step 12

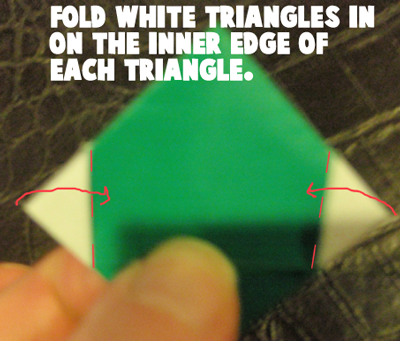
Fold white triangles in on the inner edge of each triangle.

Fold white triangles in on the inner edge of each triangle.

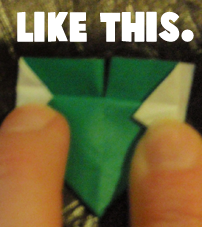
Like this.

Like this.


Step 13

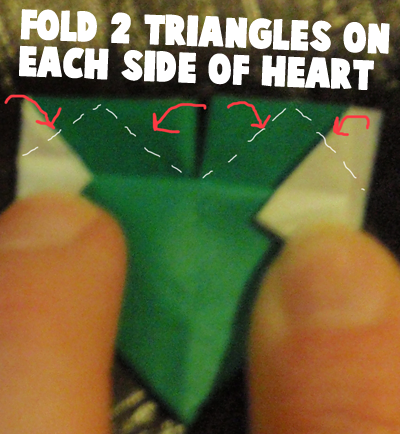
Fold 2 triangles on each side of heart.

Fold 2 triangles on each side of heart.

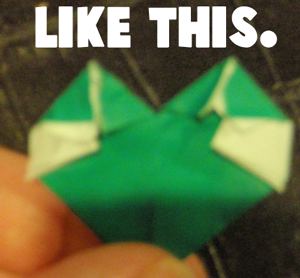
Like this.

Like this.


Step 14

Now fold down top a bit to make less pointy.

Now fold down top a bit to make less pointy.


Step 15

It should look like this.

It should look like this.


Step 16

Make four hearts and then place them like this.

Make four hearts and then place them like this.


Step 17

For stem, place origami paper green side down.

For stem, place origami paper green side down.

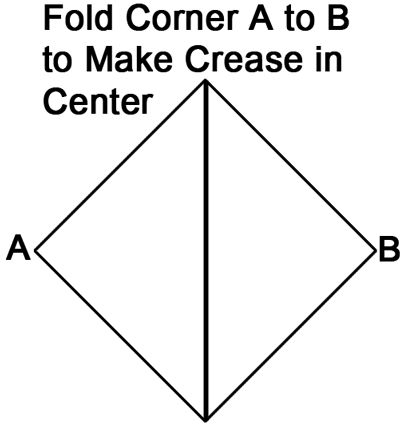
Fold corner A to B to make crease in center.

Fold corner A to B to make crease in center.

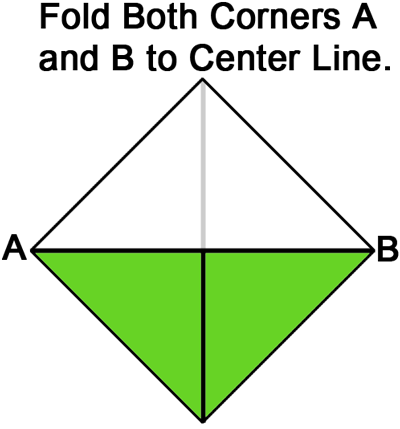
Fold both corner A and B to center line.

Fold both corner A and B to center line.

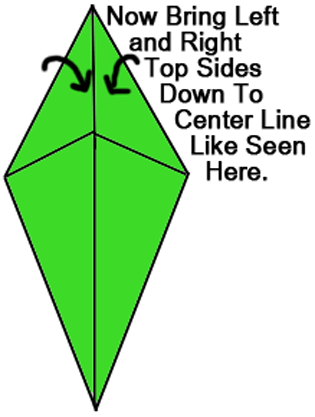
Now bring left and right top sides down to center line

Now bring left and right top sides down to center line like seen here.

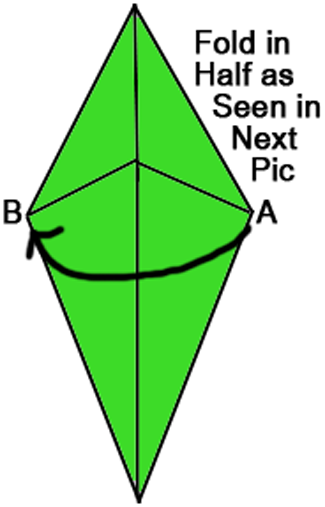
Fold in half as seen in next picture.

Fold in half as seen in next picture.

Like this.

Like this.

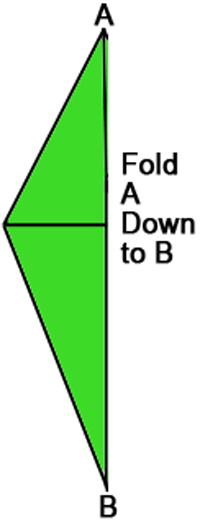
Fold A down to B.

Fold A down to B.

Like this.

Like this.


Step 18

Now place triangle over hearts.

Now place triangle over hearts.


Step 19

Glue all together.

Glue all together.


Step 20

Turn over.

Turn over.


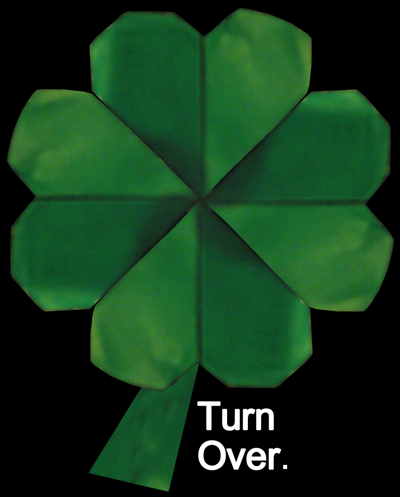
Finished Origami Shamrock

And, there you have it…. you just finished your Origami Shamrock.  Isn’t it adorable?  How did it turn out for you?  Let me know in the comments below.  And, don’t forget to take a picture of it too and post that as well in the comments…. I’d love to see it.

Technorati Tags: , , , , , , , , , , , , , , , ,

How to Make Paper Strip Belts and Bracelets

In this post I will be showing you how to make a Paper Strip Belt or Bracelet.   The choice is really yours weather you make a belt or a bracelet.  You simply will need to adjust the amount of colored paper you use for the project…. less for the bracelet and more for the belt.  Make a few and give them to your friends or loved ones…. anyone would be sure to enjoy them.  So, grab the materials needed and let’s get started with this fun craft.
Check out our other Friendship Bracelet Instructions.

How to Make Paper Strip Belts and Bracelets


Materials Needed

Thin Colored Paper, Magazine or Cellophane

Cord or Ribbon


Step 1

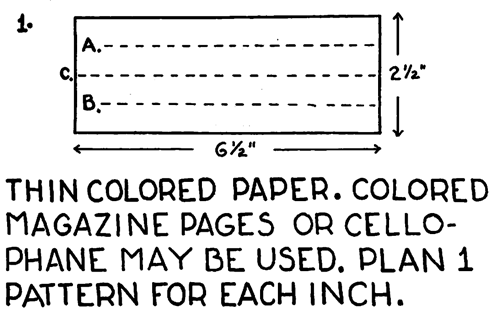
Thin colored paper, colored magazine pages or cellophane may be used.

Thin colored paper, colored magazine pages or cellophane may be used.  Plan 1 pattern for each inch.

[ad#ahc]

Step 2

Fold on 'A' and 'B' toward 'C'.

Fold on ‘A’ and ‘B’ toward ‘C’.


Step 3

Fold again on 'C'.

Fold again on ‘C’.


Step 4

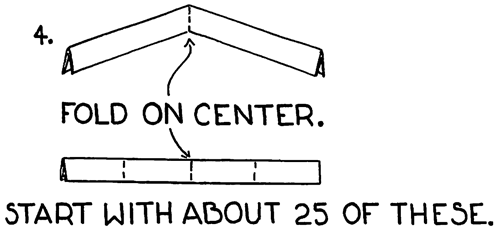
Fold on center.

Start with about 25 of these.  Fold on center.


Step 5

Fold both ends toward the center.
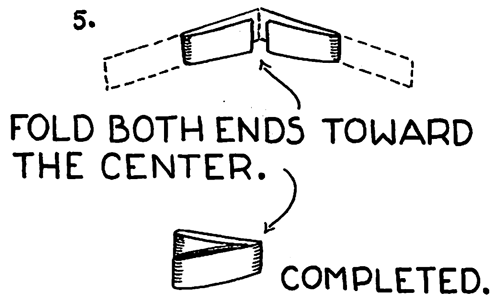
Fold both ends toward the center.  Completed.
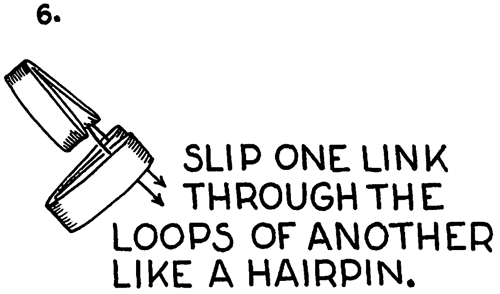
 

Step 6

Slip one link through the loops of another like a hairpin.

Slip one link through the loops of another like a hairpin.


Step 7

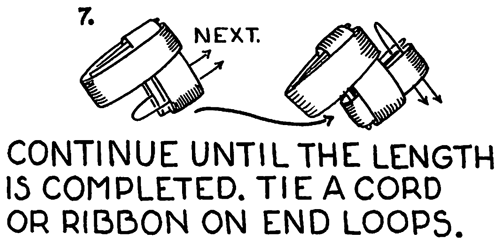
Continue until the length you desire is completed.

Continue until the length you desire is completed.


Step 8

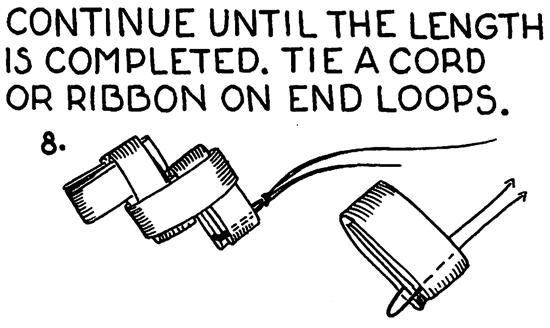
Tie a cord or ribbon on end loops.

Tie a cord or ribbon on end loops.


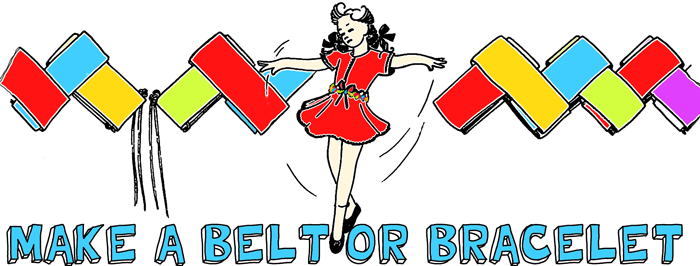
Completed Paper Link Belt or Bracelet

And, there you go…. you just finished making your Paper Strip Belt or Bracelet.  Wasn’t that fun?  The question I have for you though is…. Did you make a belt or a bracelet?  Let me know in the comments below.  Wear it proudly.

Technorati Tags: , , , , , , , , , , , , , ,

How to Make Plaster Castings of Animal Tracks or Handprints

Making Plaster of Paris castings can be a fun activity…and also a great Boy Scouts craft. You can make a keepsake craft by casting your handprints or footprints for your mom or dad. Parents love tracking the growth of their children’s hands and feet. You could also use plaster for a fun outside activity. How about making a cast of animal tracks? First you need to go outdoors and look for animal footprints…and then let the plaster do the rest. Find out how to make casts of handprints / footprints / and animal tracks below. Have fun.

How to Make Plaster Castings of Animal Tracks or Handprints

How to Make Plaster Castings of Animal Tracks or Handprints

HOW TO MIX PLASTER

Pour a little water into a can and sprinkle plaster of Paris, in small quantities. into it. Keep sprinkling in plaster until plaster rises above the water’s surface. Stir gently with a stick so as not to cause air bubbles. Use plaster immediately when made or it will harden. Caution—Never pour unused plaster down a drain or it will clog it.

CRAFTS MATERIALS NEEDED

Plaster of Paris

Water

Can

Stick

Cardboard

Paper Clip

CASTING ANIMAL TRACKS or YOUR HANDPRINTS

Step 1

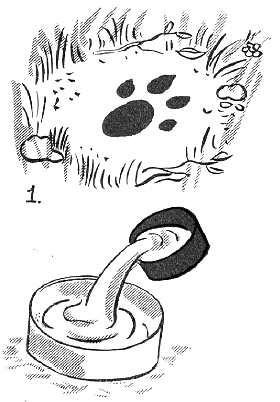
clean area around it from dirt and twigs

[ad#ahc]

When you’ve found a good animal track you’d like to preserve, clean area around it from dirt and twigs, as in Figure 1.

Step 2

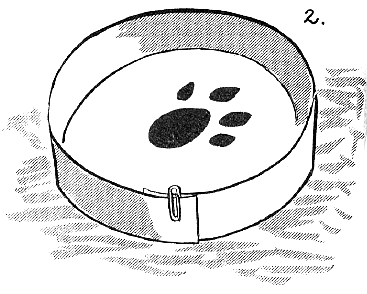
 Fasten ends of collar with a paper clip

Make a collar around the track with a  1 inch strip of cardboard. Fasten ends of collar with a paper clip, as in Figure 2.

Step 3

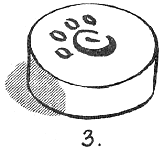
Wash off dirt and paint cast with chosen colors.

Mix the plaster and pour immediately first around track, then into the track. Allow plaster to harden for about an hour, then peel off cardboard collar. Wash off dirt and paint cast with chosen colors.

Technorati Tags: , , , , , , , ,

How to Make a Collage for Pi Day 3-14

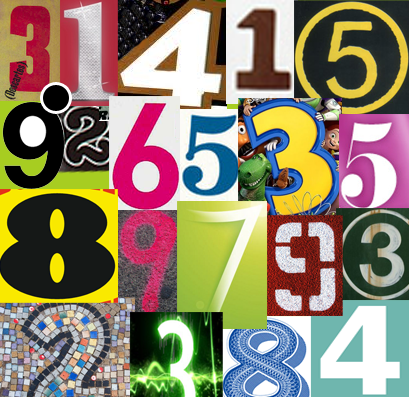
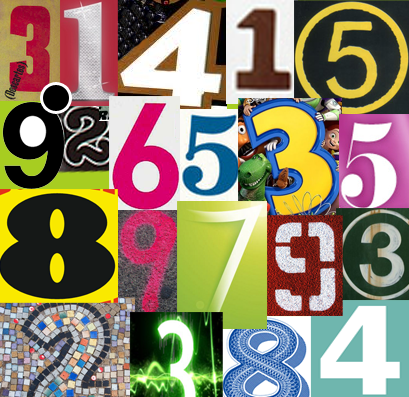
Today is 3/14….. do you know what that means?  It’s Pi Day.  π (or Pi) is a mathematical constant that is the ratio of any circle’s circumference to its diameter. π is approximately equal to 3.14.  I know it sounds confusing, but in mathematics it is one of the most important mathematical constants.  So, since today is March 14th or 3-14 it is considered Pi Day.  With that being said we are going to work on a collage surrounding all the numbers in Pi.  So, grab the materials needed and let’s get started.

How to Make a Collage for Pi Day 3-14


Materials Needed

Magazines, Brochures, Leaflets, Advertisements

Scissors

Glue

Paper


Step 1

Go through your magazines, leaflets, brochures and advertisements and find the numbers in Pi….. cut them out.  The numbers in Pi are the following:  3.141592653589793238462643383279502884197169399375105820974944592307816406286208998628
034825342117067982148086513282306647093844609550582231725359408128481117450284102701938
521105559644622948954930381964428810975665933446128475648233786783165271201909145648566
923460348610454326648213393607260249141273724587006606315588174881520920962829254091715
3643678925903600113305305488204665213841469519415116094330572703657595919530921861173819
3261179310511854807446237996274956735188575272489122793818301194912983367336244065664308
6021394946395224737190702179860943702770539217176293176752384674818467669405132000568127
1452635608277857713427577896091736371787214684409012249534301465495853710507922796892589
23542019956112129021960864034418159813629774771309960518707211349999998372978049951059731
7328160963185950244594553469083026425223082533446850352619311881710100031378387528865875
3320838142061717766914730359825349042875546873115956286388235378759375195778185778053217
12268066130019278766111959092164201989

Now, obviously Pi is an extremely long number.  Feel free to use as many numbers as you would like on your collage.

[ad#ahc]

Step 2

Glue your Pi numbers in order to a piece of paper.


Step 3

Let your Pi collage dry and then hang it up proudly to celebrate Pi Day.

Pi Day Collage

Technorati Tags: , , , , , , , , , , , , , , ,

How to Make a Paper Spinner

I have a fun craft for you today.  And, the cool part is it is just made with some standard paper and a pair of scissors.  I am going to show you how to make a Paper Spinner.  When made correctly you simply throw it up in the air and watch it spin gracefully the whole way down.  I don’t know what’s more fun….. the making of the craft or playing with the craft once it is finished.  So, grab some paper and a pair of scissors and let’s get started.

Check out our other Paper Folding Activities.

How to Make a Paper Spinner


Materials Needed

Paper

Scissors


Step 1

cut two slits towards the center

About a quarter of the way down from the top edge of the long paper, cut two slits towards the center, leaving some space between the ends of the slits.

[ad#ahc]

Step 2

Pleat one bottom section to the exact width of that space.

Pleat one bottom section to the exact width of that space.


Step 3

Then fold the other bottom section around it.

Then fold the other bottom section around it.  This produces a folded paper shape exactly like a letter “T,” the one unfolded part being the cross-at the top.


Step 4

To keep the folded segment firmly fixed, cut a short slit upwards from the bottom at the exact center.

To keep the folded segment firmly fixed, cut a short slit upwards from the bottom at the exact center. This should be about 1/2 inch or 3/4 inch in length, or even longer, with a large sheet of paper.


Step 5

Then fold one tab upward to the front, the other upward to the back

Then fold one tab upward to the front, the other upward to the back, as in the image above.  This holds the pleated portion in place, as required.


Step 6

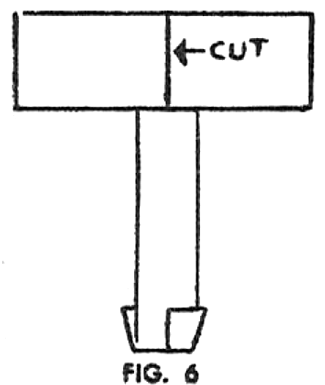
Take the scissors and make a center cut down from the top of the "T" to the folded section.

Take the scissors and make a center cut down from the top of the “T” to the folded section.


Step 7

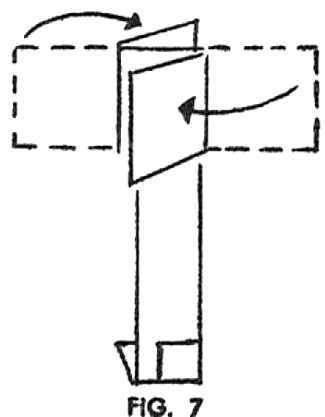
This forms two rectangular "blades" at the top.

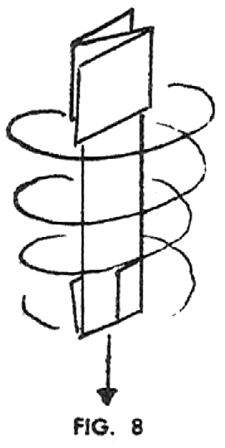
This forms two rectangular “blades” at the top. Fold one of these downwards to the front; the other downwards to the back. These folds are made along the short uncut strip where the cross-bar of the “T” joins the folded upright, or “post” of the spinner. This is shown in the image above.  The fact that the blades are flimsy does not matter. On the contrary, it proves helpful towards the spinner’s flight.


Step 8

give it a short toss straight upward.

Holding the spinner with the post upright and the blades at the top, give it a short toss straight upward. As it descends, it will begin to spin, its rotary action slackening its fall.  The folded tabs at the bottom set like stabilizers during the brief but intriguing flight. When dropped from a window, a spinner may cover more range before reaching the ground.

And, there you have it….. you just made a Paper Spinner.  Isn’t it fun to play with?  How did your Paper Spinner turn out?  Let me know in the comments below.

Technorati Tags: , , , , , , , , , , , , , ,

How to Make Origami Boats

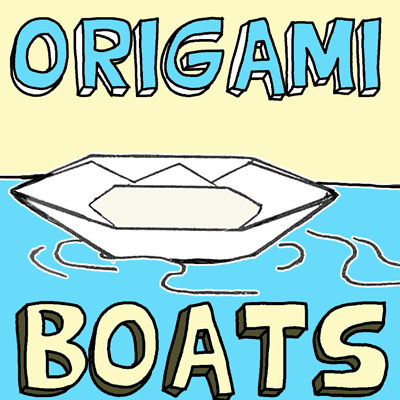
Today I’m going to show you how to make Origami Boats.  When made with waterproof paper like waxed paper or cellophane these Origami Boats will actually float.  Use them in the bathtub or in a puddle outside.  Not only is this craft fun to make, but it is equally fun to play with the Origami Boat once made.  You can even add toothpicks to the boat to give the illusion that the boat has oars.  So, grab the materials needed for this craft and let’s get started.

Check out our other Origami Crafts.

How to Make Origami Boats


Materials Needed

Waxed Paper, Cellophane, or Other Waterproof Paper

Toothpicks (optional)


Step 1

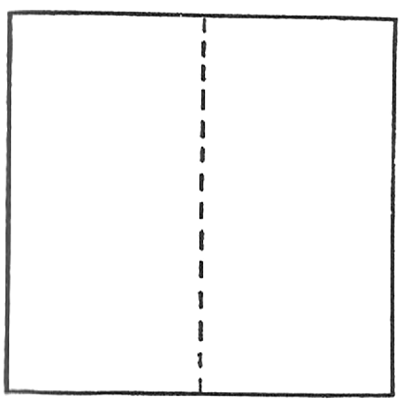
Fold a square in half and crease...then unfold.

Fold a square in half and crease…then unfold.

[ad#ahc]

Step 2

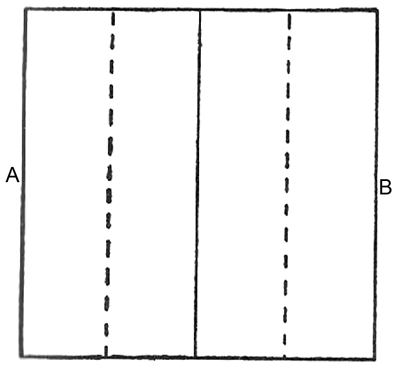
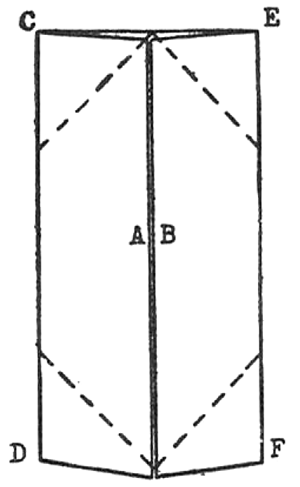
Bring lines A and B to center fold and crease.

Bring lines A and B to center fold and crease.


Step 3

Fold on diagonal dotted lines, bringing points C, D, E and F to the center line and crease.

Fold on diagonal dotted lines, bringing points C, D, E and F to the center line and crease.


Step 4

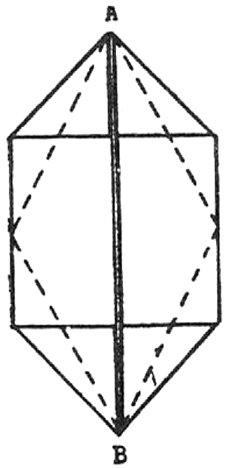
Fold on dotted lines.

Fold on dotted lines.


Step 5

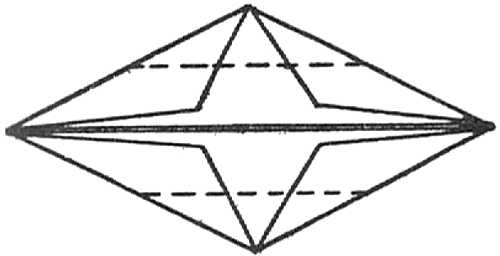
Fold again on dotted lines.

Fold again on dotted lines.


Step 6

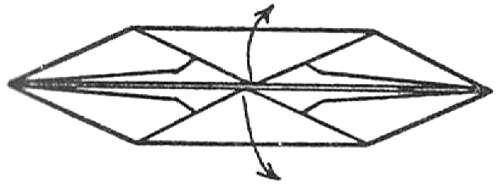
Turn boat inside out, holding folds carefully to prevent tearing.

Turn boat inside out, holding folds carefully to prevent tearing.


Step 7

Finished boat, ready for the bathtub or after-rain puddle.

Finished boat, ready for the bathtub or after-rain puddle.  If you wish, use the toothpicks to make the boat look more authentic…. the toothpicks can be the oars.  Enjoy!!

Technorati Tags: , , , , , , , , , , , ,

How to Make Paper Sculpture Birds

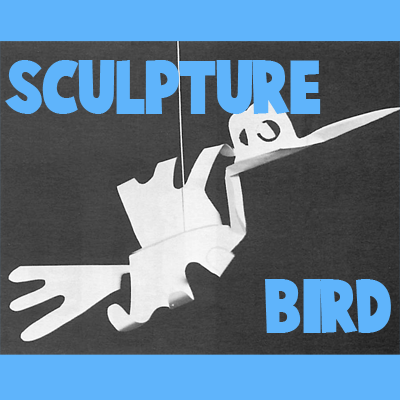
Today I have a fun craft for you.  I’m going to show you how to make a Paper Sculpture Bird.  When made correctly the birds are 3 dimensional and look so cool hanging from a ceiling.  These Paper Sculpture Birds can be used to decorate a classroom or  child’s bedroom.  A great number of birds and animals can be made by using this technique…. so feel free to use your imagination,  Grab the materials needed and let’s get started.

Check out some other Paper Folding Activities.

How to Make Paper Sculpture Birds


Materials Needed

8 1/2″ x 11″ typewriting or mimeograph paper

Scissors

Ruler

Pencil Paper punch

Thread


Step 1

8 1/2 x 11" typewriting paper is folded in half and a freehand cut is made to suggest the bird form.

8 1/2 x 11″ typewriting paper is folded in half and a freehand cut is made to suggest the bird form.

A paper punch is used to make the eyes.

A paper punch is used to make the eyes.

[ad#ahc]

Step 2

Unfolding the paper reveals a symmetrical design.

Unfolding the paper reveals a symmetrical design.


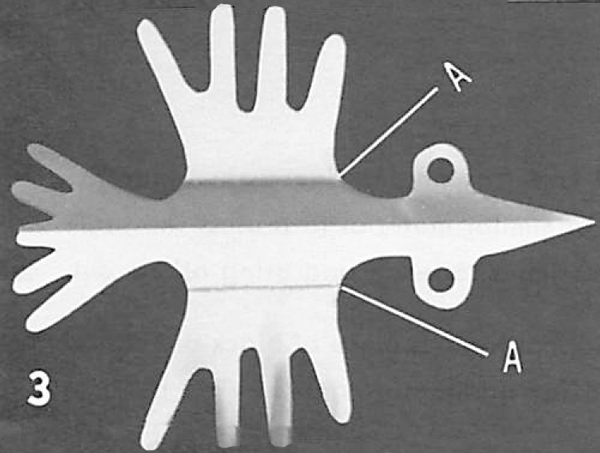
Step 3

Using a ruler as a straight edge, fold upward the wings of the bird at points "A''.

Using a ruler as a straight edge, fold upward the wings of the bird at points “A”.


Step 4

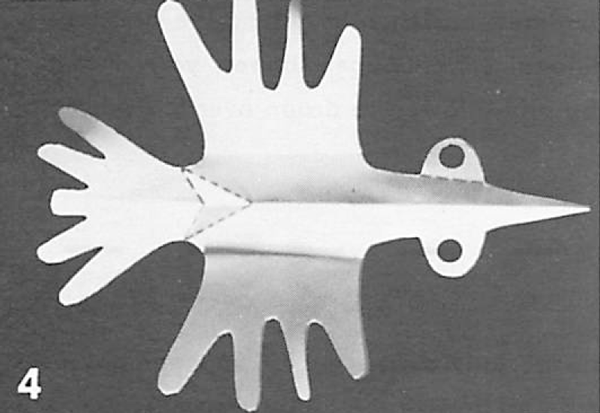
draw two triangular peaks lightly with pencil as shown in Figure 4

In making the pleat, draw two triangular peaks lightly with pencil as shown in Figure 4. Carefully fold the pleats down; this will bring the tail of the bird up.


Step 5

The wing tips are curled by rolling them tightly around a pencil.

The wing tips are curled by rolling them tightly around a pencil.


Step 6

In Figure 6 another pleat is made at the neck; and the bird is suspended from the ceiling with thread.

In Figure 6 another pleat is made at the neck; and the bird is suspended from the ceiling with thread.

And, there you have it…..you just finished making a Paper Sculpture Bird.  This Paper Sculpture Bird would look so cool hanging from your bedroom ceiling.  Where are you going to hang your bird?

Technorati Tags: , , , , , , , , , , , ,

How to Fold 5 Pointed Stars

In this post I’m going to show you an easy way to fold a 5 pointed star.   The stars in the blue field of the American flag are five-pointed.  It was Betsy Ross who convinced General Washington that it was a simple matter to cut a five-pointed star from a folded sheet of paper or cloth.  These 5 pointed stars are great to use to not only make a flag, but to decorate Christmas trees, packages, boxes, cards, toy crowns, and play costumes.  So, grab some paper and a pair of scissors and let’s get started.

Check out our other Paper Folding Activities.

How to Fold 5 Pointed Stars


Materials Needed

Square Piece of Paper

Scissors


Step 1

First fold a square of paper through the middle as shown in the illustration.

First fold a square of paper through the middle as shown in the illustration.

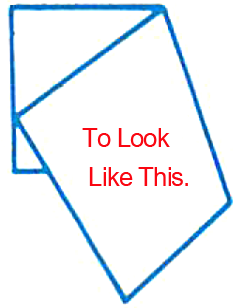
It should look like this.

To look like this.

[ad#ahc]

Step 2

Now fold corner A over to point B.

Now fold corner A over to point B.

To look like this.

To look like this.


Step 3

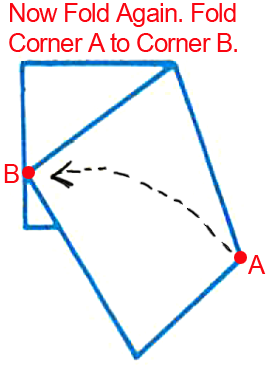
Fold corner A to corner B.

Now fold again.  Fold corner A to corner B.

It should look like this.

To look like this.


Step 4

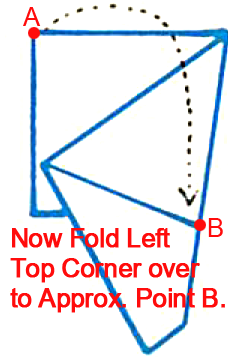
Now fold left top corner over to approximately point B.

Now fold left top corner over to approximately point B.

It should look like this.

To look like this.


Step 5

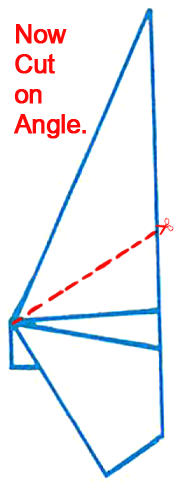
Now cut on an angle.

Now cut on an angle.

Shape should look like this now.

Shape should look like this now.


Step 6

Open up and you have a star.

Open up and you have a star.

Doesn’t the star turn out awesome?  Now, what are you going to use your star for?  Let me know in the comments below.  And, take a picture of your finished project and post that in the comments too…. I’d love to see it.

Technorati Tags: , , , , , , , , , , ,

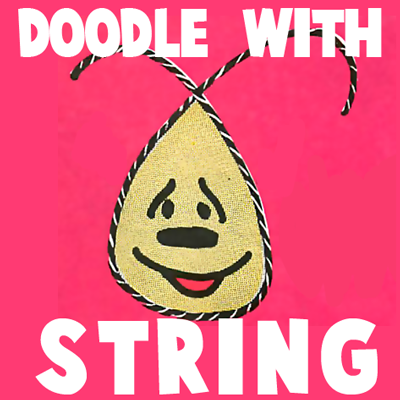
How to Doodle with String

I have a fun and creative craft for you today.  I am going to show you how to Doodle with String.  The cool part about this craft is that you will have to use your imagination and creativity to draw within the strings to create an image.  Every Doodle you do will be different than the last one.  I have given you 5 examples of some doodles you can create.  Simply scroll down within this post to see them.  Or, use your creativity to make your own designs.  The choice is yours.  So, grab the materials needed and let’s get started with this craft.

Check out our other Crafts made with String.

How to Doodle with String


Materials Needed

String

Glue

Paper

Markers, Crayons, Paints or Colored Pencils


Step 1

Dip string in glue.

Dip string in glue.

[ad#ahc]

Step 2

Hold string over paper and drop.

Hold string over paper and drop.


Step 3

Let dry.

Let dry.


Step 4

Draw a picture that you see within this string.

Draw a picture that you see within this string.


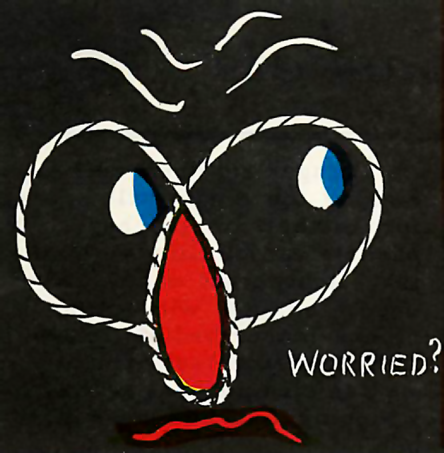
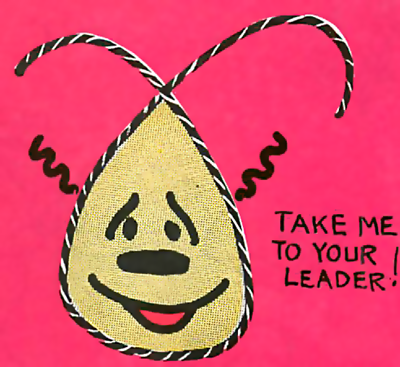
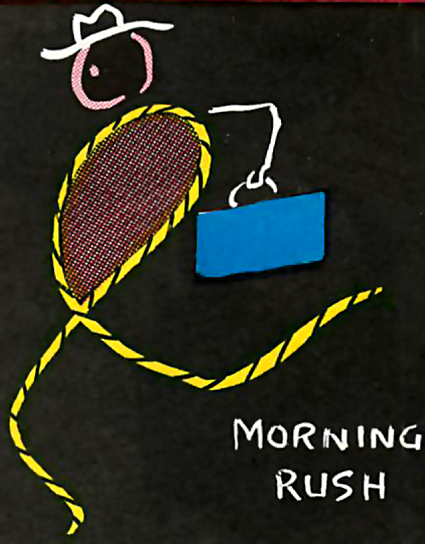
Here are a few examples:

Example 1


Example 1 - Worried

Worried


Example 2

Example 2 - Alien

Alien


Example 3

Business Man

Business Man


Example 4

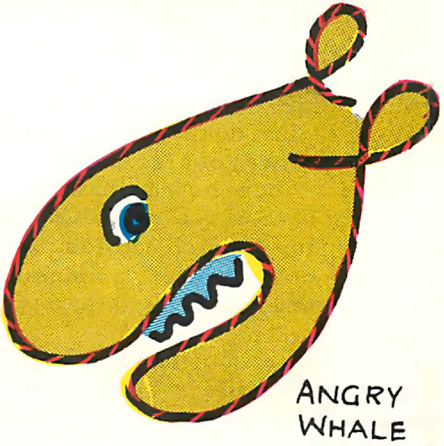
Example 4 - Angry Whale

Angry Whale


Example 5

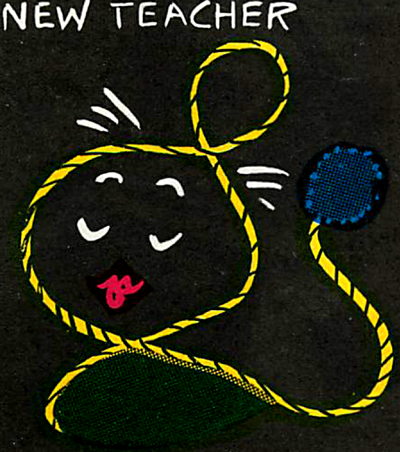
Example 5 - Teacher

Teacher


Doodling with string is so much fun…. isn’t it?  Now, of course, your Doodling with String will look different than mine.  So make sure to take a picture of your Doodling with String and post it with your comments below.  I’d love to see your Doodles.

Here is our video on how to Doodle with String

Technorati Tags: , , , , , , , , ,

How to Make Jumping Jack Leprechauns for St. Patrick’s Day

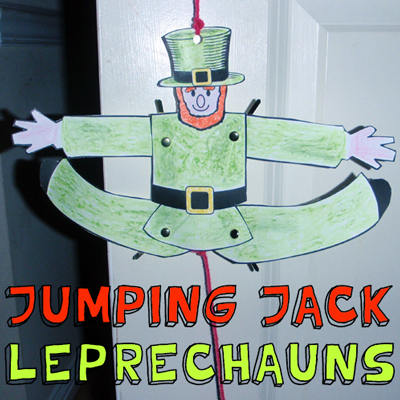
I have a fun and easy craft for you today.  In this post I’m going to show you how to make a Jumping Jack Leprechaun for St. Patrick’s Day.  When made the way that I describe in this post the arms and legs are movable making this leprechaun actually do jumping jacks when the string is pulled.  The youngest of crafters will enjoy not only making this leprechaun craft, but also playing with it once it is finished.  So, grab the materials needed and let’s get started.

Check out our other St. Patrick’s Day crafts.

How to Make Jumping Jack Leprechauns


Materials Needed

Printer & Paper

Crayons (optional)

Scissors

Glue

Cardboard (optional)

Hole Punch

Paper Fasteners

String


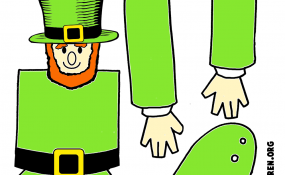
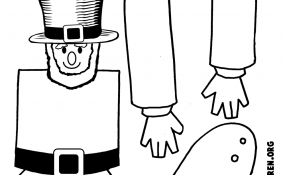
Click on template image below to make larger and to print.

Color Template

Color Template


Black & White Template

Black & White Template


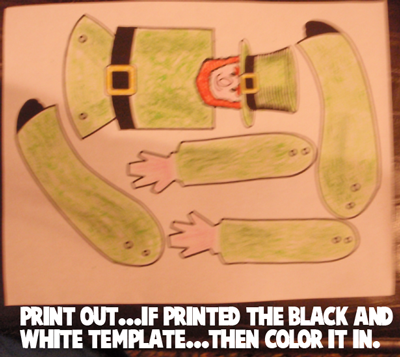
Step 1

Print out

Print out…. If you printed the black & white template then color it in.

[ad#ahc]

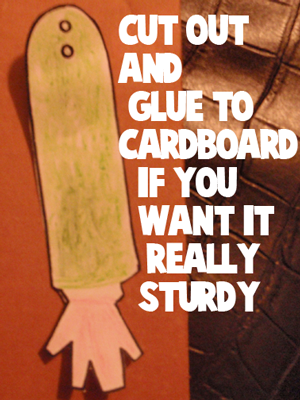
Step 2

Cut out and glue to cardboard

Cut out and glue to cardboard if you want it really sturdy.


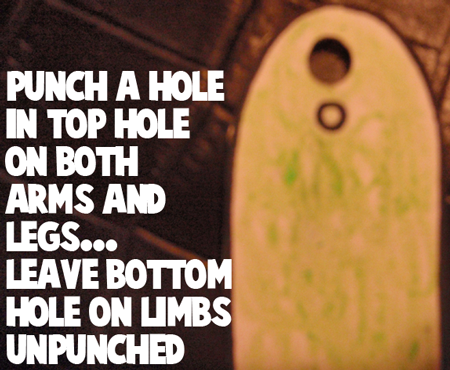
Step 3

Punch a hole in top hole on both arms and legs

Punch a hole in top hole on both arms and legs… Leave bottom hole on limbs unpunched.


Step 4

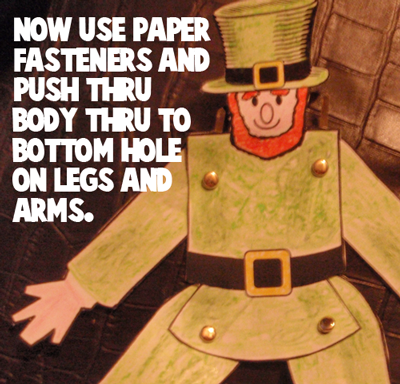
Now use paper fasteners and push thru body thru to bottom hole on legs and arms.

Now use paper fasteners and push thru body thru to bottom hole on legs and arms.


Step 5

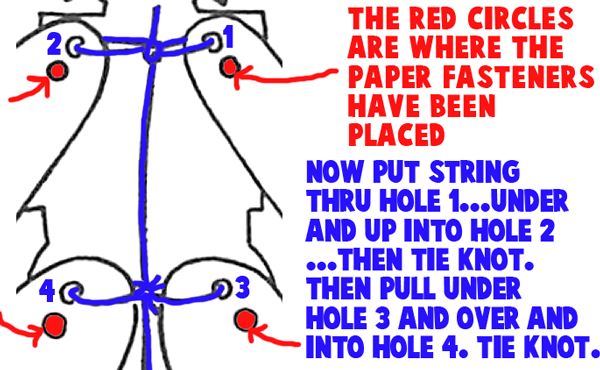
String holes the way image says to

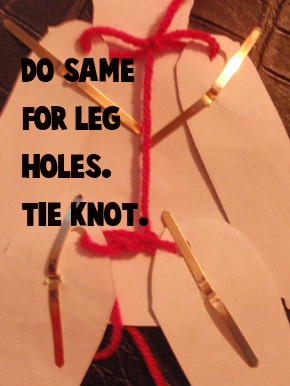
The red circles are where the paper fasteners have been placed.  Now, put string thru hole 1…. under and up into hole 2…. then tie knot.  Then pull under hole 3 and over and into hole 4.  Tie knot.

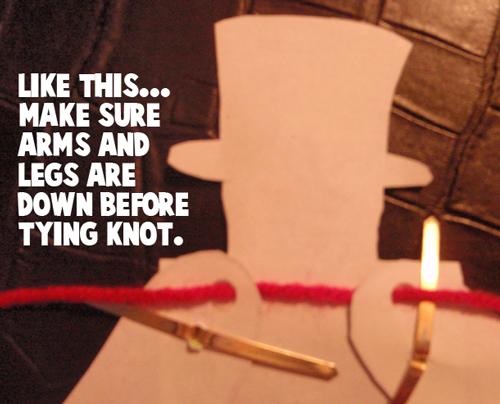
Like this

Like this… Make sure arms and legs are down before tying knot.

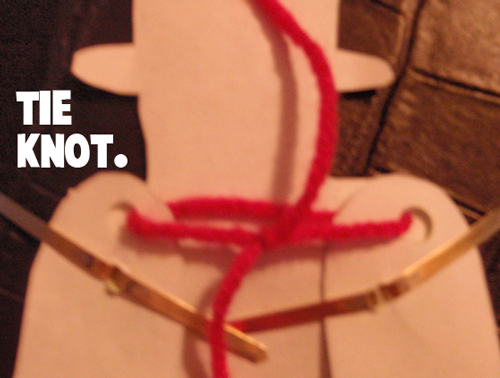
Tie knot.

Tie knot.

Do the same for leg holes.  Tie knot.

Do the same for leg holes.  Tie knot.


Step 6

Punch hole in hat and hang on door by string.

Punch hole in hat and hang on door by string.


Step 7

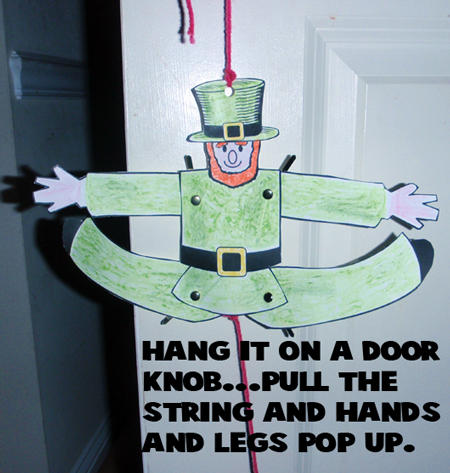
pull the string and his hands and legs pop up.

Hang it on a door knob…. pull the string and his hands and legs pop up.

And, there you go…. you just finished making a Jumping Jack Leprechaun for St. Patrick’s Day.  This is a wonderful decoration for St. Patrick’s Day and it is equally fun to play with.  Enjoy!!

Technorati Tags: , , , , , , , , ,

How to Make Sugar Cookie Leprechauns for St. Patrick’s Day

Today I’m going to show you how to make Sugar Cookie Leprechauns for St. Patrick’s Day.  We will be decorating Sugar Cookies with Icing.  In order to do this Sugar Cookie Craft correctly please check out the following post, “How to Decorate Cookies with Royal Icing”.  In that post, Sweetopia shows you how to decorate cookies with the Flood Icing technique…. that is the technique we will be using for these Leprechaun Cookies.  So, let’s get started.

Check out our other St. Patrick’s Day Crafts.

How to Make Sugar Cookie Leprechauns


Materials Needed

Sugar Cookies

Green Icing

Black Icing

Yellow Icing

Orange Icing (optional)


Step 1

Buy sugar cookies.

Buy sugar cookies.

[ad#ahc]

Step 2

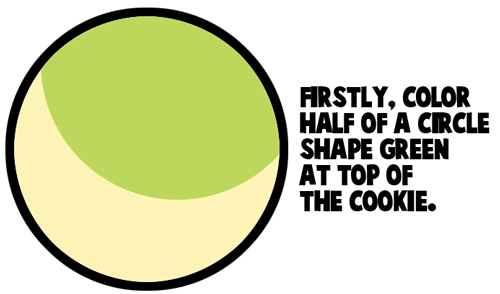
color half of a circle shape green at top of the cookie.

Firstly, color half of a circle shape green at top of the cookie.


Step 3

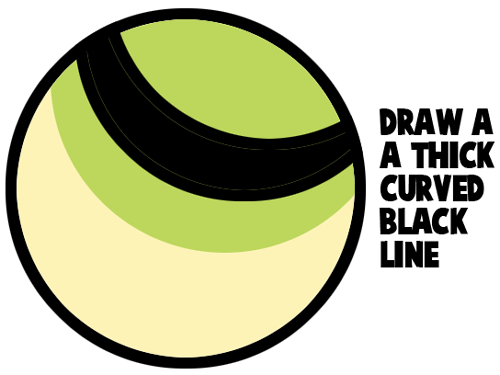
Draw a thick curved black line.

Draw a thick curved black line.


Step 4

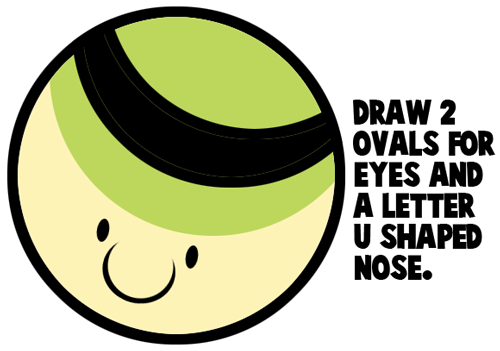
Draw 2 ovals for eyes and a letter U shaped nose.

Draw 2 ovals for eyes and a letter U shaped nose.


Step 5

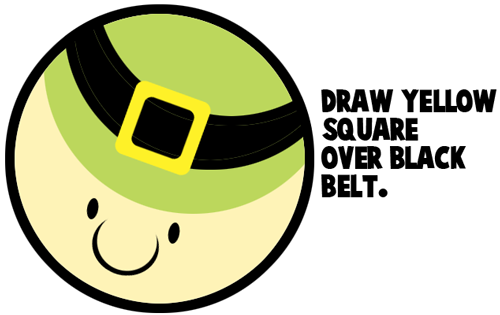
Draw yellow square over black belt.

Draw yellow square over black belt.


Step 6

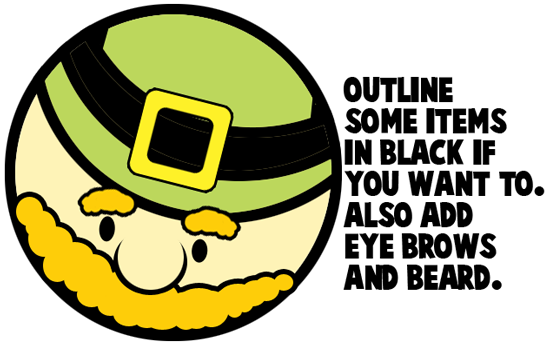
Outline some items in black if you want to

Outline some items in black if you want to.  You could also add eyebrows and a beard if you wish.

And, there you have it… you just made your super yummy Sugar Cookie Leprechauns for St. Patrick’s Day.  Didn’t they come out cute?  They are almost too cute to eat….. almost.

Technorati Tags: , , , , , , , , , , , , , , , ,

How to Make a Leprechaun Hat for St. Patrick’s Day

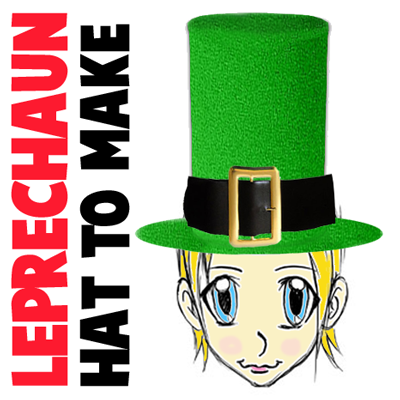
I don’t know about you, but when I think of a Leprechaun I think of the big, green hat he wears.  Today I’m going to show you how to make your very own Leprechaun Hat for St. Patrick’s Day.  After all, St. Patrick’s Day is only a little over a week away.  Now is the time to get started making and displaying your St. Patrick’s Day crafts.  So, grab the materials needed and let’s get started with this fun St. Patrick’s Day craft.

Check out our other St. Patrick’s Day crafts.

How to Make a Leprechaun Hat


Materials Needed

Large Ice Cream Carton or Bucket

Green Craft Foam or Wrapping Paper

Paper Plate

Green Paint

Pencil

Scissors

Glue

Tape

Belt or Black Foam/Paper & Yellow Paper


Step 1

You need a large ice cream carton or bucket.

You need a large ice cream carton or bucket.

[ad#ahc]

Step 2

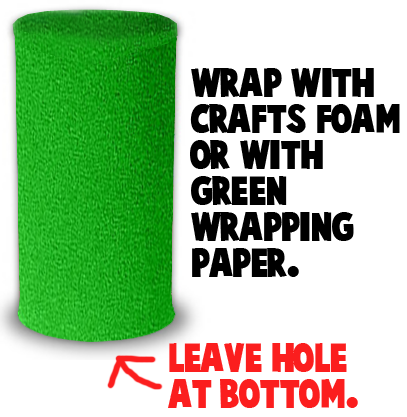
Wrap with green craft foam or with green wrapping paper.

Wrap with green craft foam or with green wrapping paper.  Leave hole at bottom.


Step 3

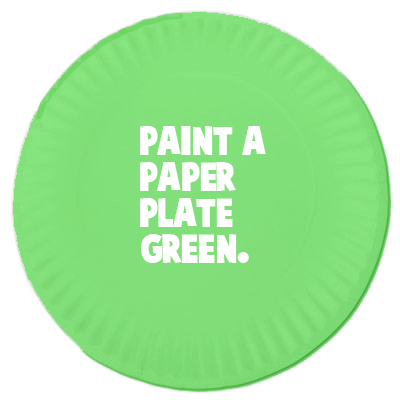
Paint a paper plate green.

Paint a paper plate green.


Step 4

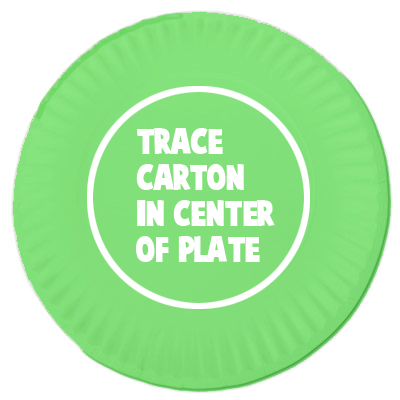
Trace carton in center of plate.

Trace carton in center of plate.


Step 5

Now draw tabs.

Now draw tabs.


Step 6

Cut out.... fold tabs inwards.

Cut out…. fold tabs inwards.


Step 7

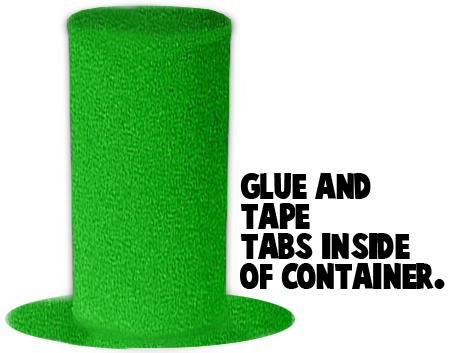
Glue and tape tabs inside of container.

Glue and tape tabs inside of container.


Step 8

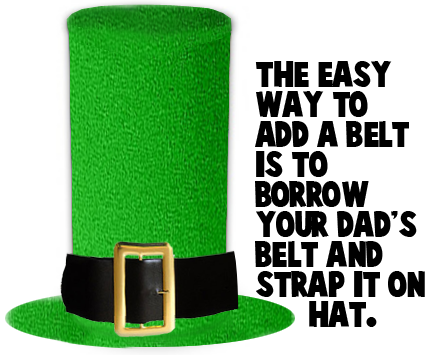
The easy way to add a belt is to borrow your Dad's belt and strap it on hat.

The easy way to add a belt is to borrow your Dad’s belt and strap it on hat.

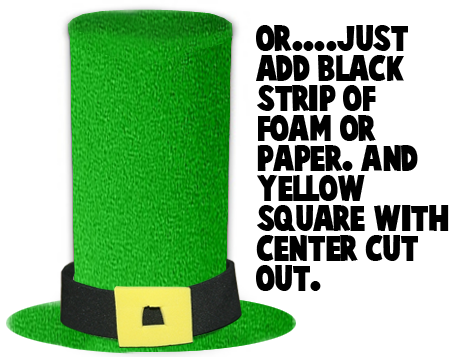
Or..... just add black strip of foam or paper.  And, yellow square with center cut out.

Or….. just add black strip of foam or paper.  And, yellow square with center cut out.


Step 9

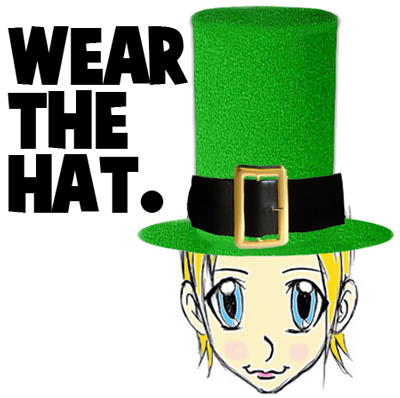
Wear the hat.

Wear the hat.

Isn’t this Leprechaun Hat adorable?  What child wouldn’t enjoy running around the house wearing this Leprechaun Hat for St. Patrick’s Day?  Enjoy.

Technorati Tags: , , , , , , , , , , , , ,

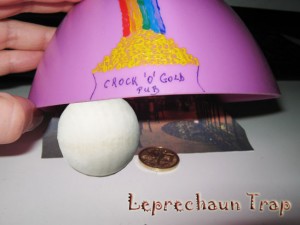
How to Make a Leprechaun Trap for St. Patrick’s Day

Everybody knows that leprechauns are very fond of money and parties, so let’s make a trap for him that will look like a pub, with the entrance marked by coins.  The craft is not only a lot of fun, but it will totally get you in the St. Patrick’s Day spirit.  After all, St. Patrick’s Day is in a little over a week.  The time is now to start decorating for the Holiday…. and this Leprechaun Trap makes for an adorable St. Patrick’s Day decoration.  So, let’s get started.

Check out our other St. Patrick’s Day Crafts.

Laura from Dacian Moon Handmade will show you, step by step, how to make a leprechaun trap.


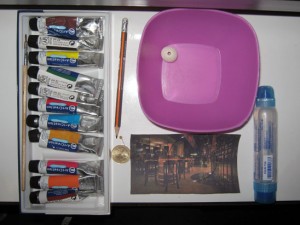
Materials Needed

– any picture of a pub interior
– bowl
– scissors
– needle
– paints
– paintbrush
– coin
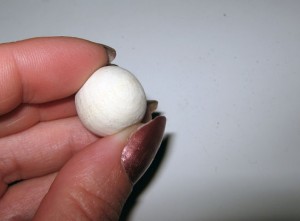
– a nut or a wooden ball
– a very thin wire (about 10 cm)


Step 1

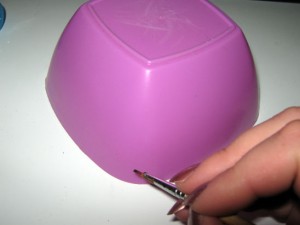
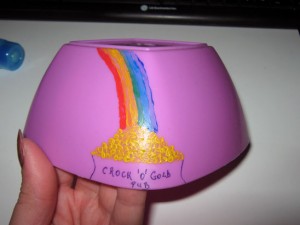
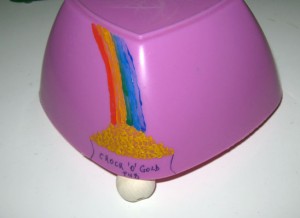
Take the bowl and with the paintbrush and paints make some coins and a rainbow on one corner of the bowl (mine is rectangular… if yours is round, just paint on one side)…

… then write “Crock ‘O’ Gold Pub”, like in the picture.


[ad#ahc]

Step 2

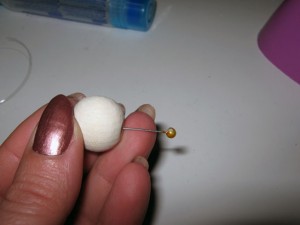
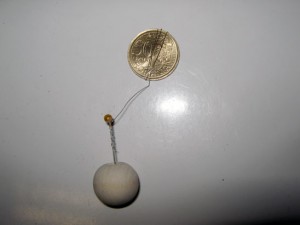
Take the wooden ball (or nut)

Stick the needle on it.

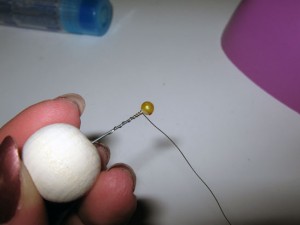
Wriggle one side of the wire around the needle…

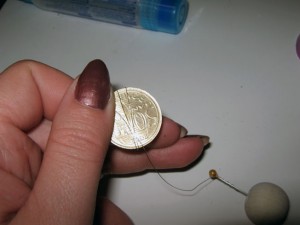
… then the other side around the coin:

It will look like this:


Step 3

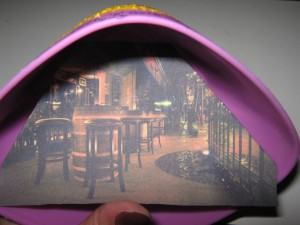
Take the picture and fold the upper corners, then place it on the bowl. It should stay like this:


Step 4

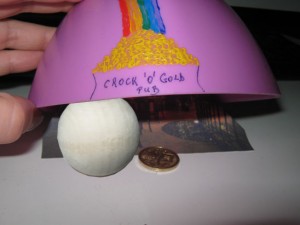
Place the bowl (with the picture inside) over the wooden ball (or nut), like this…

… and the trap is ready ! When the leprechaun will try to pass by the wooden ball (because the entrance is smaller than he) the nut will roll and the bowl will fall catching him beneath. The assurance is that even if the ball will not move (and the bowl falls) when he will try to take the coin, the ball will roll and the bowl will fall over him.

Now you have a Leprechaun Trap.  You will be able to catch a Leprechaun for sure this St. Patrick’s Day.

Technorati Tags: , , , , , , , , ,