How to Make a May Basket

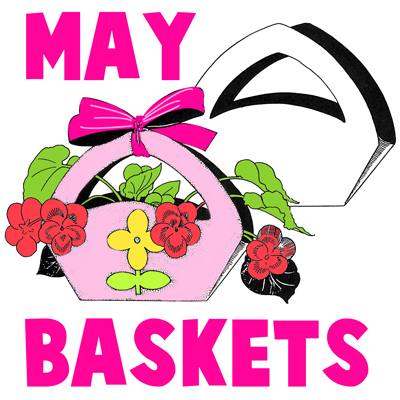
I have a fun and easy craft for you today.  In this post I’m going to show you how to make a May Basket.  This craft is a great craft for even the youngest of crafters as we will be using a template for this craft.  Simply print out the template, cut, fold and glue and that’s it.  Of course, you are going to want your May Basket to be pretty so make sure to color and decorate it the way you see fit.  So, grab the materials needed for this craft and let’s get started.

Check out our other Spring Crafts.

How to Make a May Basket


Materials Needed

Printer & Paper

Scissors

Markers or Crayons

Paste


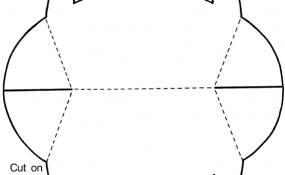
Click on the template images below to make larger and to print.

8×11 Size Paper

May Basket Template


Larger Paper

May Basket Template Large


Step 1

Print out template.

Print out template.

[ad#ahc]

Step 2

Cut out the pattern on the black lines.

Cut out the pattern on the black lines.


Step 3

Decorate the basket.

Decorate the basket.


Step 4

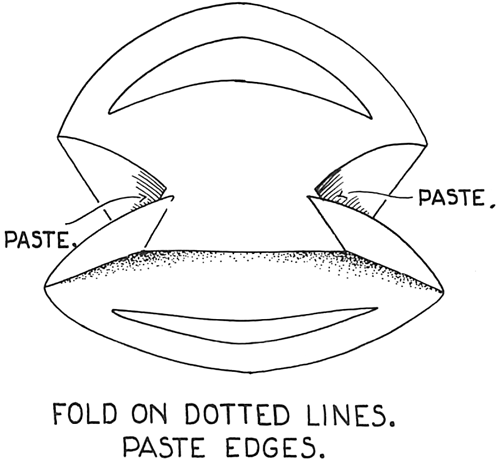
Fold on the dotted lines.  Paste edges.

Fold on the dotted lines.  Paste edges.

You finished your May Basket….. great job!!  Now, fill your basket with something for Spring.  How about fill it with some beautiful flowers…. you can’t get more Spring than that.

Technorati Tags: , , , , , , , ,

13 Cool Crafts Made with Neckties

13 Cool Crafts Made with Neckties

The styles of Neckties comes and goes pretty quickly.   Many men have a ton of extra ties in their closet that they don’t even wear.  Why not put the extra ties to good use?  I am going to show you 13 Cool Crafts made with Neckties.  All of the necktie crafts shown here will have tutorials so that you too can make these crafts.  I will not show you something that you can’t make for yourself.  Whether you want a necktie purse or a necktie coffee cozy…. you will find your necktie crafts here.   So, let’s get started.

13 Cool Crafts Made with Neckties

(1)  Necktie Purse

Necktie Purse

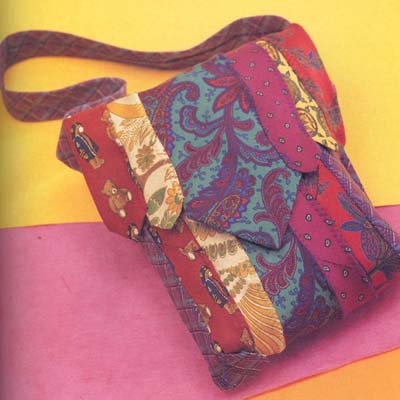
Here is a creative way to make a purse.  Imagine the compliments you will get while you carry this bag.  This purse is made from 8 neckties….. check out Sonya Style for all the crafting details.


(2)  Necktie Daisy Pins

Necktie Daisy Pins

I found this craft over at Crafters and it is a great Necktie craft.  She will show you how you too can make these Daisies out of Neckties.  Imagine how gorgeous you will look wearing these Necktie Daisy Pins.  Check out the site for the details.

[ad#ahc]

(3)  Tie Angel

Tie Angel

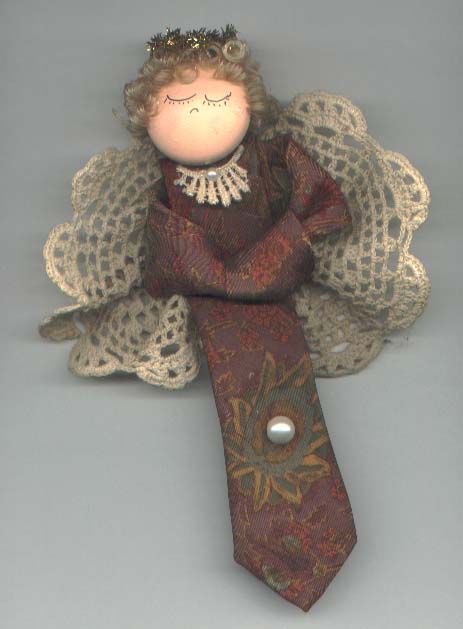
How gorgeous is this Angel?  So pretty.  And, she is made from a man’s necktie.  This Angel would be great for Christmas time decorating.  Make sure to check out Blue Bonnet Village for the instructions on how to make this craft.


(4)  Necktie TV Remote Holder

Necktie TV Remote Holder

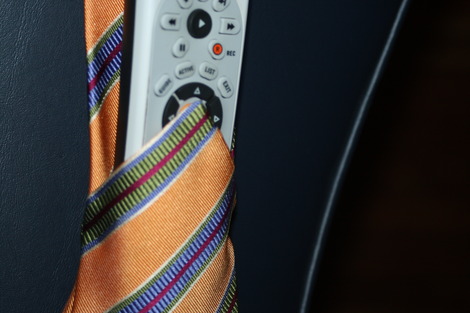
I found this necktie craft over at Yahoo Voices.  Here she made this craft for father’s day…. and it is such a great idea.  Ironically people give ties for father’s day…. here she upcycles a necktie into a TV Remote Holder.  What a clever idea!!


(5)  Cellphone or iPod Bag

Cellphone or iPod Bag
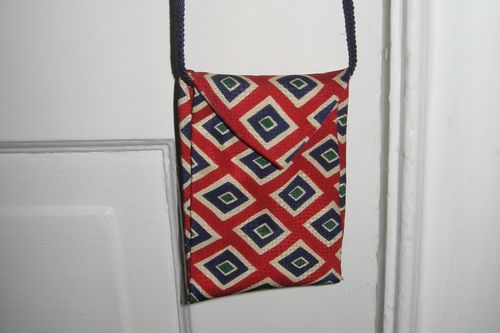
Here is a clever way to hold a cellphone or iPod….. carry it in this awesome Cellphone or iPod bag made from Neckties.  How cute is that?!  So cute.  I found this necktie craft over at Mindful Momma and I love it.  Make sure to check it out for yourself.


(6)  Coffee Cozy

Coffee Cozy

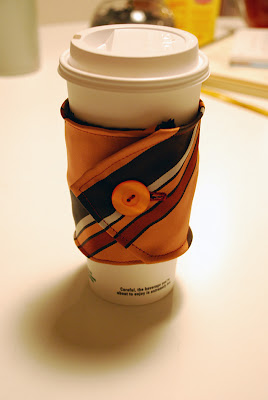
What a great way to drink hot coffee and save your hands….. use this necktie coffee cozy.  I love this idea!!   I found this necktie craft over at Lime and Aqua Studio.  Check out their website for the full craft details.


(7)  Necktie Necklace

Necktie Necklace

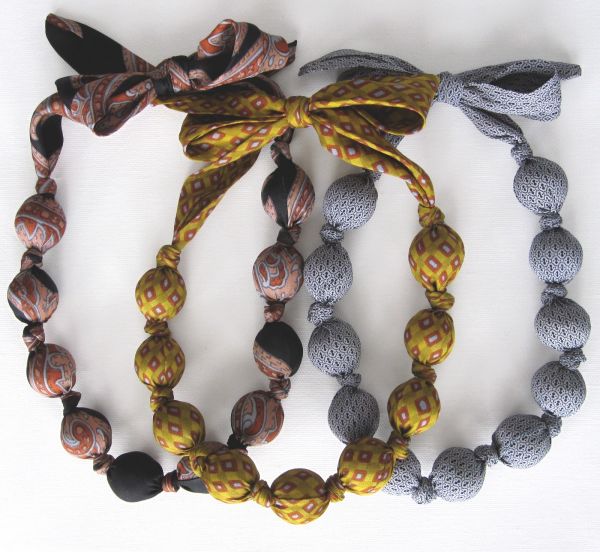
Look how beautiful these necklaces are…. and they are made from a necktie.  Made from an old necktie and some Mardi Gras beads this necklace turns out really cute.  You can get the full craft “how-to” by going to artstar by aletha.


(8)  Necktie Pumpkins

Necktie Pumpkins

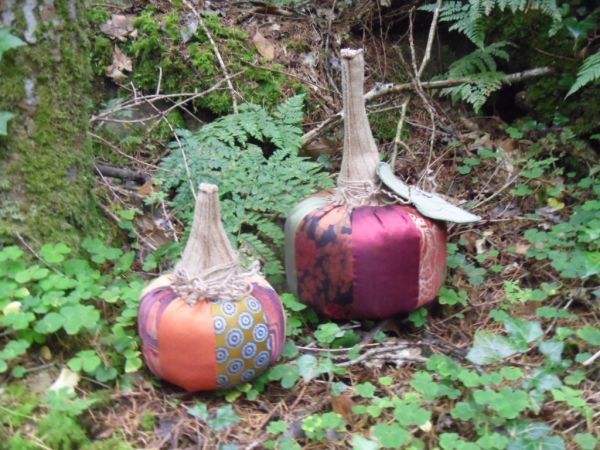
Now, these pumpkin are no ordinary fall pumpkins…. these are some of the most creative pumpkins I seen.  I found these necktie pumpkins over at Lisnaweary Quilts and the idea is super creative.  Your house will look awesome with these Necktie Pumpkins as decorations this Fall.


(9)  Necktie Headband

Necktie Headband

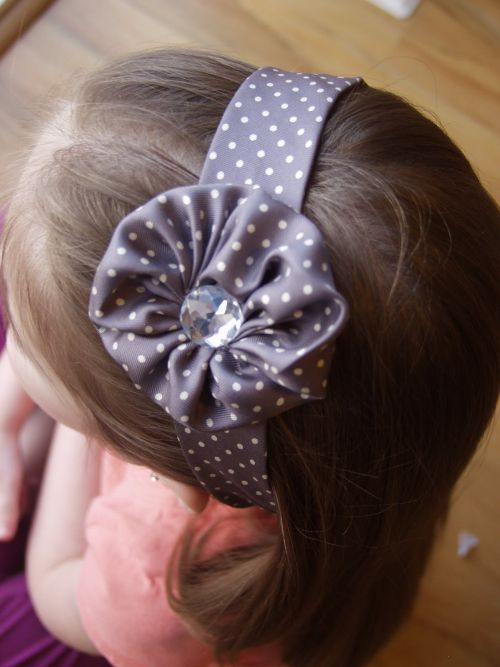
This necktie headband is so super cute…. I love the idea.   I found this necktie craft over at Craft Envy and she simply just picked up a necktie from a Thrift Store.  But, feel free to recycle any type of tie that is no longer being used.  Check out the website for all the details.


(10)  Necktie Glasses Case

Necktie Glasses Case

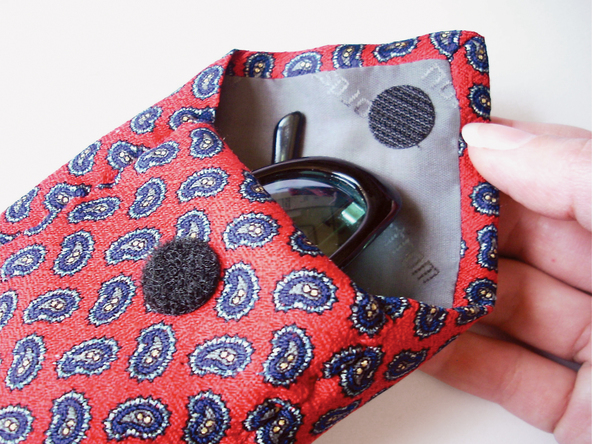
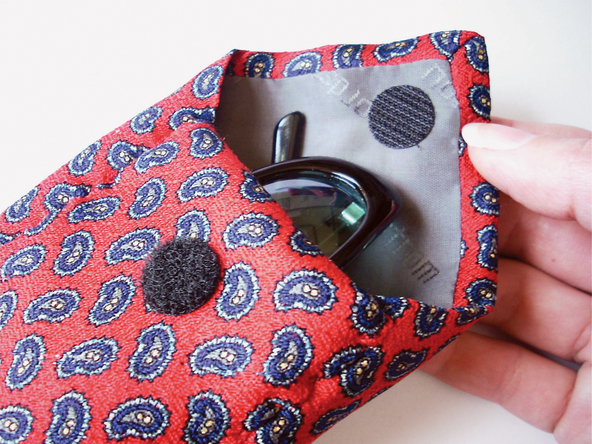
What an awesome idea….. use a necktie to make a glasses case.   What is so cool about using a necktie as a glasses case… it not only looks good, but it also has its own padding for protecting your glasses.  Check out Make Projects for the step-by-step how-to.


(11)  Flower Pin

Flower Pin

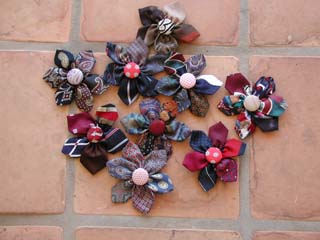
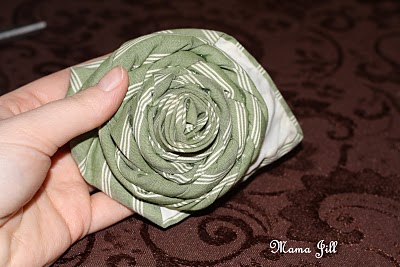
Who would have thought that a masculine necktie can be made into such a lovely flower?  But, if you check out My Heart is Yours Blog you will learn that it can.  Here she shows you how to take just a necktie and a hot glue gun to make this flower.  Make sure to check out her site.


(12)  Bow Tie

Bow Tie

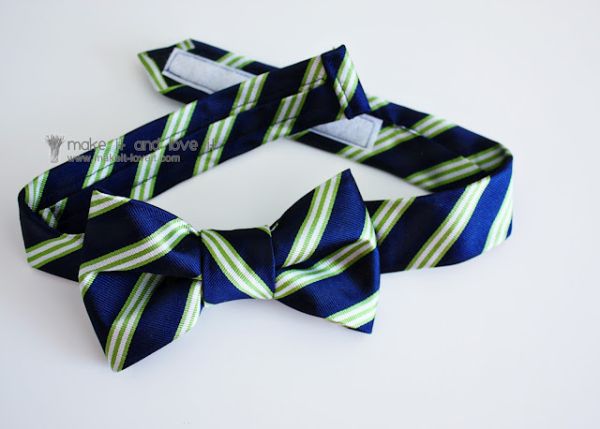
Wow, what a super creative idea…. take a Necktie and make it into a Bow Tie.  Clever!!  I found this necktie craft over at Make It and Love It .  And, I must admit it…. I do love it.  She takes a necktie and simple Velcro closure for this craft… make sure to check it out.


(13)  Necktie Skirt

Necktie Skirt

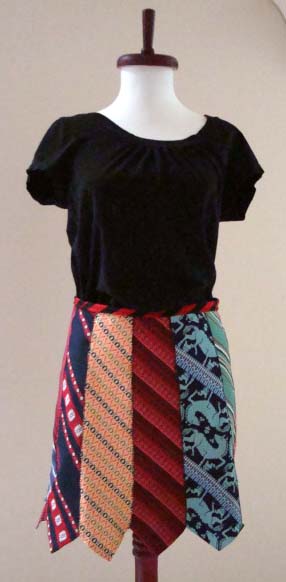
Who would have thought that a few neckties can look so beautiful on a lady, but Rick Rack Ruby shows you that it can.  Check out her site to find out how she takes about 14 ties and makes them into a beautiful skirt.  So creative!!

Technorati Tags: , , , , , , , , , , , , ,

How to Make a 3D Carnation Mother’s Day Card

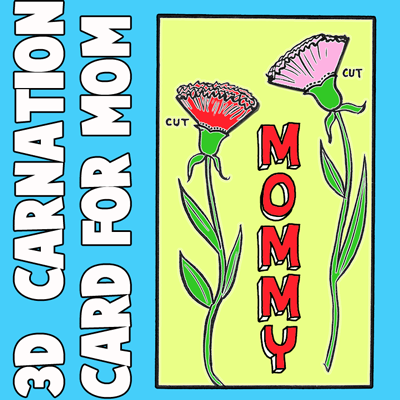
Mother’s Day is coming up next month.  That will be here before you know it.  So, in honor of the upcoming Mother’s Day Holiday today I will show you how to make a 3D Carnation Mother’s Day Card.   Any mom would love receiving a homemade card from their child.  And, this card is no exception.  Not only is this card made by you, but it is also 3D which makes it really cool.  You will use crepe paper to give this card a 3D effect.  So, grab the materials needed and let’s get started.

Check out our other Mother’s Day Crafts.

How to Make a 3D Carnation Mother's Day Card


Materials Needed

Red and Pink Crepe Paper

Construction Paper or Card Stock

Paste or Tape

Markers

Scissors


Step 1

Cut out a circle on red and pink crepe paper.

Cut out a circle on red and pink crepe paper.

[ad#ahc]

Step 2

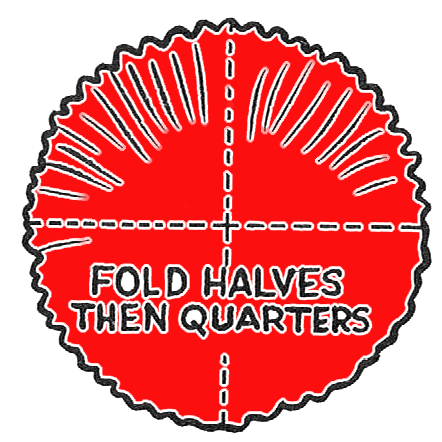
Fold in halves and then quarters.

Fold in halves and then quarters.  Snip edges irregularly to resemble a carnation.

It should look like this.

It should look like this.


Step 3

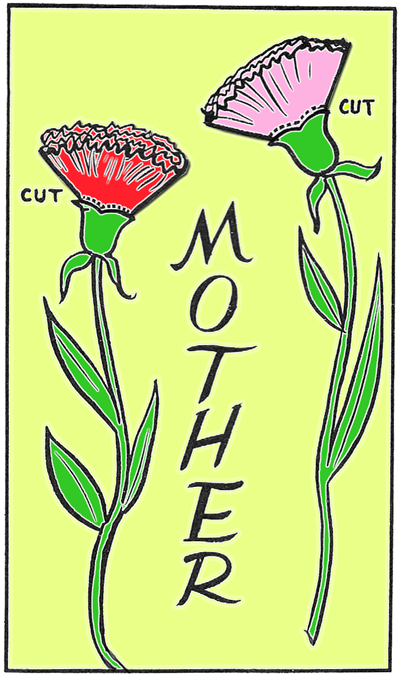
Take a piece of construction paper or card stock and draw 2 stems.

Take a piece of construction paper or card stock and draw 2 stems.  You will be pasting the carnations to the top of these stems.


Step 4

Paste or tape on carnations

Cut top of stem as shown and tuck in flower.  Paste or tape on carnations.  Write “Mom” or “Mommy” or “Mother”.


Finished Mothers Day Carnation Card

There you go….. you just finished making a 3D Carnation Mother’s Day Card.  Your mom is going to absolutely love it.  Do you know why?  Because you made it yourself.

Technorati Tags: , , , , , , , , , , , , , , , , , , , ,

How to Make Drinking Straw Flowers

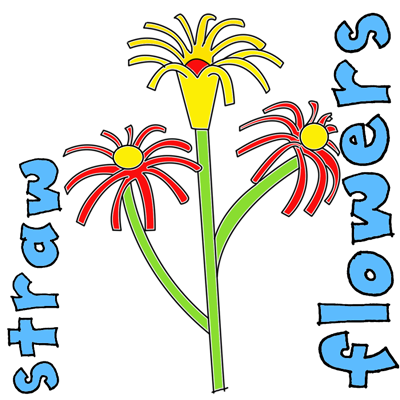
I have a fun craft for you today.  In this post I will show you how to make Drinking Straw Flowers.  The supplies are for just one flower, but make a whole bunch and you have yourself a bouquet.  They would look fun and festive this Spring in a vase or pot.  Any age child will enjoy making these flowers even the youngest of crafters.  So, grab the materials needed and let’s get started with this craft.

Check out our other Drinking Straw Crafts.

How to Make Drinking Straw Flowers


Materials Needed

Drinking Straw

Scissors

Green Pipe Cleaner

Colored Pom Pom

Glue


Step 1

Cut the end of the straw about 1/2 inch down.

Cut the end of the straw about 1/2 inch down.  Do many of these cuts.

[ad#ahc]

Step 2

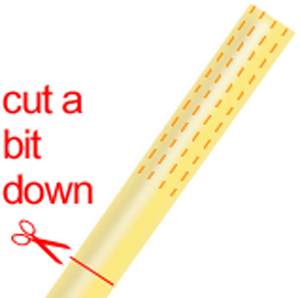
Cut a bit down from the slits you made.

Cut a bit down from the slits you made.


Step 3

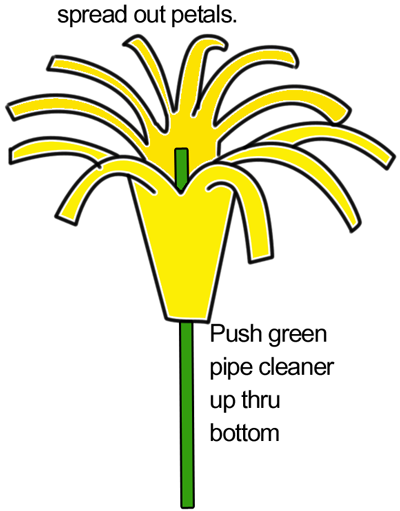
Spread out petals.  Push green pipe cleaner up thru bottom.

Spread out petals.  Push green pipe cleaner up thru bottom.


Step 4

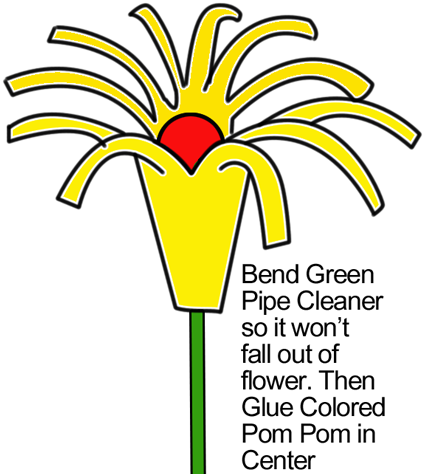
Bend green pipe cleaner so it won't fall out of flower.

Bend green pipe cleaner so it won’t fall out of flower.  Then glue colored pom pom in center.


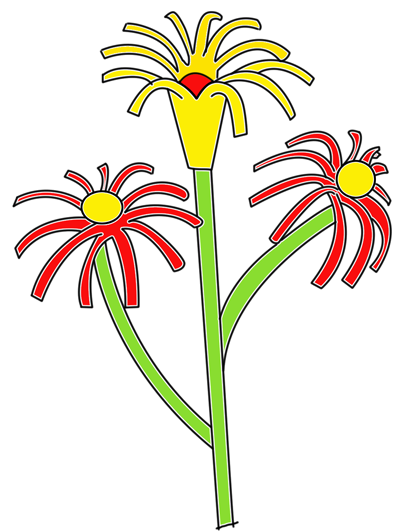
Finished Drinking Straw Flowers

And, there you have it…. you just finished your Drinking Straw Flower.  How did it turn out for you.  Now, make a few and put together a beautiful bouquet of Drinking Straw Flowers.

Here is our video on how to Make Drinking Straw Flowers.

Technorati Tags: , , , , , , , , , ,

Coolest Earth Day Craft Ideas – Crafts Made from Recycled Materials

Coolest Earth Day Craft Ideas - Crafts Made from Recycled Materials

Earth Day will be here in just a couple of weeks.  In honor of Earth Day I thought I would scour the internet looking for cool ideas for Earth Day crafts.  All of the crafts that I found and have listed here are made from recycled materials.  Earth Day is a special day to celebrate the Earth and to increase awareness and appreciation of the Earth’s natural environment.  And, I think making crafts from recycled materials such as the ones found here is a great way to teach children about recycling and the importance of doing that to help save our Earth.  So, without further ado….

Coolest Earth Day Craft Ideas

(1)  Newspaper Roses
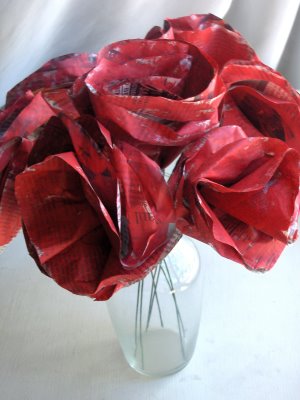
Newspaper Roses

Look how beautiful these Roses are?  They really are lovely & they are completely made from recycled newspapers.  Check out the craft and all its details over at Zakka Life.

[ad#ahc]

(2)  Serving Tray
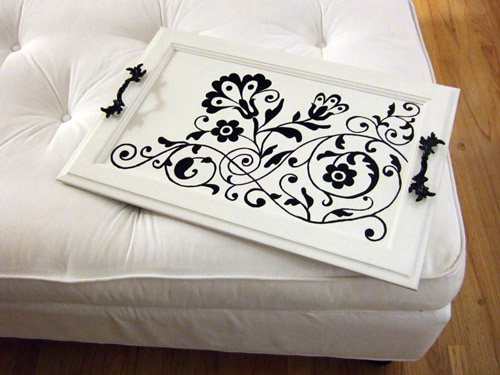
Serving Tray

I love, love, love this idea!!  Crafty Nest went to a Salvage Yard and noticed that there were old cupboards there.  She picked up a white one and with a little creativity and a lot of fun she was able to make this beautiful serving tray.  Check out her website so you too can make this.


(3)  Can-Do Robots
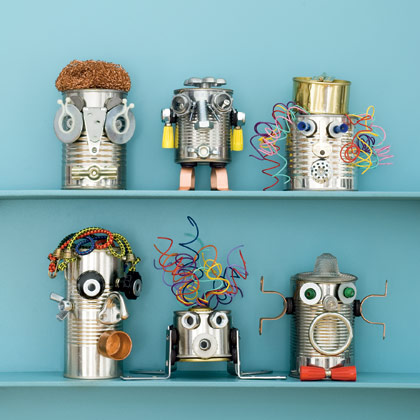
Can-Do Robots

Made from tin cans these robots are so freakin cute.  What is really cool is that their features are made of magnets, so they can be removed.  Which makes these robots like a Mr. Potato Head…. How fun is that?!  Check out the craft details over at Family Fun.


(4)  Cardboard Ottoman or Side Table
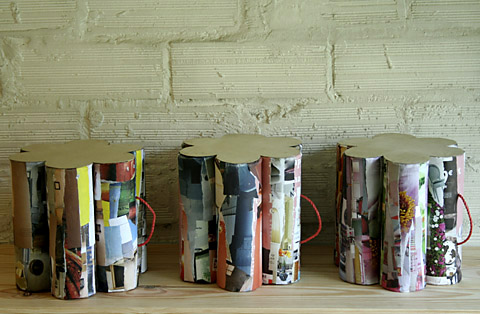
Cardboard Ottoman or Side Table

What a clever and creative idea!!  Made from recycled cardboard tubes you can choose to make either a side table or an ottoman…. or even make both.  When you look at them from above they are actually daisies.   Check out Esprit Cabane for all the crafting details.


(5)  Smashed Soda Can Animals
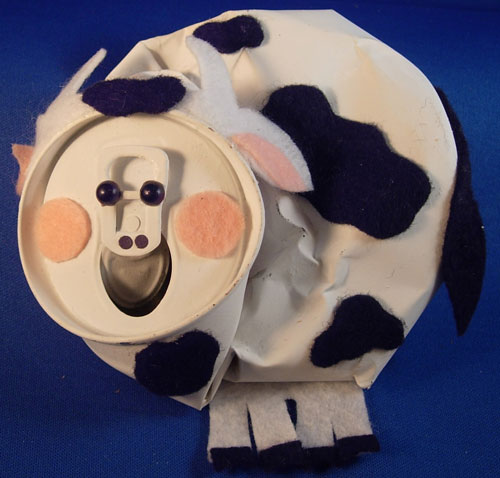
Smashed Soda Can Animals

Ok, this cow is really cute, isn’t he?!  But, wait till you check out Fave Crafts….. they have not only a cow, but they will show you how to make a pig and a bear too.  Make all three recycled can crafts and you will have a beginning to your very own recycled animal farm.


(6)  Milk Jug Shade
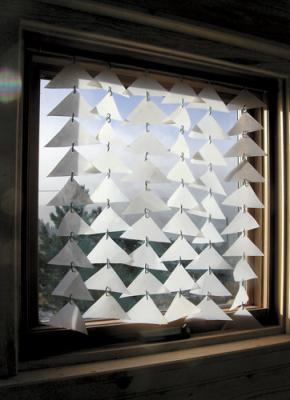
Milk Jug Shade

Now, this recycled craft turns out beautiful, doesn’t it?  Honestly, if I saw this I would have no idea it was actually made from recycled milk jugs.  But, it is.  I found this craft over at Mother Earth News.  Check out their site for all the wonderful craft details.


(7)  Recycled Picnic Basket
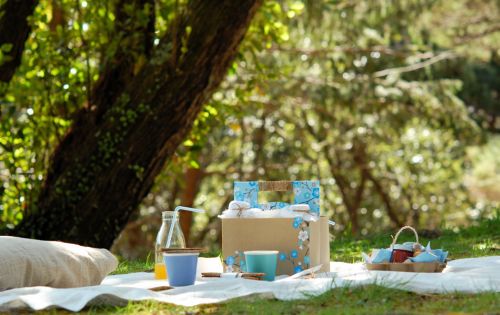
Recycled Picnic Basket

I found this recycled picnic basket over at bron marshall and for the main basket it is actually made from a recycled beer six-pack.  Isn’t that a clever idea?  They other container is actually made from a recycled half dozen egg carton…. they simply added a handle.  Make sure to check out their site for the full craft details.


(8)  Newspaper Basket
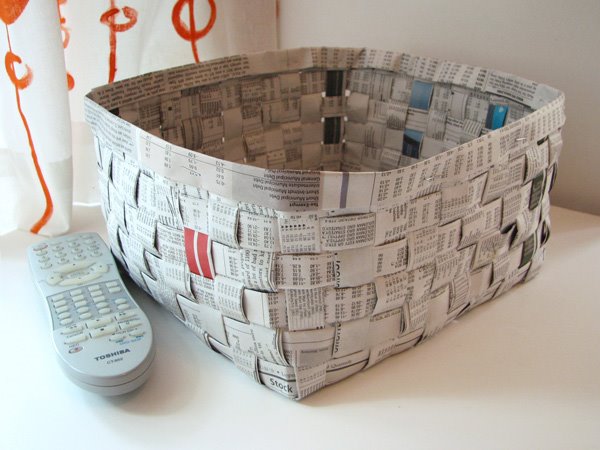
Newspaper Basket

This is an amazing basket!!  And, it is completely made from Newspaper.  Look how sturdy it looks too…. I love it.   How About Orange shows you step-by-step how to make this basket yourself.


(9)  Recycled Glass Chandelier
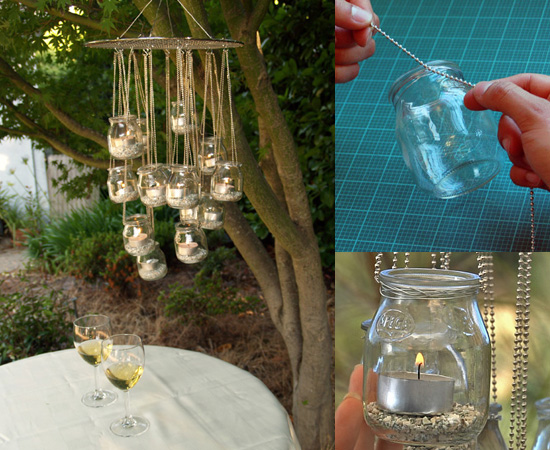
Recycled Glass Chandelier

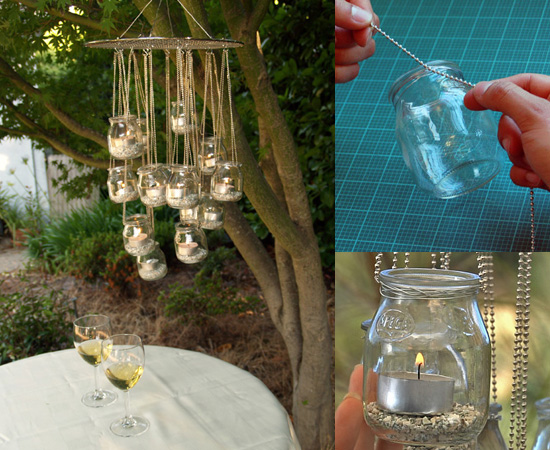
Oh I just love this recycled craft idea…. it might just be my favorite.  I found this recycled craft over at Casa Sugar.    With a few recycled materials and some tea lights  you too can have this stunning glass chandelier.  I love the way they show this chandelier being outside…. it would be perfect for a fun outside party.


(10)  Creative Notepads
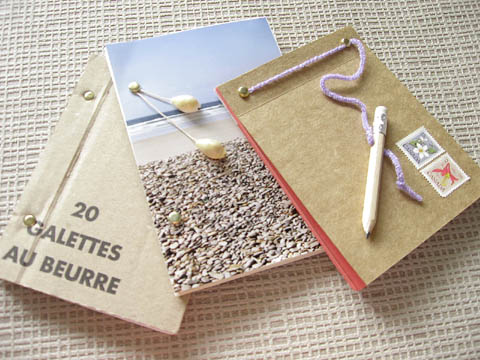
Creative Notepads

Here is a creative way to recycle those leftover notebook pages and even those left over paper scraps.  Esprit Cabane shows us how to take those leftover paper products and make them into cute little pocket size notepads.  Check out her site for the full details.


(11)  Toilet Paper Tube Albums
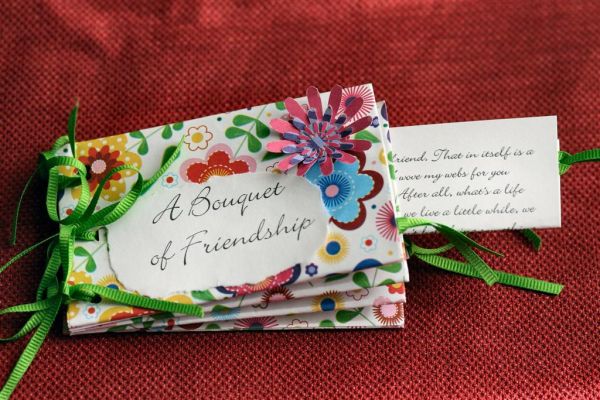
Toilet Paper Tube Albums

These Toilet Paper Tube Albums are just precious.  They are a beautiful way to store special keepsakes and pictures of events that you don’t want to lose.  Those Northern Skies shows you step-by-step how you too can make these albums from recycled toilet paper tubes.


(12)  Magazine Boxes
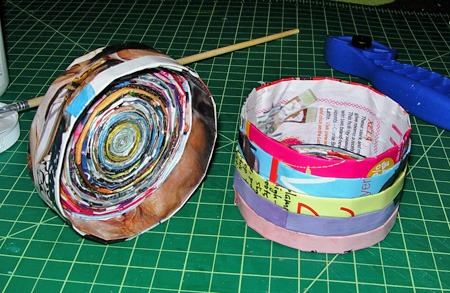
Magazine Boxes

Here is a creative and imaginative way to recycle those stacks of magazines you keep at home.  When made like the tutorial on Abstract Octopus you can actually store things in these boxes.  Check out the site for the full craft details.


(13)  Plastic Cup Earrings
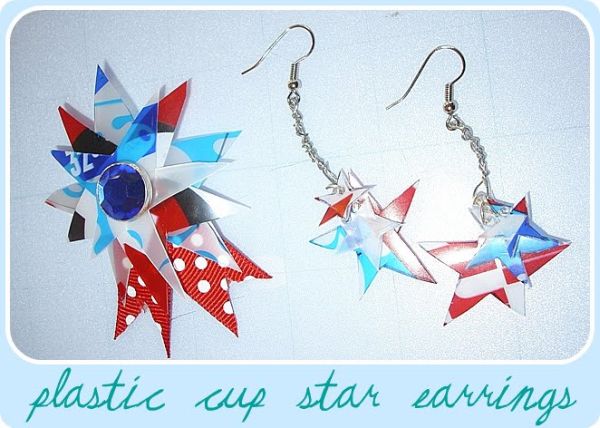
Plastic Cup Earrings

Aren’t these earrings adorable?  You would never realize they were made from a plastic cup unless I told you.  I found this idea over at Punk Projects and I think it is a great way to recycle plastic cups… plus the craft is fun to do.  Make sure to check out her website for the details.

Technorati Tags: , , , , , , , , ,

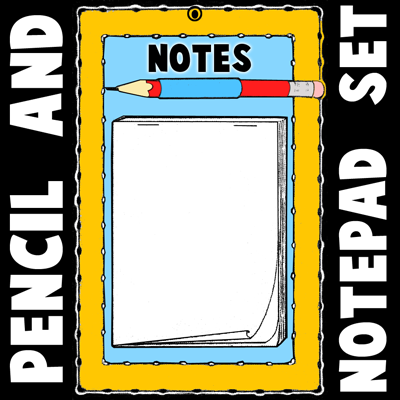
How to Make a Notepad Pencil Gift Set

Today I’m going to show you how to make a Notepad Pencil Gift Set.  This Notepad Pencil Gift Set is a perfect gift for somebody that has a lot going on and needs some organizing.  It would make a great gift for anyone like this.  They could simply hang it up in plain sight and when a note is written on the notepad they are reminded of all the things they need to do.  Or, hang this next to the phone…. this item makes for a perfect place to leave messages for others.  So, let’s get started with this craft.

Check out our other Gift Crafts.

How to Make a Notepad Pencil Gift Set


Materials Needed

Cardboard

Colored Paper

Pencil

Glue

White Paper

Hole Punch

Black Marker

Stapler


Step 1

Cover a piece of cardboard with colored papers.

Cover a piece of cardboard with colored papers.

[ad#ahc]

Step 2

Wrap paper around pencil to figure out where to glue.

Wrap paper around pencil to figure out where to glue.


Step 3

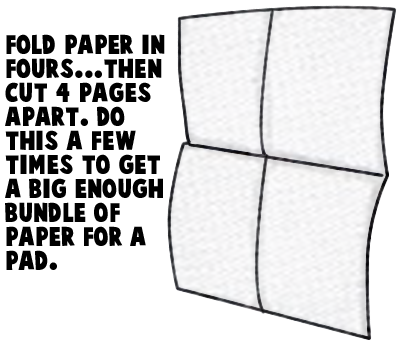
Fold white paper in fours ... then cut 4 pages apart.

Fold white paper in fours … then cut 4 pages apart.  Do this a few times to get a big enough bundle of paper for a pad.


Step 4

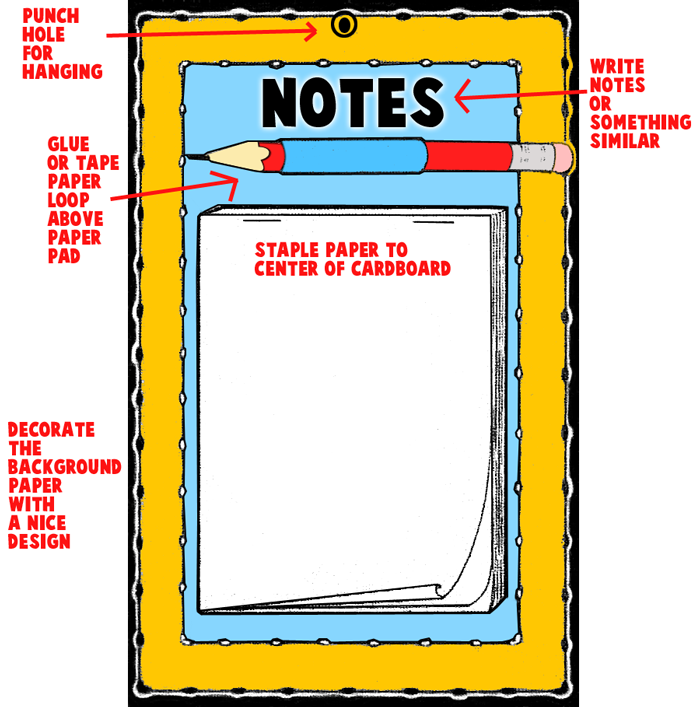
Staple paper to center of cardboard

Staple paper to center of cardboard;  Punch hold for hanging;  Glue or tape paper loop above paper pad;  Decorate the background paper with a nice design;  Write notes or something similar.


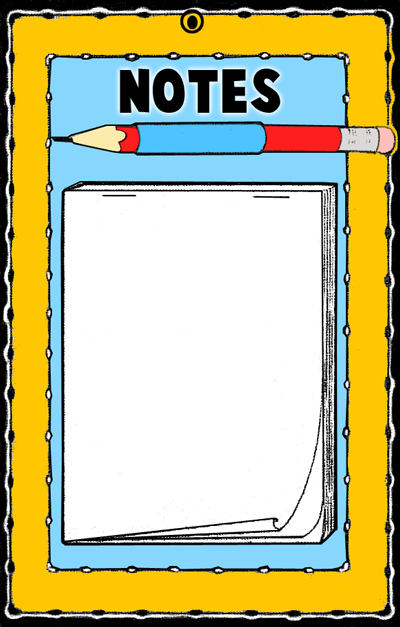
Finished Notepad Pencil Gift Set

And, there you have it…. you just finished your Notepad Pencil Gift Set.  How did it turn out for you?  Let me know in the comments below.  Also, take a picture of the Notepad and share that too in the comments…. I’d love to see it.

Here is our video on how to make a Notepad Pencil Set

Technorati Tags: , , , , , , , , ,

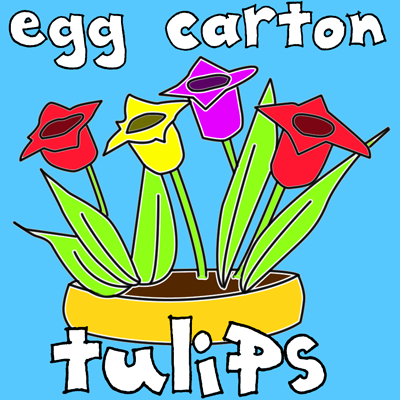
How to Make Egg Carton Tulips for Spring

I have a fun and creative Spring craft for you today.  I’m going to show you how to make Egg Carton Tulips for Spring.  This craft is a great way to use up all those egg cartons you have laying around after Easter.  Nothing like recycling items and using them to create something beautiful.  And these tulips are no exception….. they come out looking so colorful.  Just the perfect craft to make and give to you Mom or Grandma to help them celebrate Spring.  They will surely love this item….. so let’s get started.

Check out our other Spring Crafts.

How to Make Egg Carton Tulips for Spring


Materials Needed

Egg Carton

Scissors

Different Color Paints

Pipe Cleaners

Tissue Paper same Color as Paint

Green Construction Paper

Pot full of Dirt


Step 1

Cut out egg carton cups so they look a bit like this.

Cut out egg carton cups so they look a bit like this.  Cut the 4 corners like above.

[ad#ahc]

Step 2

Paint egg cups beautiful colors.

Paint egg cups beautiful colors.


Step 3

Poke hole in bottom of egg cups.

Poke hole in bottom of egg cups.  Stick pipe cleaner up this hole.


Step 4

Put a small square of tissue paper into the egg cup and let pipe cleaner push thru tissue paper.

Put a small square of tissue paper into the egg cup and let pipe cleaner push thru tissue paper.  Bend pipe cleaner to keep it on.


Step 5

Cut out a green leaf and stick it on bottom of pipe cleaner.

Cut out a green leaf … poke a hole in it… stick it on bottom of pipe cleaner.


Step 6

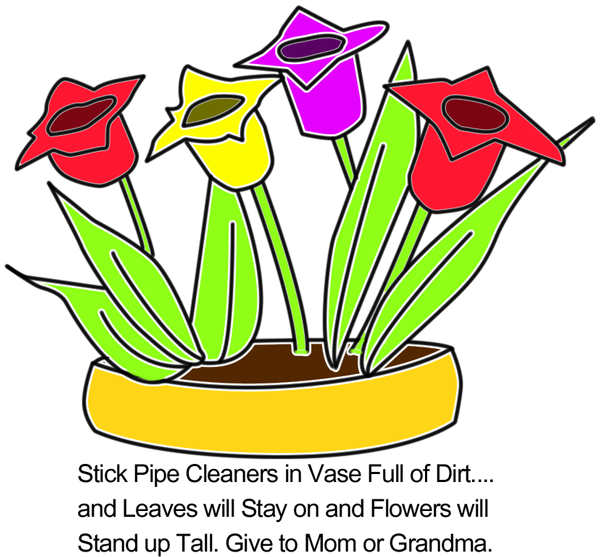
Stick pipe cleaners in vase full of dirt

Stick pipe cleaners in vase full of dirt … and leaves will stay on and flowers will stand up tall.  Give to Mom or Grandma.

Technorati Tags: , , , , , , , , , ,

Ideas for Kids to Make Seder Plates for Passover

Ideas for Kids to Make Seder Plates for Passover

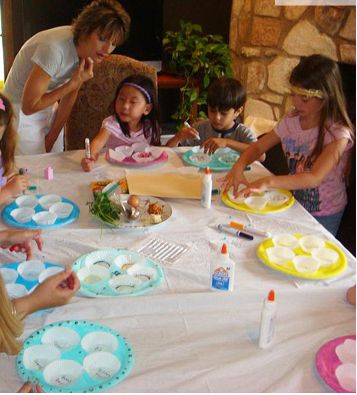
Passover will be here in just a couple of days.  And with Passover comes the wonderful Passover Seder.  And, even though we know how fantastic Passover Seder is…. we know how difficult it is to get the kids to sit still and enjoy the Passover Seder.  Well, how about if they help out with the Seder?  The kids can make the Seder Plate for Passover.  Even if it isn’t the main Seder Plate you use for the Seder they can at least work on the Children’s table Passover Seder Plate.  Beings that the children helped make the Passover Seder Plate will hold their attention a little more as they will want to pay attention to see how it will be used during the Seder.  So, scroll through the many Passover Seder Plates crafts below…. you are sure to find the one that works for you and your children.  Have a Happy Passover.

Ideas for Kids to Make Seder Plates for Passover

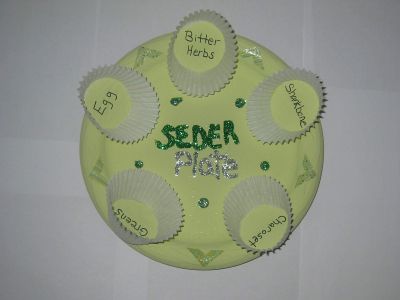
(1)  Spring Seder Plate

Spring Seder Plate

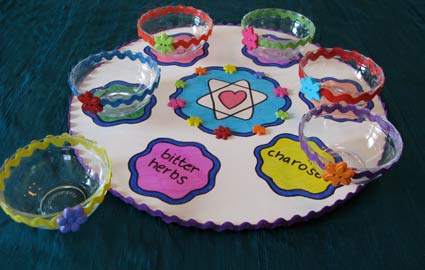
I found this awesome Seder Plate over at Kaboose.  Here they keep the color green to remind you of spring and all the good times ahead.  What a clever idea!!

[ad#ahc]

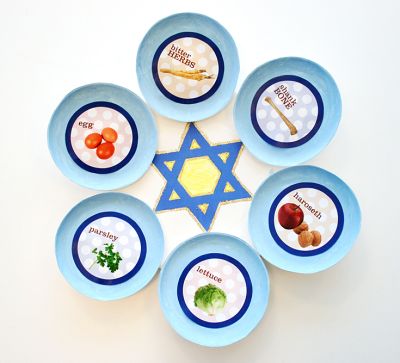
(2)  Star of David Seder Plate

Star of David Seder Plate

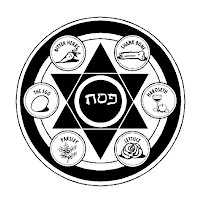
 Nick Jr. has this Seder Plate Craft all figured out.  They use 6 six inch paper plates to create the Passover Seder Plate…. not to mention a Star of David Coloring Page.  Put it all together to create this awesome Passover Seder Plate.


(3)  Printable Seder Plate Craft

Printable Seder Plate Craft

If you are looking for a super easy Passover Seder Plate Craft then this is the one for you.  Free Kids Crafts gives you this craft that is simply a printable…. print off and cut.  Doesn’t get much easier than that.


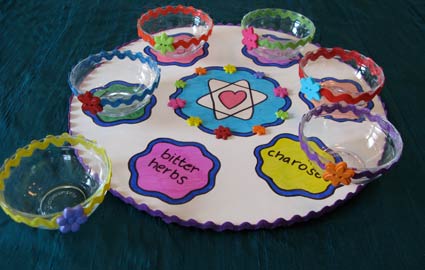
(4)  Bright Passover Seder Plate

Bright Passover Seder Plate

Isn’t this a beautiful Passover Seder Plate?  I love the use of bright colors.  Nothing keeps the attention of the little ones more than bright colors.  Parent Dish shows you step-by-step how to make this Seder Plate.


(5)  Porcelain Passover Seder Plate

Porcelain Passover Seder Plate

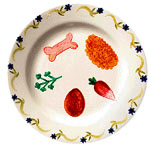
Family Fun uses an ovenproof plate and glaze paint to prepare their Passover Seder Plate.  They have the right idea as once baked this item is quite durable.  These Seder Plates become special to the child as they will be painting them themselves.


(6) Model Clay Passover Seder Plate

Model Clay Passover Seder Plate

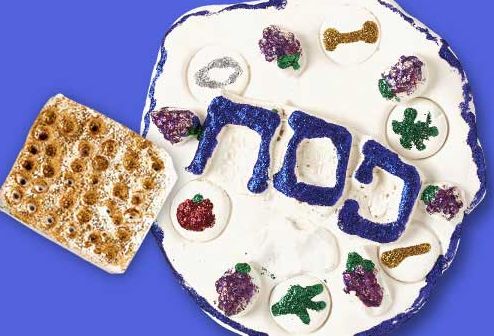
Crayola has an original spin on the traditional Passover Seder Plate.  Their craft is constructed from Model Clay.  Check out their site to get the full details and make this Passover Seder Plate yourself.


(7)  Jeweled Passover Seder Plate

Jeweled Passover Seder Plate

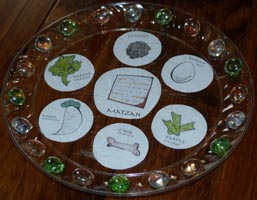
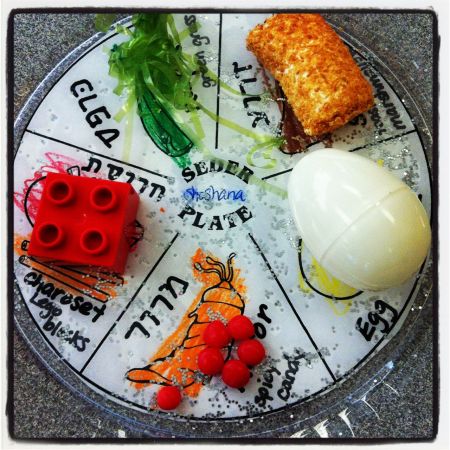
This is a beautiful Passover Seder Plate.  In case you can’t see it, there are lovely stones all around the outside of this plate.  My Activity Maker shows you how you too can make this beautiful Passover Seder Plate.


(8)  Paper Seder Plate

Paper Seder Plate

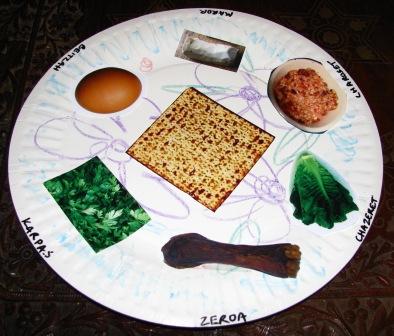
If you are looking for an easy Passover Seder Plate than this is the craft for you.  Made from a Paper Plate and pictures of the Ceremonial Food this craft doesn’t get any easier.  Check out Joyful Jewish to see how to do this craft.


(9)  Tissue Paper Passover Seder Plate

Tissue Paper Passover Seder Plate

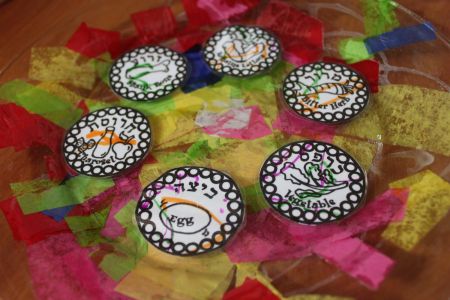
Here is a fun craft to do with the youngest of kids for Passover.  Kids love to work with tissue paper and this Passover Seder Plate Craft has plenty of tissue paper.  Check out Delicate Construction for the full details of the craft.
 

(10)  Denture Cream Passover Seder Plate

Denture Cream Passover Seder Plate

Yes, you read this right…. this craft was made with Denture Cream.  Holidash used Denture Cream to hold the dishes to the Seder Plate.  Check out the full details on their site… you will have to scroll to the 2nd slide.


(11)  Passover Prep

Passover Prep

I found this Passover Seder Craft over at Maybe Sew.  She has the right idea on how to teach the kids a little bit about each of the foods on the Seder Plate…. she uses different items other than the norm and has the kids guess what they should be.  Check out the site for the full details.
Technorati Tags: , , , , , , , , , , ,

How to Make a Lampshade Paper Sculpture – Exercise 2

Earlier today I posted How to Make a Paper Wave Sculpture – Exercise 1.  It shows you the basics of making a Paper Sculpture…. specifically a paper wave sculpture.  Well, in this post I’m going to show you how to make a Lampshade Paper Sculpture…. it’s the 2nd exercise in two showing you how to Paper Sculpt.  It’s a little more complicated than the first, but if you did Exercise 1 you are ready for the challenge of Exercise 2.  So, let’s get started.

How to Make a Lampshade Paper Sculpture


Materials Needed

Paper

Pencil

Ruler

Butter Knife

Tape


Step 1

The paper is ruled off with a pencil and a ruler.

The paper is ruled off with a pencil and a ruler.  Do this in parallel lines an equal distance apart from each other… one on one side of the paper and the next on the other and so on.

[ad#ahc]

Step 2

Now use the lines that you drew as a guide to where to score the paper.

Now use the lines that you drew as a guide to where to score the paper. To score a piece of paper, you can use the dull side of a butter knife. Take a ruler and line it up with one of the pencil lines…then use the dull side of a butter knife and run it along the ruler (on the paper) as if it were a pencil. Now you should have a scored line. The lines are scored on alternate sides of the paper and the paper bent like a fan.


Step 3

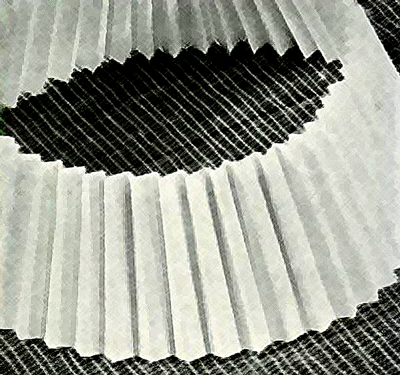
The edges of the paper are taped together to achieve a sort of lampshade effect.

The edges of the paper are taped together to achieve a sort of lampshade effect.


Step 4

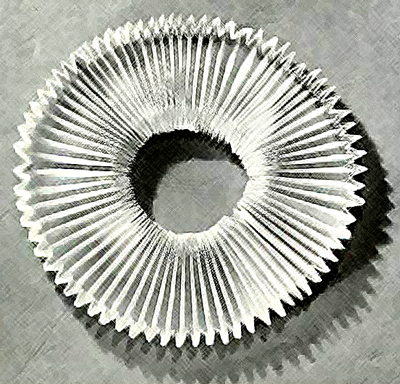
This is what the item looks like from the top.

This is what the item looks like from the top.

That’s all there is to it…. you just finished making your Lampshade Paper Sculpture.  How did your sculpture turn out?  Let me know in the comments below.  And, add a picture of the Lampshade Paper Sculpture as well to the comment…. I’d love to take a look at it.

Technorati Tags: , , , , , , ,

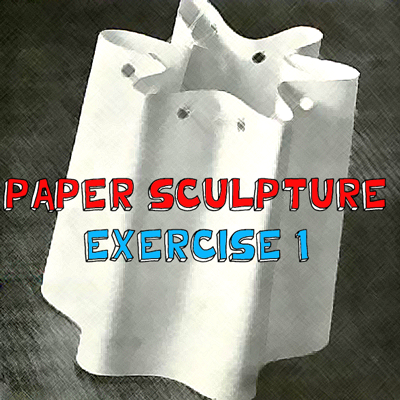
How to Make a Paper Wave Sculpture – Exercise 1

Believe it or not you can actually make sculptures out of paper.  That’s right, you can actually compose items that are built up from a simple paper and molded into shapely items.  In this post I’m going to show you how to make a Paper Wave Sculpture.  With a little bit of patience and following the steps provided below you too will be able to make a Paper Wave Sculpture.  So, grab the materials needed and let’s get started.

How to Make a Paper Wave Sculpture


Materials Needed

Paper

Ruler

Hole Punch

Thread or Fine Wire


Step 1

Cut a strip of paper, hold the ruler firmly across it and pull it through and upwards.

Cut a strip of paper, hold the ruler firmly across it and pull it through and upwards.

[ad#ahc]

Step 2

the paper becomes flexible and easy to handle.

Keep doing this…. the paper becomes flexible and easy to handle.


Step 3

By doing this on opposite sides of the paper you obtain a waved effect.

By doing this on opposite sides of the paper you obtain a waved effect.


Step 4

A thread or fine wire is drawn through a series of holes along the top edge of the paper.

A thread or fine wire is drawn through a series of holes along the top edge of the paper.


Step 5

The thread is drawn up and the edges of the paper fastened together.

The thread is drawn up and the edges of the paper fastened together.

That’s it…. you just made your own Paper Sculpture called the Paper Wave.  Isn’t it amazing?  I think the most amazing part is that this wave is actually just made from paper.  Very cool!!

Technorati Tags: , , , , , ,

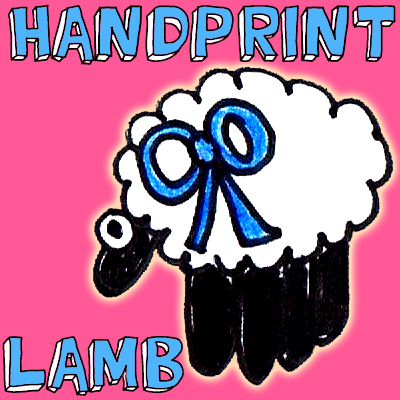
How to Make a Hand Print Lamb

I have a fun and adorable craft for you today.  I’m going to show you how to make a Hand Print Lamb.  This craft is great for all ages….. even the youngest of crafters can enjoy this craft.  Made from cotton, a bow, a googly and of course your hand print…. this craft turns out super cute.  Any child will be so proud they made this.  So, grab the materials needed and let’s get started.

Check out our other Cotton Crafts.

How to Make a Hand Print Lamb


Materials Needed

Black Paint

Paper

Cotton

Googly Eye

Bow

Glue


Step 1

Put black paint on hand.

Put black paint on hand.

[ad#ahc]

Step 2

Press hand on paper.

Press hand on paper.


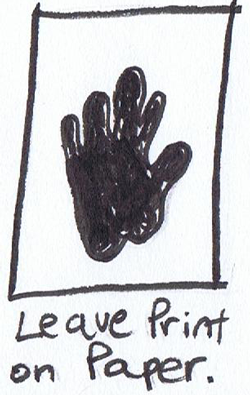
Step 3

Leave print on paper.

Leave print on paper.


Step 4

Glue on cotton

Glue on cotton…. leave fingers showing.


Step 5

Add a googly eye and a bow.

Add a googly eye and a bow.

That’s all there is to it!!  You just finished making a Hand Print Lamb.  How did your lamb turn out?  Let me know in the comments below.  And, add a picture of it too to the comments…. I’d love to see it.

Here is a video on How to Make a Hand Print Lamb.  Watch our step-by-step tutorial.

Technorati Tags: , , , , , , , , , , , , , ,

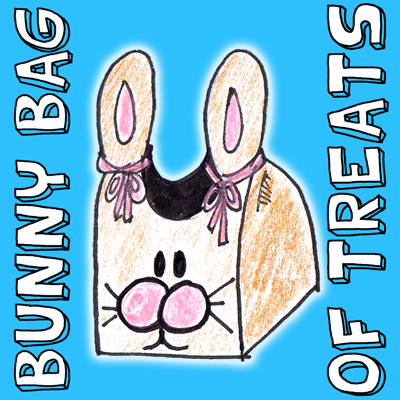
How to Make Bunny Rabbit Treat Bags for Easter

Instead of using an Easter Basket to give out Easter treats to people, have you thought of using a Treat Bag?  Today I’m going to show you how to make a Bunny Rabbit Treat Bag for Easter.  These are great if you have a bunch of people to hand out candy to.  Instead of buying an Easter Basket for everyone…. why not just make these cute Bunny Rabbit Treat Bags.  They are super easy and a ton of fun…. plus they are super cute.  So, grab the materials needed and let’s get started.

Check out our other Easter Crafts.

How to Make Bunny Rabbit Treat Bags for Easter


Materials Needed

Brown Bag

Pencil

Scissors

Black Marker

2 Pom Poms

Treats

2 Ribbons


Step 1

Draw top of bunny's head all around a brown bag.

Draw top of bunny’s head all around a brown bag.

[ad#ahc]

Step 2

After cutting out it will look like this.

Cut out the top of the bunny heads you just drew.  After cutting out it will look like this.
 

Step 3

Draw 2 ovals for eyes

Draw 2 ovals for eyes, draw 3 lines for whiskers and add 2 pom poms where shown.


Step 4

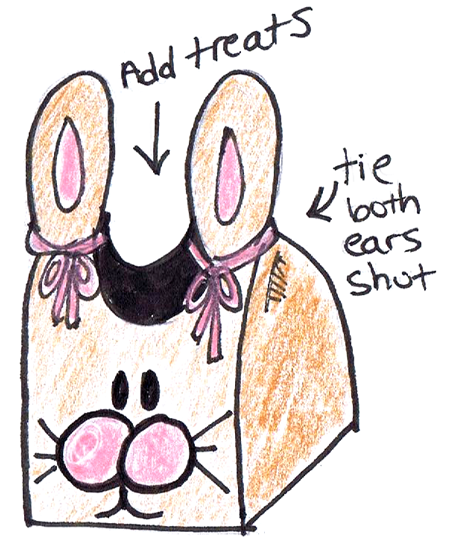
Add treats

Add treats.  Once you have added the treats tie both ears shut on each side.

That’s it!!  You just finished your Bunny Rabbit Treat Bags for Easter.  Now, give this Bunny Rabbit Treat Bag to the receiver….. they are sure to love it!!

Technorati Tags: , , , , , , , , , , , , , ,

How to Make a Woven Paper Easter Basket

I have a fun Easter Craft for you today….. In this post I’m going to show you how to make a Woven Paper Easter Basket.  This Easter Basket is made out of sheets of construction paper and ribbon and when put together correctly it makes for an awesome Easter decoration.  You can fill it with plastic Easter Eggs or Paper Easter Eggs you made yourself and display it proudly in your house for all to see.  So, grab the materials needed and let’s get this craft started.

Check out our other Easter Crafts.

How to Make a Woven Paper Easter Basket


Materials Needed

3 Sheets of Construction Paper

Stapler

Scissors

Ribbon or Construction Paper


Step 1

Fold 2 pieces of paper lengthwise.

Fold 2 pieces of paper lengthwise.

[ad#ahc]

Step 2

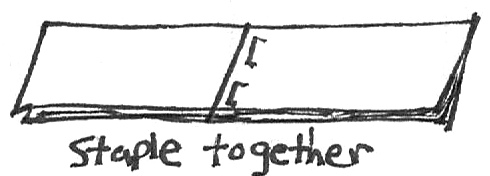
Staple together.

Staple together.


Step 3

Fold in half again.

Fold in half again.


Step 4

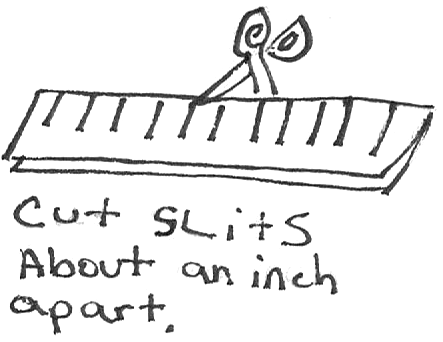
Cut slits about an inch apart.

Cut slits about an inch apart.


Step 5

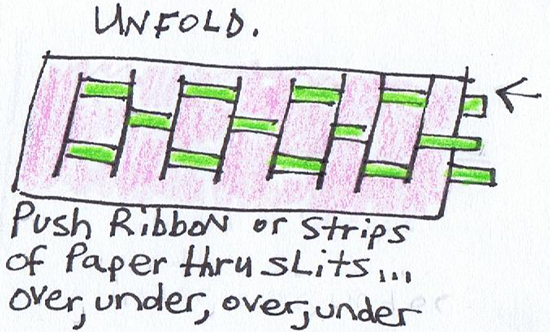
Unfold.  Push ribbon or strips of paper thru slits... over, under, over, under.

Unfold.  Push ribbon or strips of paper thru slits… over, under, over, under.


Step 6

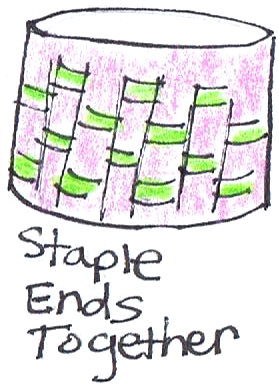
Staple ends together.

Staple ends together.


Step 7

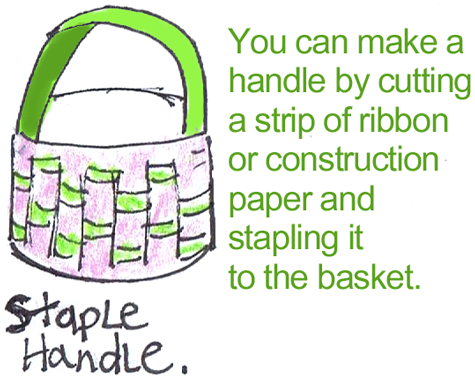
make a handle by cutting a strip of ribbon or construction paper and stapling it to the basket.

You can make a handle by cutting a strip of ribbon or construction paper and stapling it to the basket.

Step 8

pixel art, , , , , , , , , , , , , , , ,

 " src="https://www.artistshelpingchildren.org/kidscraftsactivitiesblog/wp-content/uploads/2012/03/inside-basket.png" width="400" height="393" />

Then take the 3rd sheet of construction paper and trace the circle of the basket onto the paper. Then make a 2nd line outside this first circle. Then cut slits from the outside circle to the inside circle. Then fold these slits inwards. Then tape these inward slits to the inside of the basket.

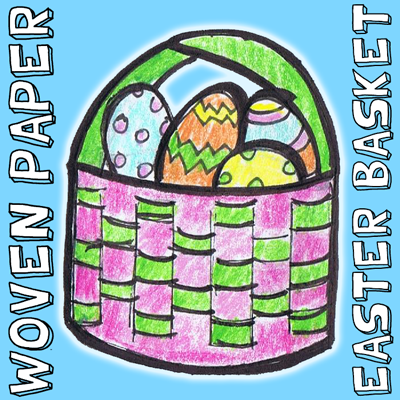
Finished Basket

Finished woven paper Easter basket

There you go…. you just finished making your Woven Paper Easter Basket.  Now, fill it with Easter Eggs and put it out as an Easter Decoration.  It sure to be a big hit!!

Technorati Tags: , , , , , , , , , , , , , , , ,

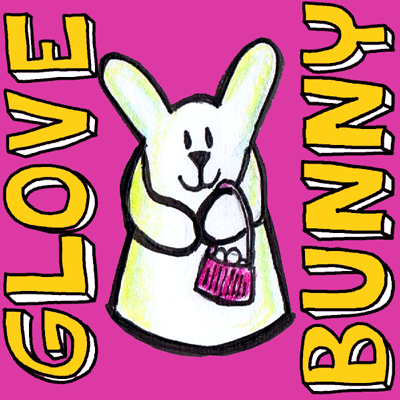
How to Make a Glove Bunny for Easter

Get ready for a fun and creative craft because I have just that for you today.  In this post I am going to show you how to make a Glove Bunny for Easter.  That’s right…. it’s an Easter bunny made out of a Glove.  This is a great craft to do to actually use that glove that you no longer have the pair for.  After stuffing the glove you have a nice, cuddly Easter Bunny that would be perfect as an Easter decoration or a nice cuddly friend.  The choice is yours.  So, let’s get started.

Check out our other Easter Crafts.

How to Make a Glove Bunny for Easter


Materials Needed

Glove

2 Safety Pins

Stuffing

Glue

Clothespins or Clips

Cap

yarn

Construction Paper

Ribbon or Twist Tie

Cotton Ball


Step 1

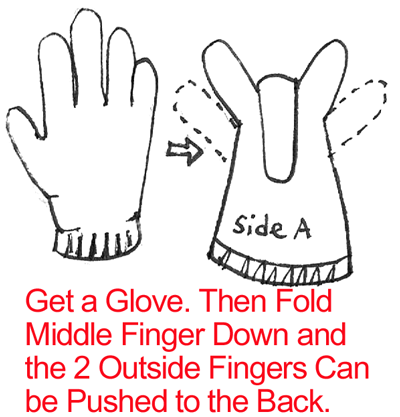
Get a glove.

Get a glove.  Then fold middle finger down and the two outside fingers can be pushed to the back.

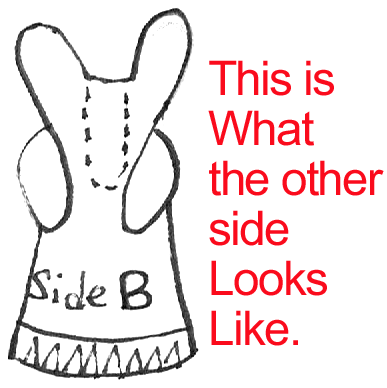
This is what the other side looks like.

This is what the other side looks like.

[ad#ahc]

Step 2

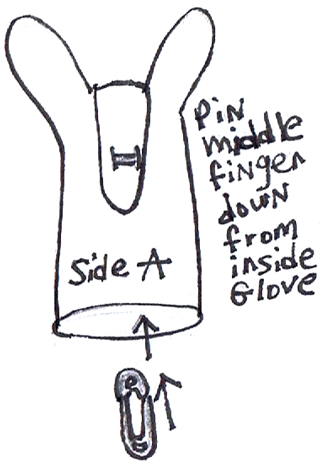
Pin middle finger down from inside of glove.

Pin middle finger down from inside of glove.


Step 3

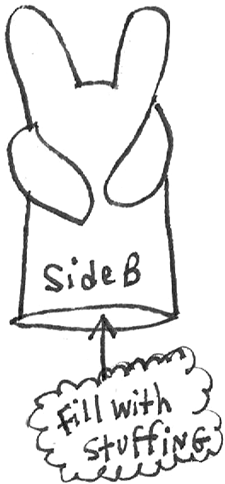
Fill with stuffing.

Fill with stuffing.


Step 4

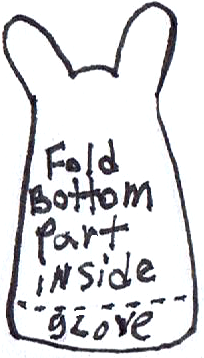
Fold bottom part inside glove.

Fold bottom part inside glove.


Step 5

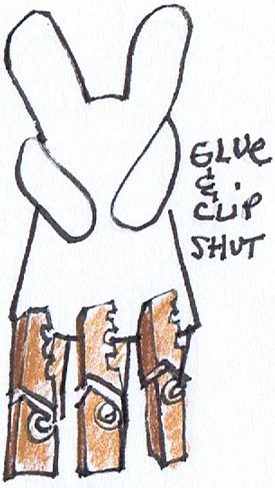
Glue and clip shut.

Glue and clip shut.


Step 6

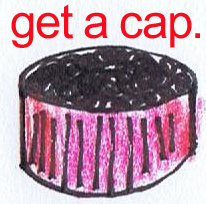
Get a cap.

Get a cap.

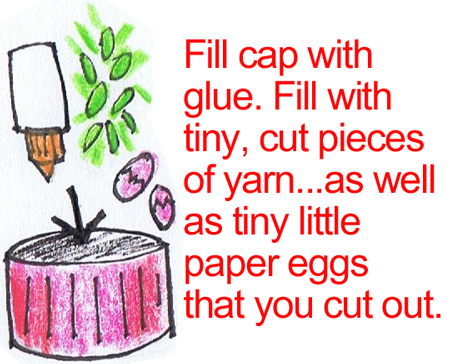
Fill cap with glue.

Fill cap with glue.  Fill with tiny, cut pieces of yarn… as well as tiny little paper eggs that you cut out.

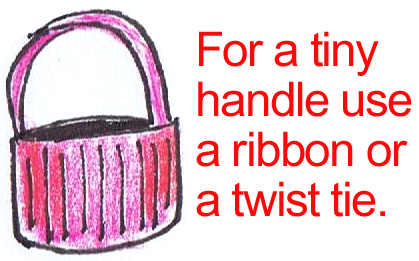
For a tiny handle use a ribbon or twist tie.

For a tiny handle use a ribbon or twist tie.


Step 7

Put tiny basket handle over one arm and then pin both arms together.

Put tiny basket handle over one arm and then pin both arms together.  Pin from behind arms.


Step 8

Glue cotton ball to back.

Glue cotton ball to back.

And, that’s it…. you just finished making your Glove Bunny for Easter.  Isn’t he a cutie patootie?!  Let me know how your Glove Bunny turned out in the comments below.  And, take a picture of it too and post that with the comment as well…. I’d love to see it.

Technorati Tags: , , , , , , , , , ,

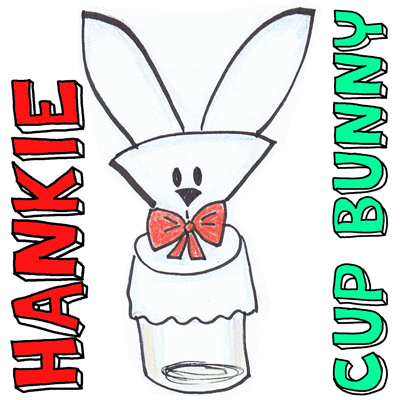
How to Make a Handkerchief Bunny Cup Cover

Today I’m going to show you how to make a Handkerchief Bunny Cup Cover.  If you don’t have a Handkerchief available…. you might have to ask one of your grandparents to borrow one for this craft.  You are going to be folding the handkerchief to create an Easter Bunny.  Once completed, this craft is perfect to use as an Easter decoration this Easter.  It would look great on any tabletop.  So, grab the materials needed and let’s get started.

Check out our other Easter Crafts.

How to Make a Handkerchief Bunny Cup Cover


Materials Needed

Handkerchief

Cup


Step 1

Fold hankie over.

Fold hankie over.

[ad#ahc]

Step 2

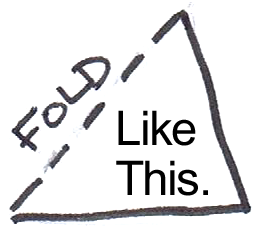
It should look like this.

It should look like this.


Step 3

turn so fold is at bottom.

First, turn so fold is at bottom.  Then… Fold up bottom about 2 inches.  Turn over.


Step 4

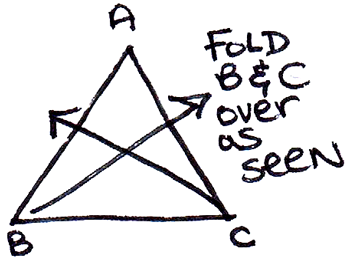
Fold B & C over as seen.

Fold B & C over as seen.

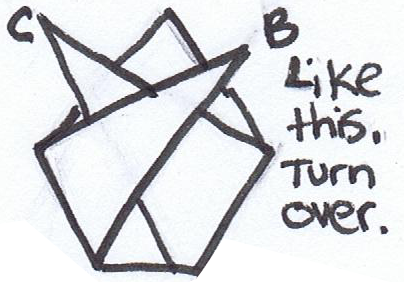
It should look like this.

It should look like this.  Turn over.


Step 5

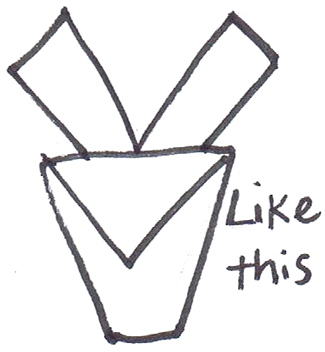
It should look like this.

It should look like this.


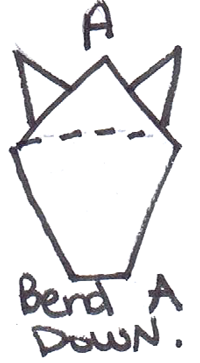
Step 6

Bend A down.

Bend A down.


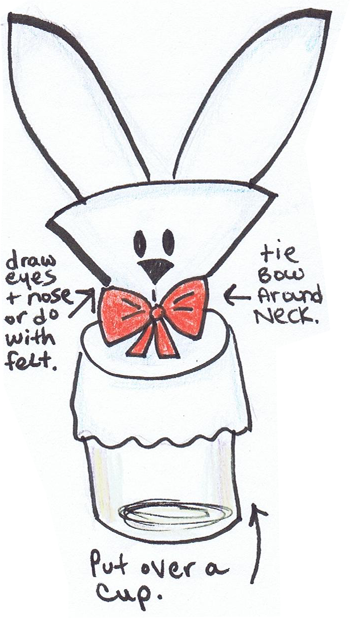
Step 7

Now tie a bow around the neck ….and for a face, draw eyes and nose or cut out felt shapes for facial features. Then put it over a cup or glass.

There you have it…. you just finished your Handkerchief Bunny Cup Cover.  Now, use it to decorate your tabletop for Easter.  People will love it!!

Technorati Tags: , , , , , , , , , , , ,

How to Make a Glued String Easter Basket

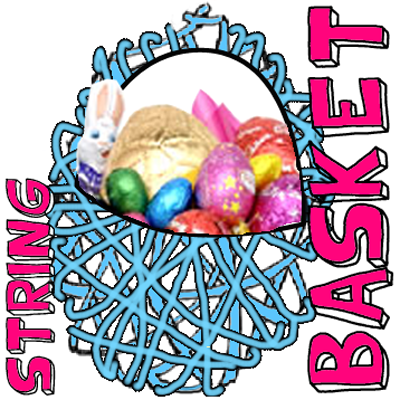
Today I have a fun and creative craft for you.  In this post I’m going to show you how to make a Glued String Easter Basket perfect to fill with Easter eggs and candy.  The Easter Basket turns out beautifully and it is simply made with a balloon, yarn, flour and water.  Don’t use the same boring Easter Baskets that every child uses from the store…. make your very own Glued String Easter Basket.  The Easter Bunny will love it.  So, let’s get started.

Check out our other Easter Crafts.

How to Make a Glued String Easter Basket


Materials Needed

Balloon

Flour

Water

Shallow Bowl

Yarn

String

Needle

Scissors


Step 1

Blow up balloon and tie a knot at the end.

Blow up balloon and tie a knot at the end.  Tie a string to this, and hang it from an overhead point, so that it is about eye level for the child.

[ad#ahc]

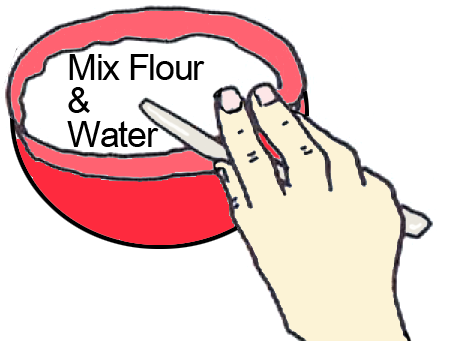
Step 2

Mix flour and water.

Mix flour and water.  Do this by mixing 1/4 cup of flour into 1 cup of water. You will want the mixture to be thin-sh and a bit runny.


Step 3

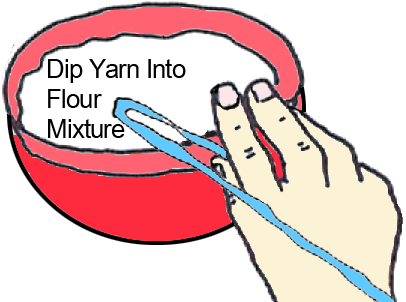
Dip the yarn into the flour mixture

Cut yarn in lengths of about 4 feet lengths. Dip the yarn into the flour mixture and wet each piece of yarn thoroughly.


Step 4

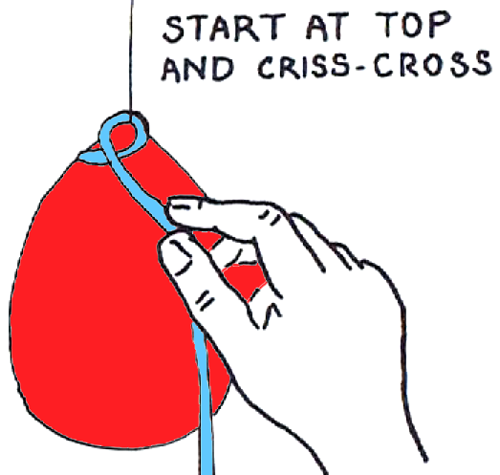
Start at top and criss-cross.

Start at top and criss-cross.


Step 5

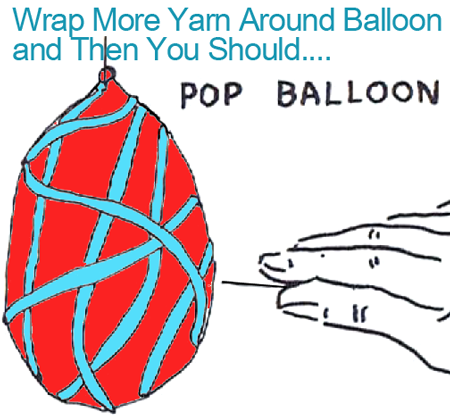
Wrap more yarn around balloon and then you should pop the balloon.

Wrap more yarn around balloon and then you should pop the balloon.


Step 6

Cut top side of string on both sides to make basket.

Cut top side of string on both sides to make basket.

And there you have it…. you just made a Glued String Easter Basket.  How did it turn out for you?  Let me know in the comments below.  And, make sure to take a picture of your Easter Basket too and share it in the comment…. I’d love to see it.

Technorati Tags: , , , , , , , , , , , , ,