How to Make a Wearable Puppet Stage

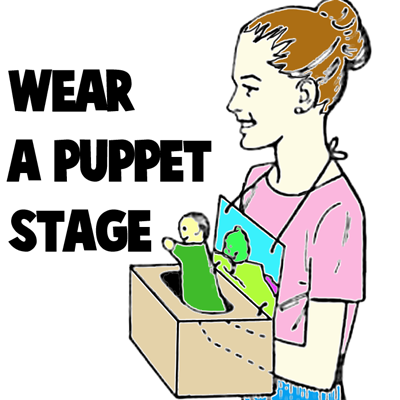
Oh boy…. do I have a fun craft for you today!!  In this post I’m going to show you how to make a Wearable Puppet Stage.  Kids love putting on puppet shows.  Well, why not wear a puppet stage?  It just makes sense…. carry this puppet stage on your chest and you are all ready to put on a puppet show for your family and friends.  Keep in mind you will need a bit of help from an adult with the cutting of the box.  So, grab the materials needed and let’s get started.

Check out our other Puppet Crafts.

How to Make a Wearable Puppet Stage


Materials Needed

One cardboard box approximately 7″x9″x16″ with all flaps intact (small appliance boxes are good)

scissors

2 lengths woven nylon or cotton rope or clothesline 36″ long

large staples and stapler or glue

paint or something to decorate the box with


Step 1

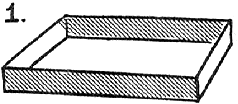
Cut one flap off one long side of the box.

Cut one flap off one long side of the box. Cut flaps on short sides in half, as seen in above sketch.

[ad#ahc]

Step 2

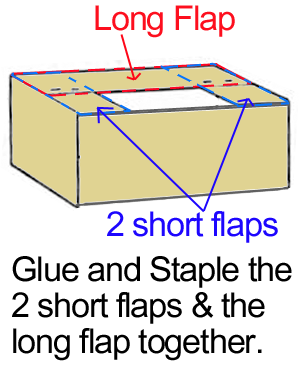
Staple or glue half flaps and remaining long flap together.

Staple or glue half flaps and remaining long flap together.


Step 3

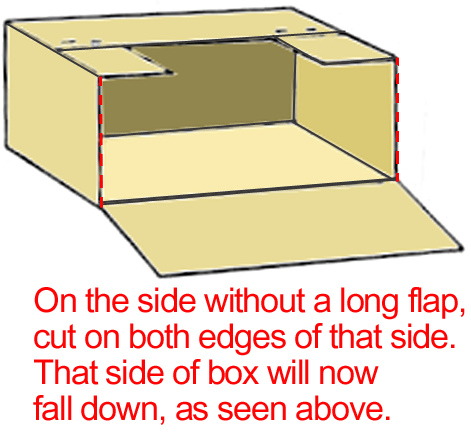
Cut side (with flap removed)  down at both corners and fold down as in above illustration.

Cut side (with flap removed) down at both corners and fold down as in above illustration.


Step 4

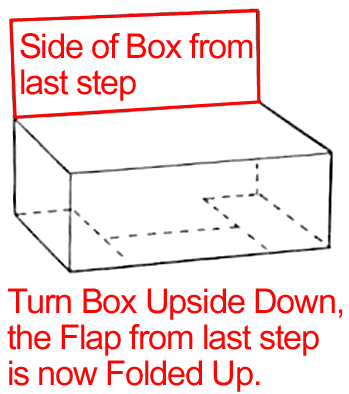
Turn box upside down so the hole is now on the bottom.

Turn box upside down so the hole is now on the bottom.


Step 5

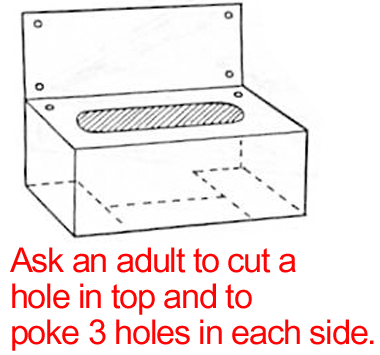
Ask an adult to help you cut an opening

Ask an adult to help you cut an opening that is about 4 1/2″ wide and 10″ or 11″ long. Also ask an adult to punch 3 holes in each side, as seen in picture.


Step 6

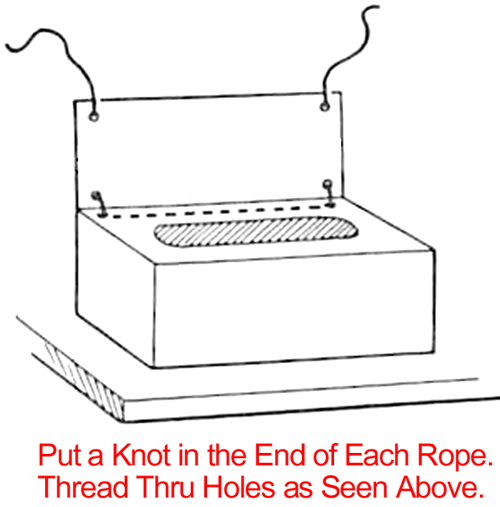
Tie a knot in one end of each piece of rope. Put rope through the 3 holes as in sketch above.

Tie a knot in one end of each piece of rope. Put rope through the 3 holes as in sketch above.


Step 7

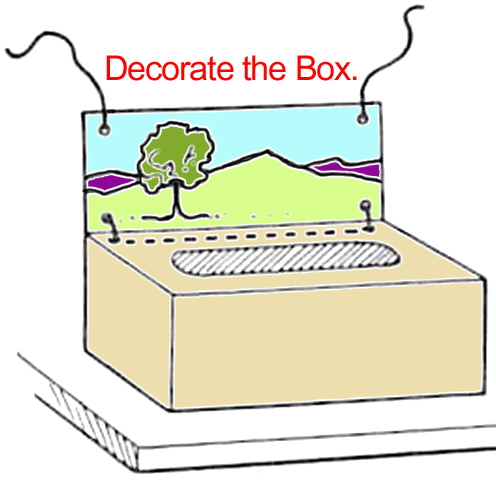
Draw a Background on the back panel ... as seen in the picture.

Draw a Background on the back panel … as seen in the picture.

Optionally, you can Cover outside of puppet stage with adhesive plastic, paint it, cover it with colorful duct tape, cover with wall paper, or just leave it as is.


Step 8

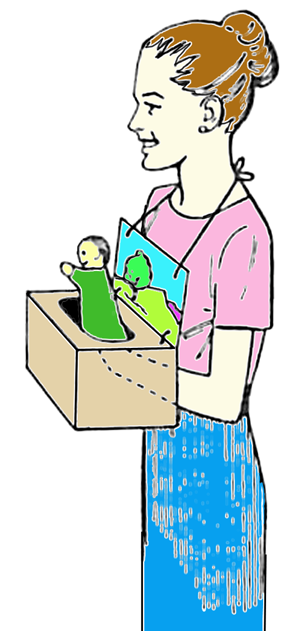
Now you can Wear puppet stage as in above illustration.

Now you can Wear puppet stage as in above illustration. Or you can optionally set it on the table. This is a fun way to put on a puppet show!

Technorati Tags: , , , , , , , , ,

How to Make a Changing Story Board

Today I’m going to show you how to make a changing story board.  You can bring your stories to life by using your creativity and a little bit of imagination.  As the story evolves you can change your story board to depict the story you are trying to tell to your family and friends.   You will actually have moveable figures and changeable backgrounds for your story…. what better way to actually tell your story than to have visuals.  So, grab the materials needed and let’s get started.

How to Make a Changing Story Board


Materials Needed

2 poster boards

markers and / or poster paints

scissors

stapler and staples (optional)

glue or paste

tape

card stock to make figures


Step 1

Fold one of the poster boards as seen in above

Fold one of the poster boards as seen in above. Basically folding forward and then fold backwards…then forwards…backwards…etc.

[ad#ahc]

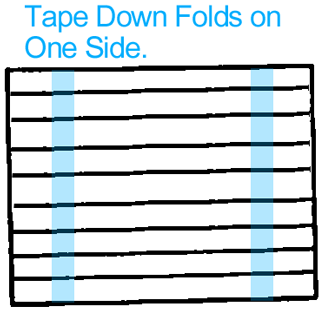
Step 2

Tape folds on back of poster board.

Tape folds on back of poster board.


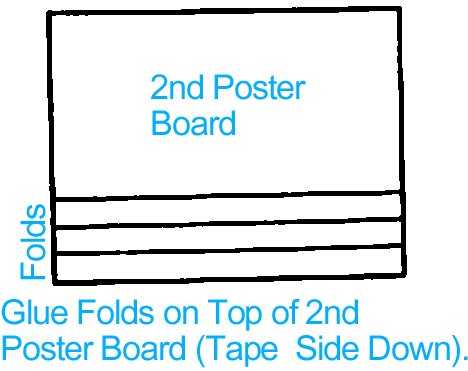
Step 3

Glue folds onto bottom of the second poster board

Glue folds onto bottom of the second poster board, as seen in the picture. You can cut off folds that you don’t want before you glue it down. along sides of board.


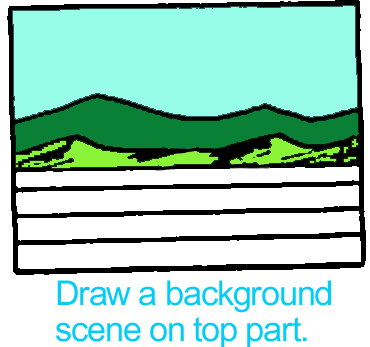
Step 4

Draw a background that depicts your story.

Draw a background that depicts your story. This should be drawn on on upper section (2nd poster board).


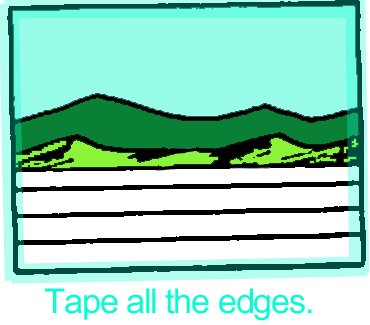
Step 5

Bind edges with tape.

Bind edges with tape.


Step 6

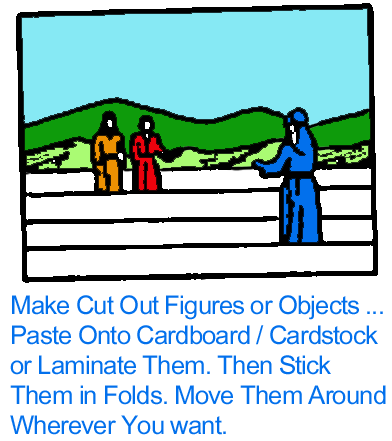
Place figures in various folds as story is told.

Make cut out figures or objects.  Place figures in various folds as story is told.


Step 7

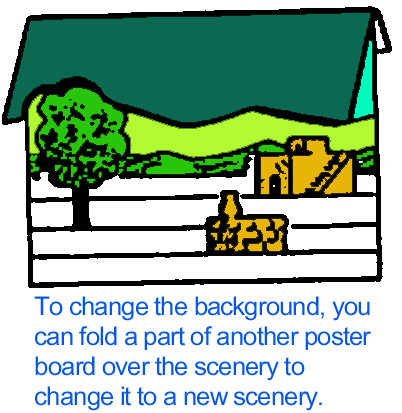
Scenes may be changed easily.

Scenes may be changed easily. Night or stormy sky may be added by drawing and coloring on another poster board and folding along top about 2 in from edge.  Hang over top of board, as seen above. Cut the bottom of sky to show hills in background. Shrubs, houses, wells, etc. may be placed in folds.

And, that’s it.  Use your imagination to make any story line you can come up with for your story board.  Share your story with your family and friends…. they are sure to love it.

Technorati Tags: , , , , , , , , , ,

How to Make Papier Mache Bowls

Today I’m going to show you how to make Papier Mache Bowls.  Using a wooden, glass or ceramic bowl for your armature for this project as well as newspaper strips and the papier mache paste we will make together you will be able to make a beautiful bowl that you can actually hold stuff in.  Once dry you will paint the bowl in the beautiful colors of your choice…. it is an all around fun project.  So, grab the materials needed and let’s get started.

Check out our other Sculpting Crafts.

How to Make Papier Mache Bowls


Materials Needed

Wooden, Glass, or Ceramic Bowls

Grease, Lard or Salad Oil

Newspaper Strips

1 Cup Water

4 tsp Salt

1 Cup Flour

Elmer’s Glue (optional)

Tempera or Acrylic Paint

Shellac or Lacquer (optional)


Step 1

Select simple wooden, glass, or ceramic bowls to serve as the armature for this project.

Select simple wooden, glass, or ceramic bowls to serve as the armature for this project. Make sure that the bowl you have selected is free from undercuts so that no problems arise in the removal of the following papier mache forms. Go over the surface of the bowl lightly with grease, lard, or salad oil to facilitate removal of the finished papier mache form.

[ad#ahc]

Step 2

In beginning this project, tear newspaper strips.

In beginning this project, tear newspaper strips.


Step 3

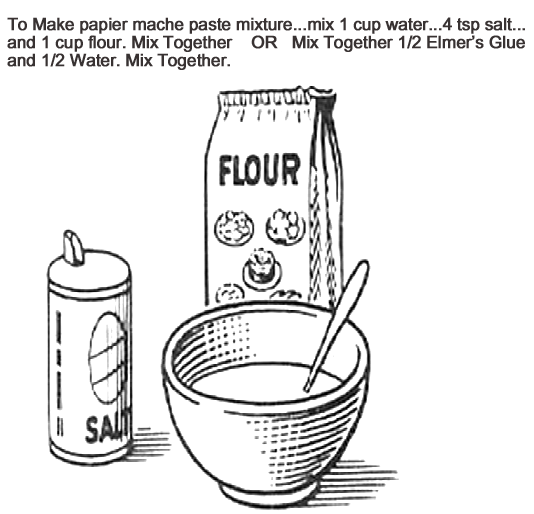
Make Papier Mache Paste.

Make Papier Mache Paste…it should be the consistency of light cream. Soak newspaper strips in prepared paste.  To make Papier Mache paste mixture…. mix 1 cup water… 4 tsp salt… and 1 cup flour.  Mix together.  Or, mix together 1/2 Elmer’s Glue and 1/2 water.  Mix together.


Step 4

Dip / soak each newspaper strip in the papier mache mixture

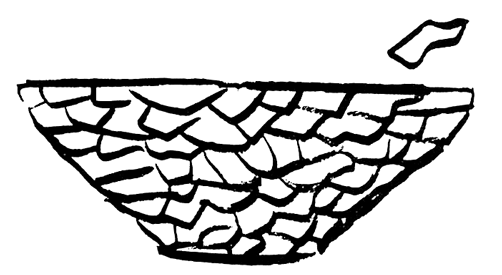
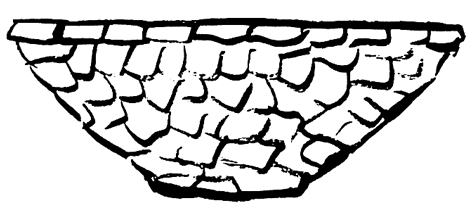
Dip / soak each newspaper strip in the papier mache mixture and then you will place them on the bowl. Build up a shell of about six layers of newspaper strips around the outside of the bowl.


Step 5

When the papier mache is dry, lift the shell from the original bowl

When the papier mache is dry, lift the shell from the original bowl and build up the lip on the papier mache bowl as illustrated above. This will provide extra strength and will give a more finished appearance to the bowl.


Step 6

When the papier mache is dry, paint with tempera or acrylic paint.

When the papier mache is dry, paint with tempera or acrylic paint. You can finish with an application of shellac or lacquer for final, durable surface conditioning.

And, there you have it….. that’s how you make Papier Mache Bowls.  How did your bowl turn out?  Let me know in the comments below?  Also, take a picture of your finished Papier Mache Bowl and share it with your comment as well.  I’d love to see it.

Technorati Tags: , , , , , , , , ,

How to Make a Milk Carton Row Boat

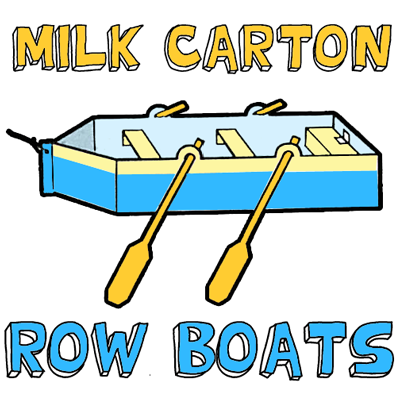
Today I have a craft for you that is perfect for the nice warm summer season.  In this post I will show you how to make a Milk Carton Row Boat.  Made from a couple of milk cartons this row boat will actually float.  What is nice about milk cartons is that their waxy surface makes them completely water proof…. perfect for the water.  So, grab the materials needed and let’s get started.

Check out our other Milk Carton Crafts.

How to Make a Milk Carton Row Boat


Materials Needed

2 Milk Cartons

Pen or Pencil

Scissors

Tape

Nail

String


Step 1

Rinse out 2 finished Milk Cartons.

Rinse out 2 finished Milk Cartons.  Let dry.

[ad#ahc]

Step 2

Put carton on its side... draw a line 2 inches from bottom.

Put carton on its side… draw a line 2 inches from bottom.  Cut along this line.

Step 3

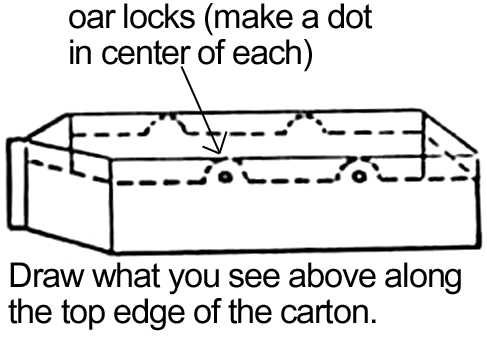
Draw what you see above along the top edge of the carton.

Draw what you see above along the top edge of the carton.  For the oar locks…. make a dot in the center of each.


Step 4

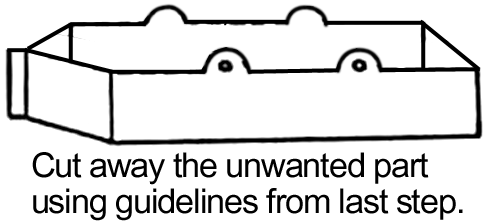
Cut along the unwanted part using guidelines from last step.

Cut along the unwanted part using guidelines from last step.


Step 5

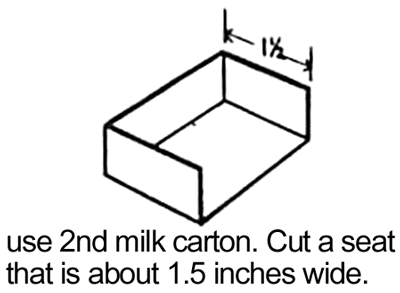
Use 2nd milk carton.

Use 2nd milk carton.  Cut a seat that is about 1.5 inches wide.


 Step 6

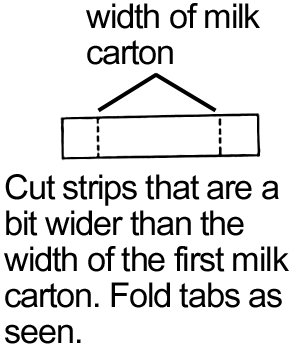
Cut strips that are a bit wider than the width of the first milk carton.

Cut strips that are a bit wider than the width of the first milk carton.  Fold tabs as seen.

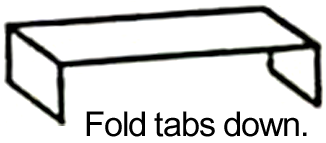
Fold tabs down.

Fold tabs down.


Step 7

Draw oars on extra milk carton.

Draw oars on extra milk carton.  Cut out 4 of them.


Step 8

Tape the seats into the boat.

Tape the seats into the boat.


Step 9

With a nail, poke a hole in each oar lock.

With a nail, poke a hole in each oar lock.  Also, poke a hole in front of boat.  Put an oar in each oar lock.  Tie string around the hole in the front of the boat.  Now go play with your boat.

And that’s it.  You just made yourself your very own Milk Carton Row Boat.  Use it in your pool, bath tub or any body of water.  Enjoy!!

Technorati Tags: , , , , , , , , ,

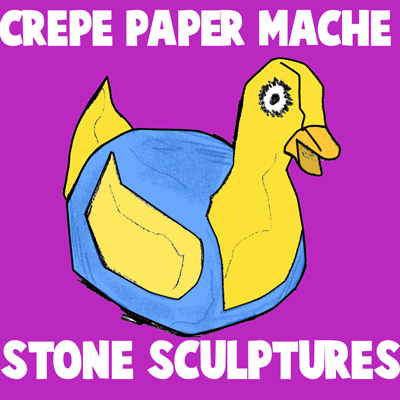
How to Make Crepe Paper Mache Rock Sculptures

HAVE you ever wished you could suggest a use for the interesting stones that children bring home? Here is an idea. By adding crepe-paper mache to these rocks, the children can produce interesting creatures of the imagination. These can be used for paperweight gifts, but the experience of making them has its own reward. With crepe-paper mache children can make rocks into birds, animals, vehicles, fruit, vegetables, holiday novelties.  Sounds fun, right?  Sure does.  So, let’s get started.

Check out our other crafts made from stones and rocks.

How to Make Crepe Paper Mache Rock Sculptures


Materials Needed

Crepe Paper of Different Color

1 Cup Measuring Cup

Bowl

Water

Mixing Spoon

Flour

Salt

Rock


Step 1

Cut up crepe paper into tiny pieces.

Cut up crepe paper into tiny pieces.

[ad#ahc]

Step 2

Make about one cupful of crepe paper.

Make about one cupful of crepe paper.


Step 3

Add enough water to cover paper... soak overnight.

Add enough water to cover paper… soak overnight.


Step 4

Mix and rub wet paper into into fine pulp.

Mix and rub wet paper into into fine pulp.


Step 5

Mix in 4 or 5 tablespoons of flour and 2 tablespoons of salt.

Mix in 4 or 5 tablespoons of flour and 2 tablespoons of salt.  Work until texture of clay.  Add more flour or salt as needed.  Make a different batch for each color.


Step 6

Use the mixture as if it were clay.

Use the mixture as if it were clay.  Use rock as base, and crepe clay as head, wings, feet, tails, or whatever else your sculpture needs.  It will dry as hard as the rock.

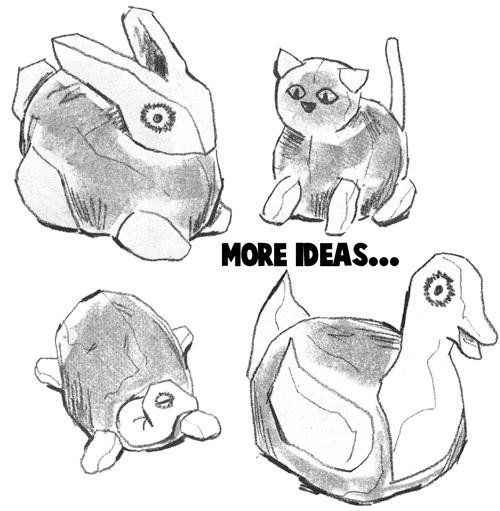
Here are more ideas


Here are some more ideas.


And, there you have it.  A great way to mold many different items simply by making Crepe Paper Mache Rock Sculptures.  What did you land up sculpting?  Let me know in the comments below.  And, don’t forget to take a picture of your item as well…. you can add the picture to the comment.  I’d love to see it.

Technorati Tags: , , , , , , , ,

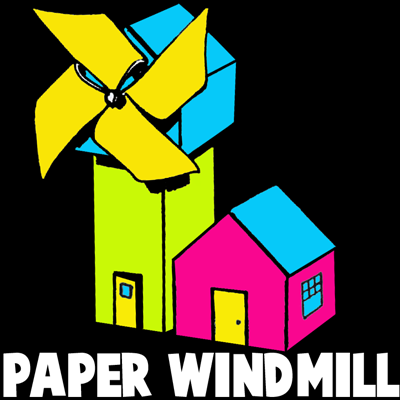
How to Make a Folded Paper Windmill

Today I am going to show you how to make a Folded Paper Windmill.  This windmill is so much fun to make and it is simply made from 4 sheets of paper.  The majority of the craft supplies needed can be found in your home so you can get started with this craft right away.  So, grab the materials needed and let’s get started.

Check out our other Paper Folding Activities.

How to Make a Folded Paper Windmill


Materials Needed

4 Sheets of Paper

Scissors

Paste/Glue

Ruler

Pencil

Paper Fastener


Top of Windmill

Step 1

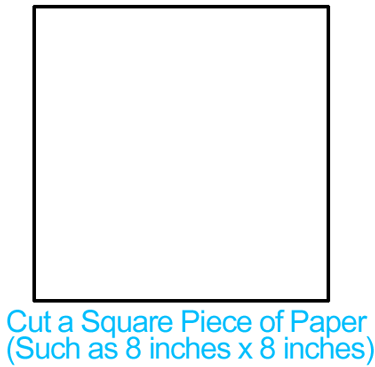
Cut a square piece of paper

Cut a square piece of paper (such as 8 inches x 8 inches).

[ad#ahc]

Step 2

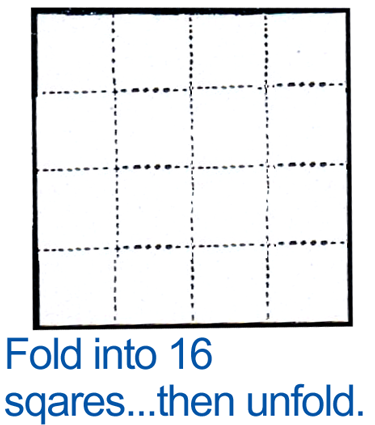
Fold into 16 squares and then unfold.

Fold into 16 squares and then unfold.  Detailed steps are below.

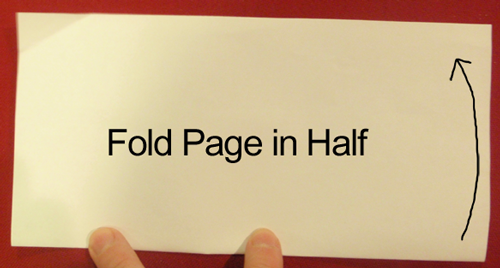
Fold page in half.

Fold page in half.

Fold page in half again.

Fold page in half again.

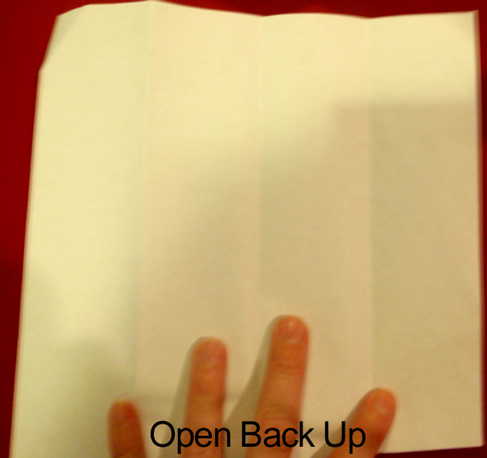
Open back up.

Open back up.

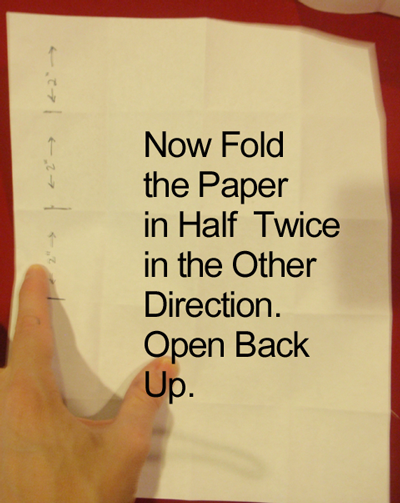
Fold in half twice in the other direction.

Fold in half twice in the other direction.

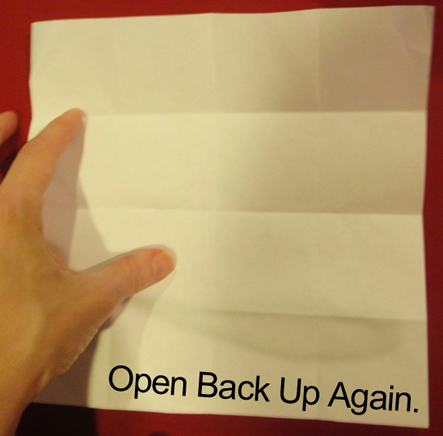
Open back up again.

Open back up again.


Step 3

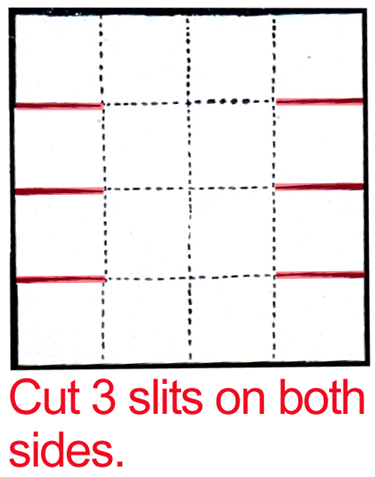
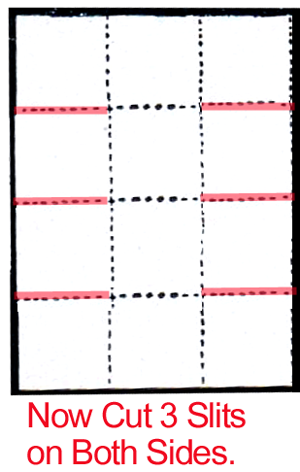
Cut 3 slits on both sides.

Cut 3 slits on both sides.

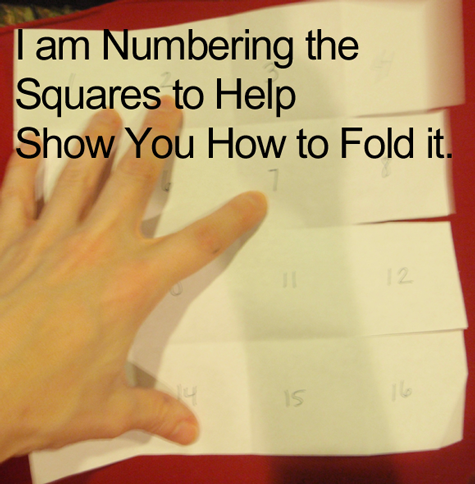
I am numbering the squares to help show you how to fold it.

I am numbering the squares to help show you how to fold it.


Step 4

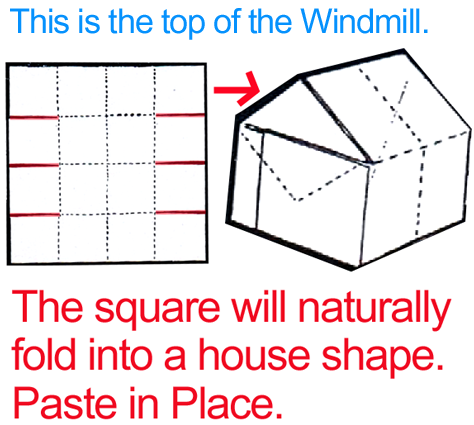
This is the top of the windmill.

This is the top of the windmill.  The square will naturally fold into a house shape.  Paste in place as I will show you below.

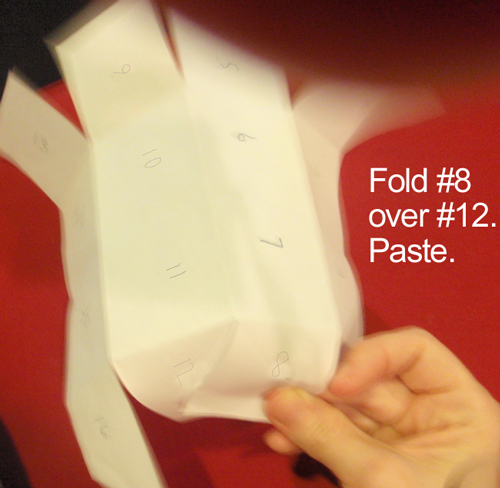
Fold #8 over #12.  Paste.

Fold #8 over #12.  Paste.

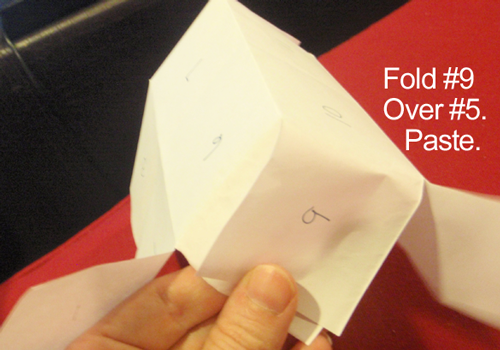
Fold #9 over #5.  Paste.

Fold #9 over #5.  Paste.

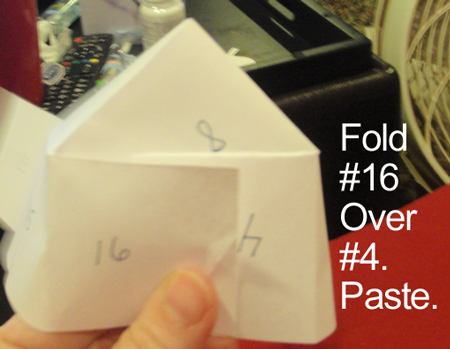
Fold #16 over #4.  Paste.

Fold #16 over #4.  Paste.

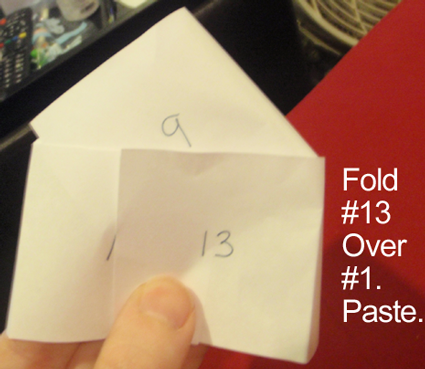
Fold #13 over #1.  Paste.

Fold #13 over #1.  Paste.

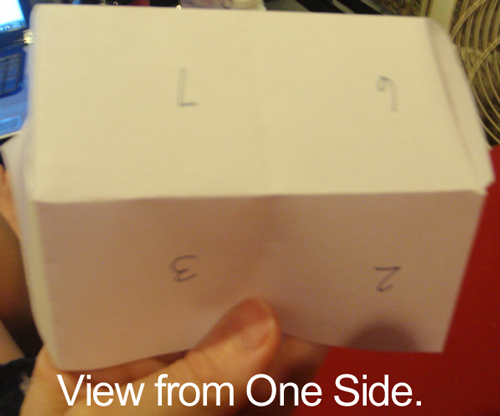
View from one side.

View from one side.

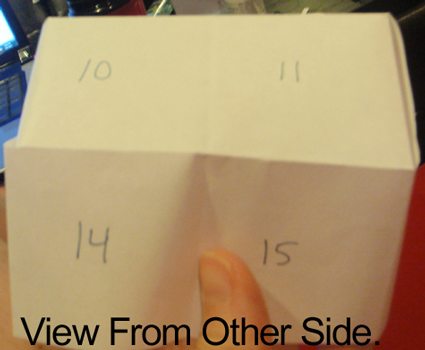
View from other side.

View from other side.


House

Step 1

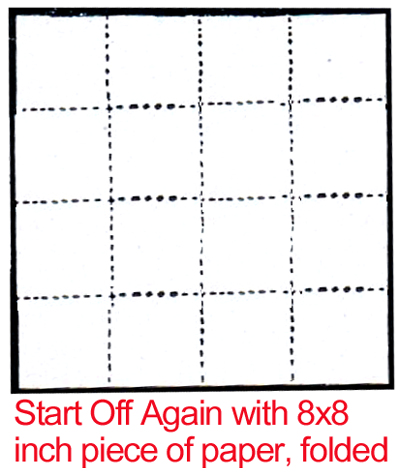
Start off again with 8x8 inch piece of paper, folded.

Start off again with 8×8 inch piece of paper, folded.


Step 2

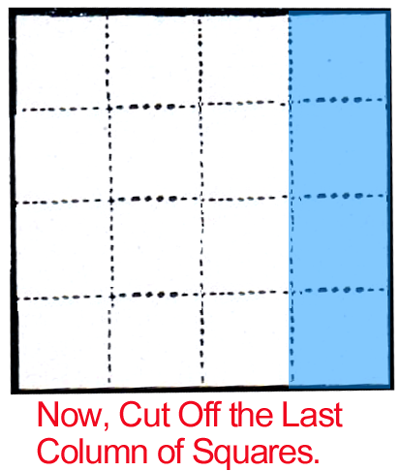
Now, cut off the last column of squares.

Now, cut off the last column of squares.

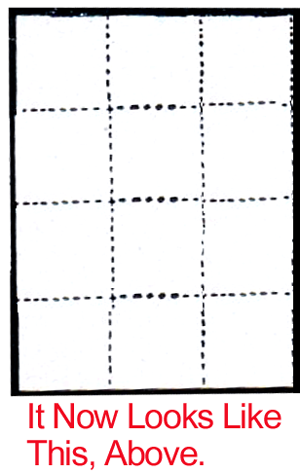
It now looks like this

It now looks like this, above.


Step 3

Now, cut three slits on both sides.

Now, cut three slits on both sides.


Step 4

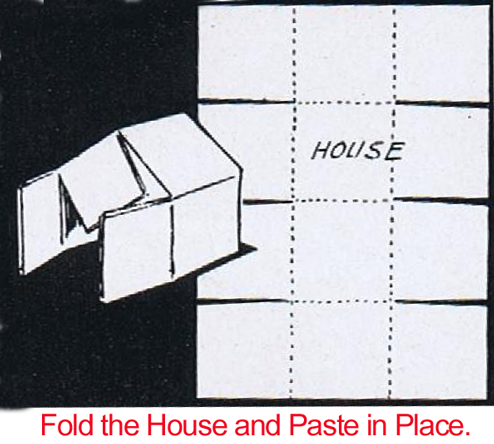
Fold the house and paste in place.

Fold the house and paste in place.


Windmill

Step 1

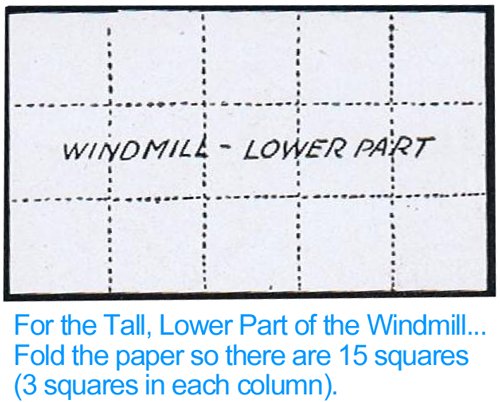
For the tall, lower part of the windmill... fold the paper so there are 15 squares

For the tall, lower part of the windmill… fold the paper so there are 15 squares (3 squares in each column).  Follow directions below.

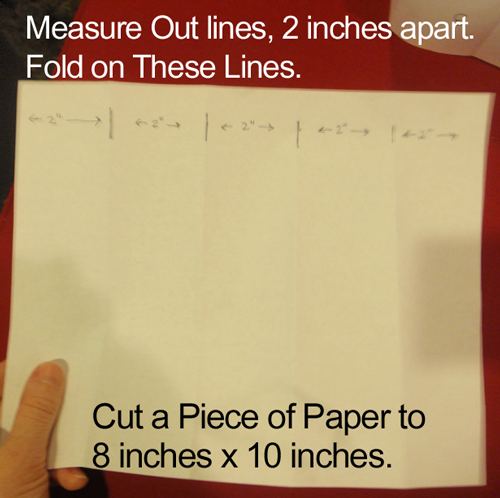
Cut a piece of paper 8 inches x 10 inches.

Cut a piece of paper 8 inches x 10 inches.  Measure out lines 2 inches apart.  Fold on these lines.

Now fold the paper in half twice in the other direction.

Now fold the paper in half twice in the other direction.  Open back up.

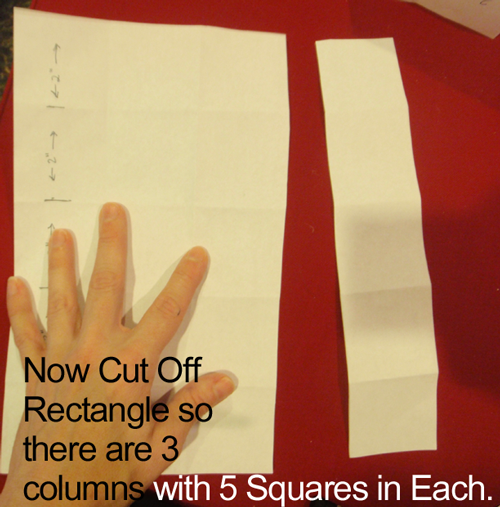
Now cut off rectangle so there are 3 columns with 5 squares in each.

Now cut off rectangle so there are 3 columns with 5 squares in each.


Step 2

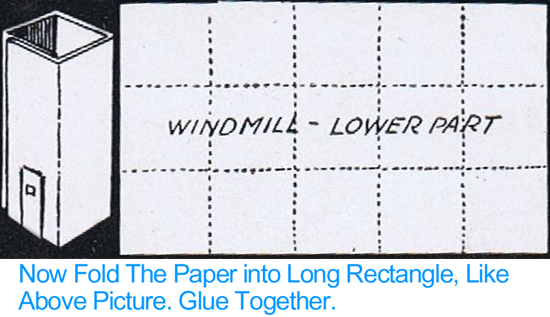
Now fold the paper into long rectangle, like above picture.  Glue together.

Now fold the paper into long rectangle, like above picture.  Glue together.

Now fold the paper into long rectangle, like above picture.  Glue together.

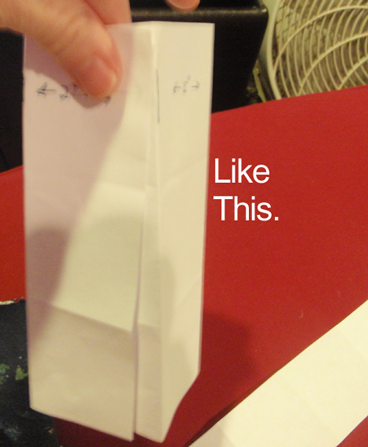
Like this.


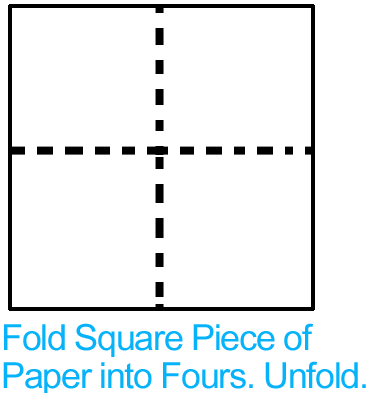
Pinwheel

Step 1

Fold square piece of paper into fours.  Unfold.

Fold square piece of paper into fours.  Unfold.


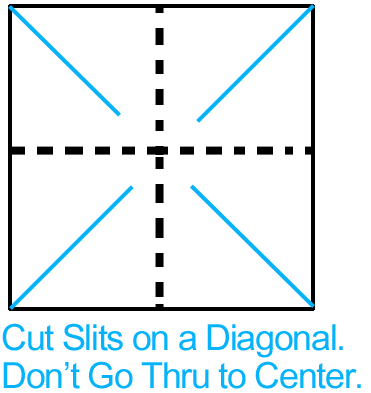
Step 2

Cut slits on a diagonal.  Don't go thru to center.

Cut slits on a diagonal.  Don’t go thru to center.


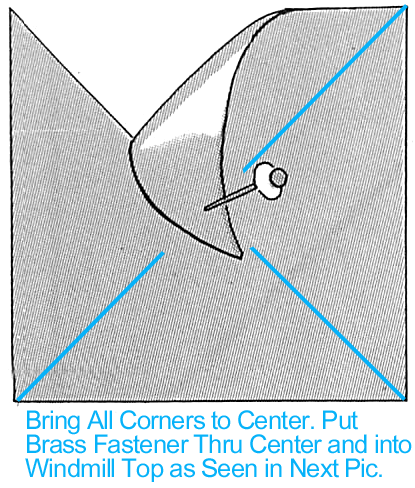
Step 3

Bring all corners to center.

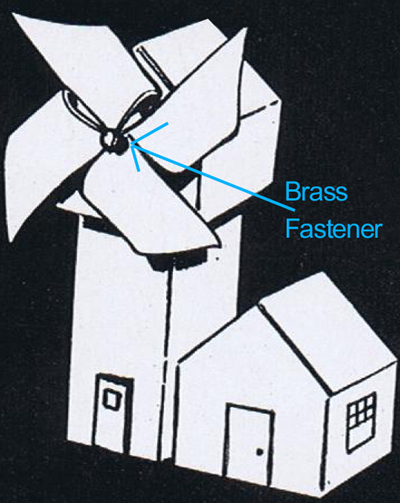
Bring all corners to center.  Put brass fastener thru center and into windmill top as seen in next pic.

Finished Windmill

And, there you have it….. you just finished making your Folded Paper Windmill.  How did you Windmill turn out?  Let me know in the comments below.  And, don’t forget to take a picture of your Windmill and share it in the comment as well.

Technorati Tags: , , , , , , , , , ,

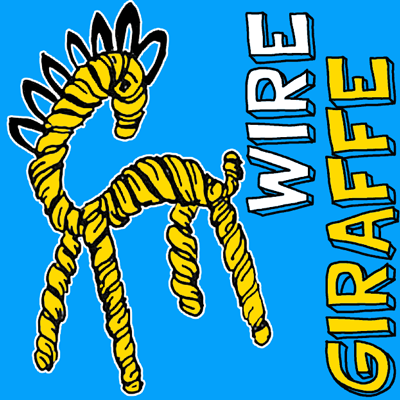
How to Make a Wire Giraffe

I have a fun and creative craft for you today.  In this post I’m going to show you how to make a Wire Giraffe using a wire hanger and some crepe paper.  This craft is a great way to use those wire hangers that you have, but no longer use to hang up your clothes.  You will need a little bit of adult supervision for cutting the wire so make sure to have an adult around during this craft.  So, grab the materials needed and let’s get started.

Check out our other Wire Hanger crafts.

How to Make a Wire Giraffe


Materials Needed

Cutting and slip joint pliers

Scissors

Wire coat hangers

Raffia or crepe paper

Glue, Paste, or Rubber cement


Step 1

Cut the hanger.

(Parental Supervision / Help for younger children) Using cutting pliers cut a wire coat hanger in the following places: (1) at each end of the straight bottom piece (2) one side, at the point where the sides join to form the hook. This cutting results in three pieces of wire.

[ad#ahc]

Step 2

Using piece that has the hook on one end, shape to form the body of giraffe.

Using piece that has the hook on one end, shape to form the body of giraffe.


Step 3

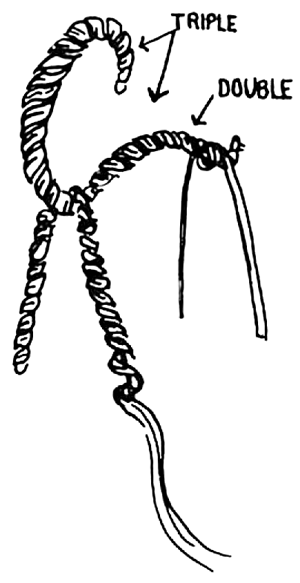
Cut longest wire in half and form legs.

Cut longest remaining piece of wire in half.  Each piece is bent in half and placed in the proper place over the body to form the legs.  Make one complete turn of each wire around the body and with pliers squeeze tightly in place.


Step 4

Using raffia or narrow strips of crepe paper completely wrap each wire.

Using raffia or narrow strips of crepe paper completely wrap each wire.  Ends of paper or raffia may be secured in place by pasting.

for additional thickness to appropriate portions of the figure, merely wrap with additional layers of raffia or crepe paper

In order to provide for additional thickness to appropriate portions of the figure, merely wrap with additional layers of raffia or crepe paper.


Step 5

To make mane wrap with more raffia.

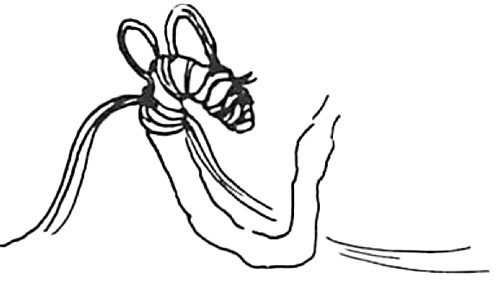
The mane of the giraffe is constructed by using a 24-inch length of raffia or one-quarter inch strip of crepe paper. Paste one end of strip on top of head and form one-inch high loop.

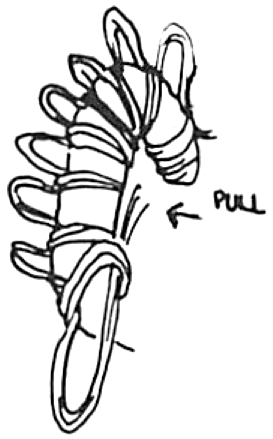
Finishing making mane by wrapping loops.

Using second piece of raffia or one-quarter inch crepe paper strip, wrap loop in place. Continue making loops down neck of giraffe until 24-inch length of raffia or crepe paper is consumed. Eyes can be cut from appropriately colored raffia or crepe paper and glued in place.

Finished Wire Giraffe

Awesome job!!  You just finished your wire giraffe…. didn’t it turn out cute?  Let me know how your wire giraffe turned out for you in the comments below.  And, don’t forget to take a picture too… you can add that to the comment as well.

Technorati Tags: , , , , , , , , , , , ,

How to Make Costume Hats

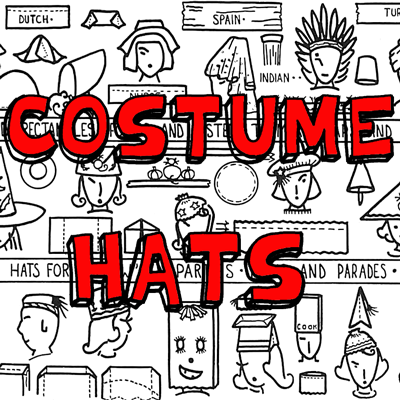
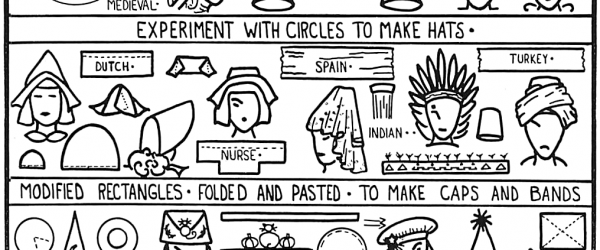
Costume hats are so much fun to make.  There are so many different hats you can make.  You can make a Medieval Hat or a Nurses Hat…. or maybe even a Pirates Hat.  If you are looking for different costume hats to make then you are going to love today’s post.  Today I have a printable diagram of many, many different Costume Hats you can make.  No matter what mood you are in you are sure to find a hat to fit your taste.  So, print of the printable diagram and get started making your hat today.

Check out our other Costume & Dressing Up Crafts.

How to Make Costume Hats

[ad#ahc]


Click on the image below to make the diagram larger and to print off.

Make costume hat ideas

Leave a comment below and let us know what hats you decided to make.  Better yet, take a picture too and leave that with your comment…. we’d love to see them.

Technorati Tags: , , , , , , , ,

How to Make 3d Box Cover Shadow Box Framed Pictures

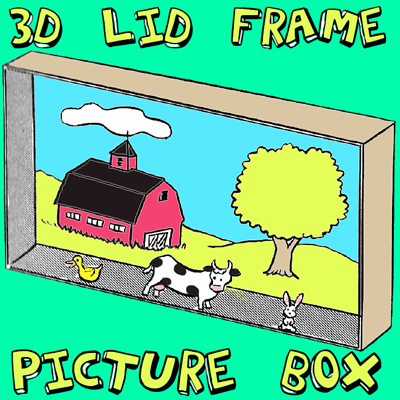
Don’t throw away those box lids because I have a fun use for them. Make these 3-dimensional pictures and use the box lids as the shadow box frame. The pictures seem to come out towards you and that is what makes them 3 dimensional. Find out how to make these with the step by step instructions found below.

How to Make 3d Box Cover Framed Pictures

Crafts Materials Needed

Box cover ( 2″ deep)

Paints

Pictures

Glue

Cardboard

Cork

Scissors

How to Make the 3D Frames

Step 1

Box Lids

Paint box cover, either oblong or square and 2″ deep, on both sides with a solid color paint, as in illustration above.

Step 2

3d-framed-box-cover-pictures-02

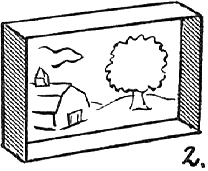
Inside the cover, as a background, either paint a scene, or cut a colorful scene from a magazine and glue to background, as in image above. If you want to make a barnyard scene like we did, the draw / paint a barn, some hills, and a tree.

[ad#ahc]

Step 3

3d-framed-box-cover-pictures-03

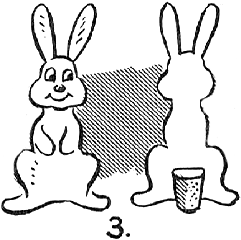
Cut out or paint small pictures of people or animals. Mount on cardboard and glue to small slices of cork to make them stand (an adult should slice the cork for you), as in image above. If you want to make a barnyard scene, you might want to try some farm animals such as cows, chickens, pig, horses, sheep, and maybe some ducks. Here are some animal crafts that might help you.

Step 4

3d-framed-box-cover-pictures-04

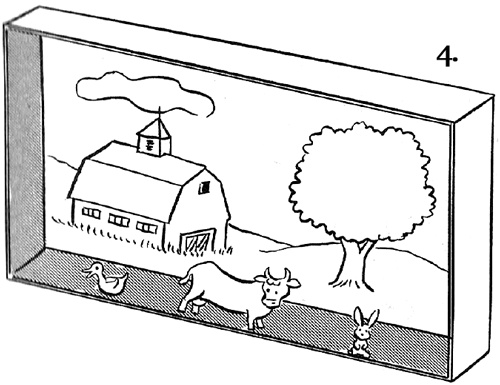
Glue figures in place on floor of picture for 3-D effect, as in illustration above.

Technorati Tags: , , , , , , , ,

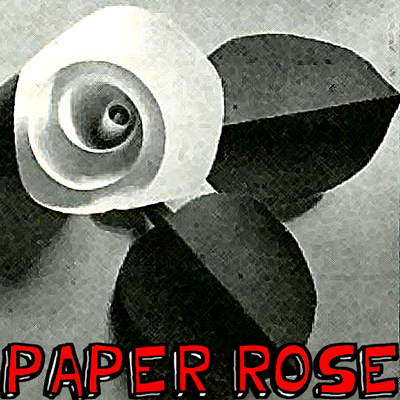
How to Make a Paper Rose

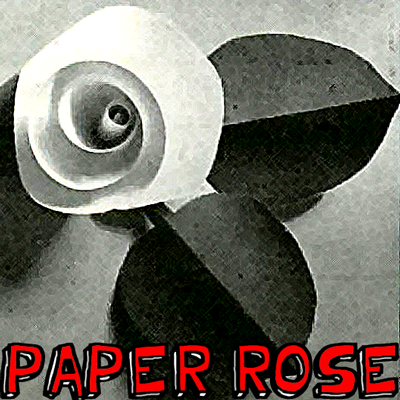
Today I’m going to show you how to make a paper rose.  Knowing how to make a rose out of paper can came into handy on special days like Mother’s Day, Valentine’s Day or even on someone’s Birthday.  With only a few materials you can learn how to make a beautiful rose that is good enough to give out on these special days.  So, grab the few materials needed and let’s get started.

Check out these other Flower Crafts.

How to Make a Paper Rose


Materials Needed

Any Color Paper

Green Paper

Pencil

Scissors

Ruler

Stapler


Step 1

Draw a spiral like this.

Draw a spiral like this.

[ad#ahc]

Step 2

Cut out the spiral.

Cut out the spiral.


Step 3

Roll paper with ruler

Roll paper with ruler… then when flexible roll with hands.


Step 4

The outside edge is now pushed down thru center.

The outside edge is now pushed down thru center.


Step 5

Staple base together.

Staple base together.


Step 6

Fold a piece of paper in half and cut half of a leaf shape

Fold a piece of paper in half and cut half of a leaf shape (as seen above).


Step 7

Roll leaves a bit.

Roll leaves a bit.


Step 8

Staple or tape leaves on rose.

Staple or tape leaves on rose.

And, that’s it…. you just made a paper rose.  Isn’t it beautiful?  Now, the real question is…. who are you going to give it to?  hmmmmmm……

Technorati Tags: , , , , , , , , , , , , ,

13 Cool Bubble Wrap Crafts for Kids

13 Cool Bubble Wrap Crafts for Kids

Bubble Wrap can have many uses.  You can use bubble wrap to package items so they deliver safely…. you can use bubble wrap as a stress reliever…. you can even use bubble wrap as a noise maker.  But, did you know that bubble wrap is an awesome material to use in crafts?  It really is.  This week I was scouring the internet looking for some cool bubble wrap crafts for kids…. and I found 13 of them.  I couldn’t help but show these bubble wrap crafts to you as they are as much fun as they are creative.  So, scroll through these 13 bubble wrap crafts… you are sure to find quite a few that you will enjoy making.

13 Cool Bubble Wrap Crafts for Kids

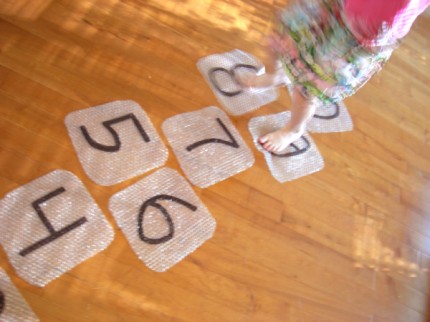
(1)  Bubble Wrap Hopscotch

Bubble Wrap Hopscotch

This is a fabulously cool idea…. I just love it!!  I found this awesome bubble wrap craft over at Givers Log.   Here she uses bubble wrap to create this fun activity that kids have been doing for years…. hopscotch.  What child doesn’t love jumping on bubble wrap… now there is plenty of chances to do just that.


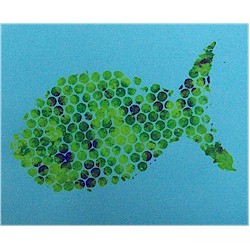
(2)  Bubble Wrap Fish

Bubble Wrap Fish

Bubble Wrap is a great medium to paint with.  Bubble wrap has tons of cuts and grooves giving this fish a bunch of texture.  Make sure to check out Free Kids Crafts to get all this crafts details.

[ad#ahc]

(3)  Bubble Wrap Greeting Cards

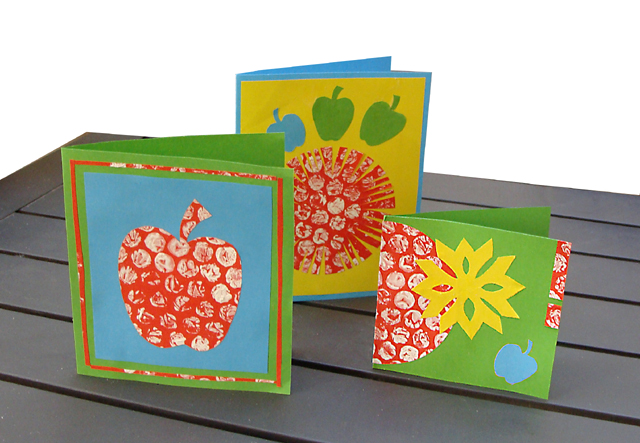
Bubble Wrap Greeting Cards

Check out these beautiful Greeting Cards…. and for each of them bubble wrap was used.  I found this bubble wrap craft over at Creative Jewish Mom… and as she says, she is very creative.  In this post she shows you how to make Rosh HaShana Cards with bubble wrap.  Keep in mind with this technique you can make any greeting card you wish.


(4)   Tactile Letters using Bubble Wrap

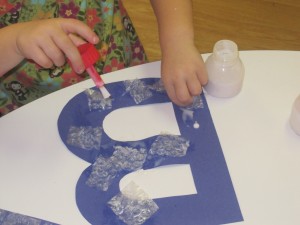
Tactile Letters using Bubble Wrap

I found this really cool site that in order to help teach children the letters and the sounds they make they integrate the letter of the week with a sensory experience…. in this case they used bubble wrap and glued it to a letter B to help teach the children the Letter B and its sound.  Check out Teach Preschool for all the details.


(5)  I Don’t Want to Stay Down Doll

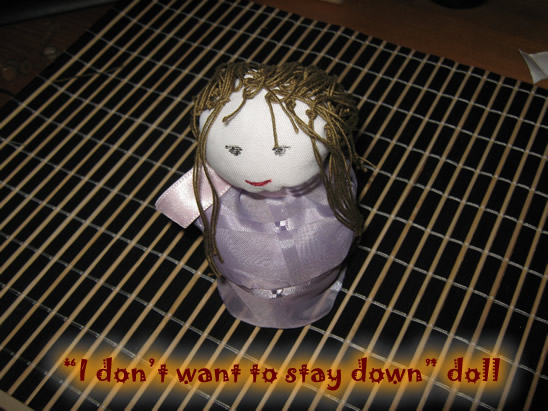
Bubble Wrap Doll

Here is one of our posts that we made a few months back.  Here we used bubble wrap to make a “I Don’t Want to Stay Down” Doll.   This doll is a traditional Romanian Toy.  It is called a “Hopa Mitica” Doll and it won’t stay down no matter how hard you try…. it keeps popping back up.  Check it out to make one for yourself.


(6)  Bubble Wrap Travel Game

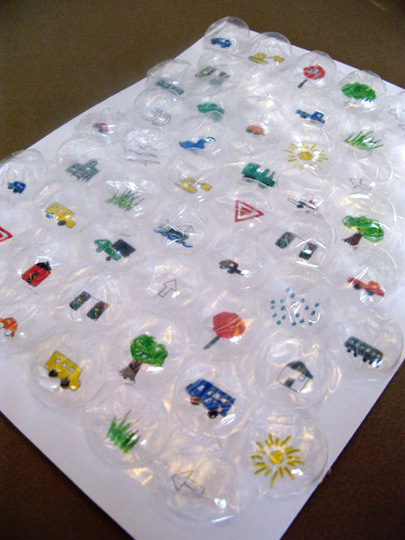
Bubble Wrap Travel Game

Here is a creative way to use bubble wrap….. Create Bubble Wrap Bingo.  Using the large bubble wrap Apartment Therapy shows you how to make this awesome Bubble Wrap Travel Game.  Make this craft and carry it in the car for long trips…. the kiddos can pop the bubbles every time they see one of the items.  Check out the site for all the crafting fun.


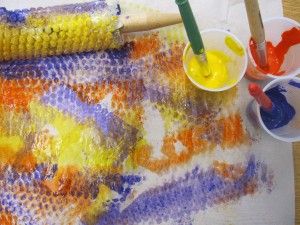
(7)  Roller Pin & Bubble Wrap Painting

Roller Pin and Bubble Wrap Painting

This is a great way to have children paint…. after all look at the great texture bubble wrap and the rolling pin create.  This is such a great idea.  I found this bubble wrap craft over at Teach Preschool and it looks super fun to me.  Imagine all the great paintings your kids could make.  Check out the site for yourself.


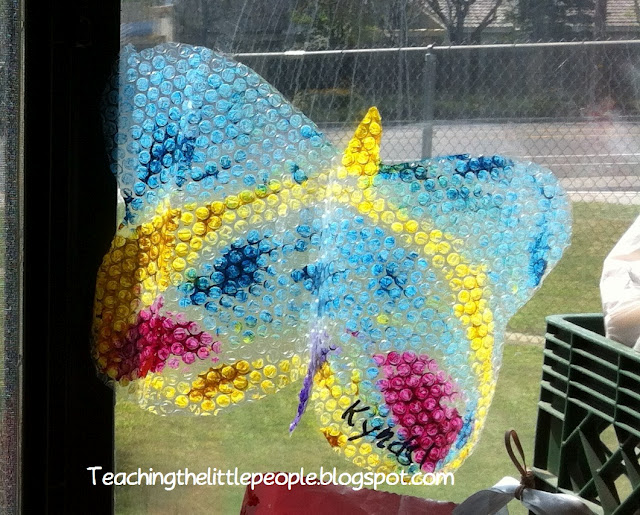
(8)  Bubble Wrap Butterflies

Bubble Wrap Butterflies

Aren’t these butterflies just simply magnificent?  And, they are made from bubble wrap…. which of course makes them perfect for this post.  Teaching the Little People came up with this idea and it is such a great one…. she points out how making Bubble Wrap Butterflies are a perfect way to teach your little ones the letter B.  Check out her site for all the details.


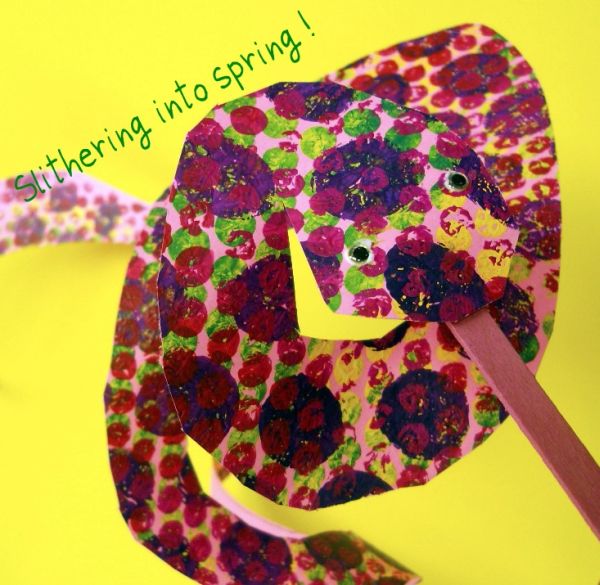
(9)  Bubble Wrap Snakes

Bubble Wrap Snakes

These bubble wrap snakes are sssssssssoooo…. cute!!  They are fun, colorful and they even spring to life.  I found this bubble wrap craft over at Fun Art 4 Kids and I love it.   She used bubble wrap, paint and a popsicle stick to create this springy snake.  Make sure to check out her site to get all the details.


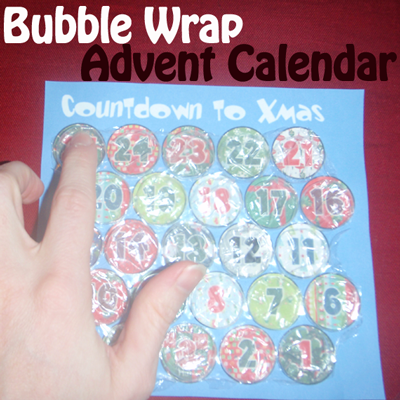
(10)  Bubble Wrap Advent Calendar

Bubble Wrap Advent Calendar

Here is another bubble wrap craft that is from our site.  We showed you this craft last year just in time for the Christmas Holidays.  In this particular post we showed you how to make an Advent Calendar out of Bubble Wrap.  What better way to count down to the Holidays than to do it with a advent calendar you made yourself.  Make sure to check it out.


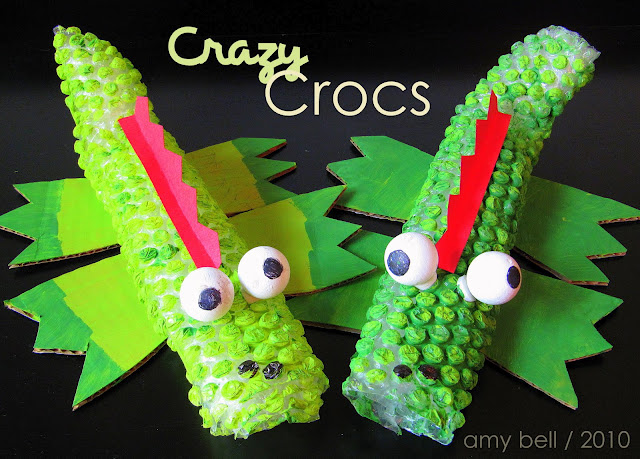
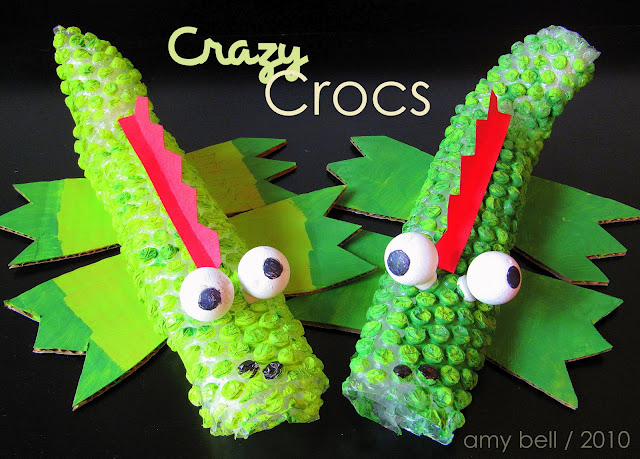
(11)  Bubble Wrap Crocs

Bubble Wrap Crocs

This bubble wrap craft has got to be one of my favorite bubble wrap crafts I found.  Just look how adorable these crocs are!!  I found this super creative bubble wrap craft at Positively Splendid and it is pretty incredible.   Amy at Positively Splendid shows you step-by-step how to create these bubble wrap crocs so check it out for yourself.


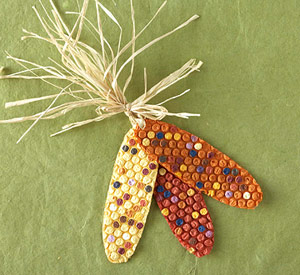
(12)  Bubble Wrap Corn

Bubble Wrap Corn

Look how amazing this bubble wrap corn looks…. it really looks like Indian Corn.  I found this bubble wrap craft at Parents and it looks like a lot of fun.  This bubble wrap Indian Corn makes the perfect decoration for the Thanksgiving Holiday.  Make sure to check out the website for the step-by-step tutorial.


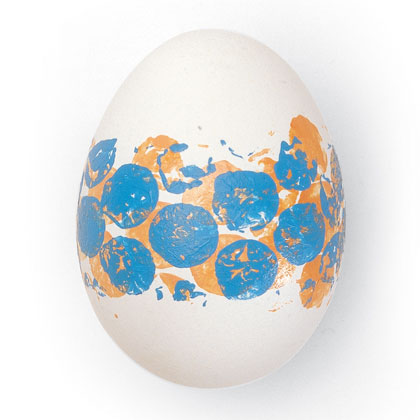
(13)  Bubble Wrap Egg Dyeing

Bubble Wrap Egg Dyeing

Here is a super duper creative way to use Bubble Wrap.  Use Bubble Wrap to dye an egg.  I would have never thought to do this…. but Family Fun did.  They will show you how you too can make your Easter Eggs using Bubble Wrap.  Cool idea!!

Technorati Tags: , , , , , , , , ,

How to Make a Flower Stand for Mother’s Day

Mother’s Day is coming up in less than a couple of weeks.  Do you know what you are giving your Mother yet?  If you know you would like to give her a flower…. why not make this flower stand craft to go with it.  First of all, you know she loves when you make her things yourself.  Second of all, this way you don’t have to just hand her a single flower all by itself…. with this flower stand craft you have something to hand your flower in.  You can choose to print off the color template flower stand or the black and white template and decorate the flower stand yourself…. the choice is yours.  So, let’s get started.

Check out our other Mother’s Day Crafts.

How to Make a Flower Stand for Mother's Day


Materials Needed

Printer & Paper

Scissors

Flower

Crayons or Markers (optional)


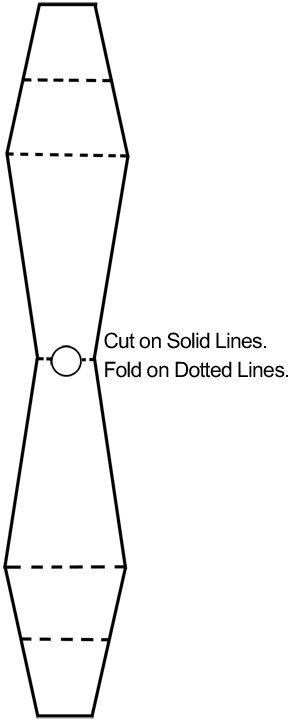
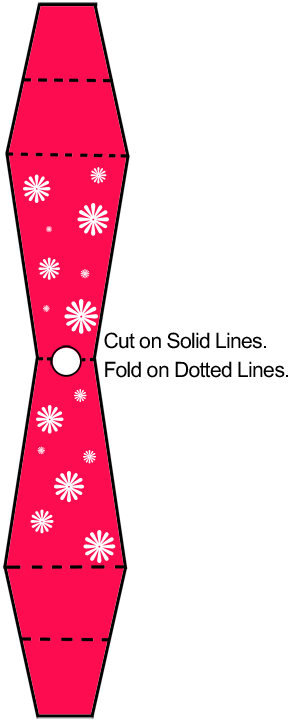
Click on template images below to make larger and to print off.

Black & White Template

Black & White Template


Color Template

Color Template


Step 1

Print out template.

Print out template.

[ad#ahc]

Step 2

Cut on solid lines.

Cut on solid lines.


Step 3

Fold on dotted lines.

Fold on dotted lines.


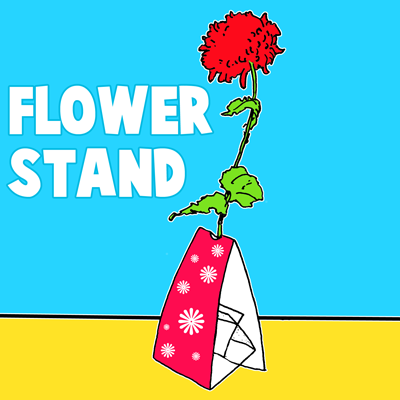
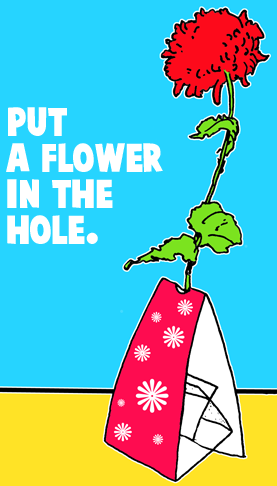
Finished flower stand

Put a flower in the hole.  And, that’s it…. you just finished making your flower stand for Mother’s Day.  Present this flower stand and flower to your Mother for Mother’s Day…. she is sure to love it!!

Technorati Tags: , , , , , , , , , , ,

Awesome Crafts Made with Duct (Duck) Tape

Awesome Crafts Made with Duct (Duck) Tape

Duct tape is commonly used in situations that require a strong, flexible, and very sticky tape.  When I originally thought of Duct Tape I thought of construction workers and fathers using duct tape to fix things.  As a matter of fact, my father could use duct tape to fix anything.  Well, that is what he thought…. most things were not fixed at all.  Well, that’s a whole other story.   Today’s post is about duct tape, but not duct tape used in that way.  No, today’s post is about Awesome Crafts made with Duct (Duck) Tape.  Here in this post I have looked around the internet and found some amazing duct tape crafts that are made by some creative people.  You have to check them out.  I have Duct Tape crafts that you can wear and I have Duct Tape crafts that you can play with….. you are sure to find here duct tape crafts that you will enjoy.  So, let’s get started.

Awesome Crafts Made with Duct (Duck) Tape

(1)  Baseball Cap
Duct Tape Baseball Cap

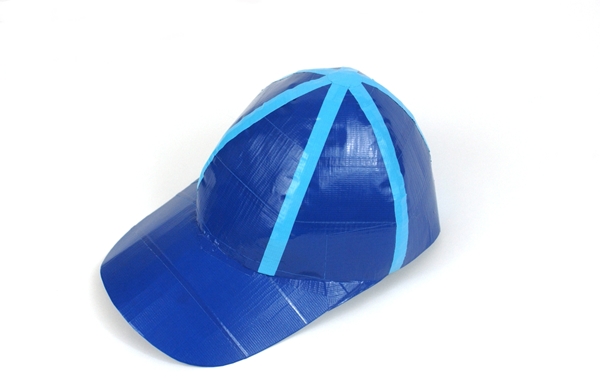
It’s Spring time.  And, in Spring there is something that I can’t get enough of…. Baseball.  But, you can’t go to a baseball game without wearing a cap.  Well, here is a baseball cap I would be proud to wear…. a Duct Tape Baseball Cap.  Check out Duck Brand for the full instructions on how to make this for yourself.


(2)  Bowling Pin
Duct Tape Bowling Pin

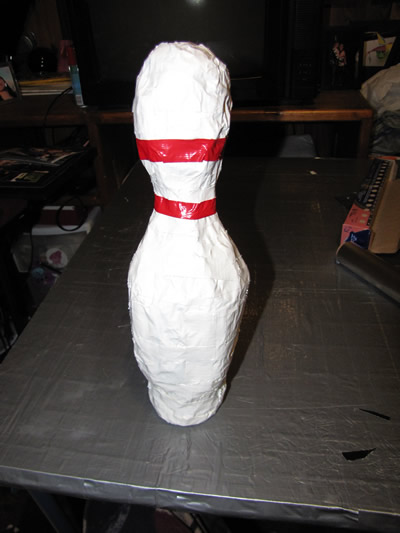
Do you like bowling?  Do your kids like bowling?  Well, how about making these duct tape bowling pins for an indoor bowling game…. that would be so much fun.  It is incredible how creative people can be….. just look at this awesome bowling pin.  Make sure to go to Duck Tape Fun for all the details.

[ad#ahc]

(3)  Duct Tape Dress

Duct Tape Dress

Do you have somewhere special to go…. but nothing to wear?  Well, check out this beautiful dress made out of duct tape.  I found this duct tape dress over at Craftster and it is really something.   She explains how she used garbage bags, streamers and duct tape to make this beautiful dress.


(4)  Duct Tape Wallets
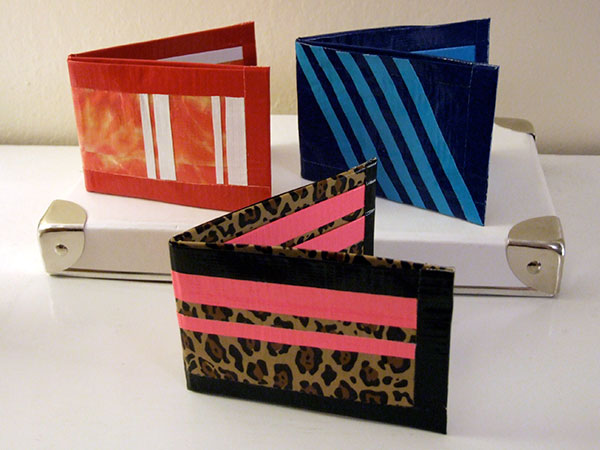
Duct Tape Wallets

These aren’t your standard gray duct tape wallets…. these are super colorful and wild duct tape wallets.  I love them!!  And, the cool part is that you can actually hold your money and cards inside of them.  Make sure to check out Crafty Nest for all the fun crafting details.


(5)  Valentine Heart
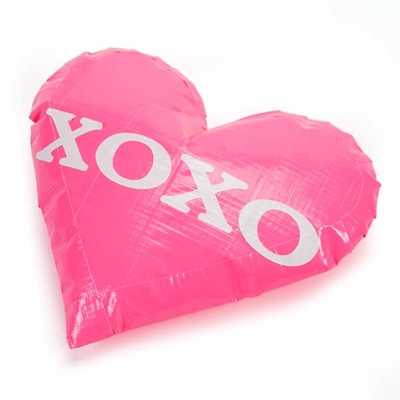
Duct Tape Valentine Heart

It is true that the best gifts are not the ones bought, but the ones that were made from scratch.  Well, how about showing your love with this Duct Tape Valentine’s Heart.    It is pretty much a duct tape stuffed item and it is super duper cute.  Make sure you check out Duck Brand for yourself.


(6)  Bedroom Accessories
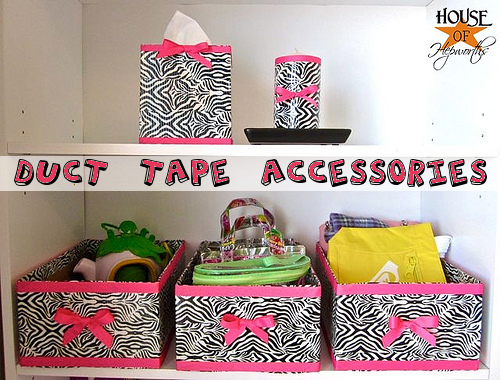
Duct Tape Bedroom Accessories

Now, these bedroom accessories are absolutely adorable.  Who would have thought they are made from Duct Tape.  She used the zebra print duct tape for this project and with the pink pop of color these accessories couldn’t look any better.  Check out House of Hepworths for all the crafty details.


(7)  Duct Tape Hair Bow
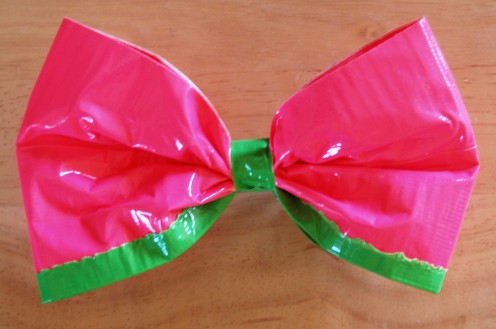
Duct Tape Hair Bow

This bow is BEAUTIFUL and it is made out of duct tape….. who would have thought that the word “beautiful” and “duct tape” could appear in the same sentence.  But, apparently they have.  I found this duct tape craft over at HubPages and Daisy Mariposa explains in great detail how you too can make this duct tape hair bow.


(8)  Duct Tape Tote Bag
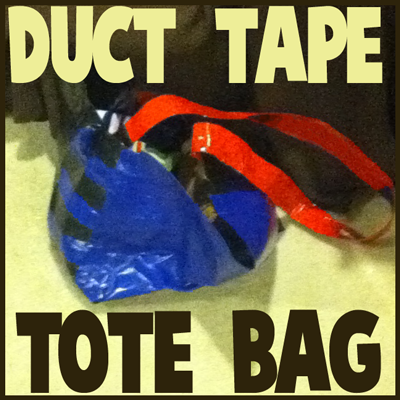
Duct Tape Tote Bag

This Duct Tape Tote Bag is one of our crafts that we did a little while ago.  This tote bag is made completely out of duct tape….  nothing else.  And, believe it or not it is amazingly strong.    You can even use it for carrying your groceries…. it’s just that strong.  Make sure to check out our post “How to Make Duct Tape Tote Bags” and make one of these duct tape tote bags for yourself.


(9)  Duct Tape Clutch
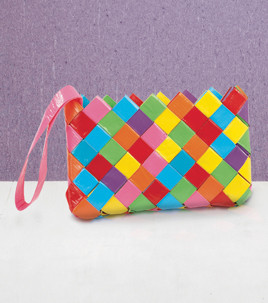
Duct Tape Clutch

What an amazing purse!!  It is pretty incredible and it is, of course, made out of duct tape.  The crafter made it out of different color duct tape to give this duct tape clutch a colorful look.  I just love it!!  JoAnn has all the details.  Make sure to go to that site and check it out for yourself.


(10)  Duct Tape Flip-Flops
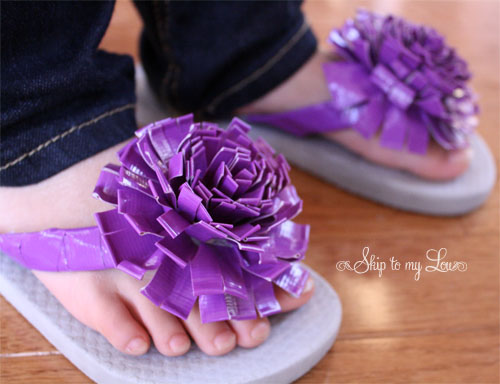
Duct Tape Flip-Flops

These flip-flops are just so adorable….. they are really, really cute.  And, the flower and straps are made from purple duct tape.  They are just so cute!!   I found this duct tape craft over at Skip To My Lou ….. make sure to go there and check it out to find out how she took an ordinary pair of flip-flops and made them special with duct tape.


(11)  Duct Tape Sun Hat
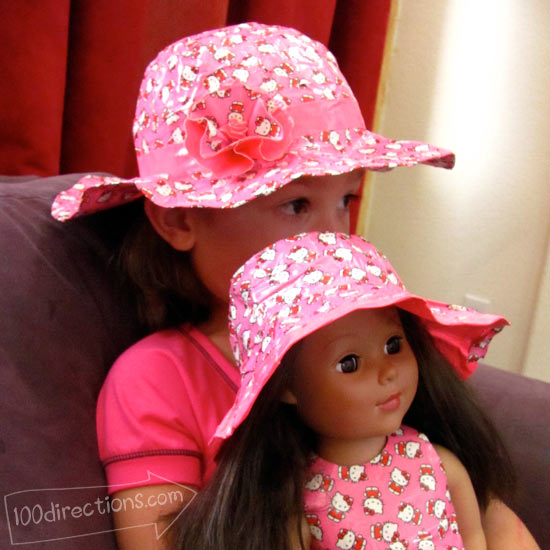
Duct Tape Sun Hat

If you want to see a truly adorable craft that was made from duct tape then you have found it here.  100 Directions shows you how you can take Hello Kitty Duct Tape and some hot pink Duct Tape and you can make it into these cutie patootie sun hats…. just brilliant.  Make sure to check out the craft for yourself.


(12)  Duct Tape Rose Wreath
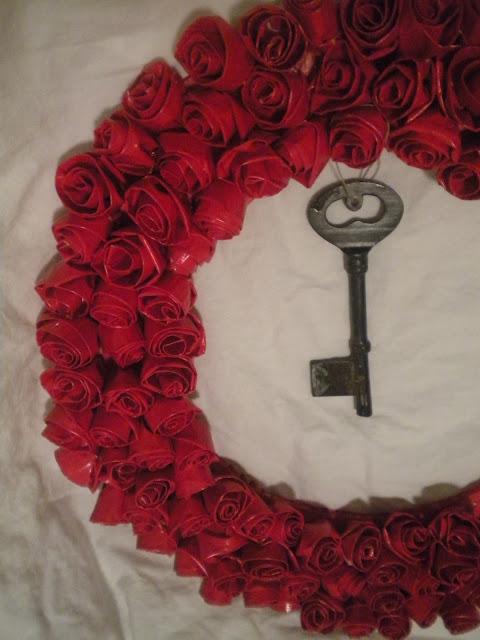
Duct Tape Rose Wreath

This amazing Rose Wreath is beautiful enough to be hung on any door anytime of the year….. it is just that attractive.  And, it is made of Duct Tape, of course… Otherwise it wouldn’t be in this post.  I found this duct tape craft over at Poppies at Play…. check it out because she gives a really excellent tutorial.


(13)  Duct Tape Rings
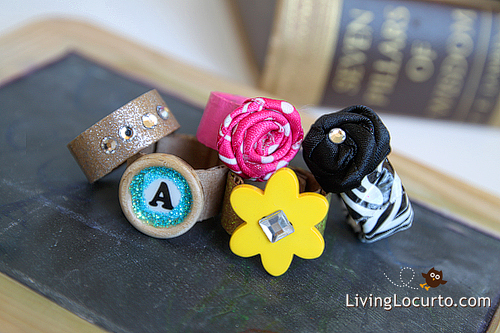
Duct Tape Rings

Aren’t these rings adorable?  They really truly are.  No one would believe that these rings are a duct tape craft…. but they are.  Any girl would love not only crafting them, but wearing them too.  Make sure to check out Living Locurto for all the fun crafting details.


(14)  Duct Tape Flower Pens
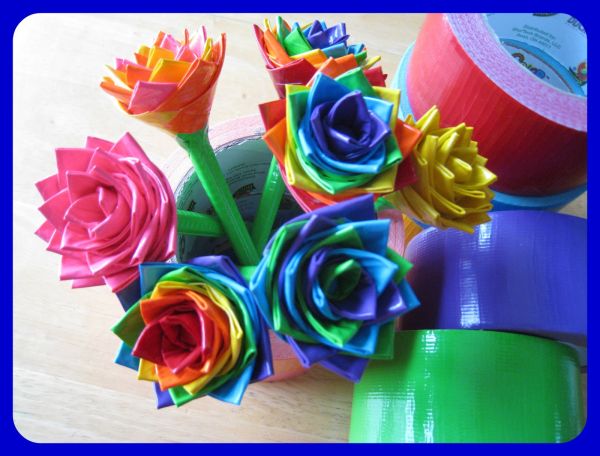
Duct Tape Flower Pens

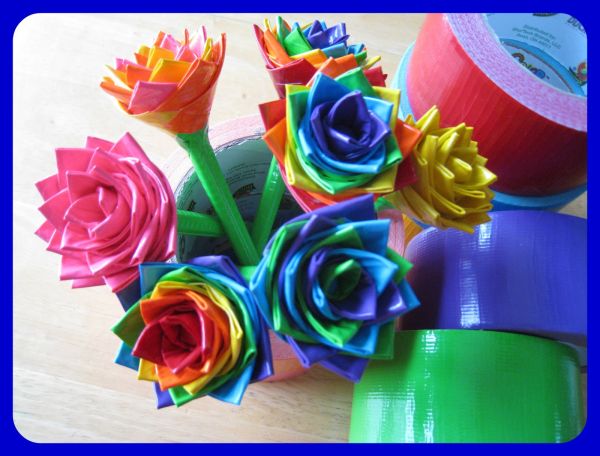
These Duct Tape Flower Pens are so cute….. what girl wouldn’t love using these pens to write?  I think they would all love using them.  I love how she used all different color duct tape to make the flowers…. it just makes them even more colorful and lovely.  Make sure you check out Seven Sisters so you too can make these.

Technorati Tags: , , , , , , , , , ,

How to Make a Coupon Organizer Case

Mother’s Day is right around the corner.  Have you thought about a gift for your mother yet?  Well, if not I got a great Mother’s Day craft for you.  I’m going to show you how to make a Coupon Organizer Case.  There is not many things more frustrating that going shopping with a pile of coupons and no way of organizing them…. well, your mom won’t have that problem anymore.  With the number of envelopes you are going to be adding to this craft she will have more than enough places to organize her coupons.  So, let’s get started.

Check out our other Mother’s Day Crafts.

How to Make a Coupon Organizer Case


Materials Needed

Cardboard

Paper

Glue or Paste

Hole Punch

10-20 Envelopes

5 Binder Rings, Ribbon or Yarn

Markers, Crayons, Glitter Glue (items to decorate case)


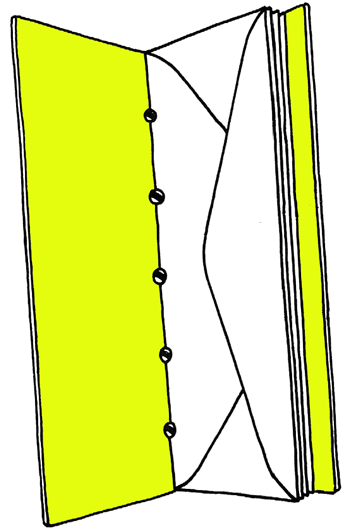
Step 1

Cut 2 pieces of cardboard down to a size that is a tiny bit larger than a business envelope.

Cut 2 pieces of cardboard down to a size that is a tiny bit larger than a business envelope.

[ad#ahc]

Step 2

Cover with paper.  Paste in place.

Cover with paper.  Paste in place.


Step 3

Use a hole punch to poke holes on left side.

Use a hole punch to poke holes on left side.


Step 4

Punch holes in 10-20 envelopes so they will match up with covers.

Punch holes in 10-20 envelopes so they will match up with covers.


Step 5

Bind 2 covers and all the envelopes together.

Bind 2 covers and all the envelopes together.  You can use binder rings, ribbon or yarn to bind them together.


Step 6

Decorate cover.

Decorate cover.


Finished Coupon Case

And there you have it…. you just finished making your Coupon Organizer Case.  Isn’t it a wonderful way to organize coupons?  Your mom is going to surely love this!!

Here is our video on How to Make a Coupon Organizer Case

Technorati Tags: , , , , , , , , , , , ,

How to Make Cone May Baskets

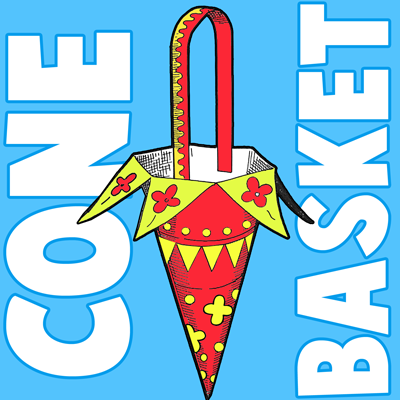
I have a fun craft for you that will totally get you in the Spring mood.  I’m going to show you how to make a Cone May Basket.  May is all about the Spring flowers.  Well, imagine how beautiful a basket will be filled with some of those magnificent flowers.  Or, perhaps you want to give this Cone May Basket to someone special…. well, why not fill it with candy.  The receiver will surely love it!!  Either way this Cone May Basket will surely be enjoyed.  So, grab the materials needed and let’s get started.

Check out our other Spring Crafts.

How to Make Cone May Baskets


Materials Needed

Printer

Paper

Scissors

Crayons or Markers

Paste

Items to Fill the Basket With


Click on template images below to make larger and to print.

8×11 Template

May Basket Template 8x11


Larger Template

May Basket Larger Template


Step 1

Print out template.

Print out template.

[ad#ahc]

Step 2

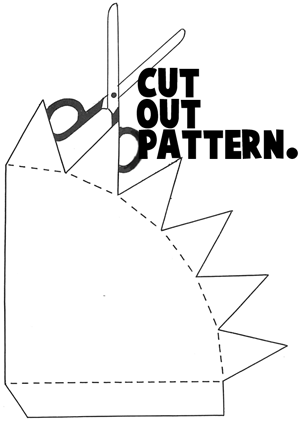
Cut out pattern.

Cut out pattern.


Step 3

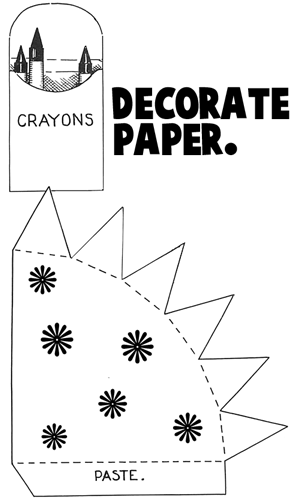
Decorate paper.

Decorate paper.


Step 4

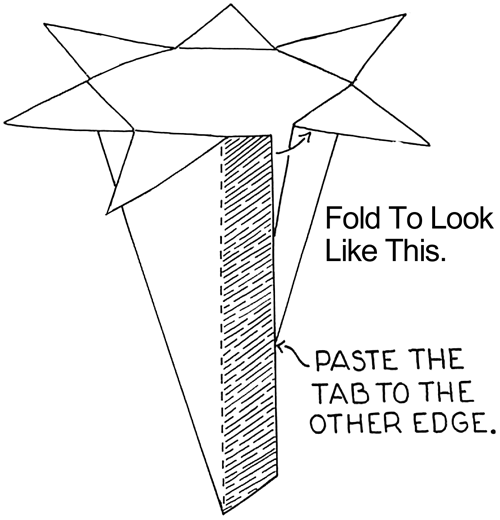
Fold to look like image above.  Paste the tab to the other edge.

Fold to look like image above.  Paste the tab to the other edge.


Step 5

Cut a long strip of paper and use for the handle.

Cut a long strip of paper and use for the handle.  Paste the handle.


Step 6

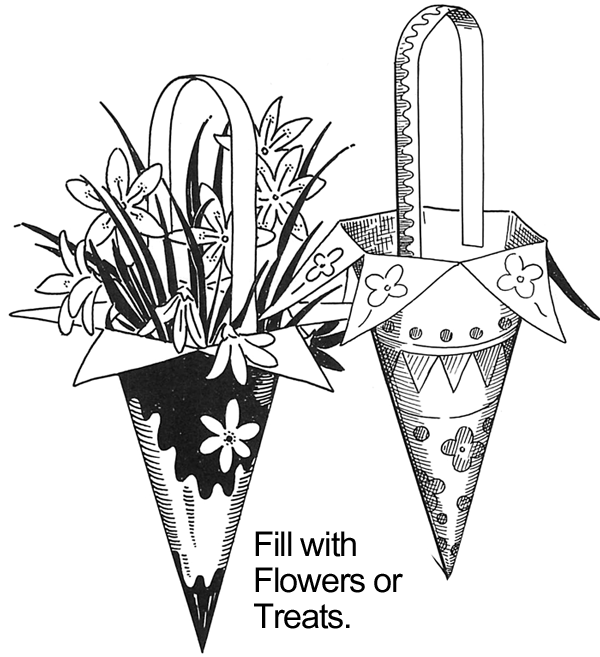
Fill with flowers or treats.

Fill with flowers or treats.  Now your basket is finished.  What did you fill your basket with?  Are you keeping it for yourself or are you giving it away as a gift this May?  Let me know in the comments below.

Technorati Tags: , , , , , , , , , , , ,

15 Cool Crafts Made with Altoid Tins

15 Cool Crafts Made with Altoid Tins

If you ever had an Altoid mint you know that the mints come in this wonderful little tin.  But, who would have thought all the imaginative things you could do with this little tin.  By scouring the internet I came across a bunch of Altoid crafts you can make.  In this post I am listing 15 of the coolest crafts you can make with Altoid Tins.   The crafts range in skill level between easy and more challenging.  But, you can count on each of them being a lot of fun.   So, scroll through the different Altoid Tin crafts and you are sure to find one that you will like.  So, grab your Altoid Tin Containers and let’s get started on some fun crafts.

15 Cool Crafts Made with Altoid Tins

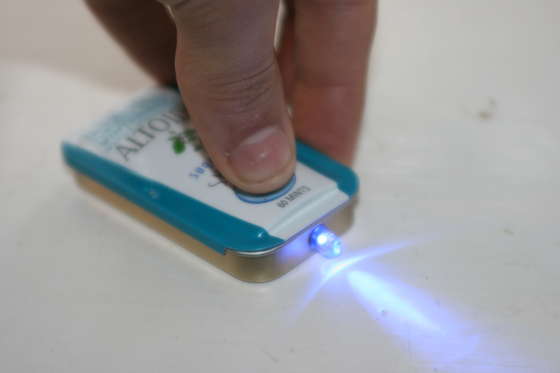
 (1)  Altoids Mini Flashlight

Altoids Mini Flashlight

This Altoid Tin craft is a little more complicated than we typically list in this blog, but how can I make a post about Altoid Tin Crafts without putting this one in it.  I found this craft over at Instructables and it is an awesome one.  Check out their site to find out how you too can make this Altoid Tin Mini Flashlight.

[ad#ahc]

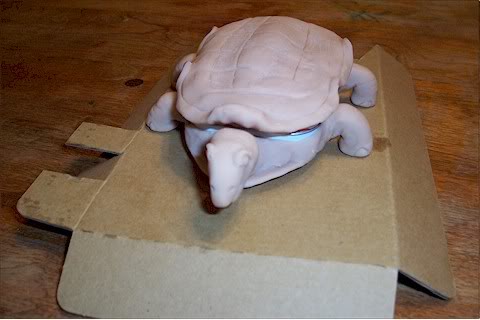
(2)  Altoids Turtle Keepsake Box

Altoids Turtle Keepsake Box

Check out this elaborate Keepsake Box…. and it is made from an Altoid Tin container and Super Sculpey.  I found this fun Altoid Tin craft over at Sculpey Club….. check out her site for all the fun crafting details.


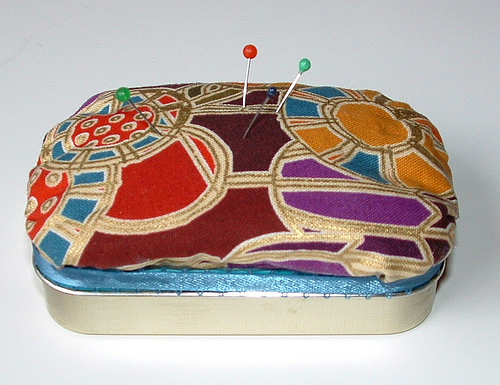
(3)  Altoids Pincushion

Altoids pincushion

I absolutely love this Altoid Tin Pincushion idea.  What you can’t see here is that inside she added magnets so that inside you can hold pins, needles and such.  Make sure to check out My Recycled Bags so you too can make this Altoid Pincushion.


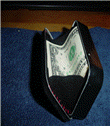
(4)  Altoid Tin Wallet

Altoid Tin WalletAltoid Wallet

Here is a great way to keep your cash….. keep it in an Altoid Tin Wallet.  Roxy Craft shows us how to make this wallet from an Altoid Tin Container…. she explains the craft in a very detailed step-by-step “how-to”.  Check out the site for yourself.


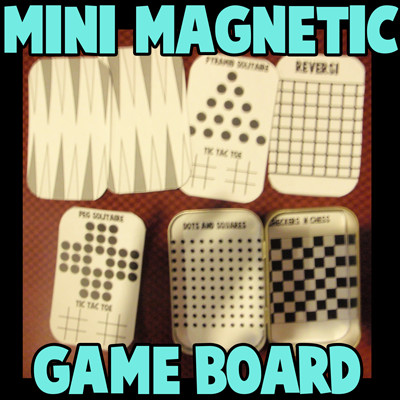
(5)  Magnetic Travel Board Game Set

Magnetic Travel Board Game Set

This Altoid Tin Craft is from our very own site.  I previously posted How to Make a Magnetic Travel Board Game Set from an Altoid Tin Container.  It is a fun craft and the outcome is you will have 8 games to play in the car while traveling.  Make sure to check this one out.


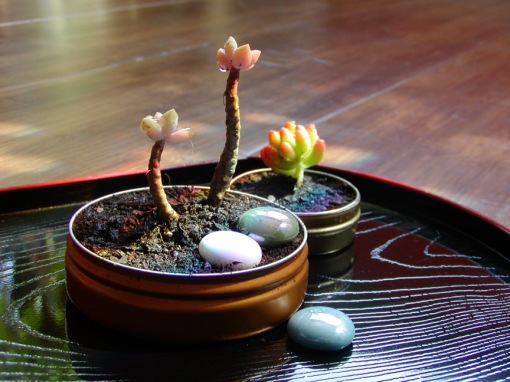
(6)  Altoids Tin Garden

Altoids Tin Garden

Here is another great way to use those extra Altoid Tin Containers…. use them to make a beautiful garden.  Gomi Style shows us how to do just that.  Just by adding a bit of potting soil to the tin you can have your very own small little garden.


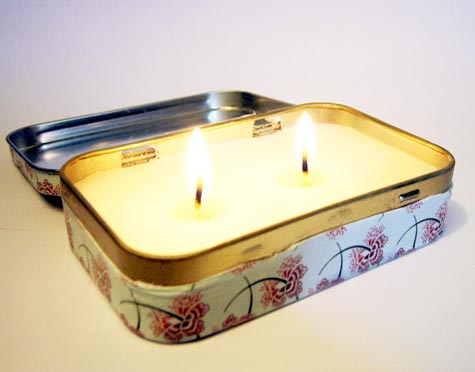
(7)  Travel Candle

Travel Candle

I found this idea over at Design Sponge and what a great idea it is.   Here she gives you all the step-by-step details on how to make a travel candle out of an Altoid Tin Container.  She points out how great these can come into handy during an emergency… after all, you never can have enough candles.


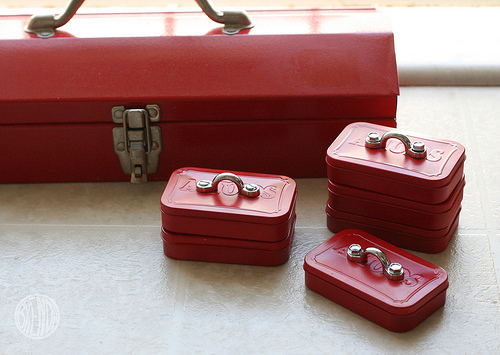
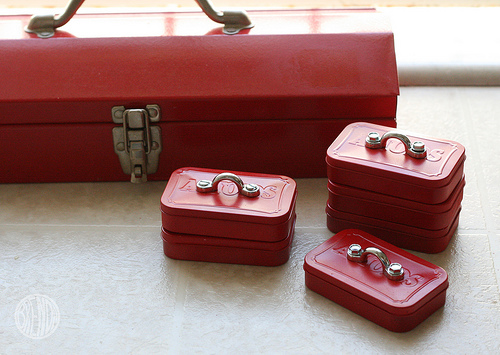
(8)  Altoid Tin Mini Toolboxes

Altoid Tin Mini Toolboxes

I found this awesome Altoid Tin craft over at Alpha Mom.  She came up with this super creative idea to surprise Dad for Father’s Day.  She made a few so that Dad could hold the bits and bolts of his choice.  Make sure to check out the website for all the crafting details.


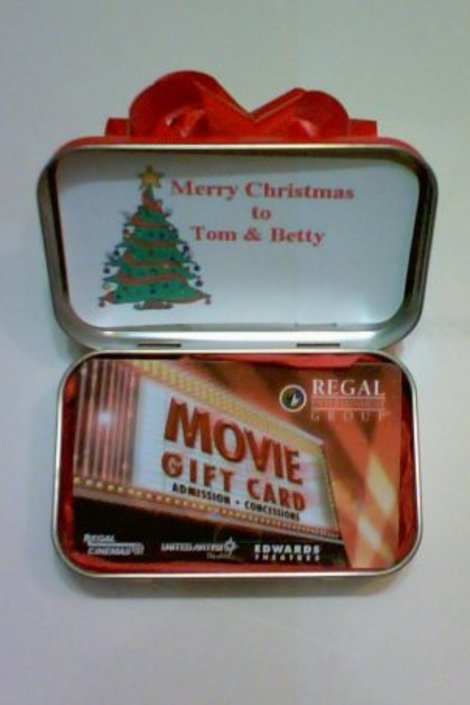
(9)  Altoid Tin Gift Card Holder

Altoid Tin Gift Card Holder

Here is a clever way to keep a hold of all those Gift Cards you have accumulated.  Store them in this Altoid Tin Gift Card Holder.  I found this Altoid Tin Craft over at Yahoo Voices and I dig the idea.  Check out the website for the tutorial.


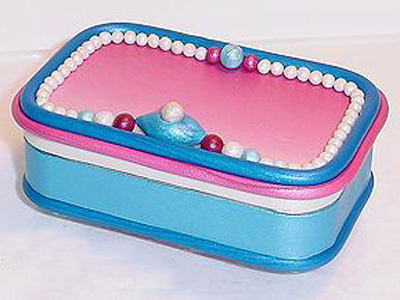
(10)  Altoid Tin Jewelry Box

Altoid Tin Jewelry Box

You would never believe it by looking at it, but this beautiful jewelry box is made from an Altoid Tin and Polymer Clay.  I found this fun Altoid Tin craft over at TLC and I love it.  Get the full crafting “how-to” over at the website.


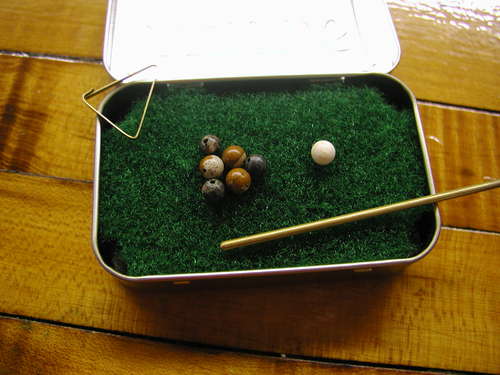
(11)  Pocket Yard Pool Table

Pocket Yard Pool Table

Ok, how cute is this pool table?  So cute!!  And it is small enough that you can take it pretty much anywhere.  How many other pool tables can you say that about?  You can find the tutorial over at Instructables.   This is just so creative.


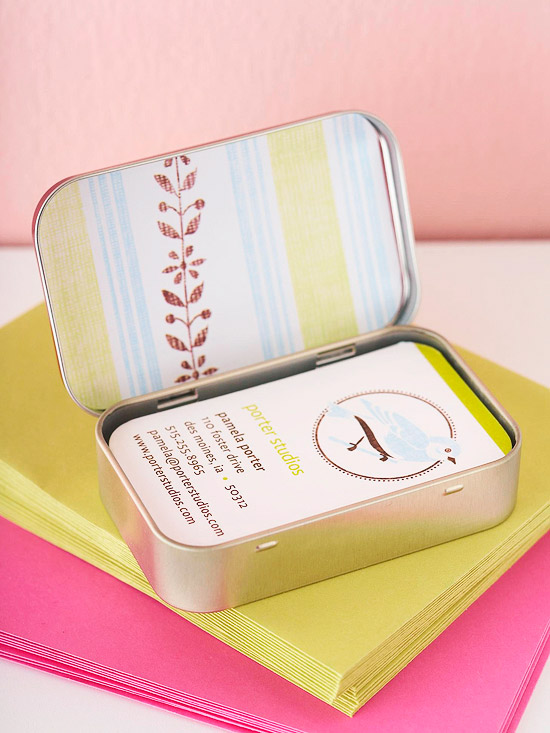
(12)  Business Card Holder

Business Card Holder

What a clever way to hold your business cards…. and I must say quite attractive too.   This is a great way to use your left over Altoid Tin for something useful.   Check out Better Homes and Gardens for all the crafting details.


(13)  Altoid Earbud Case

Altoid Earbud Case

This is a fantastic idea.  Did you ever put your earbuds somewhere and when you wanted to use them you found they were tangled up?  Well, this Altoid Earbud Case will prevent that…  put your Earbuds inside and find that they will never tangle again.  Charlotte’s Fancy came up with this brilliant idea.  Check out her site for the details.


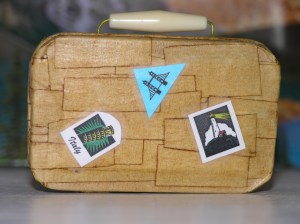
(14)  Doll Suitcase

Doll Suitcase

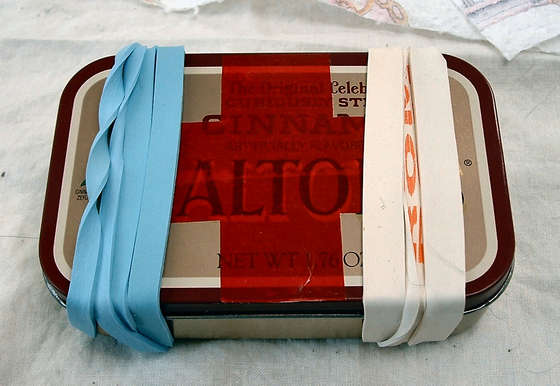
Isn’t this an adorable suitcase for your doll….. and, your doll will surely love it.  Made from an Altoid Tin and masking tape this suitcase has an aged look to it…. like a suitcase that is well traveled.  Check out Crafty Crafts for the full instructions on how to make this.


(15)  First Aid Kit

First Aid Kit

Everyone needs a first aid kit.  You don’t know when you will need some first aid treatment…. so having a kit is very important.  But, sometimes a first aid kit can be bulky and when you are “out & about” you can’t carry a bulky one…. well, how about making a first aid kit out of a Altoid Tin.  Check out Instructables for all the details.

Top image by Alpha Mom

Technorati Tags: , , , , , , , , , , ,