How to Make a Glue Stick Man out of your Recycled Glue Sticks

With all the crafts that I do  I go through a lot of glue sticks.  I always hate the idea of throwing them away…. I always try to find crafts that I can make out of recycled items.  And, glue sticks are no exception.  Here is a great craft you can make with your used glue sticks.  Today I’m going to show you how to make a Glue Stick Man out of your recycled glue sticks.  You will see what a great feeling you get from making something out of recycled materials.  Plus, you get a very cool toy man.

Check out our other Green Environmental Crafts.

How to Make a Glue Stick Man


Materials Needed

Empty Glue Stick

Glue

Paint, Paper, Foam or Felt

Black & White Paint


Step 1

Take an empty Glue Stick and peel the label off of it.

Take an empty Glue Stick and peel the label off of it.

[ad#ahc]

Step 2

Glue the cap in place like this.

Glue the cap in place like this.


Step 3

Paint on clothes or glue on clothes with paper, foam or felt.

Paint on clothes or glue on clothes with paper, foam or felt.


Step 4

If painted clothes, then use black paint to outline.

If painted clothes, then use black paint to outline.


Step 5

Paint a sleeve on each side.

Paint a sleeve on each side.  Also, draw a dot for each eye.


Step 6

Draw a circle for each hand.

Draw a circle for each hand.


Step 7

Paint each hand white.

Paint each hand white.  Also, paint white buttons on the shirt.

How adorable is this little guy?  So adorable!!  Make a few of these Glue Stick people and you can have a small family.  What a great way to recycle those used glue sticks.

Technorati Tags: , , , , , , , , ,

Haunted House Crafts Perfect for Halloween

Haunted House Crafts Perfect for Halloween

Halloween is coming up quickly.  After all, it is at the end of this month.  When you think of Halloween what do you think of?  Probably bats, jack-o-lanterns and witches.  But, don’t forget the place they all live.  That’s right…. I’m talking about a Haunted House.  There is not much scarier than a Haunted House.  So, with that being said I am dedicating today’s craft to Haunted Houses.  I scoured the internet looking for an assortment of different kinds of Haunted House crafts perfect for Halloween.  With all 17 of these Haunted House crafts I have listed here you are sure to find one you will love.  So, without further ado….

Haunted House Crafts Perfect for Halloween

(1)   Haunted House Centerpiece

Haunted House Centerpiece

If you are throwing a Halloween party and you are looking for something to have as a centerpiece…. then I have the perfect craft for you.  Busy Bee Kids Crafts shows you how to make this spooky Haunted House Centerpiece step-by-step.


(2)  Paper Bag Haunted House

Paper Bag Haunted House

This Paper Bag Haunted House is perfect for decorating your house for Halloween, but it is also wonderful to use as party favors for a Halloween party.  You can fill these bags with goodies for the kids…. they will love it.  I found this craft over at Kaboose and it looks like a ton of fun.

[ad#ahc]

(3) Haunted House Milk Carton (You can Fill This One with Treats)

Haunted House Milk Carton for Treats

This one is on our site and is made from a simple milk carton or creamer carton. All you have to do is fill with treats or candy, tape closed, wrap with paper, and decorate. Here are the craft instructions.

(4)   Popsicle Stick Haunted House

Popsicle Stick Haunted House

Here is a great Haunted House craft perfect for the youngest of children.  All Kids Network shows you how to make this Halloween craft and it is almost totally made up of Popsicle sticks.  And, we all know how much kids love making things with Popsicle sticks…. almost as much as they love eating the Popsicles.


(5)   Haunted Gingerbread House

Haunted Gingerbread House

Now, tell me how awesome this Haunted House is!!  It is just incredible…. and it is totally edible.  Gotta love that!!  I found this Haunted House craft over at Sisteroo and I hope you love it as much as I do.  This Gingerbread Haunted House makes for a perfect decoration or an edible treat for a Halloween party.

(6) Haunted House Pop Up Cards

Haunted House Pop Up Cards

Here is another Haunted House craft this from this site. Everyone loves pop up cards and this is one of the simplest types that you can make. We will teach you how to make these with just a few slits and a bit of folding. Find out the instructions here.


(7)  Cardboard Box Haunted House

Cardboard Box Haunted House

How cute is this Haunted House?  So cute!!  And, it is made out of an item you probably have laying around the house…. a cardboard box.  I found this Halloween craft over at Spoonful and it is a great find.  Check out this craft and get all the haunted details.


(8)  Spooky S’mores Haunted House

Spooky S'mores Haunted House

YUMMY!!  Here is another edible Haunted House craft.  I love the edible crafts.    If you love S’mores then you are going to surely love this craft.  Check out Kitchen Fun with my 3 Sons for all the yummy spooky details.


(9)  Shoe Box Haunted House

Shoe Box Haunted House

I just love those crafts where you can find the materials needed right in your home.  And, this craft is one of them.  Scribble Press shows you step-by-step how to make this creepy Haunted House out of a shoe box….. very clever!!


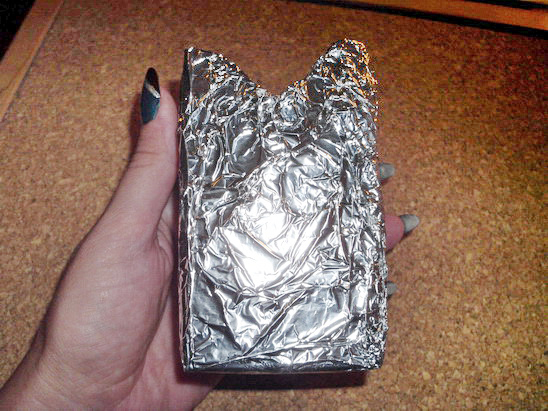
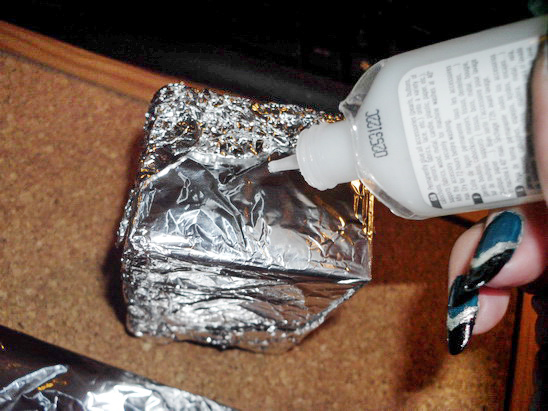
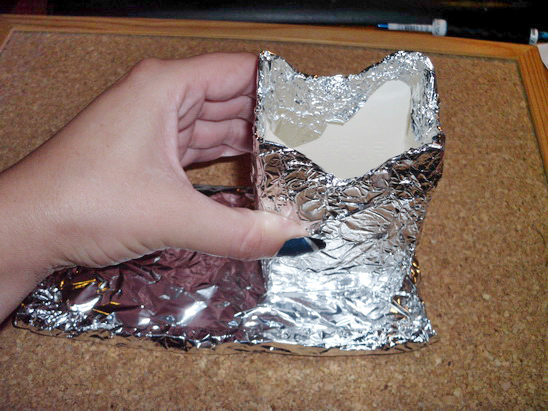
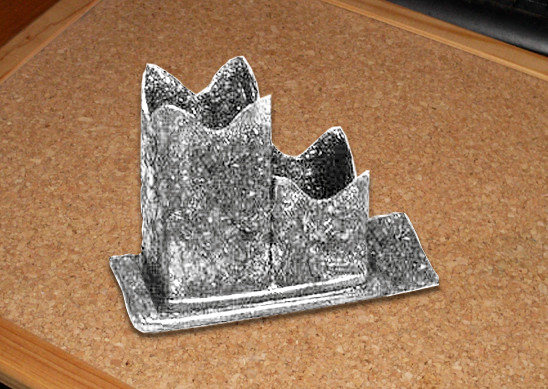
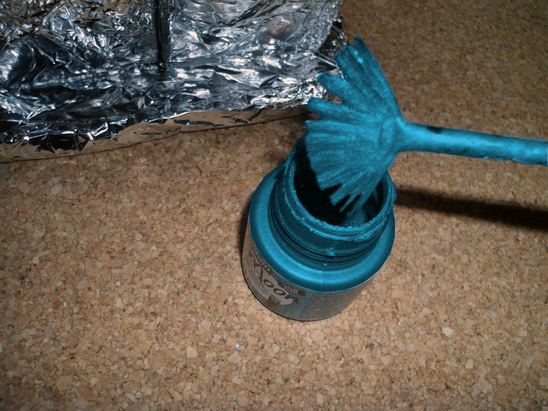
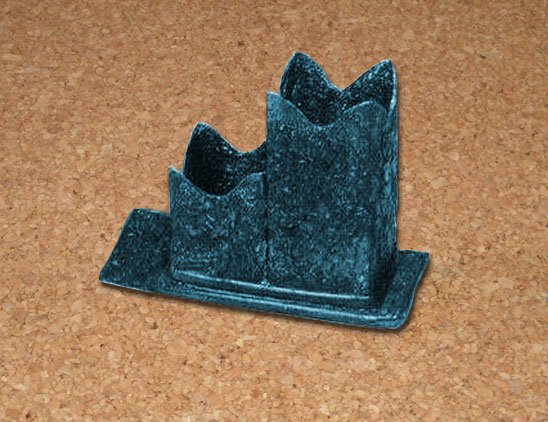
(10)  Poster Board Haunted House

Poster Board Haunted House

I love this Haunted House craft!!  I think what I love so much is the fact that this Haunted House is very narrow and tall…. it gives it a very creepy vibe.  Perfect for a Halloween decoration.  I found this Haunted House craft over at Crissy’s Crafts.  You have to check it out for yourself.


(11)  Paper Mâche Haunted House

Paper Mache Haunted House

Kids love working with Paper Mâche…. and making this Paper Mâche Haunted House will be no exception.  And, this haunted house really turns out amazing.  Get all the Halloween craft details over at Woman’s Day.


(12)  Mod Podge Haunted House

Mod Podge Haunted House

How amazing is this Haunted House?  So amazing!!  Mod Podge is a material that kids love working with…. they just do.  I know my children do.  Here B-Inspired Mama shows you how you too can make this incredible Haunted House using Mod Podge.


(13)  Spooky Haunted House

Spooky Haunted House

 AllYou shows you how to take an old dollhouse and make it into this awesome Haunted House.  Your kids are sure to get a kick out of using their old dollhouse and making it into a Haunted House.  Check out the website for all the craft details.


(14)  Heebie Jeebie Haunted House

Heebie Jeebie Haunted House

I found this Haunted House craft over at Crayola.  This Halloween craft is perfect if you are having a Halloween party.  Make a bunch of these Haunted Houses and use them to store candy…. hand them out as a Halloween Party favor.  How fun is that?!


(15)  Cardboard Boxes & Rolls Haunted House

Cardboard Boxes & Rolls Haunted House

Isn’t this a rock’n Haunted House?!  Or, should I say…. Haunted Mansion?!  I love it.  Patheos used different sized cardboard boxes and cardboard rolls to make this Haunted House craft.  It is a clever idea and it came out amazing.  Check out her site to see it for yourself.


(16)  Cereal Box Haunted House

Cereal Box Haunted House

What a great Haunted House.  And, what it totally cool about this Halloween craft is that it is simply made from a cereal box.  I love when you can find your craft materials right at home…. and in this case you can.  Check out Fun Lab Blog for all the Haunted House Craft details.


(17)  Glow in the Dark Haunted House

Glow in the Dark Haunted House

You know what is spooky?  Something that glows in the dark….. like this Haunted House.  I’m not sure why, but an item that has a glowing effect is just 10 times spookier.  And, it’s perfect for Halloween.  Make sure to check out Craft Project Ideas for the step-by-step “how-to” on making this Glow in the Dark Haunted House.

Technorati Tags: , , , , , , , ,

How to Make a Trick-or-Treat Paper Toy

Today I have a fun and festive Halloween craft.  It can be either a spooky Halloween decoration as well as a fun Halloween toy for the little ones.  In this post I’m going to show you how to make a Trick-or-Treat Paper Toy.  Using the 4 templates included in this craft you are going to make a little town with people that you can actually pretend they are going Trick-or-Treating.  Kids love pretending and even more than that they will love pretending to trick-or-treat with this toy because they made it themselves.  Let’s get started.

Check out our other Halloween Crafts.

How to Make a Trick-or-Treat Paper Toy


Materials Needed

Printer & Paper

Scissors

Cereal Box

Tape

Black Paint

Glue

Thread


Click on template images below to make larger and to print off.

Template 1

Template 1


Template 2

Template 2


Template 3

Template 3


Template 4

Template 4


Step 1

Print out first three templates.

Print out first three templates.

[ad#ahc]

Step 2

Cut out parts.

Cut out parts.


Step 3

Cut both slits.  Then fold sides in to center.

Cut both slits.  Then fold sides in to center.

It should look like this.

Like this.


Step 4

Place a person in the slots.

Place a person in the slots…


Step 5

Here's the line up of figures.

Here’s the line up of figures.


Step 6

The cat and pumpkin just need to be folded in half.

The cat and pumpkin just need to be folded in half.


Step 7

Cut everything out.

Cut everything out…. Leave a white outline around the edges…


Step 8

Cut off the front of a cereal box so you get this

Cut off the front of a cereal box so you get this…


Step 9

Tape outside of box together.

Tape outside of box together.


Step 10

Paint the inside of box black.

Paint the inside of box black…


Step 11

Glue pieces of cardboard to back of paper cutouts so they appear like they are sticking out from box.

Glue pieces of cardboard to back of paper cutouts so they appear like they are sticking out from box.


Step 12

It should look like this.

Like this.


Step 13

Tape thread to back of moon and clouds and tape to top of box.

Tape thread to back of moon and clouds and tape to top of box.  Now, they pop out at you.


Step 14

Print out houses paper

Print out houses paper (template 4).


Step 15

Cut out like this... then fold on the dotted lines.

Cut out like this… then fold on the dotted lines.


Step 16

If first dotted line is folded towards you... then fold the next away from you.

If first dotted line is folded towards you… then fold the next away from you.


Step 17

Notice you also fold the right and left side away from you

Like this…. Notice you also fold the right and left side away from you…


Step 18

Here are all the pieces... Now you can play pretend Trick-or-Treat games.

Here are all the pieces… Now you can play pretend Trick-or-Treat games.

Technorati Tags: , , , , , , , , , , , ,

How to Make a Milk Jug Vampire Candy Holder

I have a wonderfully fun Halloween craft for you today.  In this post I’m going to show you how to make a Milk Jug Vampire Candy Holder for Halloween.  What is really cool about this craft is that you probably have all the craft materials needed in your house.  This vampire candy holder is made from a Milk Jug…. just simply wash it out and you are good to go.  You will need a bit of help from an adult cutting the milk jug as it can be difficult to cut.  So, grab the materials needed and let’s get started.

Check out our other Halloween Crafts.

How to Make a Milk Jug Vampire Candy Holder


Material Needed

Milk Jug

Black Marker

Scissors

Paint (color of your choice)

White, Black & Red Paint

Glue

Yarn

Paper Plate

Candy


Step 1

Clean out a milk jug.

Clean out a milk jug.  Take the labels off too.

[ad#ahc]

Step 2

There are indentions in the plastic... I drew lines there for the mouth.

There are indentions in the plastic… I drew lines there for the mouth.


Step 3

Cut out this line.

Cut out this line.  Ask parents for help.


Step 4

 Draw eyes behind the handle.  Draw a nose too.

Draw eyes behind the handle.  Draw a nose too.


Step 5

Paint everything other than the eyes.

Paint everything other than the eyes.  I chose purple… choose any color.


Step 6

Paint eyes white.

Paint eyes white.  I decided to paint the nose a lighter purple… it’s optional.


Step 7

Remember the piece you cut out for the mouth?  Paint it black now.

Remember the piece you cut out for the mouth?  Paint it black now.


Step 8

Draw two triangles.

Draw two triangles on a paper plate.


Step 9

Cut them out.

Cut them out.


Step 10

Glue them in mouth.

Glue them in mouth.


Step 11

Glue black cloak to back of jug.  Outline parts in black.

Glue black cloak to back of jug.  Outline parts in black.


Step 12

Fold lots of yarn in half several times

Fold lots of yarn in half several times…. like this.


Step 13

Tie a string around the middle

Tie a string around the middle…

It should look like this.

Like this.


Step 14

There will be loops on both sides... cut them in half

There will be loops on both sides… cut them in half…

It should look like this.

Like this.


Step 15

Cut off top of jug.  Glue yarn to top of jug for hair.

Cut off top of jug.  Glue yarn to top of jug for hair.


Step 16

Add red paint for blood.... also add candy.

Add red paint for blood…. also add candy.

Isn’t this Milk Jug Vampire Candy Holder so cool?  It is perfect for holding candy this Halloween Season.  You are sure to get lots of comments on this candy holder.

Also, Check out How to Make a Pumpkin Milk Jug Candy Holder.… it’s another great Candy Holder for Halloween.

Technorati Tags: , , , , , , , , , , , , ,

How to Make Clothespin Witches

Halloween is later this month.  It is coming up quickly….. so now is the time to decorate your house for Halloween.  Today I’m going to show you how to make Clothespin Witches.  The craft calls for a wooden clothespin.  My suggestion to you is to use the old-fashioned clothespins…. not the “pinch-to-open” ones.  Make a few of these Clothespin Witches to decorate your whole house.   Grab the materials needed and let’s get started.

Check out our other Halloween Crafts.

How to Make Clothespin Witches


Materials Needed

Wooden Clothespin

Green and Red Paint

Black Felt, Paper or Craft Foam

Pencil

Scissors

Stapler

Glue

Red and Yellow Yarn

Stick


Step 1

Paint a wooden clothespin green.

Paint a wooden clothespin green.

[ad#ahc]

Step 2

Draw a big circle on felt, paper or craft foam.

Draw a big circle on felt, paper or craft foam.


Step 3

Cut out the circle.

Cut out the circle.


Step 4

Draw a line thru the center.... both ways.

Draw a line thru the center…. both ways.


Step 5

Cut out one of the pizza slices.

Cut out one of the pizza slices.


Step 6

Staple closed like this.

Staple closed like this.


Step 7

Now push the head thru the hole.

Now push the head thru the hole.


Step 8

Now, your piece looks like this.

Now, your piece looks like this.


Step 9

Paint stripes on legs.

Paint stripes on legs.


Step 10

Cut out a small circle and a pizza slice shape

Cut out a small circle and a pizza slice shape… Use paper, felt or craft foam.


Step 11

Glue pizza slice into cone shape for top of hat.

Glue pizza slice into cone shape for top of hat.


Step 12

Cut slits at bottom of cone.

Cut slits at bottom of cone.


Step 13

Glue slits to top of circle.

Glue slits to top of circle.


Step 14

Fold yarn in half several times

Fold yarn in half several times…


Step 15

Glue yarn on top of head.

Glue yarn on top of head.


Step 16

Now cut looped ends of yarn to make hair.

Now cut looped ends of yarn to make hair.

It should look like this.

Like this.


Step 17

Glue the hat on top of head.

Glue the hat on top of head.

Glue the hat on top of head.

Like this.


Step 18

Find a stick.

Find a stick.


Step 19

 Cut a slit in front of dress.  Then put stick thru clothespin and slit in dress.

Cut a slit in front of dress.  Then put stick thru clothespin and slit in dress…


Step 20

It should look like this.

Like this.


Step 21

Fold some yellow yarn in half a few times

Fold some yellow yarn in half a few times… Like this…


Step 22

Take a 2nd piece of yarn and tie it around folded yarn.

Take a 2nd piece of yarn and tie it around folded yarn.

It should look like this.

Like this.

Step 23

Take loops on each side and cut the loops open.

Take loops on each side and cut the loops open.

It should look like this.

Like this.


Step 24

Tie this on to end of stick with another piece of yarn.

Tie this on to end of stick with another piece of yarn.

It should look like this.

Like this.


Step 25

Finished Clothespin Witch

And, that’s it.  You just finished making a Clothespin Witch.  Isn’t it awesome?!  This will make for a wonderful Halloween Decoration in your house.  Enjoy!!

Technorati Tags: , , , , , , , , , ,

15 Spooky Halloween Crafts using Milk Jugs

14 Spooky Halloween Crafts using Milk Jugs

I had no idea how many super cool crafts are out there for Halloween using Milk Jugs.  There are just so many…. and they all are just so cool.   I was searching the internet for some awesomely creepy Halloween crafts and I found some doozies for you.  In this post I have listed 15 spooky Halloween crafts using Milk Jugs.  What’s so wonderful about these Halloween crafts is that they all use milk jugs…. an item that most of us use every day.  So, you are sure to at least have the most important material for these crafts.  Scroll through all 15 of these Halloween milk jug crafts to find some to do with your kids at home.  They will love it.

15 Spooky Halloween Crafts using Milk Jugs

(1)  Spooky Spider

Spooky Spider

Check out this spider.  It’s super awesome and super big…. I love it!!  It will be a wonderful Halloween Decoration this Season.  It is sure to creep out all who see it.  Check out Family Fun to get all the details on this great Halloween Milk Jug Craft.


(2)  Halloween Table Centerpiece

Halloween Table Centerpiece

I don’t know about you, but I’m always looking for a unique way to show off my Halloween spirit with a great centerpiece.  Well, folks I think I found it.  Check out this awesome Halloween Table Centerpiece.  I found it over at The Ramblings of a Crazy Woman and I absolutely dig it!!

[ad#ahc]

(3)  Spirit Jugs

Spirit Jugs

I have a great Halloween Craft for you to use up those extra Milk Jugs you have along with some old Christmas Lights.  Eighteen25 shows us in great detail how to make this amazing looking outside decoration.  By simply decorating a bunch of milk jugs into ghosts you can have a cheap and fun way to decorate the house this Halloween Season.


(4)  Trick-or-Treat Basket

Trick-or-Treat Basket

Every Halloween I look for original ways for the kids to carry their candy.  How about making a unique Trick-or-Treat Basket using a Milk Jug.  I found this great Milk Jug Halloween Craft over at TLC Family.  What is great about using a Milk Jug for this craft is that the Trick-or-Treat Basket will not only be sturdy, but it will be rain proof too.


(5)  Recycled Halloween Windsock

Recycled Halloween Windsock

Here is another fantastic way to use a Milk Jug to make an outside Halloween Decoration.  Here Thrifty Fun shows you how to take a milk jug along with some plastic garbage bags and make a terrific windsock.  The ghost will actually look like he is flying through the night.


(6)  Milk Jug Storm Trooper Helmet

Milk Jug Storm Trooper Helmet

This has got to be one of the most creative ways to use a milk jug for Halloween.  Filth Wizardry shows us step-by-step how to take an everyday milk jug and make it into a storm trooper helmet perfect for dressing up this Halloween.  Any child will not only love making the craft, but using it to dress up too.


(7)  Halloween Monster Yard Lights

Halloween Monster Yard Lights

Here is a wonderfully colorful way to decorate the outside for Halloween.  Take milk jugs and transform them into Monster Yard Lights.  This is a fun way to decorate your yard or walkway and the kids will absolutely love it.  Do you know what they will love even more?  Making them with you.  Check out Crafts by Amanda for all the craft details.


(8)  Milk Jug Pumpkin

Milk Jug Pumpkins

If you are tired of decorating your usual pumpkins…. why not try something a little bit different this year.  Kiwi shows us how to take a milk jug and decorate it into a pumpkin.  Let the kids decorate whatever way they want to come up with unusual and unique pumpkins.  They will become great Halloween decorations and you will create loving memories of the time you made these together.


(9)  Milk Jug Pinata

Milk Jug Pinata

If you are having a Halloween Party this year this is an excellent Halloween craft for you.  You can make this creepy looking Halloween Pinata with the help of Cathie Filian.  Here she describes in great detail how you too can make this one of a kind scary pinata for your next Halloween party.


(10)  Halloween Masks

Halloween Masks

Why not take those extra milk jugs you have and make them into Halloween Masks.  Your kids can be as creative as they would like to.   These Halloween masks are as much fun to make as they are to wear.  Check out TLC Family for all the how-to’s to make this craft.


(11)  Milk Jug Ghost

Milk Jug Ghost

Here is a great Halloween Decoration….. perfect for inside your house.  Because this craft is made with Christmas lights the ghost actually lights up.  Turn off the lights and check out how your Ghost will actually glow.  Spooky, right?  Sure is.  Get all the craft details at She Knows.


(12)  Monster Light Jug

Monster Light Jug

This friendly little monster is not only cute during the day, but also lights up the night!  Not everything about Halloween has to be scary or spooky.  Some little ones just can’t handle too much scary.  For these little ones this Halloween Milk Jug craft is perfect.  Check out Kaboose for all the details on this craft.


(13)  Milk Jug Skeleton

Milk Jug Skeleton

This Halloween Milk Jug Craft is so creative!!  And, it looks like an incredibly fun craft for the kids as well as the adults.  I found this craft over at The Party Animal and I just love it!!  You will need plenty of Milk Jugs for this craft…. 7 to be exact.  But, if your kids drink a lot of milk like my kids… you will have the 7 milk jugs in no time.


(14)  Halloween Milk Jug Lanterns

Halloween Milk Jug Lanterns

I found this creative Halloween craft over at Ladies Home Journal.    In this post they show you how to take Milk Jugs and make them into Skeletons, Frankensteins and Cats.  Line a bunch of these down your driveway or a path to make a spooky lit area for the trick-or-treaters to walk.


(15)  Milk Jug Vampire Candy Holder

Milk Jug Vampire Candy Holder

We just put up our very own Halloween Milk Jug Craft.  We made a Milk Jug Vampire Candy Holder and it’s perfect for Trick-or-Treat night.  You can actually put tons of candy in the mouth and let the Trick-or-Treaters reach in the Vampire’s mouth and take the candy.  They are sure to get a big kick out of this.

Technorati Tags: , , , , , , , , , ,

How to Make Jack-o-Lantern Beads

Oh boy… Do I have a fun Halloween Craft for you today!!  In this post I’m going to show you how to make Jack-o-Lantern Beads.  These Jack-o-Lantern Beads are so much fun and yet so easy.  They are perfect even for the young kids.  Just make sure your child isn’t too young that they still put things in their mouth…. beads can be choking hazards.  If you make a bunch of these Jack-o-Lantern Beads they will be perfect to add to a clear bowl and make a Halloween Centerpiece.  So, let’s get started.

Check out our other Halloween Crafts.

How to Make Jack-o-Lantern Beads


Materials Needed

Orange Bead (if have no orange bead… paint the bead orange)

Dark Orange Paint

Black Paint or Marker

Green Pipe Cleaner

Scissors


Step 1

Get an orange bead.

Get a bead.  If it isn’t orange…. paint it.

[ad#ahc]

Step 2

Paint a darker orange stripe all around the bead

Paint a darker orange stripe all around the bead… in both directions.


Step 3

Draw more lines around the bead.

Draw more lines around the bead.


Step 4

Draw a triangle for each eye.

Draw a triangle for each eye.


Step 5

Draw a triangle for the nose.

Draw a triangle for the nose.


Step 6

Start drawing the mouth

Start drawing the mouth…


Step 7

Draw bottom of the mouth

Draw bottom of the mouth…


Step 8

Fill in the mouth

Fill in the mouth…


Step 9

Take a piece of green pipe cleaner and fold it in half

Take a piece of green pipe cleaner and fold it in half.


Step 10

Put the closed side of pipe cleaner into bottom of pumpkin

Put the closed side of pipe cleaner into bottom of pumpkin.


Step 11

Cut off the pipe cleaner at bottom of pumpkin

Cut off the pipe cleaner at bottom of pumpkin.


Step 12

Turn pipe cleaner to the side

Turn pipe cleaner to the side…. to look like this…


Finished Jack-o-Lantern Bead

So, there you have it…. a simple and fun Halloween Craft.  Make a bunch of Jack-o-Lantern Beads and add them to a bowl for a wonderful Halloween Centerpiece.

Technorati Tags: , , , , , , , , , , ,

Collection of Halloween Paper Figures and Creepy Paper Toys

Here is an entire collection of Halloween paper figures. All of these are figures that you print out, fold, and glue together. You can use them as creepy paper toys on Halloween. Find all the tutorials for these paper toys below.

Collection of Halloween Paper Figures and Creepy Paper Toys


Below you will find each of the individual Tutorials for the Halloween Paper Figurines.

Paper Witch Toy


Dracula Paper Toy


Paper Mummy Toy


Paper Monster Toy


Frankenstein Paper Toy


Black Cat Paper Toy

[ad#ahc]

 You Might Also Like Our Other Halloween Crafts

Technorati Tags: , , , , ,


Paper Witch with Hat to Print Out for Halloween

There are many characters that we associate with celebration Halloween. The witch is one of them. Today we will show you how to make your very own paper witch with hat toy, along with many other Halloween characters. Below you will find the template and instructions for the following paper witch figurine. Have fun.

More Halloween Crafts.

Here  are the Other Halloween Paper Toys in This Collection

Paper Witch Toy for Halloween

Materials Needed

Paper or Card Stock

Scissors

Glue

[ad#ahc]

The Templates to Print Out:

witch-paper-foldable-toy-template
CLICK ON THIS PICTURE TO OPEN UP TEMPLATE so you can save it to your computer and then print it out.
witch-hat-paper-foldable-templates
CLICK ON THIS PICTURE TO OPEN UP HAT TEMPLATE so you can save it to your computer and then print it out.

 How To: Step 1

Cut out the witch template

 Step 2

Optionally, score the template to make it easier to fold. All you have to do is put a ruler along each fold line. Then use the dull side of a butter knife and drag it along the ruler and the line on the paper. Then when you fold it on that line, it will fold beautifully.

 Step 3

Fold on the lines.

 Step 4

Fold the tabs too.

 Step 5

Paste the tabs together.

Step 6

Now it should look like this.

 Step 7 : Witch Hat

Print out the witch’s hat template. Cut out the hat parts…hopefully you are better at cutting than me.

 Step 8

Fold the triangle-ish shape into a cone and glue to keep together.

 Step 9

Now put the cone thru the donut shape. Cut slits all the way up to the donut.

 Step 10

Fold up the slits, like this.

 Step 11

Now glue these slits to the bottom of the hat.

 Step 12

This is the finished hat.

 Step 13

Glue the legs to the bottom of the witch’s body.

 Step 14

Place the hat on the witch. If you want, you can glue in place.

More Halloween Crafts.

Here are the Other Halloween Paper Toys in This Collection

Technorati Tags: , , , , , , , , , ,

Paper Vampire Dracula Toy Figure Craft for Halloween

Halloween is coming next month so I put together a collection of Halloween characters that you can cut and fold out of paper. These are Halloween figurines that are very easy to print out, fold, and paste together. This specific character is Dracula, an evil vampire. He is sort of cute and nothing to be scared about. Find out how to make this cute Vampire paper toy below.

More Halloween Crafts.

Here are the Other Halloween Paper Toys in This Collection

Paper Vampire Dracula Toy Figure for Halloween

Materials Needed

Paper or Card Stock

Scissors

Glue

[ad#ahc]

The Template to Print Out:

Vampire Dracula Paper Toy Template for Halloween
CLICK ON THIS PICTURE TO OPEN TEMPLATE. Then Save the Template to Your Computer and Print.

How To: Step 1

Step 1 Print the Template

Print the Vampire / Dracula template.

Step 2

Step 2 Cut Template

Cut out the template now.

Step 3

Step 3 Score the Template

Optionally, score the template to make it easier to fold. All you have to do is put a ruler along each fold line. Then use the dull side of a butter knife and drag it along the ruler and the line on the paper. Then when you fold it on that line, it will fold beautifully.

Step 4

Step 4 Fold on Lines

Fold on the lines.

Step 5

Step 5 Fold Tabs

Fold on the tabs too.

Step 6

Step 6 Glue Dracula Together

Paste tabs together.

Step 7

Step 7

Now Dracula / the vampire looks like this.

More Halloween Crafts.

Here are the Other Halloween Paper Toys in This Collection

Technorati Tags: , , , , , , , , , , ,

Paper Mummy Toy Figure Craft for Kids on Halloween

There are many characters that we associate with celebration Halloween. The mummy is one of them. Today we will show you how to make your very own paper mummy toy, along with many other Halloween characters. Below you will find the template and instructions for the following paper mummy figurine. Have fun.

More Halloween Crafts.

Here are the Other Halloween Paper Toys in This Collection

Foldable Paper Mummy Toy Craft for Halloween

Materials Needed

Paper or Card Stock

Scissors

Glue

[ad#ahc]

The Template to Print Out:

Foldable Paper Mummy Toy Craft Template
CLICK ON THIS PICTURE TO OPEN TEMPLATE. Then Save the Template to Your Computer and Print.


How To: Step 1

Step 1 Cut out Paper Mummy Template

Cut out the template, found above.

 Step 2

Step 2 Score the Template

Optionally, score the template to make it easier to fold. All you have to do is put a ruler along each fold line. Then use the dull side of a butter knife and drag it along the ruler and the line on the paper. Then when you fold it on that line, it will fold beautifully.

 Step 3

Step 3 Fold on the lines

Fold on the lines.

 Step 4

Step 4 Fold the tabs too

Fold the tabs too.

 Step 5

Step 5 Glue the tabs together

Paste the tabs together.

 Step 6

Step 6 The Paper Mummy FIgure

Now your mummy is done and ready to play with or to display as a Halloween decoration.

More Halloween Crafts.

Here are the Other Halloween Paper Toys in This Collection

Technorati Tags: , , , , , , , , ,


Foldable Paper Monster Toy Figures for Kids to Make on Halloween

You don’t need to do very much to make these adorable paper monster figures. All you need is a printer, paper, scissor, and some paste. Find out how to make these paper monster figurines with the following instructions and a handy template.

More Halloween Crafts.

Here are the Other Halloween Paper Toys in This Collection

monster paper toy craft for halloween

Materials Needed

Paper or Card Stock

Scissors

Glue

[ad#ahc]

The Template to Print Out:

Paper Foldable Monster Templates
CLICK ON THIS PICTURE TO OPEN TEMPLATE. Then Save the Template to Your Computer and Print.

How To: Step 1

Step 1 Cut out the template

Cut Out the Template.

Step 2

Step 2 score the template

Optionally, score the template to make it easier to fold. All you have to do is put a ruler along each fold line. Then use the dull side of a butter knife and drag it along the ruler and the line on the paper. Then when you fold it on that line, it will fold beautifully.

Step 3

Step 3 fold on the lines

Fold on the lines.

Step 4

Step 4 now fold on tabs

Now Fold on Tabs.

Step 5

Step 5 glue the tabs together

Glue tabs together.

Step 6

Step 6 monster foldable paper toy for kids

To Look Like This. Argghhh….scary. 🙂

Step 7

Step 7 glue feet on

Now all you have left to do is to glue the monster’s feet on to the bottom of the box. Isn’t he cute?!

More Halloween Crafts.

Here are the Other Halloween Paper Toys in This Collection

Technorati Tags: , , , , , , , ,

Frankenstein Foldable Paper Toy Craft for Halloween

Halloween is coming next month so I put together a collection of Halloween characters that you can cut and fold out of paper. These are Halloween figurines that are very easy to print out, fold, and paste together. This specific character is Frankenstein. He is sort of cute and nothing to be scared about. Find out how to make this cute Frankenstein paper toy below.

More Halloween Crafts.

Here are the Other Halloween Paper Toys in This Collection

Frankenstein Paper Toys Craft for Halloween

Materials Needed

Paper or Card Stock

Scissors

Glue

[ad#ahc]

The Template to Print Out:

frankenstein-paper-foldable-toy-templates
CLICK ON THIS PICTURE TO OPEN TEMPLATE. Then Save the Template to Your Computer and Print.

How To: Step 1

Step 1 print template

First of all, print out the template above.

Step 2

Step 2 Cut out template

Cut out the Frankenstein template.

Step 3 (Optional)

Step 3

Optionally, score the template to make it easier to fold. All you have to do is put a ruler along each fold line. Then use the dull side of a butter knife and drag it along the ruler and the line on the paper. Then when you fold it on that line, it will fold beautifully.

Step 4

Step 4 Fold along the lines

Fold along the lines.

Step 5

Step 5 - Fold Along the Tabs

Fold the little tabs too.

Step 6

Step 6 - Glue Tabs Together

Now glue the tabs together.

Step 7

Frankenstein Paper Toys Craft for Halloween

Now Frankenstein is all folded and done. He is now ready to play with or to be used as a decoration.

More Halloween Crafts.

Here are the Other Halloween Paper Toys in This Collection

Technorati Tags: , , , , , , , ,

Black Cat Foldable Paper Toy Craft for Halloween

Halloween is just around the corner so I put together a bunch of Halloween characters that you can fold out of paper. These are Halloween figurines that are very easy to print out, fold, and paste together. This specific character is a black cat, however I decided to make the cat cute instead of scary. Find out how to make this cute kitty cat below.

More Halloween Crafts.

Here are the Other Halloween Paper Toys in This Collection

black-cat-paper-foldable-toy-first-pic

Materials Needed

Paper or Card Stock

Scissors

Glue

[ad#ahc]

The Template to Print Out:

black-cat-paper-foldable-toy-template
CLICK ON THIS PICTURE TO OPEN TEMPLATE. Then Save the Template to Your Computer and Print.

How To: Step 1

Cut Out Cat Template

Cut Out the Template.

Step 2

Fold Paper Cat Toy on the Lines

Fold on the lines.

Step 3

Fold Paper Cat Toy on the Tabs

Fold the Tabs too.

Step 4

Now Glue Together

Glue the cat together on the tabs.

Foldable Paper Cat Figurine Pasted Together

To look like the above picture.

Step 5

Glue the Tail and Ears on

Glue the ears on the top of the cat. Glue the tail onto the back of the cat.

Now enjoy your black cat for Halloween. Print out the other foldable paper Halloween toys in this collection too.

More Halloween Crafts.

Here are the Other Halloween Paper Toys in This Collection

Technorati Tags: , , , , , , , ,

How to Turn a CD Case into a Pencil Box

I have a great craft today that will help you keep your pens and pencils in one place.  In this post I will show you how to turn a CD Case into a Pencil Box.  This creative craft is easy and it is a lot of fun.  With this pencil box you can keep your notes or your schedule on the left hand side while you keep your pens and pencils in the right side.  Close up the pencil box and throw it in your school bag and you are good to go.  So, grab the materials needed and let’s get started.

Check out our other Back to School Crafts.

Laura from Dacian Moon Handmade will show you this craft step-by-step.


Materials Needed

– CD case
– favorite picture (A4 format)
– craft glue
– pen
– scissors
– needle and thread
– light blue cotton piece
– wide elastic band
– a sheet of white cardboard


Step 1

Open the CD case and measure the cloth on the right side.

Cut it to the right dimensions.

[ad#ahc]

Step 2

Measure the elastic band on the same side and cut it a little wider.

Bend the band over the edge of the cloth…

… and sew it there…

… like this.

Bring it to the front and bend the other end over the cloth, like this.

Sew it there.

Sew a stitch at each centimeter. This will help to determine the places for pencils.


Step 3

Measure another elastic band …

… and sew it on the lower part of the fabric.


Step 4

Turn the fabric backwards…

… and apply a layer of glue on it…

… and put it in its place. Press and then let the glue dry.


Step 5

Take the white cardboard…

… and measure the left side of CD Case.

Place it under the clamps.

Now you can use it to write things.

I will write my schedule on it.

Add some pencils and the interior of your pencil box is ready.


Step 6

Let’s make the exterior now. Turn over the CD case.

Take the picture…

… and measure it on the CD case.

Cut it at the right dimension and put it between the plastic wrap and the case.

It will look like this.

Now close the case and your pencil box is ready.

How awesome is this pencil box?  It’s really great and will come in handy for school or at home for homework.  Enjoy it!!

Technorati Tags: , , , , , , , , , ,

How to Make an Elegant Pen Holder

Since school is back in session I decided to show you how to make an Elegant Pen Holder.  This elegant pen holder will look wonderful on any desk and it is so useful.  No longer will you have pens and pencils floating around your desk…. you will now have a spot for all your pens and pencils.  This craft is so easy and a lot of fun.  It is made from recycled boxes so it is a great green craft too.  Add style to your desk with this elegant pen holder.  Let’s get started.

Check out our other Back to School Crafts.

Laura from Dacian Moon Handmade  will show you, step by step, how to make this craft.


Materials Needed

– recycled box
– cardboard
– pen
– craft glue
– scissors
– paint
– paintbrush
– aluminum foil


Step 1

From the recycled box we will make two holders.  Trace your shape on the box…  I made a wave shape.

Cut on the line…

… and you have the two pieces. You can adjust the edge until you are happy with the result.

[ad#ahc]

Step 2

We will use aluminum foil to cover them. This way we will add a nice texture.

Cut a piece of foil (wide enough to cover the holder piece) and place one holder in the middle.

Cover it with foil.

Press well to preserve the shape of the holder.


Step 3

Apply a layer of glue on the base…

… and place it on the cardboard piece (also covered in foil).

Do the same with the other holder piece.  Flatten the foil well and let the glue dry.


Step 4

Use a wide paintbrush to cover it with paint. Apply as many layers that you need until it looks as you want.

I applied 3 layers of paint on mine and I think it looks good.

And, there you have it….. you now have an Elegant Pen Holder.  This pen holder will look great on any desk.

Technorati Tags: , , , , , , , , , , , , , ,