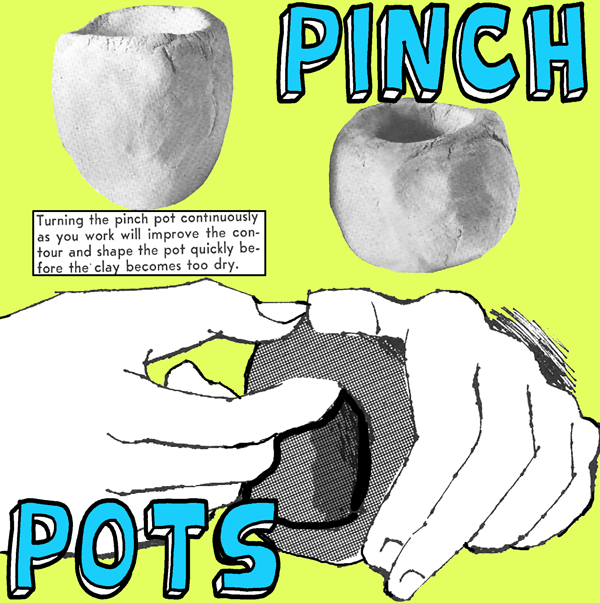
I have a fun and creative craft for you today. In this post I’m going to show you how to make a Clay Pinch Pot. Actually, in this post I don’t show you how to make this pot step-by-step…. instead I just direct you. This way you are using your own creative juices to make this clay pinch pot yourself. Use the image and instructions below to give direction on how to make your own Clay Pinch Pot. So, grab some clay and let’s get started.
Check out our other Clay & Sculpting Craft Ideas
Materials Needed
Clay
Sponge & a bit of Water
Paint (optional)
[ad#ahc]
How To:
The simplest clay dish to make is fashioned from a ball of clay into which the thumb is pressed as the clay is turned in the palm of one hand and guided with the other. From this thumb hole, the sides are slowly pressed out uniformly. This is called a pinch pot. Make sure that there is at least 1/4 inch thickness on the bottom of the pot. **Note** Turning the pinch pot continuously as you work will improve the contour and shape the pot quickly before the clay becomes too dry.
Pinch pots should be dried on a hard and clean surface. When the surface is hard, the children can sponge their pieces gently to remove irregularities. Caution them to use water, sparingly. Under glaze colors can be applied with a clean paintbrush. Dry the pinch pot until completely dry and then you can paint it.
Alternatively:
If you are with a teacher or an artist who has access to a kiln…then this adult can fire your pinch pot in a kiln. When the pieces are cold, they may be dipped or sprayed with transparent glaze and fired a second time in the kiln. This makes them glossy. Such pottery will hold water and can be used as vases.
Technorati Tags: clay, clay crafts, clay crafts for kids, clay activities, clay activities for kids, sculpting crafts, sculpting, sculpting activities, sculpting crafts for kids, clay pinch pot, how to make a clay pinch pot, pinch pot, pinch pot crafts, pinch pot crafts for kids

