Soap can be a great first-time sculpting activity as soap is soft enough for small hands to work with. Your child can have fun and be creative without worrying that he might mess up the soap, since soap is cheap enough to replace. Your child will be able to find his or her inner artist and find out about new skills that they didn’t know they even had. One of the first times I realized that I had any sort of artistic skills was when someone put clay in front of me and I sculpted Abe Lincoln’s face and it ACTUALLY looked like him. Let your child have that Ah-Hah moment too.
Soap Carving for Kids and Making Soap Sculptures Safely
CRAFTS MATERIAL NEEDED
Ivory Soap
Pencil
Either Clay Sculpting Tools or Pumpking Carving Tools
(Optionally) Toothpicks
Instructions About Safely Carving Soap
Instead of using a paring knife to sculpt soap, kids should use safer options. I suggest using either Child-Safe Pumpkin Carving Tools or Clay Sculpting Tools. A toothpick can be used for fine carving. This way if the child slips or makes a mistake, he or she won’t get too hurt. However, whenever a child is carving, an adult should always be present in order to ensure the child is carving in a safe fashion.
There are two ways of applying a design to soap.
1. With a pencil or pointed tool, draw design directly on soap.
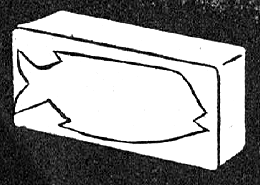
2. Place a cake of soap on a piece of paper and draw outline of soap on paper. Draw design on paper, within the pencilled outline. Trace drawing on soap.
For large projects join two cakes of soap. In carving soap keep the silhouette simple. Don’t carve too long in one place; turn the work often. Hold in different lights and at different angles. Keep the heavy masses at the bottom. Soap may be colored with waterproof India ink.
Safely Carving Soap for Soap Sculptures
1. Scrape lettering from one side of soap, removing only enough to reveal a smooth even surface.
[ad#ahc]
2. Allow soap to dry for about an hour before starting in to work.
3. Trace design on soap (see above instructions)
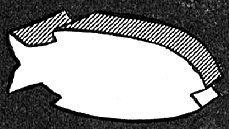
4. Rough out design by cutting away small pieces at a time, within 1/4 ” of the outline.
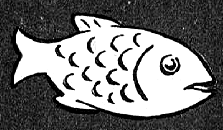
5. Proceed slowly. Round out figure, turning project as you work. Work in details.
6. Polish by rubbing.
(Optional) Joining Two Cakes of Soap
1. Scrape down sides that are to be joined.
2. (Parent or Adult Should Complete this Step!) Place soap, scraped sides down, into a shallow pan over low heat.
3. Insert toothpicks where they will not interfere with the carving.
4. After 30 minutes, press cakes together. Wait 24 hours to carve
Technorati Tags: soap crafts, soap, soap carving, soap carving for kids, soap sculptures, soap sculpture for kids, sculpture crafts, sculptures for kids


Leave a comment