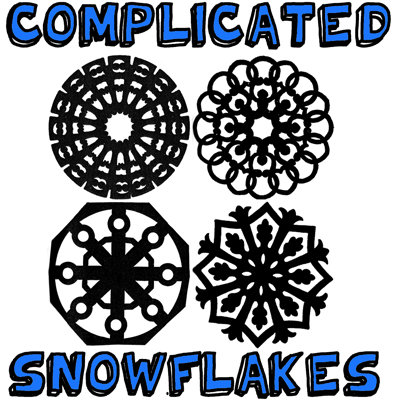
When I was a child I used to love making different paper snowflakes simply by cutting folded paper. Around my bedroom would be the snowflakes I made…. causing my bedroom to look like a winter wonderland. Today I’m going to show you how to make many different types of paper snowflakes. I have given you five different snowflake patterns in this tutorial…. all starting from the Basic Snowflake Fold shown below. Simply start with the basic snowflake fold and cut the folded paper as the patterns below show. Let’s get started.
Check out our other Christmas Crafts.
Materials Needed
Paper
Scissors
Basic Snowflake Fold
Step 1
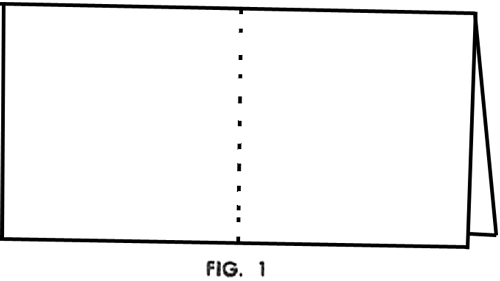
Use a large sheet of paper, in the shape of a square. This can consist of two or three pieces, plain, colored, or varicolored, which can be pasted in overlapping fashion to form the final square. With the paper square before you fold the left side of the paper over to the right, and crease along the central, vertical line.
Step 2
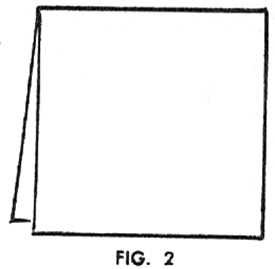
The next fold is from top to bottom, bringing the upper edge down to the lower and creasing it in place. This simply reduces the square to 1/2-size, with a folded edge at the left and another at the top.
Step 3
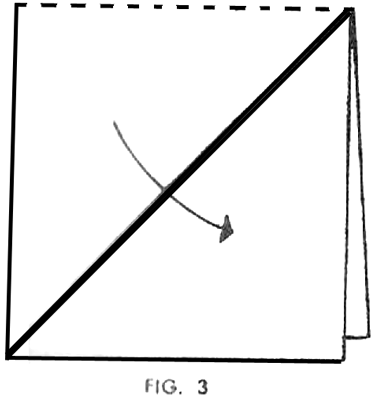
Now fold the lower left corner up to the upper right, forming a triangle. Note that the long side of the triangle forms the thickest fold.
Step 4
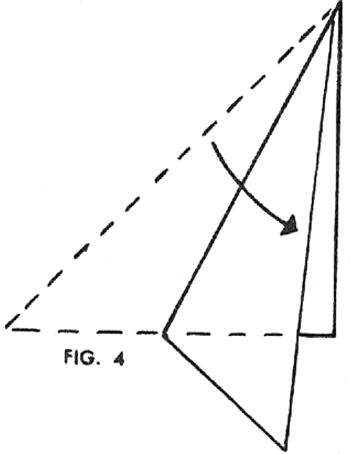
Fold the triangle that you created downward and forward until it meets the long side. Crease the paper firmly, as this makes the final stage of the basic working fold.
You will note that the paper looks now like a half of an arrow, with a projecting tail. Both long edges should consist of folds (as indicated) with the single edges all at the end. The projecting tab (X) is entirely torn or cut away when making the specific snowflake designs, as it serves no purpose in the patterns. As a result, the single edges simply form the outside of the circular snowflake designs which follow.
[ad#ahc]
COG WHEEL SNOWFLAKE
Step 1
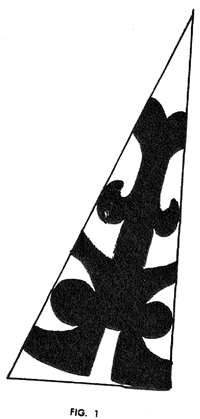
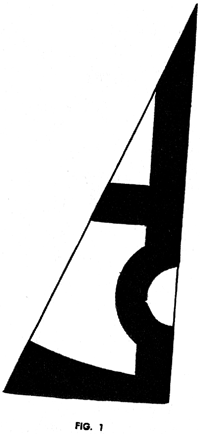
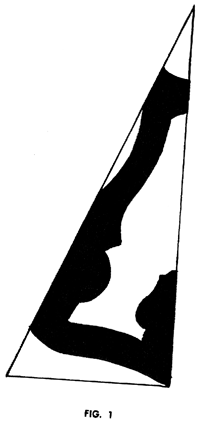
Make the cuts as shown in Fig. 1.
Step 2
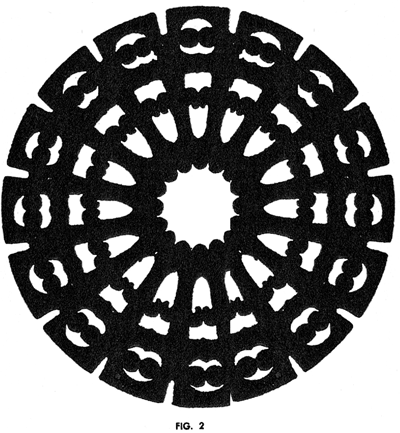
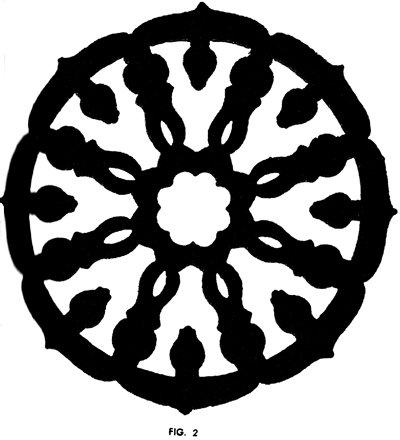
When opened, the pattern shows the heavy “cog wheel” effect illustrated in Fig. 2. After making a nice one, it can be folded and traced for future use.
FILIGREE SNOWFLAKE
Step 1
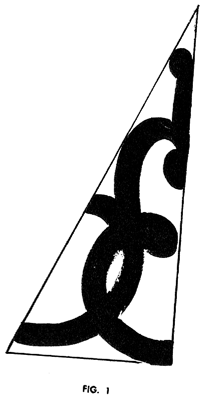
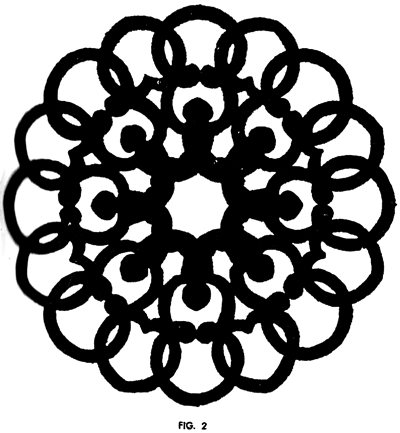
Beginning with the curved lines shown in Fig. 1, a series of cuts will produce a design living up to its “filigree” title.
Step 2
Fig. 2 shows the filigree. For best effect, the finished design should be placed or pinned against a sheet of paper of contrasting color such as red against green or white against black, or vice versa.
GEOMETRIC PATTERN SNOWFLAKE
Step 1
Make the cuts as show in Figure 1. While all these folds result in what may technically be termed “geometric patterns”, the design cut from the outline shown in Fig. 1, particularly lives up to its geometric claims…
Step 2
…The reason is that it comes out in the form of a central star, surrounded by diamonds and a ring of circles outside of that. The design is shown in Fig. 2.
CLASSIC SNOWFLAKE
Step 1
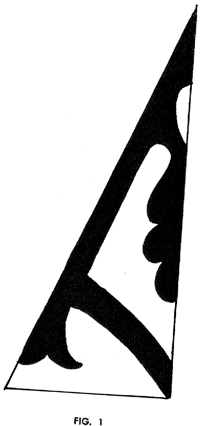
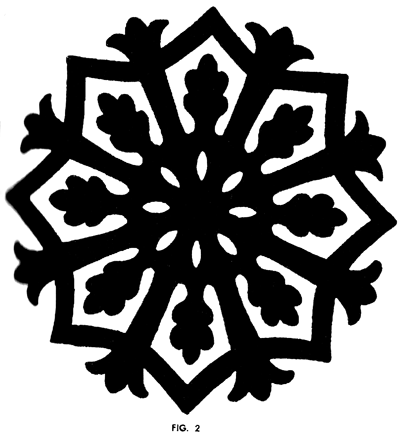
This design is very much designed after a classic / common snowflake, as seen under a powered microscope. Start, as usual, by cutting along the lines in Fig. 1.
Step 2
When opened out, the pattern is interesting indeed, appearing like the illustration shown in Fig. 2. Here, again, placing it against a contrasting color to make it really pop. Since it is styled as “Snowflake” the logical thing would be from white paper; then place it against a black or very dark background.
ANOTHER SHIP’S WHEEL SNOWFLAKE
Step 1
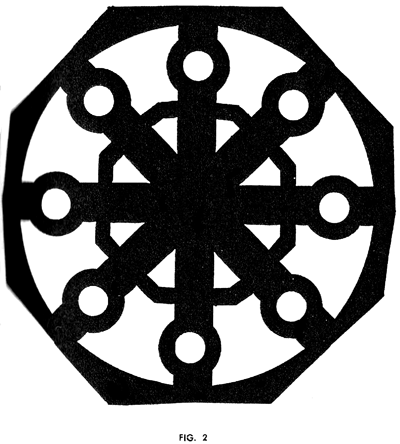
Form your “arrow” cut along the lines shown in Fig. 1.
Step 2
After cutting, your Ship’s Wheel design should turn out as in Fig. 2.
And, there you have it…. five different snowflake patterns for you to make paper snowflakes and use as your Holiday decorations. Which snowflake pattern is your favorite? Make sure to let me know in the comments below.
Technorati Tags: Christmas crafts, xmas crafts, Christmas activities, xmas activities, December crafts, Holiday crafts, Holiday activities, decorations, Christmas decorations, Christmas decoration crafts, paper snowflakes, paper snowflake crafts, paper snowflake patterns

very amazing designs