This is a great craft for older children, girls, and teens. This is a more complicated arts and crafts project than many of our other crafts ideas, so read over the following craft before deciding to do it. This pot holder craft would make a great gift for Mom or Grandma on Mother’s Day. Pot holders are great gifts for anyone who loves their kitchen and cooking. Good luck.
Make Pot Holders Gift for Mom on Mother’s Day
CRAFTS MATERIALS THAT YOU WILL NEED:
*2 round scraps of decorative flannel, denim, or other heavy cotton fabric about 8 inches in diameter
*2 old wash cloths or good pieces of old toweling
*piece of ribbon, 5 inches long
*embroidery yarn
*thread
*bias tape
*scissors
*tape measure
*needle
*kitchen bowl, 8 inches in diameter
*chalk
*tracing paper
*pencil
*pins
DIRECTIONS FOR MAKING POT HOLDERS:
Step 1
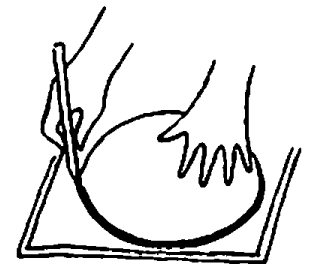
Put the kitchen bowl on top of the decorative fabric and draw around it with chalk. Do the same with a double piece of old towel or two wash cloths.
Step 2
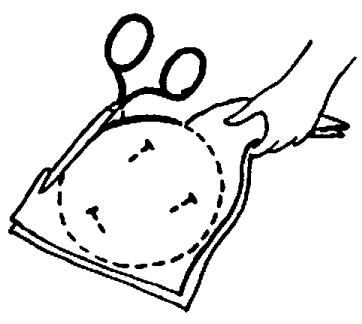
Cut the material where it is marked with chalk.
[ad#ahc]
Step 3
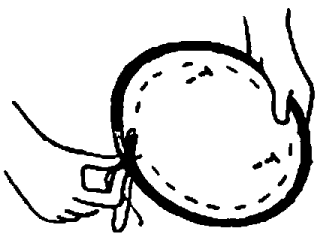
Put one circle of decorative fabric on the table, then the two circles of toweling, and last the other circle of decorative fabric. Baste them all together.
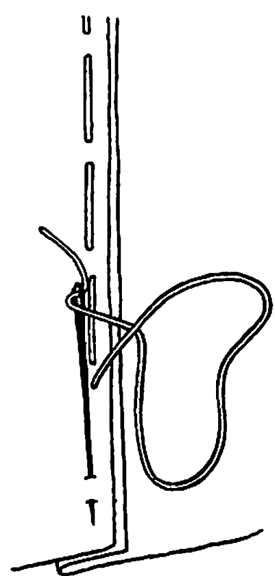
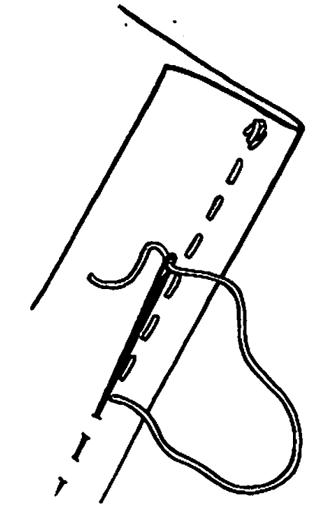
Tip : How to Sew the Basting Stitch (How to Baste)
This is not a permanent stitch. It holds two pieces of material. together while another, stronger, stitch is being sewn. Make a knot at the end of your thread. Make large running stitches, about 1/2 inch apart, on a straight line. End with a few backstitches, sewn one on top of the other. When your permanent stitches have been made, cut the basting stitches every few inches and pull out all the threads.
Step 4
Sew the bias tape around the basted circles with a backstitch and be sure the needle catches both sides of the tape.
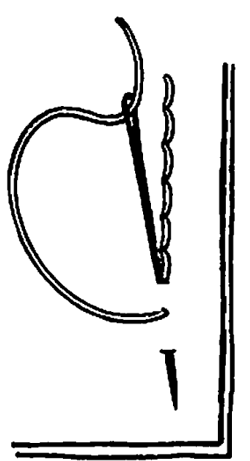
Tip : How to Sew the Backstitch
Begin sewing this stitch with three or four little stitches sewn one on top of the other. Make a little stitch backwards on the upper part of the two pieces of fabric you are sewing together, and then make a longer stitch forwards on the under part of the two pieces of fabric you are sewing together. Bring the needle back on the upper part of the two pieces of fabric where the last stitch ended and then push it forward again on the under part of the two pieces of fabric you are sewing. Do this until the seam is completely done and finish it with three or four small backstitches one on top of the other.
Step 5
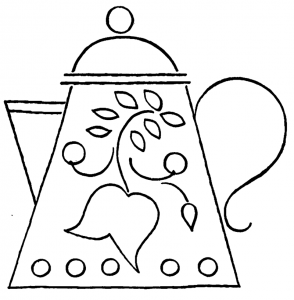
Transfer with pencil the illustration of a cooking pot to your tracing paper. Pin the tracing paper in the center of the circle and embroider the outline of the pot with a running stitch. Be sure the needle and thread go through all the layers of fabric, because then the embroidering will also quilt the material. When the embroidery is done, take out the pins and gently tear off the tracing paper.
Tip : How to Sew the Running Stitch
Begin sewing this stitch with three or four little stitches sewn one over the other, instead of making a knot in the thread. The running stitch itself is a small, even stitch, running on a straight line. Try to make each stitch about 1/8 inch long, though if it is closer to 1/4 of an inch no thunder or lightning are going to strike you. You can run up to six of these little stitches on the needle and then pull the needle .through the fabric. Finish your seam with three or four little stitches sewn one on top of the other.
Step 6
Fold the 5-inch length of ribbon in half and sew it on the edge of the pot holder so it can be hung on a kitchen hook.
If you liked the pattern that we had on our pot holder, click on the image below, and print it out and transfer it to your pot holders’ fabric.
Good Luck.
Technorati Tags: make pot holders, making pot holders, how to make pot holders, pot holders, crafts for girls, sewing crafts, easy sewing crafts, crafts for kids, mothers day gifts, make mothers day gifts, mothers day, mothers day crafts, gifts for mom, make gifts for mom
