How to Personalize Your School Bags : Draw on and Paint Your BackPacks
[ad#ahc]
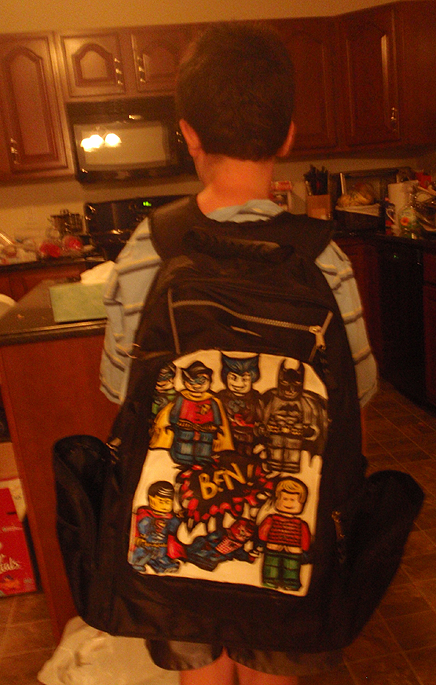
Last week I wrote about my daughter’s backpack and how I personalized her backpack by drawing on it with Sharpie markers. Sarah loves the way I customized her new school book bag and is very excited to start school tomorrow to show off her new backpack. My oldest son, Ben, also wanted me to customize his new school backpack. The one thing that I didn’t like about the way Sarah’s backpack turned out is that the marker’s colors didn’t show up on the background color of her book bag very well because the bag was too dark. Ben’s book bag is black so I knew that I had to either paint one part of his bag white (so I could paint or draw on it) or paint on canvas and glue / sew the canvas on to the bag. I decided to do the latter. I had some extra canvas in my basement and I decided to put it to good use.

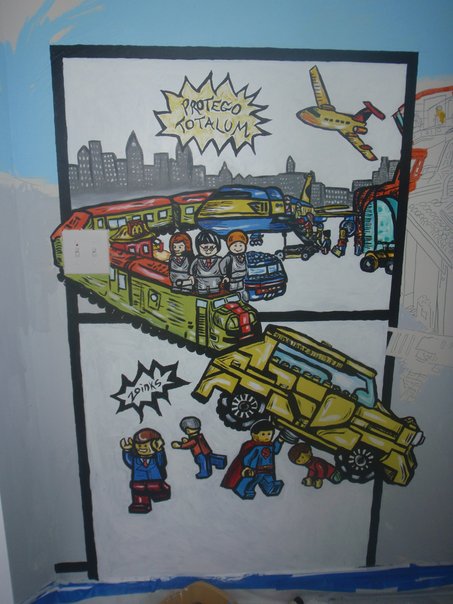
My son Ben LOVES Legos. The kid does nothing but build with Legos. So a few weeks ago I started painting a Lego City mural in his room. It is huge so I haven’t gotten very far on it yet, but I decided to draw a Lego Superheroes backpack to go with his new wall. I copied above an image of his partly done mural (it is going to be on 3 of his walls so I need to get busy).
You don’t have to be a an artist to paint and or draw on your backpack, but if you or your child loves to draw, then this book bag painting craft will be even more fun for you or your child. Nobody else will have the same exact knapsack as you…it will be a great keepsake to keep for years to come. It would also be neat to make a different personalized backpack every year so that you can put all of your special projects from that year in your personalized book bag from that year. This is how I went about making Ben’s backpack.
Step 1 – Planning Stage
Since I knew that my son wanted a Lego Superhero painting on his backpack, I knew that I had to see if these Lego Minifigs even existed. So I did a search on Google Images for ‘Lego Superheroes’ and found many great images to draw for my son’s personalized backpack.
Crafts Materials Needed:
Book Bag / Back Pack
Canvas (if your backpack is too dark to draw on)
Pencil
Eraser
Sharpie Markers (or Permanent Markers)
Acrylic Paints or Fabric Paints
Hot Glue or Needle and Thread
Step 2 – Pencil and Then Pen Draw Your Sketch onto Your Canvas or Book Bag
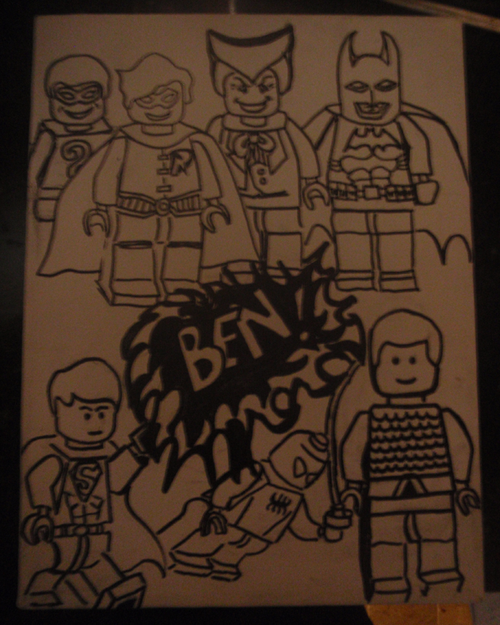
Get your book bag or canvas out and draw your sketch onto the bag in PENCIL FIRST. I was able to draw these from looking at the pictures that I found, but if you are having problems…then you can get a really cheap projector off of eBay or from a toy store. With a projector, you can trace images very easily and this allows anyone to be able to make excellent drawings.
When you are sure that you like the way your design looks, then you can use a black sharpie to draw out the lines permanently. The thicker and darker the lines are drawn, the sharper the design will look. Take a look at Marvel Comics to see what I mean.

Step 3 – Color in Your Designs on Your School BackPack
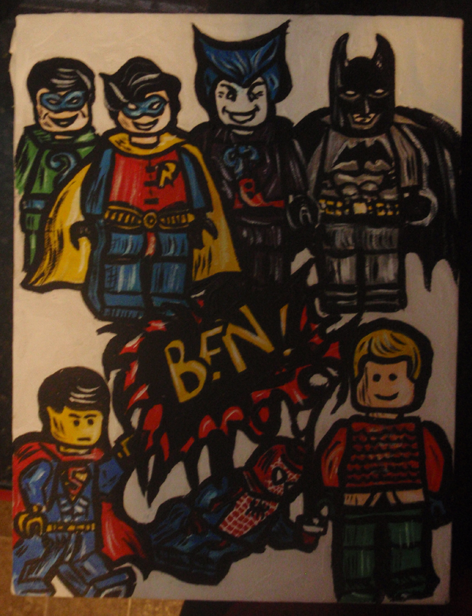
Now that your sketch drawing has been outlined in a permanent marker, you can start painting with acrylics or fabric paints. Don’t paint to thick and try to smooth out all of your painted lines. After you have painted everything in, I suggest that you re-outline everything with black paint with a nice thick black line. This will make your illustrations “POP’ out at you. You can also put the highlights in the painting like I did with a few white highlights (just lines or slight smudges).
When you are finished, set your painting aside and let it sit out to dry (somewhere out of reach of animals and young children.) If you painted directly on the surface of your backpack, then you are finished. Once it dries, you can wear your backpack. If you painted on canvas, then we are going to need to attach that to your backpack.

Step 4 – Attach Your Painted Canvas On To Your Book Bag’s Surface
Once your painting has dried we can attach it to your book bag’s surface. All book bags are different so you will need to decide where to attach it. However, on my son’s backpack, there was a large front zipper compartment that the painting fit on almost perfectly. You can either use hot glue or needle and thread to attach the canvas to your bag’s surface … or you can do both to make sure that the painting stays put. I decided to just use hot glue. I tucked in the edges of the canvas as I was gluing it to the bag’s surface. This was a little tough to do around the curved edges, but I took my time and it looks like I painted directly on the surface of the bag…and that is a good thing. Make sure (if you are using glue) to glue all of the canvas to the bag, not just the edges. If you are sewing, make sure to find a thread that closely matches your child’s painting / bag.

Good Luck! Also check out my Daughter’s Customized Backpack – Decorated by Drawing on it with Sharpie markers
Here are More School Book Bags Crafts
Here are More School Book Bags Crafts
Decorate Your Binders and Notebooks Crafts
Make or Decorate Bulletin Boards / Tack Boards / Cork Boards
School Work Organization and Homework Organizers Crafts
How to Make and Decorate School Book Covers Crafts
Technorati Tags: painting bags, paint bags, painting backpacks, paint backpacks, paint school bags, back to school crafts, back to school, back to school activities, backpack crafts, back pack crafts, book bag crafts, school crafts, decorate backpacks, decorate book bags

This is a very wonderful idea, it gives my student the chance to explore their creativity and at the same time, be proud of their work by wearing these bags to school. Thanks for sharing.
Great ideas. I just found your post… wish I’d had it a few months ago! I had to come up with a way to do this on my own… hope you don’t mind if I share the results here, to help some other people as well… http://www.keelanparham.blogspot.com.