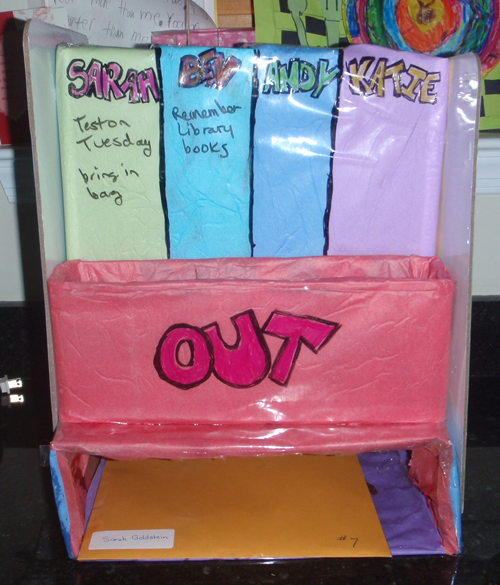
How to Make a Homework Organizer to De-Clutter School Paperwork
[ad#ahc]
My kids had their first day of school today. I spent the entire day cleaning and organizing the house because after an entire Summer of kids being at home, the entire house was a cluttered mess. After I finished de-cluttering my kitchen, I realized that as soon as the kids get home, my kitchen is going to get cluttered again within a week. Why? Because with school comes tons of school papers … homework, tests, crafts, artwork, notifications, and so much more … and all of these papers will pour into my house. I never know what to do with all of quickly growing stack of homework and school papers. I am afraid to throw things away for fear that either my children or me will need that paper soon. So I decided that I would create a school papers organizer. This school paperwork organization system is the craft that I will share with you today.
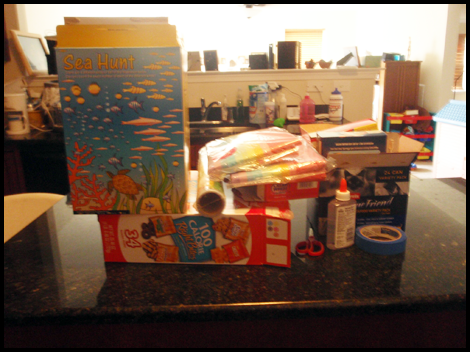
Crafts Materials Needed:
Cereal Boxes and other boxes in various sizes
Scissors
Glue or Glue Stick
Tape
Contact Paper
Wrapping Paper or Construction Paper or Tissue Paper or Decorative Papers
Sharpie Markers (or other Permanent Markers)
Wipeable Markers
Step 1 – Planning Stage
The first step is to plan out how the boxes that you have will fit together to hold school papers and possibly folders and what ever other items that you will want to store in this schoolwork organization box. Cereal Boxes seem to be the perfecgt size to hold paper, but all cereal boxes come in many different shapes and sizes, so please make sure that looseleaf paper will fit in your cereal boxes too.

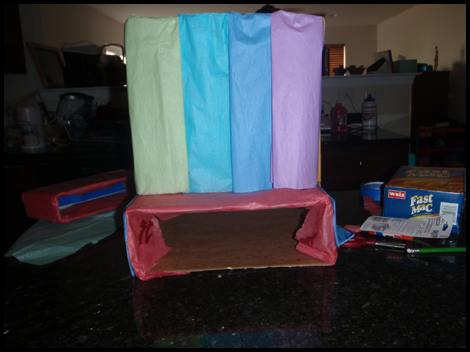
When you know where you want the boxes to lay, then loosely keep them in place by making tape loops (as seen above). This will hold the boxes in place long enough to tape the boxes in place more securely later.
Step 2 – Tape Boxes Together Securely
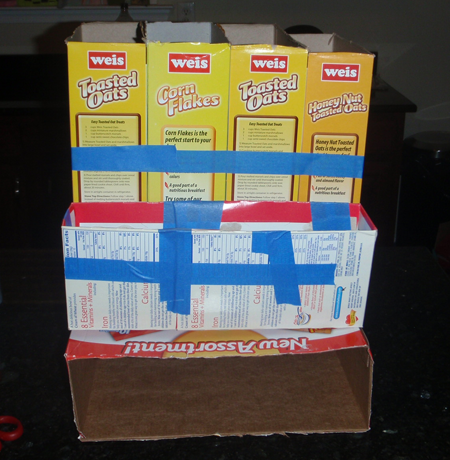
Now, first of all, painting tape wouldn’t have been my first choice, but my kids are always stealing my tapes, so this blue tape is what I was stuck with. After you have loosely secured the boxes together with tape loops, then you can take tape and tape everything together more securely. You can see above that I didn’t go overboard, I just taped where tape was needed.
Step 3 – Cover / Wrap Your Boxes with Colored Paper
Now it is time to cover your boxes with colorful paper. I have four kids, and I decided to use a different color for each child. I also tried to keep in mind what colors my boys would reject as being too girly. Attach the paper with glue or glue stick.
Step 4 – Cover with Contact Paper
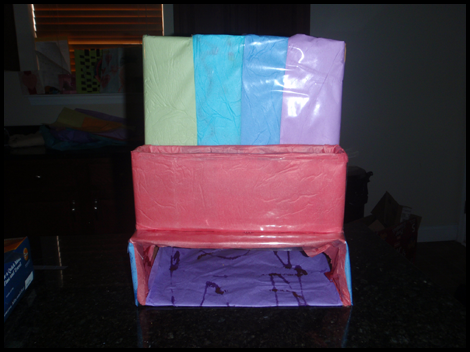
Now you can start covering the homework organization box with contact paper. The reason we are doing this is so that you can leave notes to each of your children…or they can leave notes to you. I also like covering the box with contact paper because it laminates and protects the surface of the box from spilled drinks and other liquids. Since this will be in my kitchen, I wanted to make sure that the surface was protected.
Step 5 – Label with Permanent Markers

Now you can use Permanent Marker, such as a Sharpie marker, to label the boxes. I put each of my children’s names on each of the boxes in big bubble letters to show each of them which box is theirs. Below my children’s names are notes to my children (or notes from my children to me) that is drawn on with a wipeable marker. Every day we can wipe off the wipeable marker to leave new messages to eachother. I wrote out on the middle box to show where they should pick up notes and papers that need to go back to school. You can set up this however you feel would work best for your family.
An extra that I decided to add to this project was to pick up 2 wipeable boards, which I picked up from the dollar store. Oone is an empty wipeable task list and one is an empty wipeable calendar. I used hot glue to glue each of these to the side of the box. But really I could have just drawn the calendar and task list on the contact paper.
Good Luck. You might also like the last 2 blog posts that we did – How to Paint Your School BookBag … How to Use Sharpies to Decorate Your School BookBag
Here are More School Book Bags Crafts
Here are More School Book Bags Crafts
Decorate Your Binders and Notebooks Crafts
Make or Decorate Bulletin Boards / Tack Boards / Cork Boards
School Work Organization and Homework Organizers Crafts
How to Make and Decorate School Book Covers Crafts
Technorati Tags: organization crafts, school organization crafts, paper organization crafts, paper organization, school organization, organize schoolwork, organize homework, organization for kids, how to organize, back to school crafts, back to school, back to school activities

I like it. Going to give it a go!
it was a horible idea horible i say horilble just kiddin lol