
|
|

Tin foil is awesome for kids crafts. I've never met a kid who didn't love shiny things, and tin foil is the way to get that effect on the cheap. Although it is easy to come by, it is also hard to use aluminum foil without making a big lumpy, wrinkly mess. Try to take your time and to keep it on the roll while you wrap your craft. If you keep making a lumpy mess, then ask a grown-up for help, such as a parent or a teacher.
I have a lot of ideas for tin foil crafts....as do you probably. One idea is to take some sturdy cardboard....cut it out in the shape of a sword. You can reinforce it with duct tape to make it stronger, if you are really going to use it to spar with your friends. Then wrap the blade in tin foil. With the foil added, it now looks like shiny metal.
What about a toy robot?! Take different sized boxes and cardboard tubes, soda cans, or hose for the arms and legs. Take the cardboard boxes and cover them in the aluminum foil. You probably won't need glue or paste since tin foil stays put usually. Glue everything together and then add buttons with colorful shirt buttons, beads, or other objects. This is a project for the creative person as every robot will be different than the others.
Another idea is to play around with embossing by taking a disposable foil pan and turning it over so the bottom is sticking up. Then take a screw driver or embossing tools if you have them and draw designs into the foil. After the foil is embossed you can use markers or paint to color your new design.
Another good idea is to make a king, queen, prince, or princess crown, Just take cardboard and measure it around your head. Then Cut triangles on the top of this cardboard to form the crown shape. Cover the cardboard with tin foil for the metal appearance. Staple the cardboard together to fit your head properly.
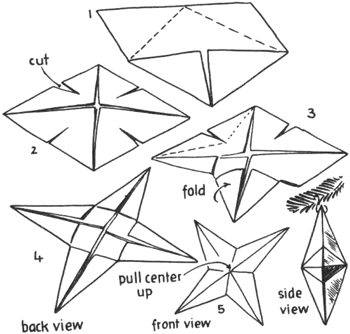
The best material for this shining star is tin foil. Fold it and cut it with a pair of scissors, following the illustrations carefully. For a Christmas decoration, cut two stars and paste them together, back to back. Pull the center of the front up to make the star three-dimensional. Then attach a piece of thin wire to the top so you can hang it.
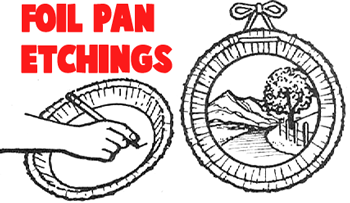
You will need One 8" or 9" foil pie plate, one 10" length of yarn or ribbon, sharpened sucker stick or pencil without a point, and an awl or something to punch a hole. Each child may use stick or pointless pencil to draw a picture or design on the foil plate. This is called an etching and it comes out very beautifully. Punch two holes in top rim of plate and tie yarn or ribbon in bow for hanging. (See sketch.)
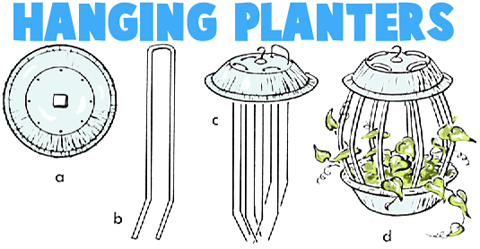
Gather the following items : 3 aluminum foil pie pans (3" diameter), four 18" lengths No. 3 round "strapping" copper or aluminum wire, 1 small nail, 1 cup hook, 1 small block of wood 1" x 1" x 3/4" or 1/2", stapler, 1 plant, and enough soil to fill 1 pan. With nail, punch 8 evenly spaced holes around the bottom of two tins (sketch a). Place small block of wood in center of one perforated tin. Screw cup hook through outside of pie tin into block of wood so they fit together tightly. Bend wires in U shape to fit the space between the holes (sketch b). Insert bent wires through top of tin with cup hook attached. After all wires are in place, bend each wire in 2" from bottom (sketch c). Put these wires through corresponding holes in other. perforated pie tin. Work carefully so aluminum foil will not tear. After wires are all in place, fit unperforated pan under the bottom tin to cover wire ends and make a solid bottom. Staple the two bottom tins together around the edge of rims. Now shape the wires to give a Japanese lantern effect (sketch d). Fill bottom pan with soil, and plant vine or plant in soil.
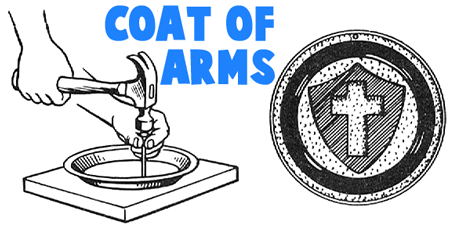
(PARENTAL SUPERVISION REQUIRED) This craft can be dangerous for younger children who haven't used hammers before, so make sure to supervise them. Buy a disposable pie tin pan, a blunt nail, a hammer, a block of wood larger than the pie pan, enamel, and a paint brush. Now, use a nail to scratch the coat of arms design onto the inside of the pan (create your own design). Now put the tin pan on top of the block of wood to protect your table or counters. Now hit the nail with hammer to make holes close together to form lines (because the holes are so close together). Do this to the entire design. Work from the inside of the tin pan. Design will stand out on the back of pan . Paint with enamel. Punch hole in top of rim for hanging.
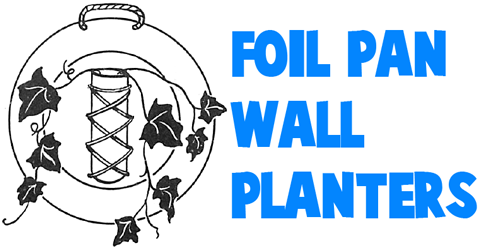
Glue a plastic toothbrush container in the center of an oblong or round aluminum foil container. Carefully fill with water and put in small flowers, plants or an ivy slip. Add a string for hanging. Add a string for hanging.
 Easter Basket with Berry Container - If you like strawberries, blueberries, raspberries, and other berries than you probably have a lot of extra baskets hanging around. Why not make mini Easter baskets for your friends with them. Decorate it with foil or lace doily.
 Making Fun Light Battle Toy - Use Tin Foil to make these cool light battle boards.
 Hot Plates Made from Coils of Tin Foil - Make these Amazing hot plates made from coiling tin / aluminum foil and then weaving thread under and over these coils. These come out pretty cool.
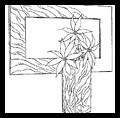 Matching Tin Foil Vase and Photo Frame - Make this photo frame from cardboard and tin foil...make a matching milk carton vase.
 Paper Clip Earrings to Make - Make cool earrings out of Paper Clips and buttons and other items such as Tin Foil.
 Making Butterfly Headbands - Learn how to make these butterfly headbands with a headband, and transparent foil.
 Painters Palettes - Make these almost spill-proof painting palettes with a foil pan & some caps or lids.
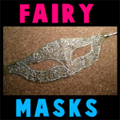 How to Make Fairy Masks - Learn how to make this fairy mask with transparent foil.
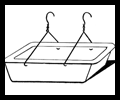 Foil Loaf Pan Bird Feeders - This is a sturdy bird feeder that can hold a few birds. Hang it from your tree.
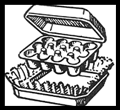 Make Jewelry Box for Mom with Egg Carton - Make a jewelry box with an egg carton and foil pan.
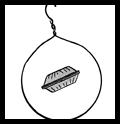 Foil Pan Tossing Game - Make a tossing game with 2 foil pie pans and a wire coat hanger.
 Foil Paper Engraving Tutorial - A great guide to engraving on foil paper...great for kids of any age with adult supervision.
 Foil Doily Flowers - Learn how to make these fancy flowers to give to someone you love.
 Foil Pan Bird Mobiles - Use a dowel, string, cardboard, and a foil pan to make this flying birds mobile.
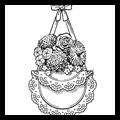 Doily Foil Plate Baskets - The base of this flower basket is an aluminum foil plate...find out how to transform it into a basket filled with flowers.
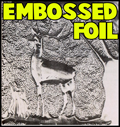 Embossed Foil Reliefs - Find out how to make an embossed foil design.
 Make Angels with Foil Paper - These angels turn out really cute, just cut and fold...find out how with this tutorial.
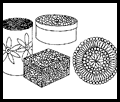 Foil Mosaic Covered Cardboard Boxes & Tiles - Make foil or confetti mosaic covered cardboard boxes as well as seed covered cardboard tiles...they come out beautifully.