|
|

Home > Arts and Crafts Projects >Games and Toys > Circle Color Wheel Toy
Here are 2 color wheel toys to make. The first one is based on the old button-on-a-string toy, with color added to make it more interesting. With this color wheel toy, kids will learn what 2 colors mixed together will result in. So this is an education, yet still fun toy. The secon toy is a color wheel top . This toy is made using the same idea as the color wheel, but It is one that is usually easier for younger children to manage. Find out how to make both of them below.

awl (or something to poke a hole in cardboard)
drawing compass
pencil
pencil stub (for the top toy)
ruler
scissors
stapler
white cardboard
string
crayons
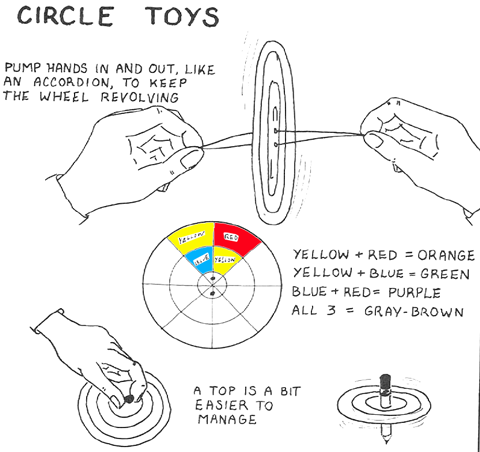
Draw a circle 4 to 5 inches in diameter on stiff, white cardboard. Make two for each toy, and staple these back to back after the circles have been colored. Do not glue together, as glue has a tendency to warp, and the toy won't operate properly unless straight. When the toy is whirled, the colors will run into each other, and result in a different set of colors. See the illustration for one way to lay out the circle to color in this way.
Start the circle spinning by keeping hands rather close together, and swinging the circle as rapidly as possible. When it is going, use an accordion-playing motion, in and out, to keep the wheel pumping. The children will need some help before they get the hang of it.
Lay out a small circle, about 3 inches in diameter, and divide and color the same way as for the color wheel. Poke a short pencil stub or stick through the center, and spin with the fingertips. Experiment with the position of the wheel on the stick. Usually it will spin better when the circle is slightly lower than halfway on the stick.